
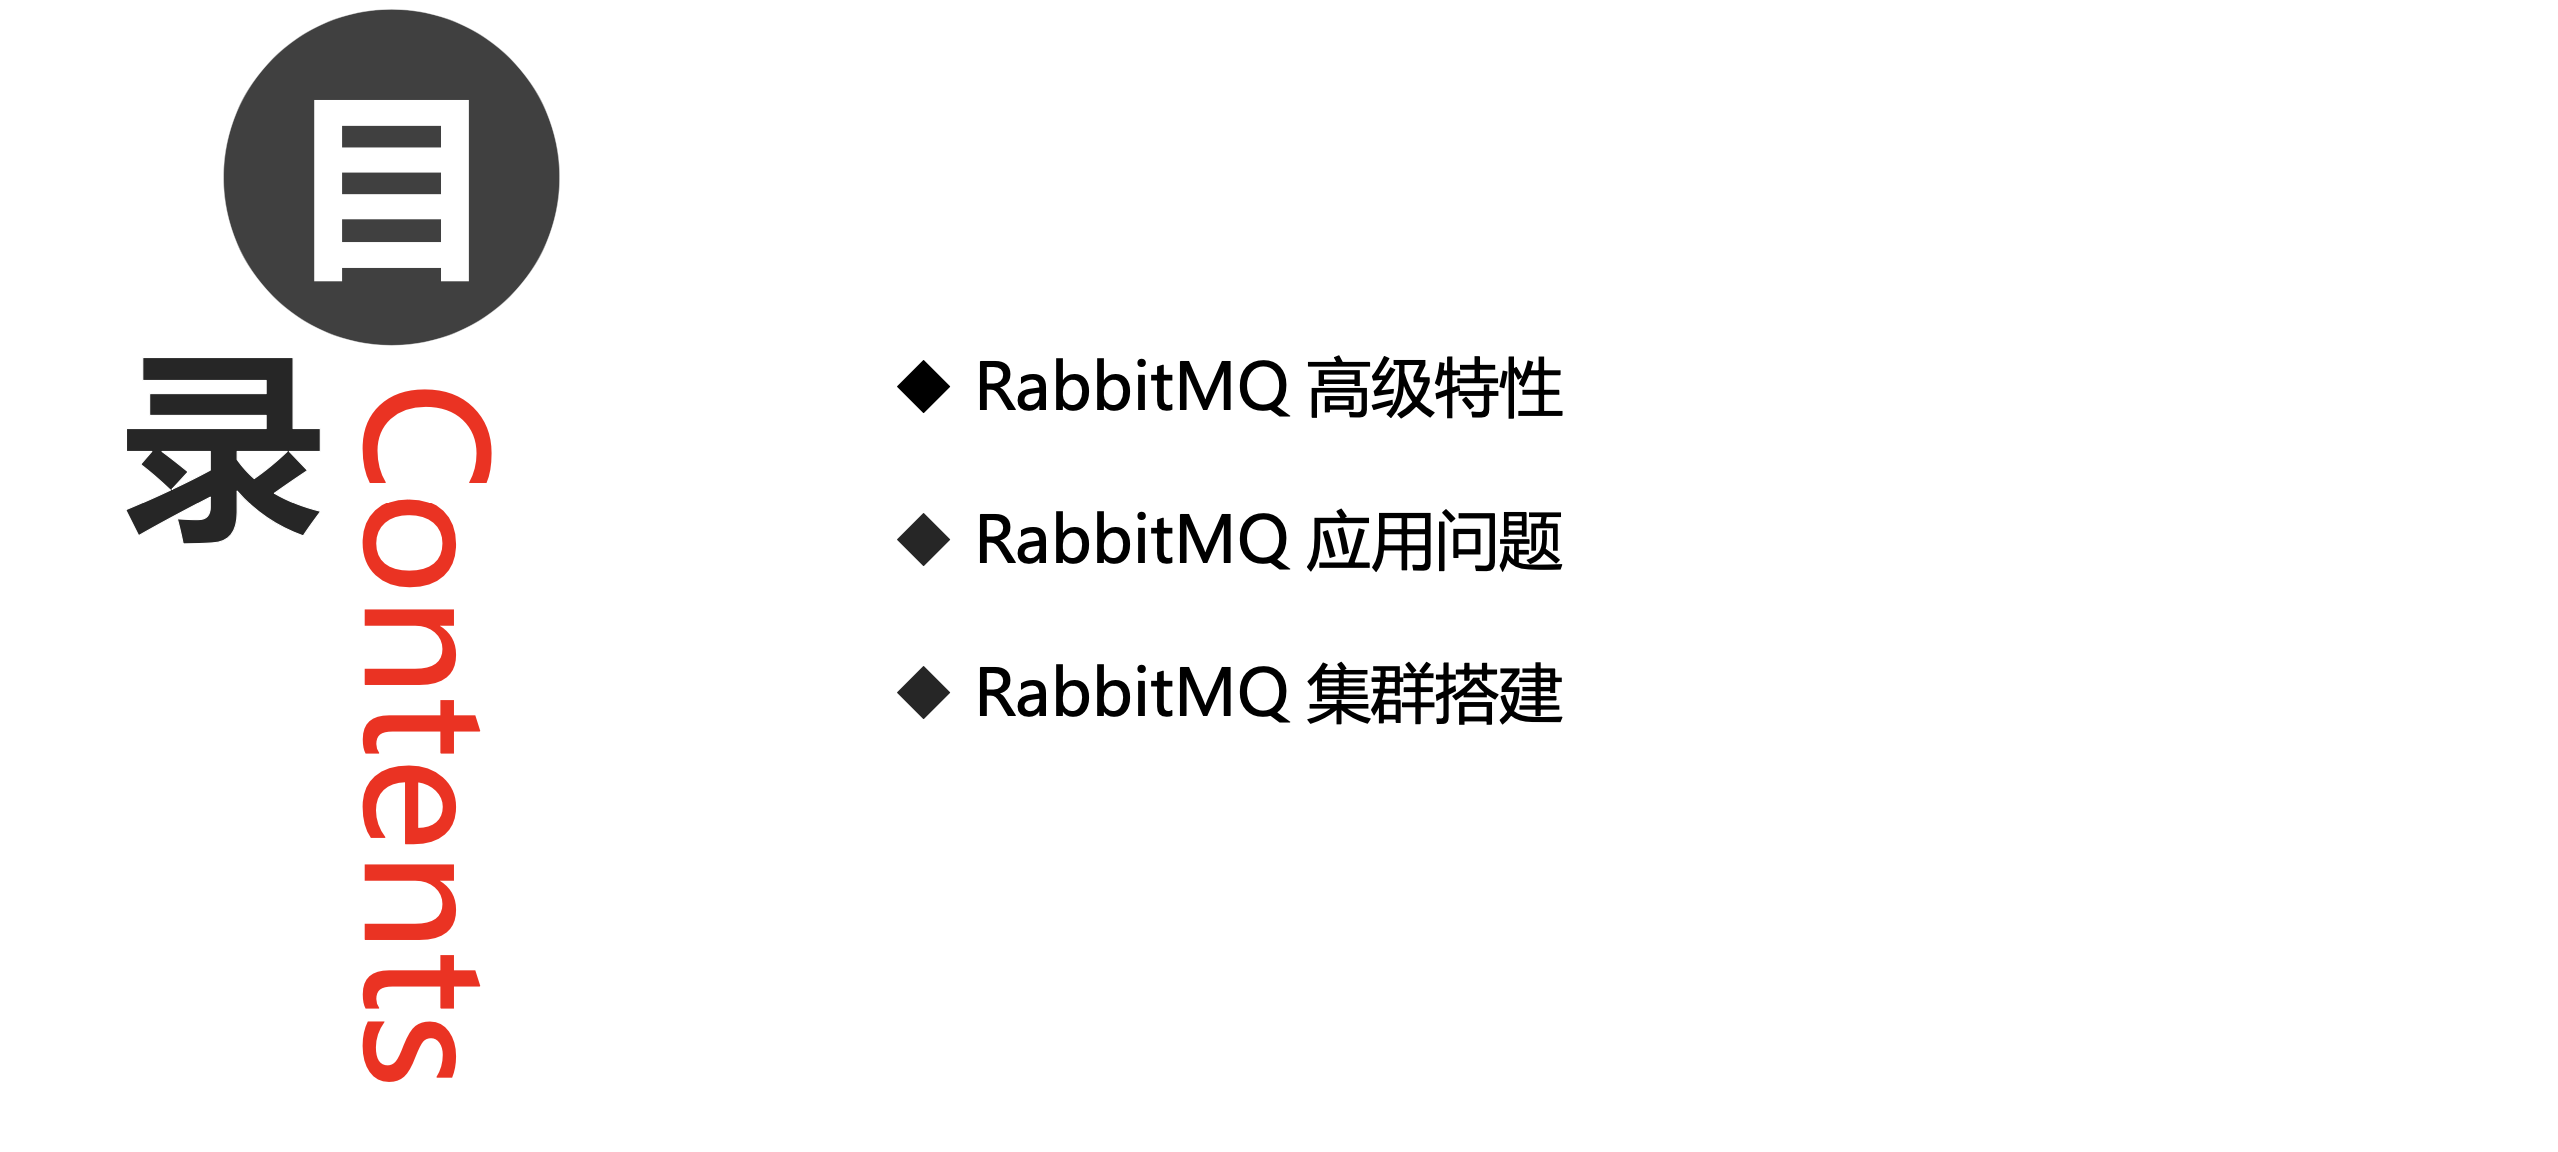
黑马程序员-RabbitMQ
MQ的基本概念
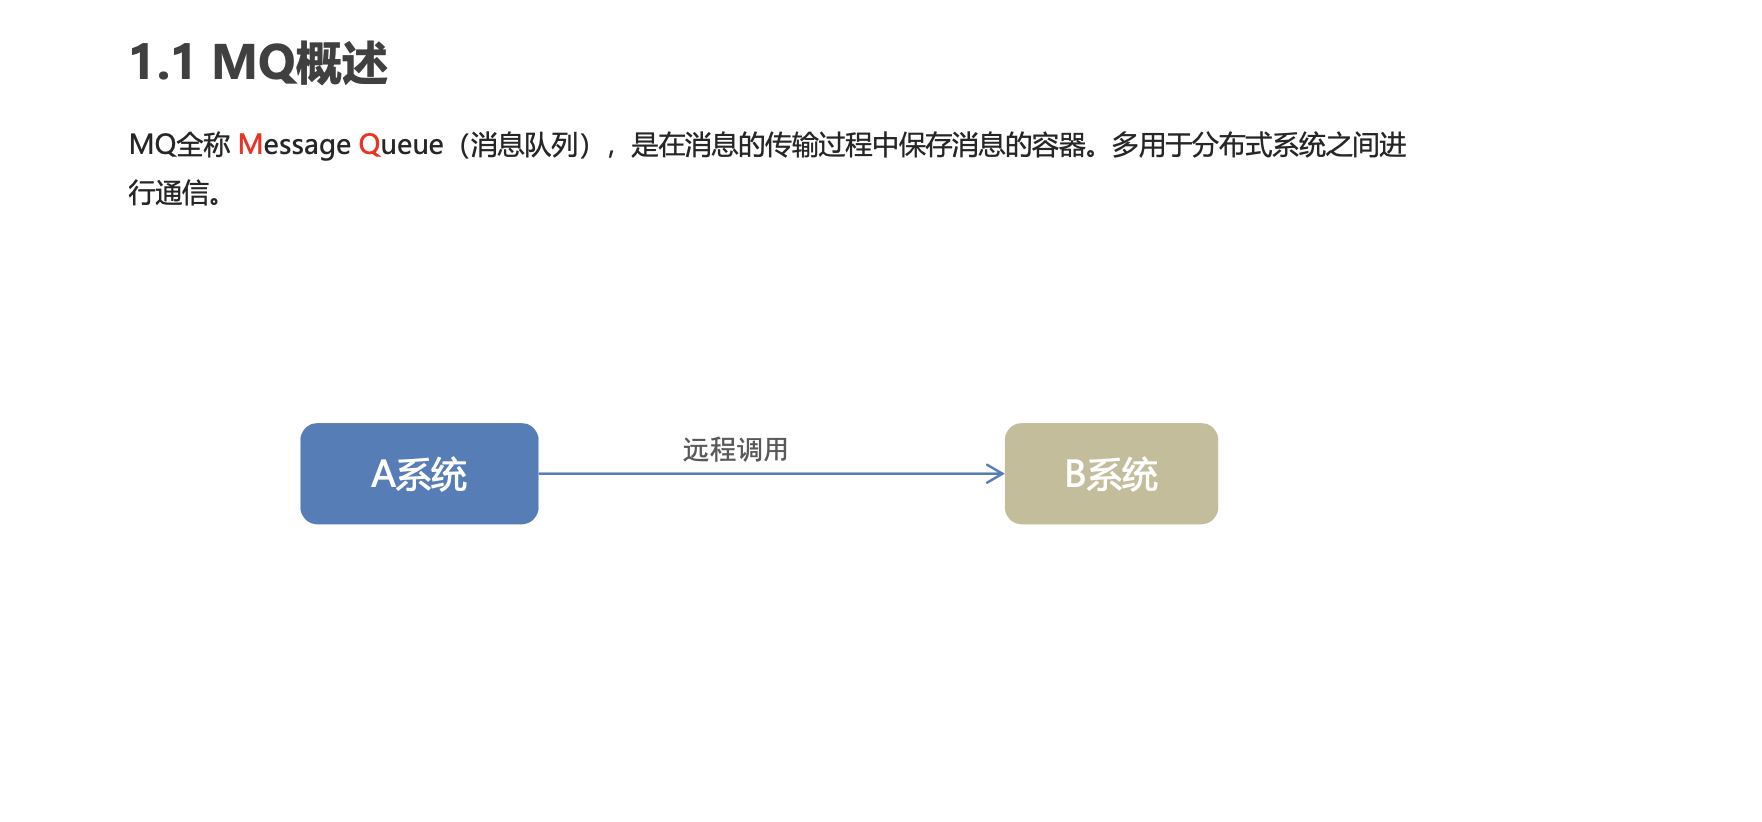
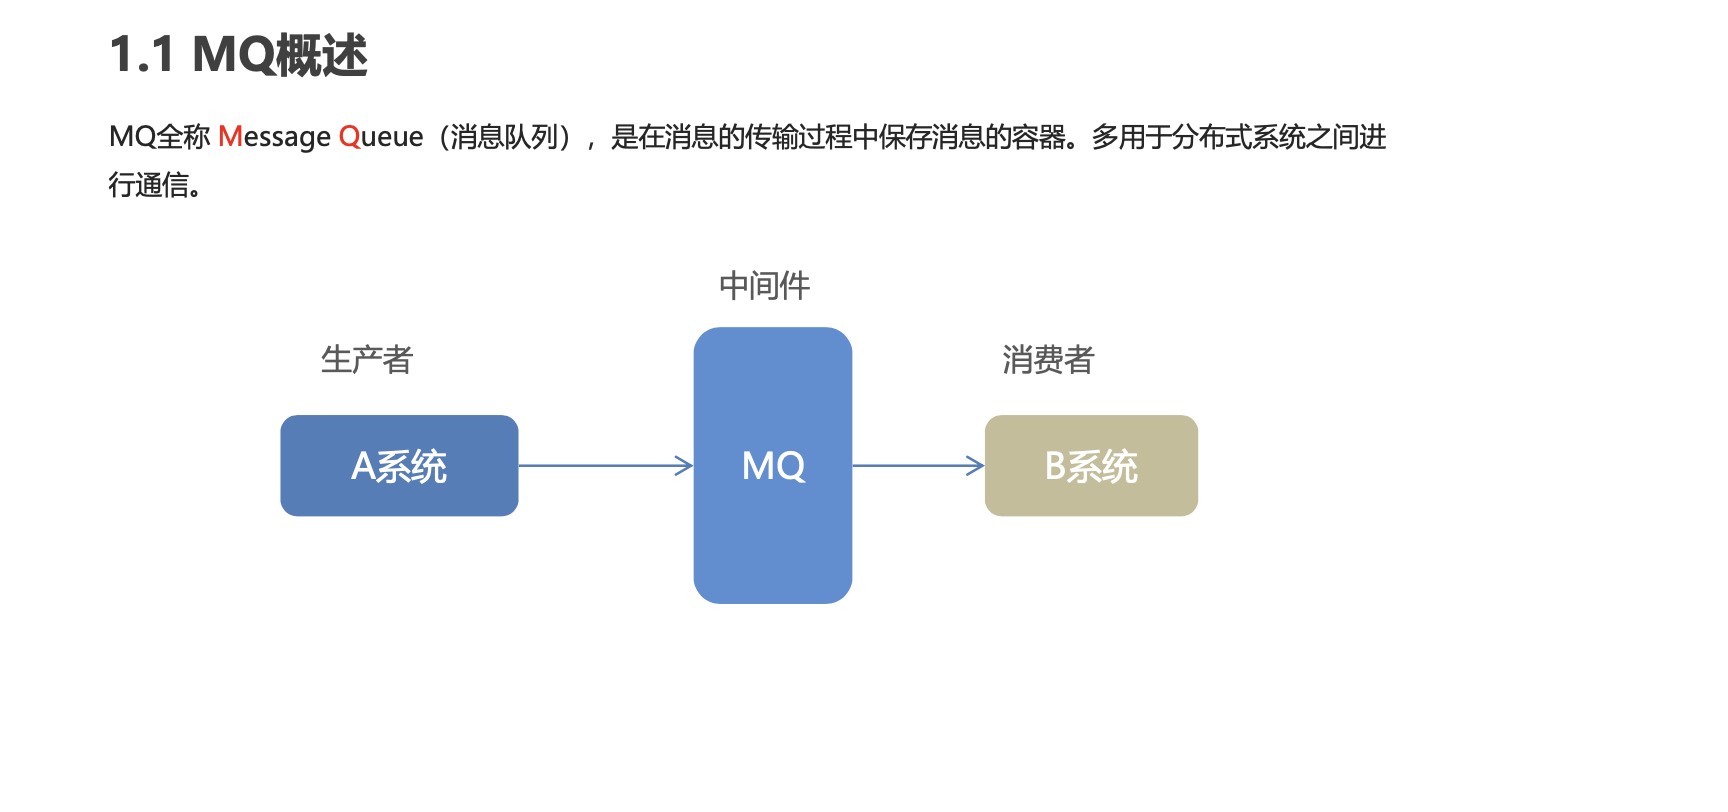
MQ概述

MQ的优势和劣势

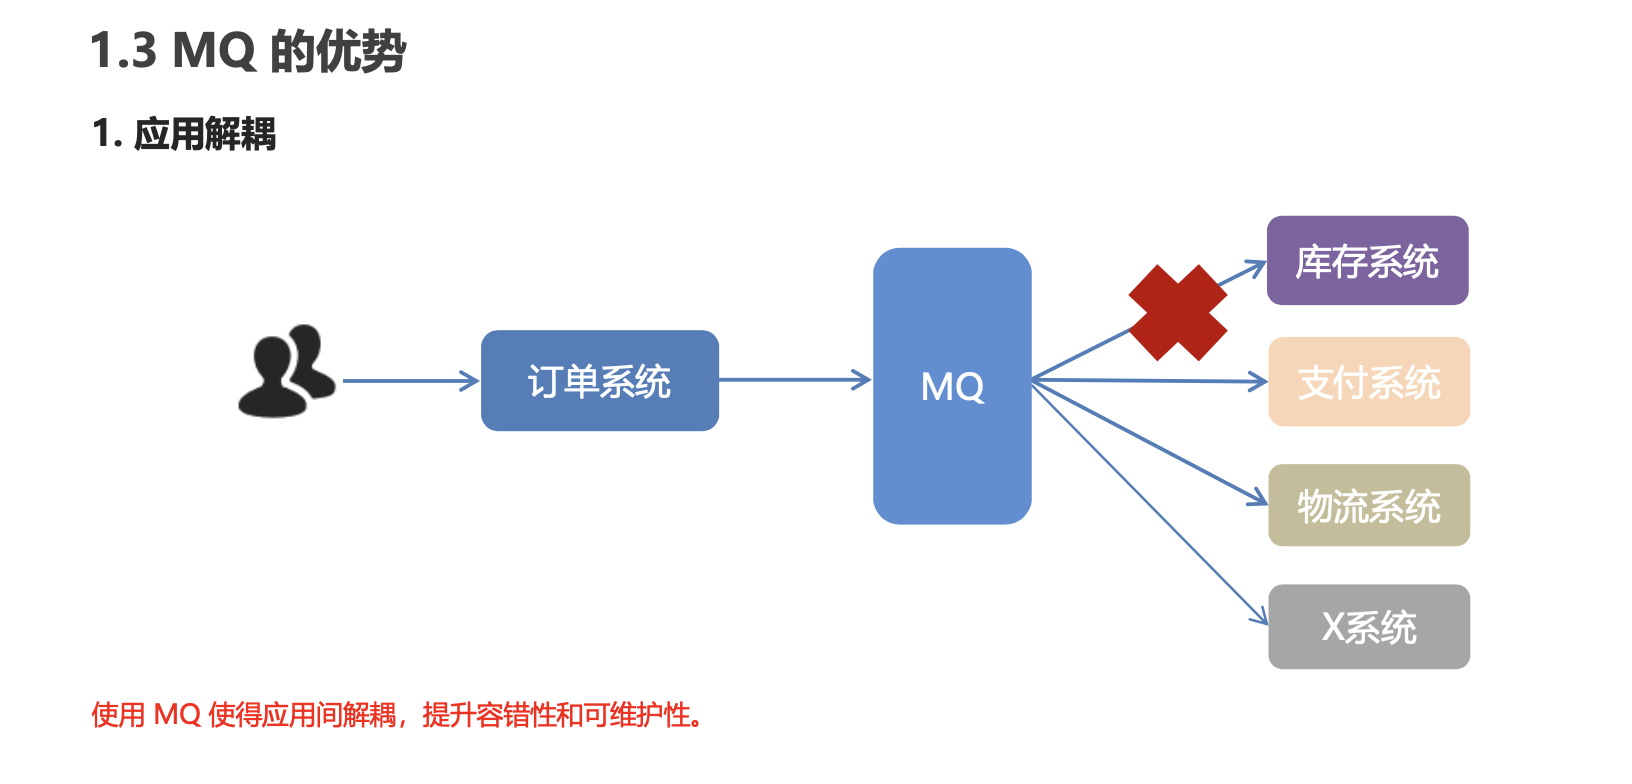
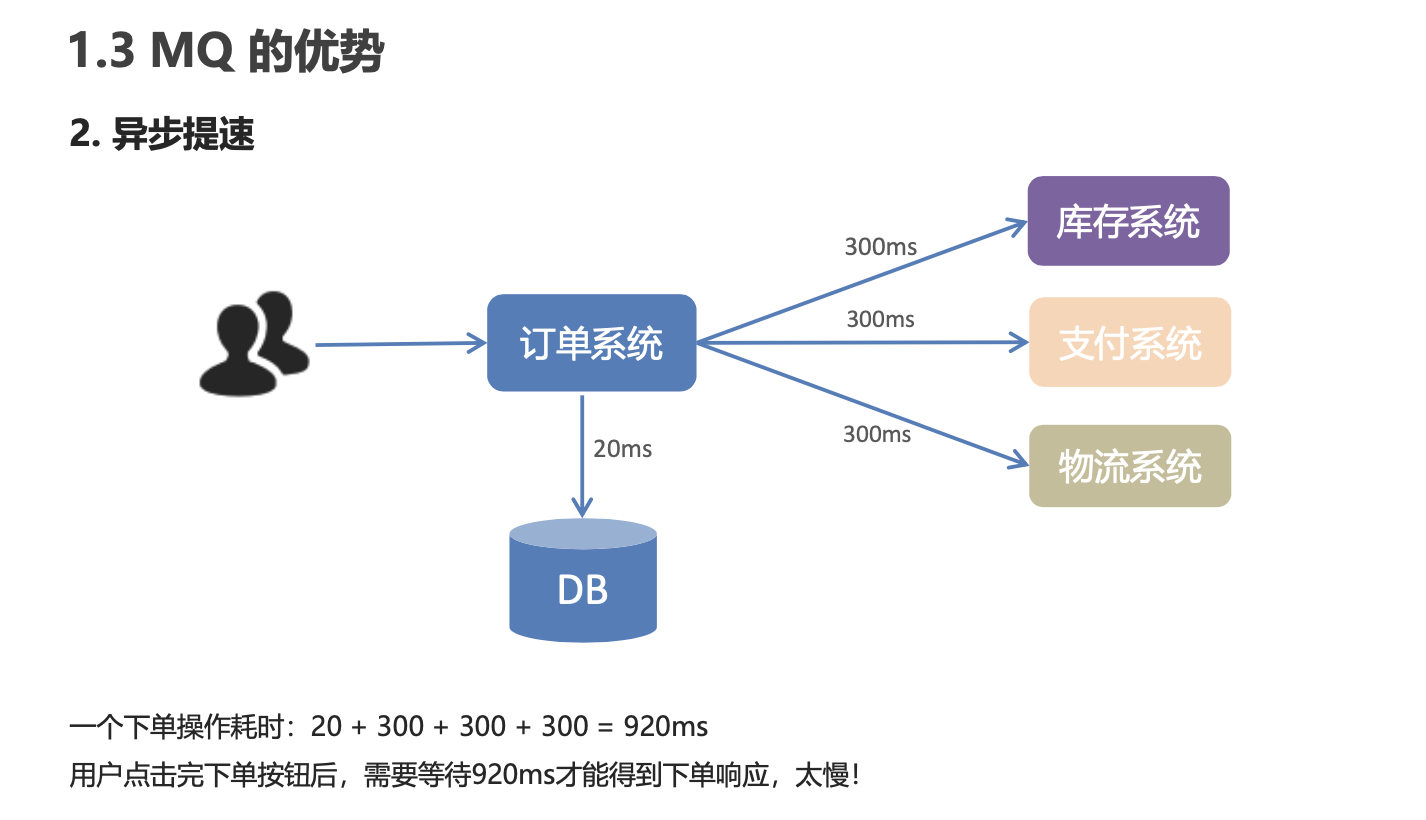
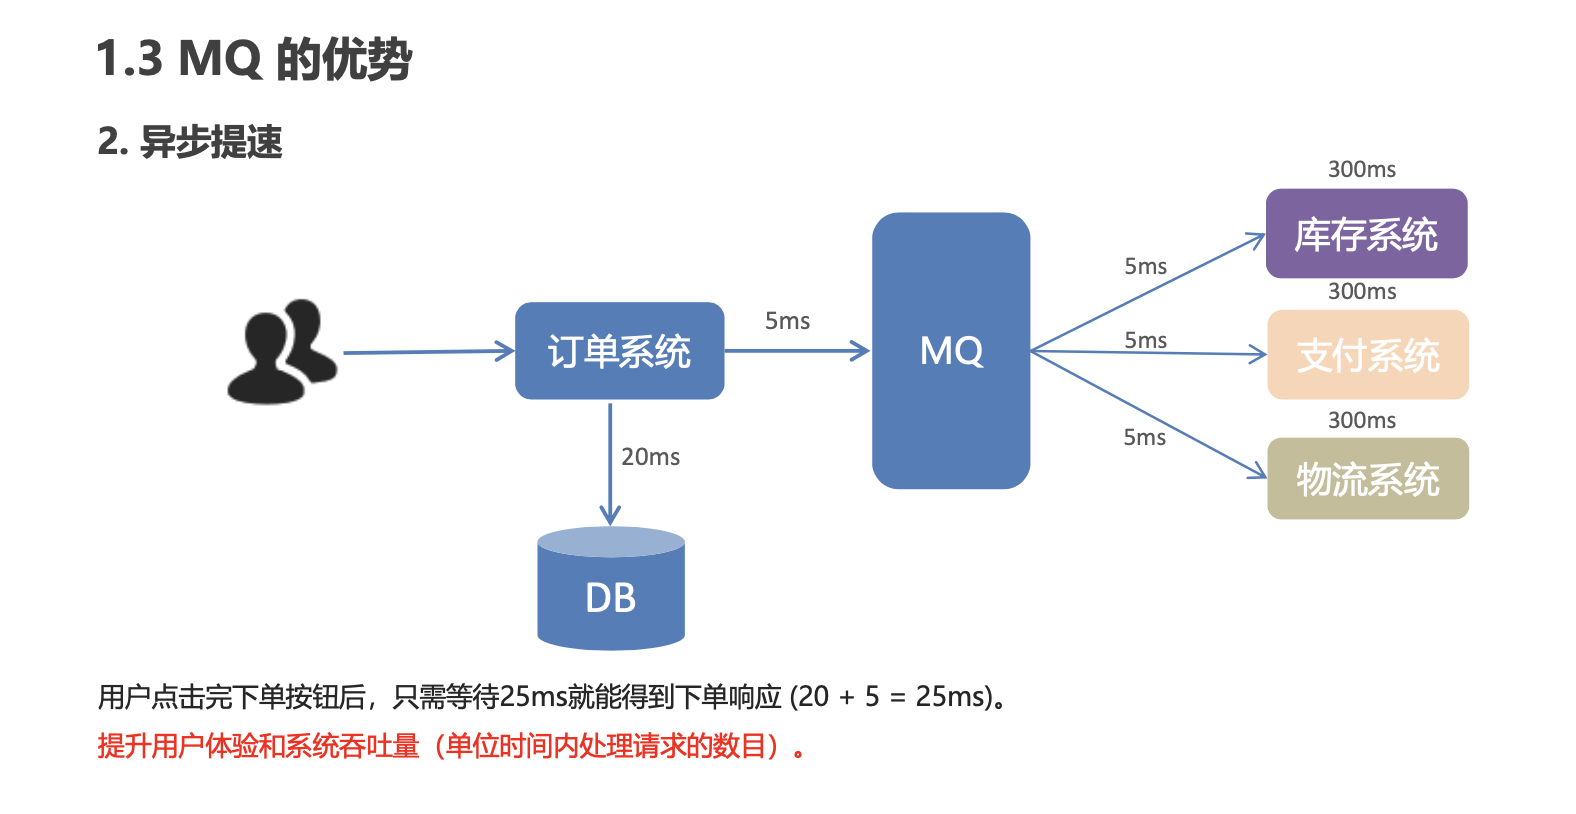
MQ的优势
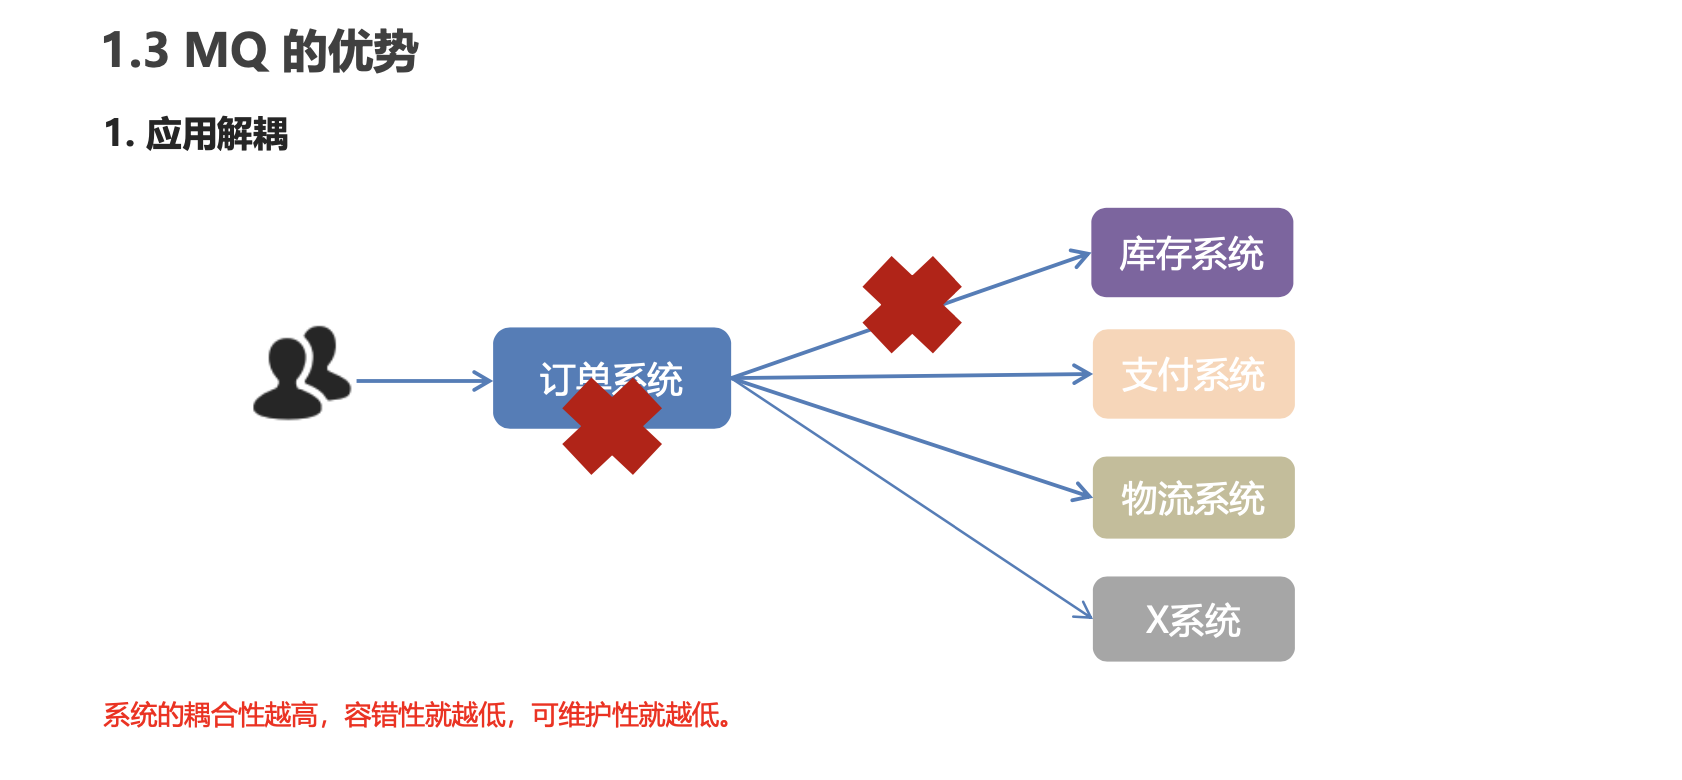
应用解耦
异步提速
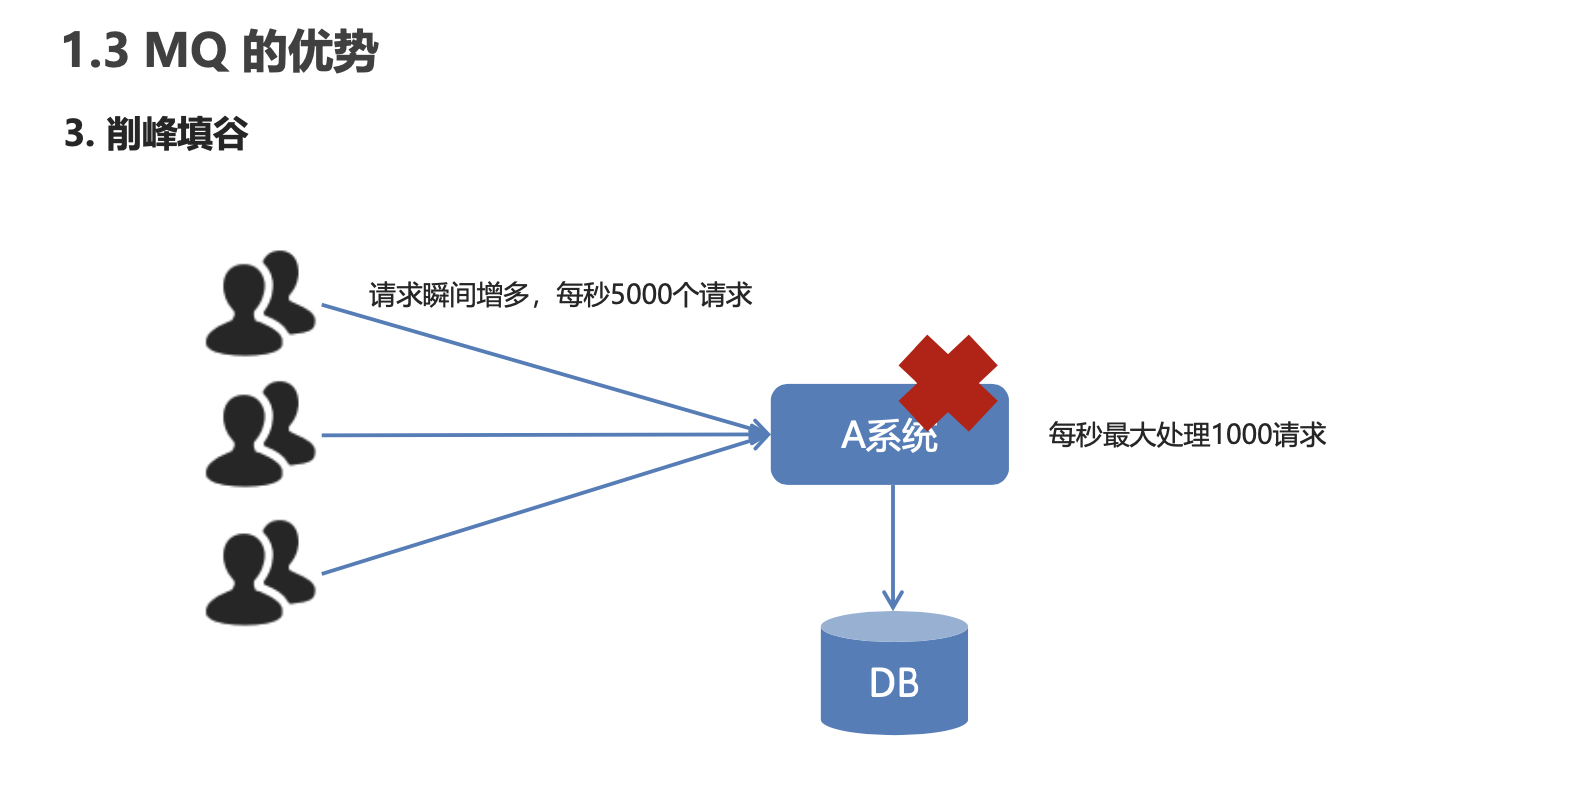
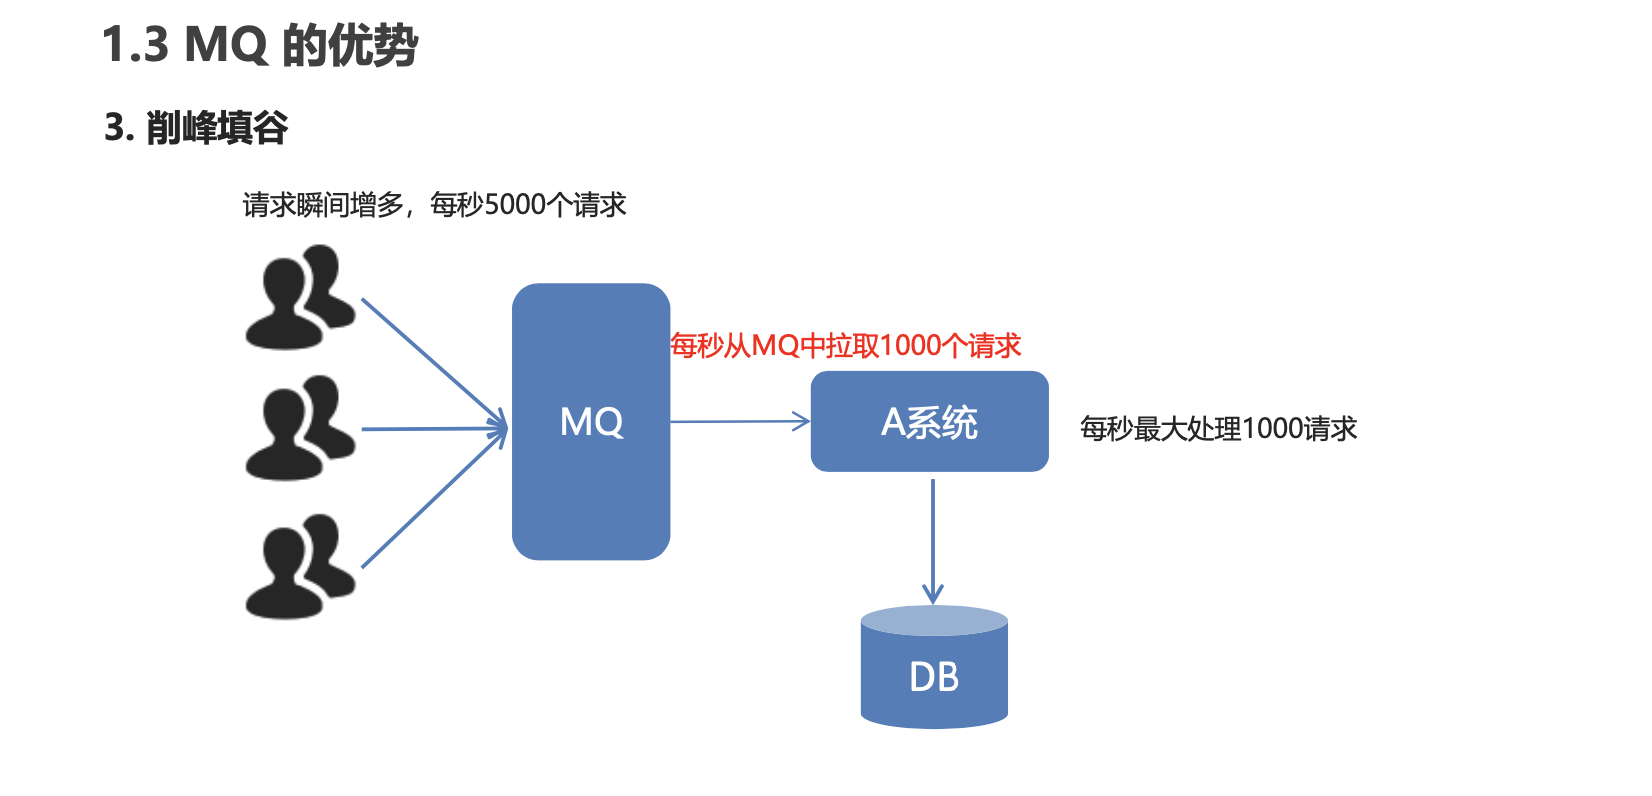
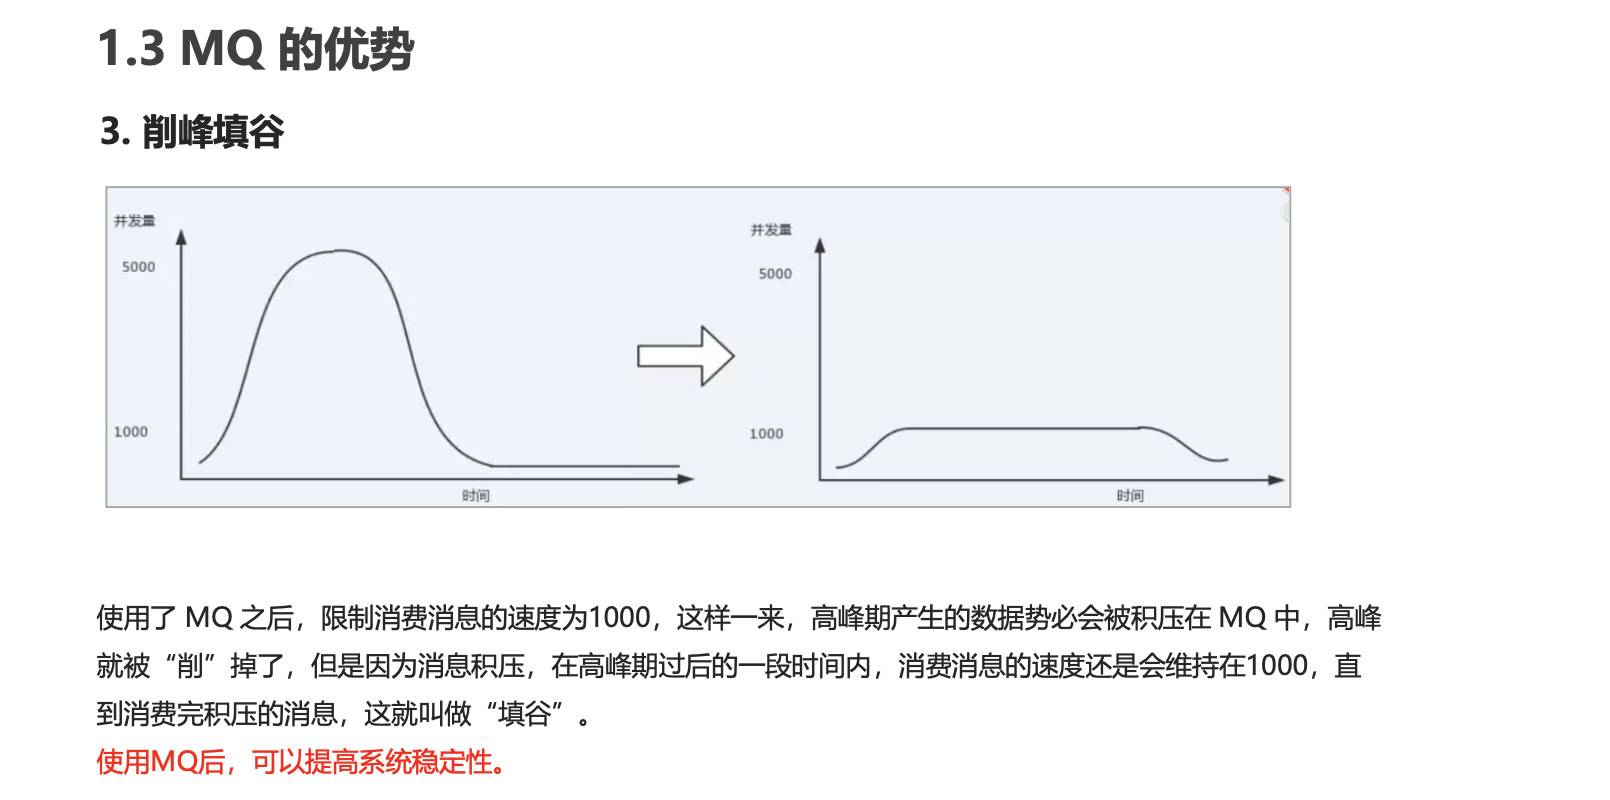
削峰填谷

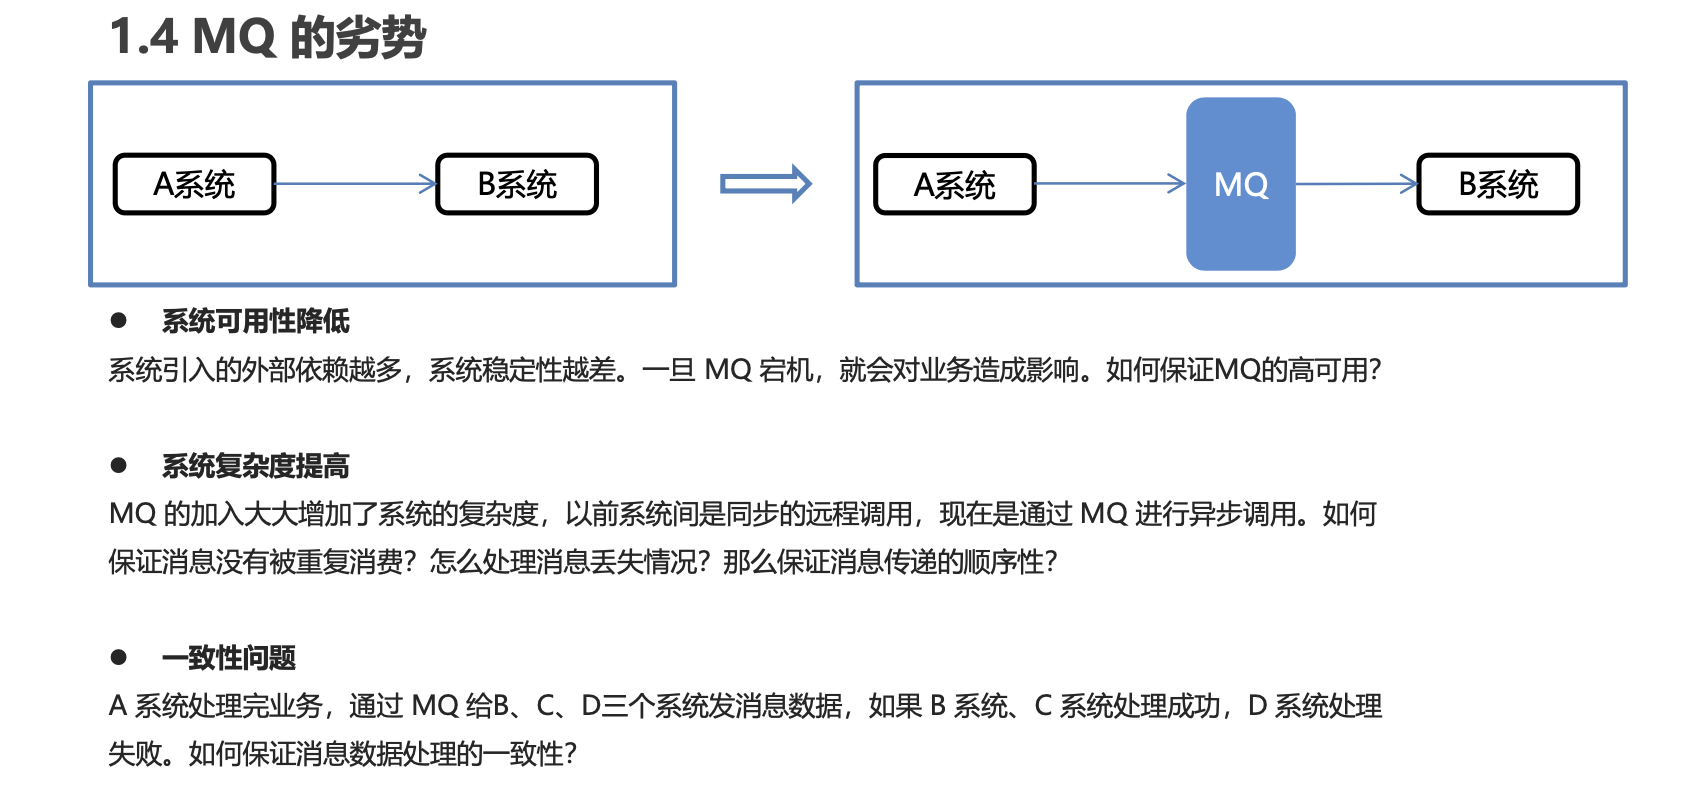
MQ的劣势
常见的MQ产品

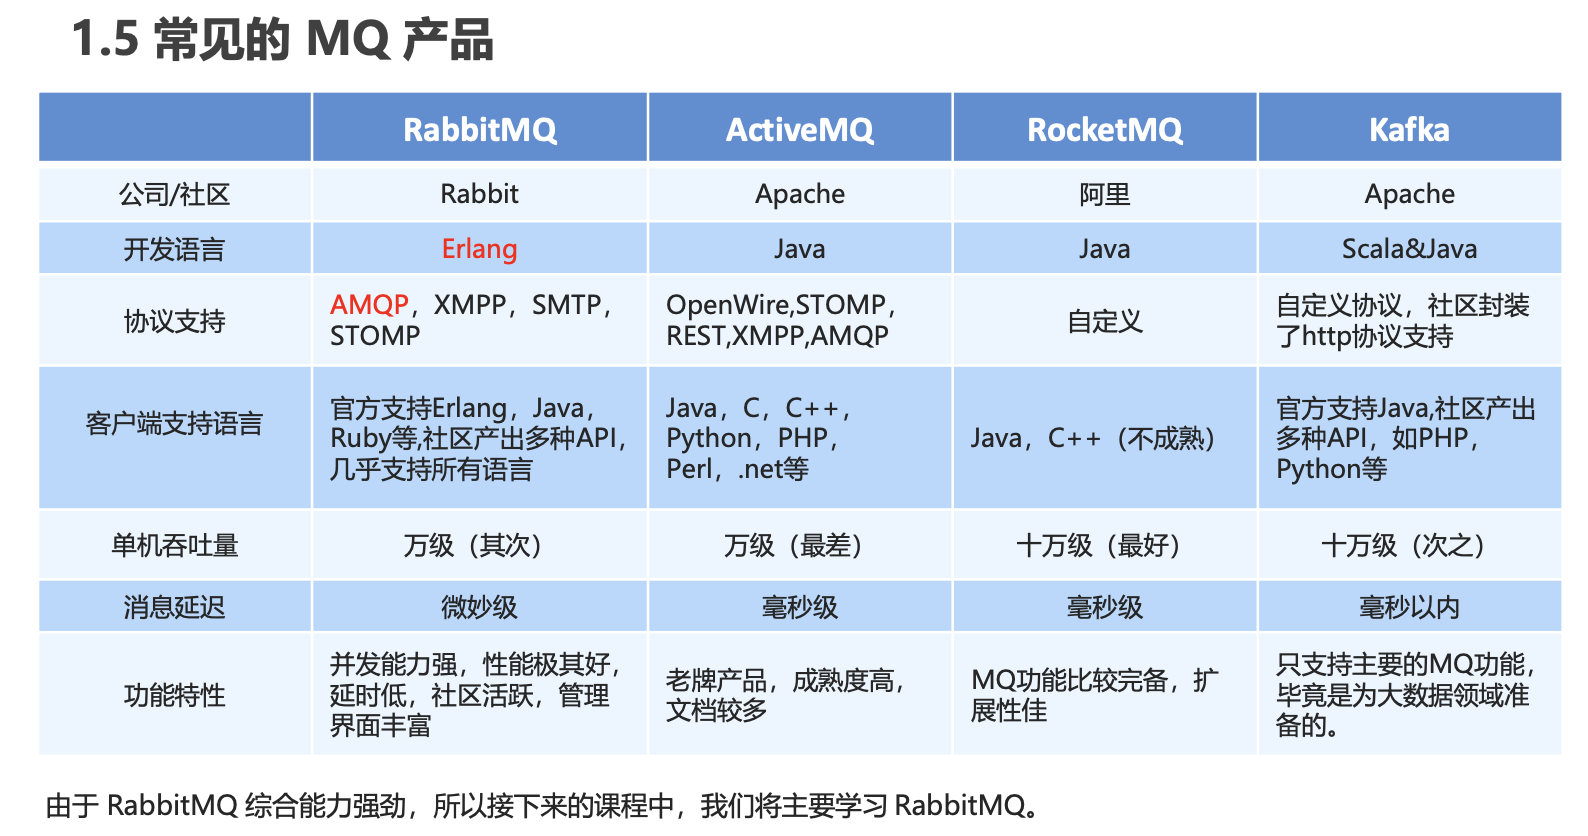
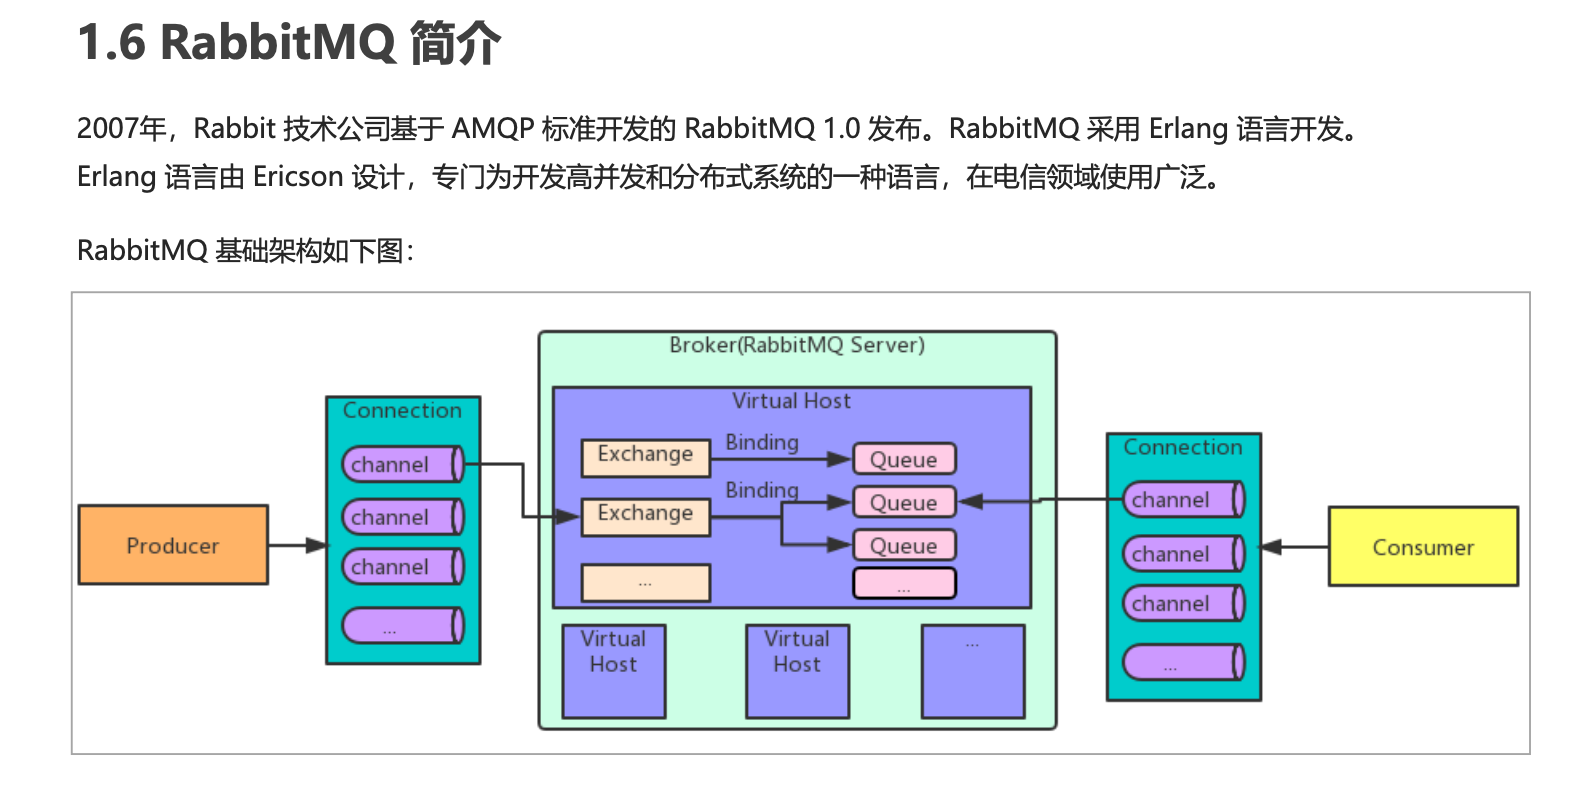
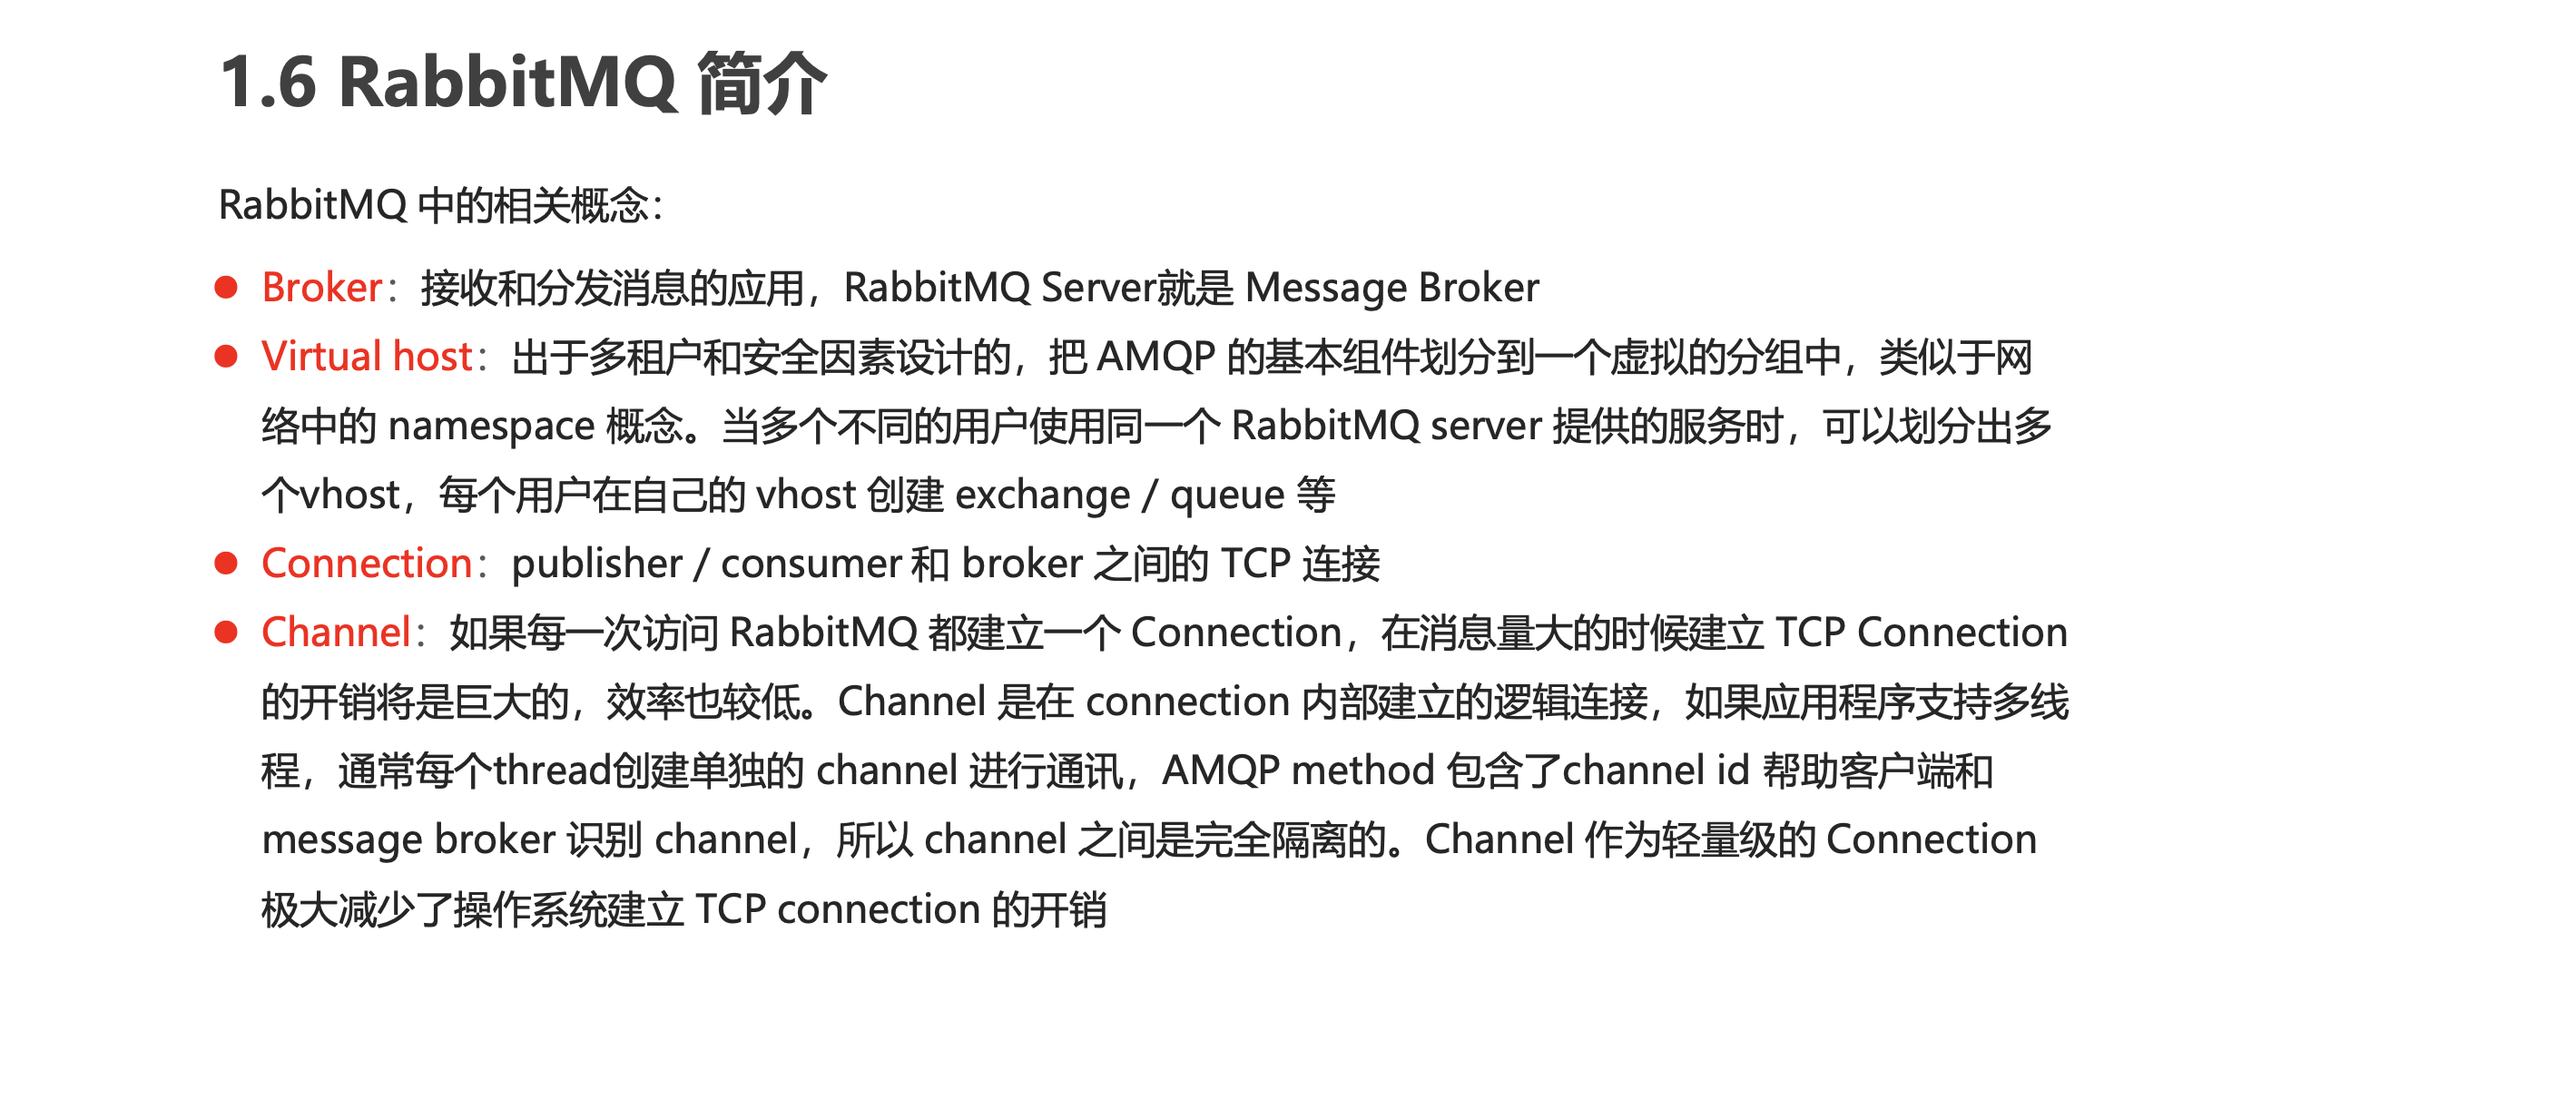
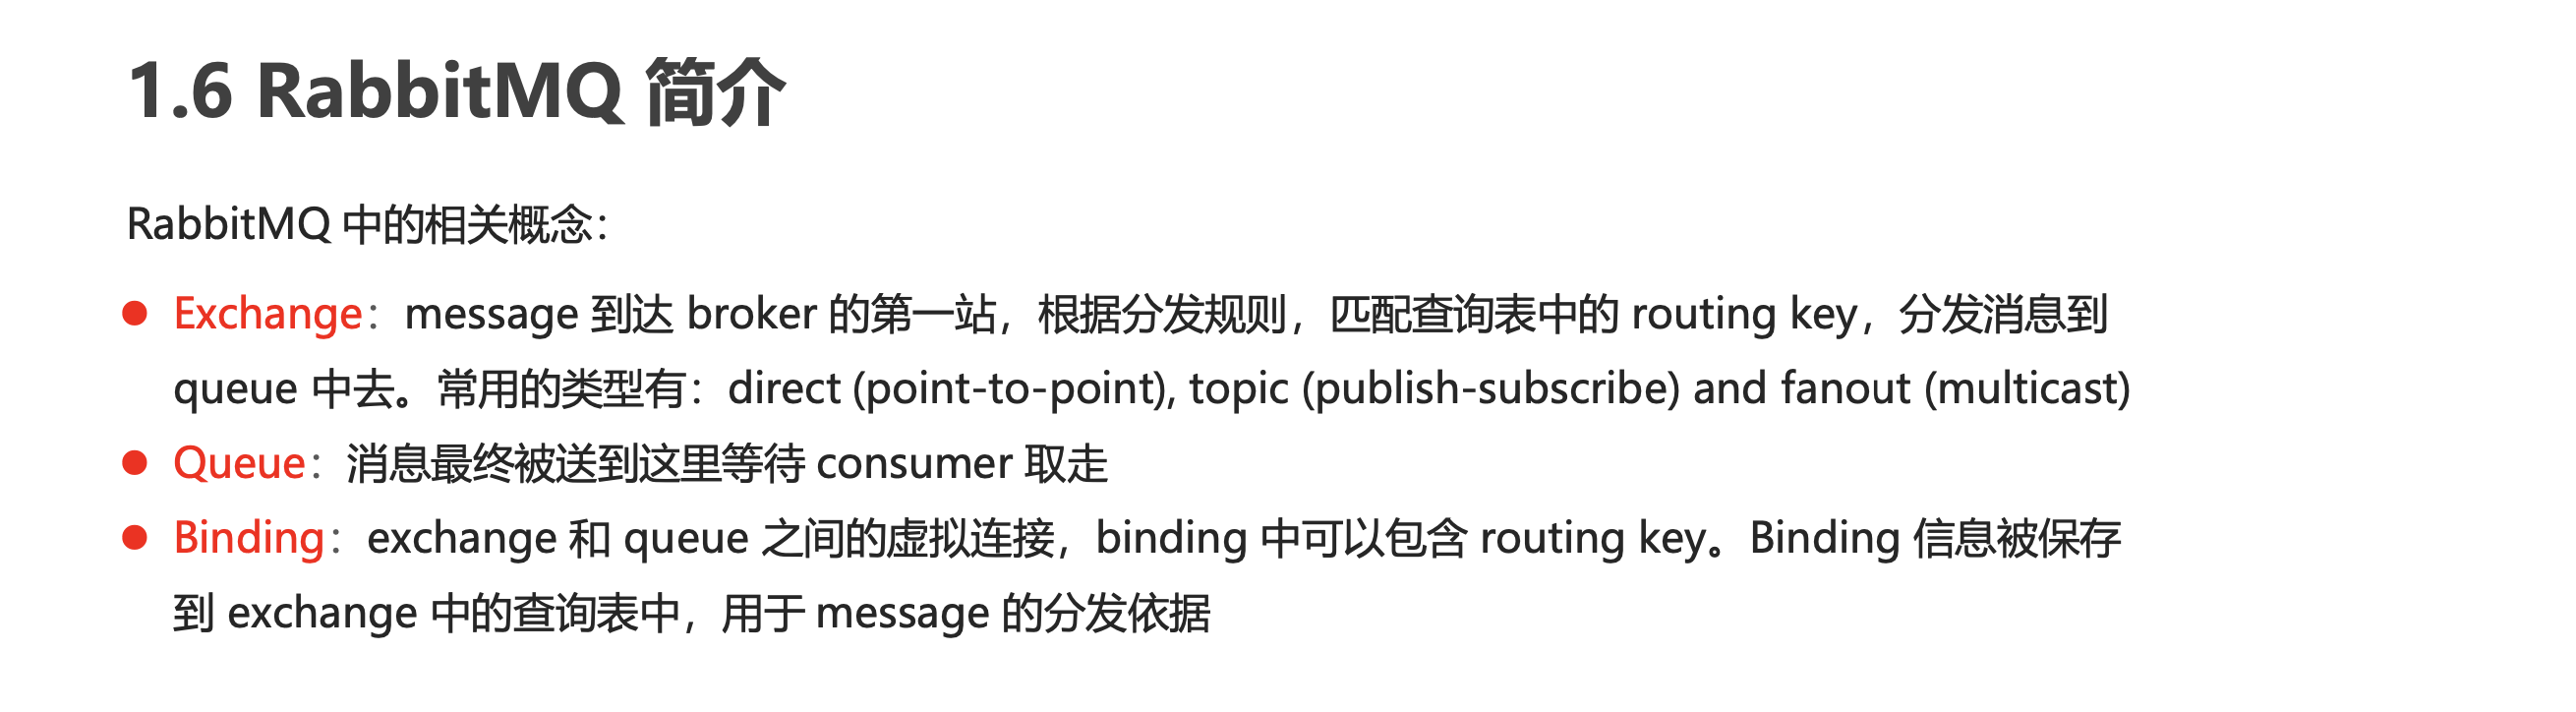
RabbitMQ简介
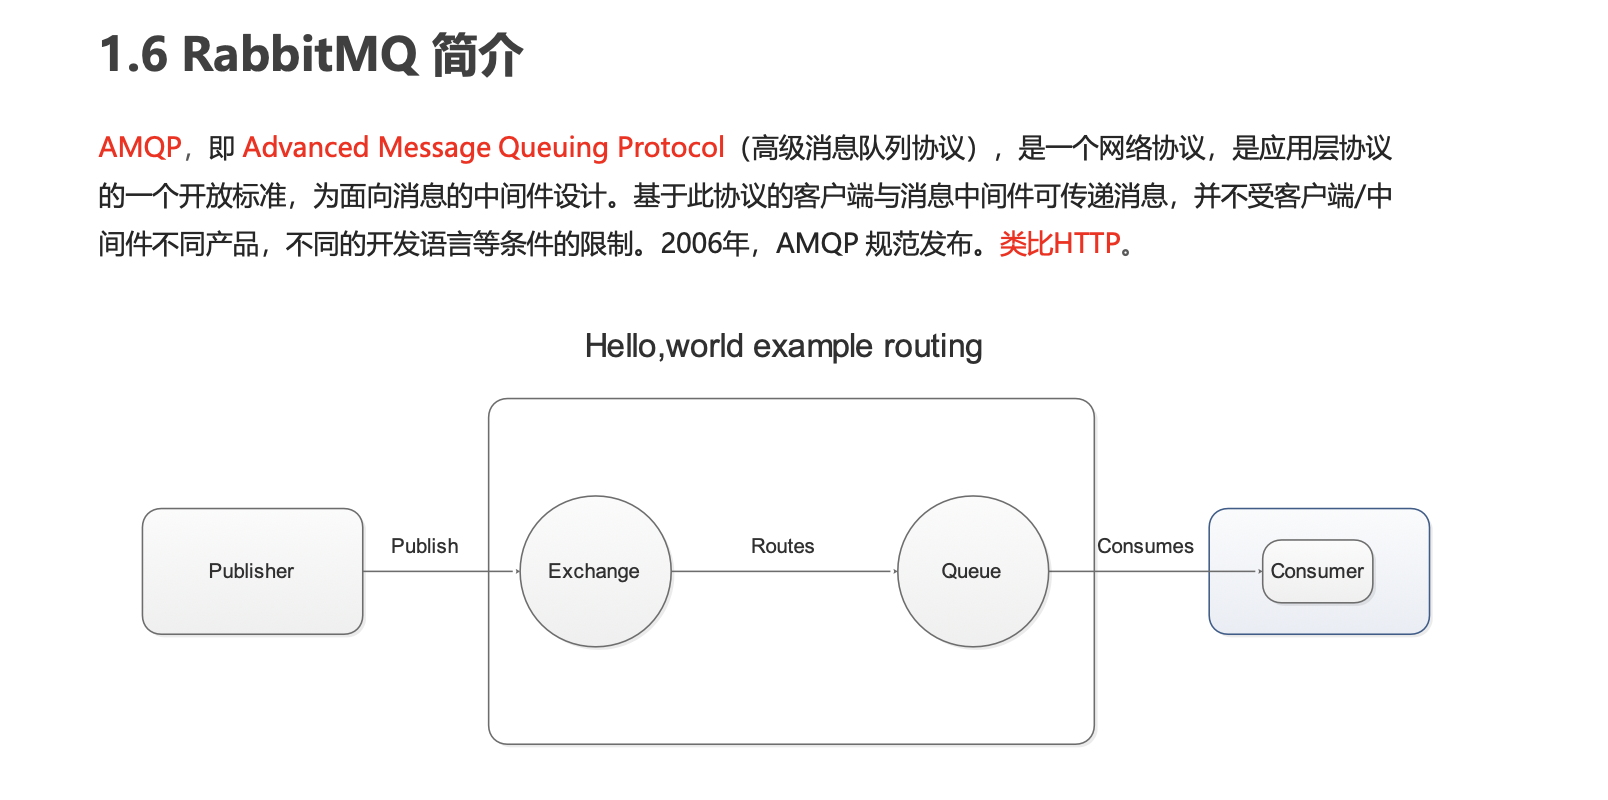

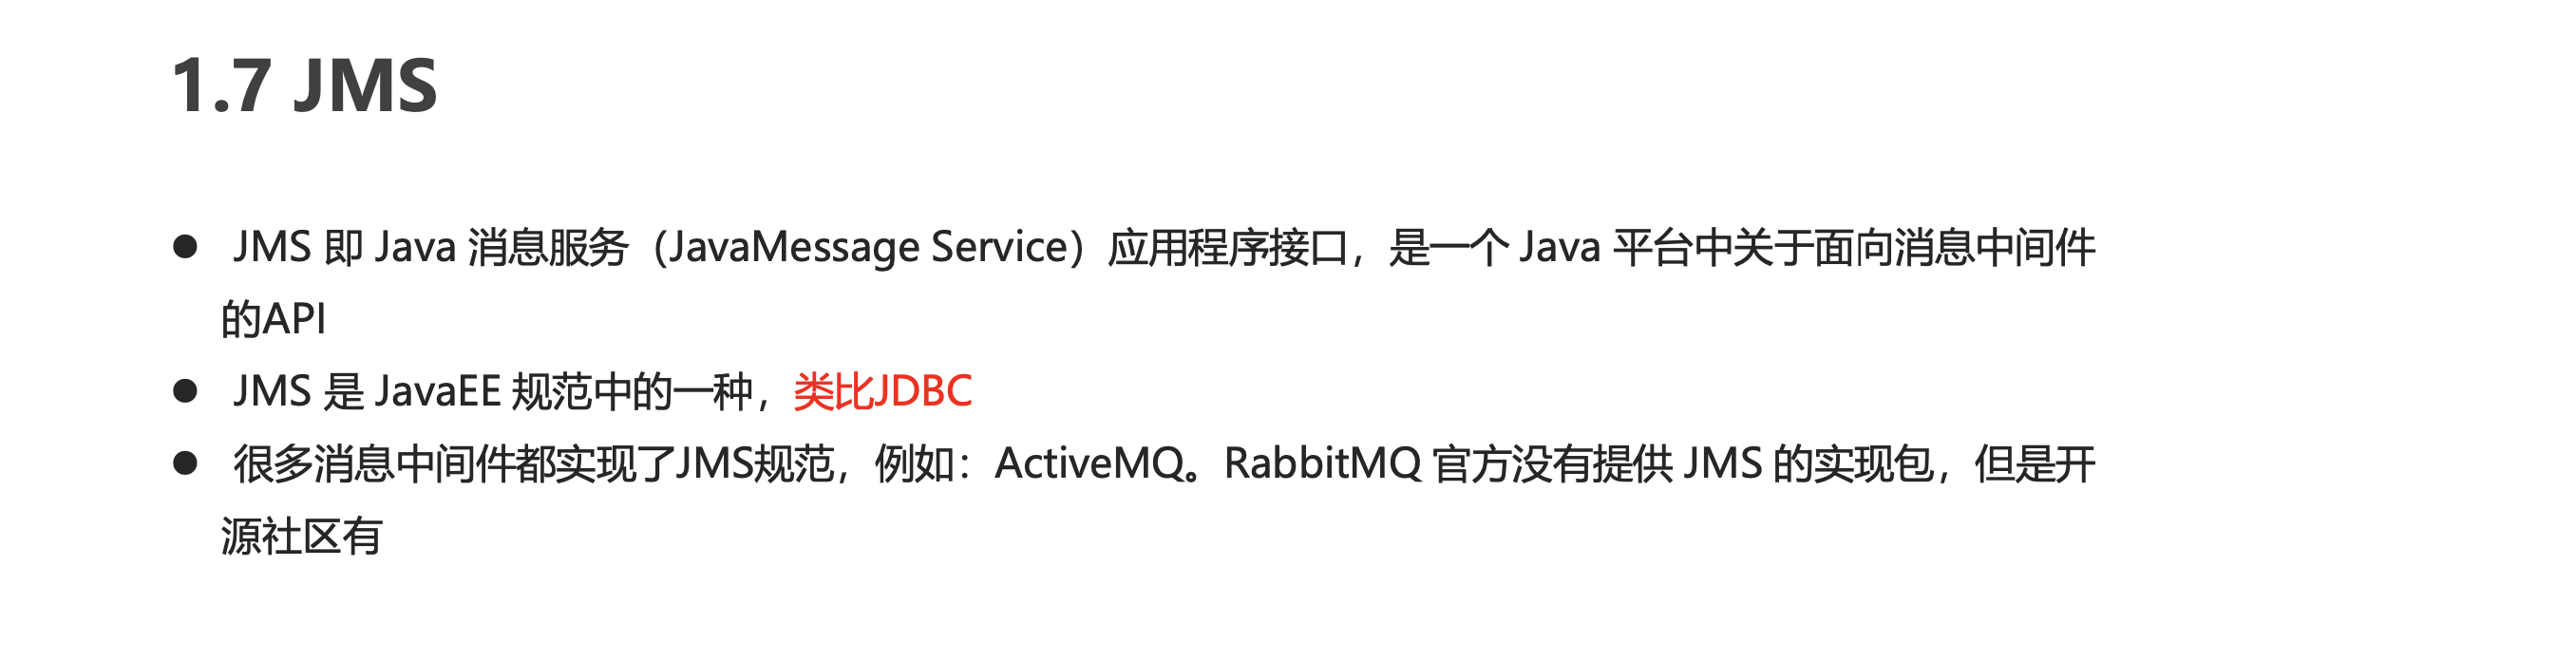
JMS
RabbitMQ的安装和配置

以下操作均基于centos7.9
1. 安装依赖环境
在线安装依赖环境:
1 | yum install build-essential openssl openssl-devel unixODBC unixODBC-devel make gcc gcc-c++ kernel-devel m4 ncurses-devel tk tc xz |
2. 安装Erlang
上传文件
erlang-18.3-1.el7.centos.x86_64.rpm
socat-1.7.3.2-5.el7.lux.x86_64.rpm
rabbitmq-server-3.6.5-1.noarch.rpm

1 | # 安装 |

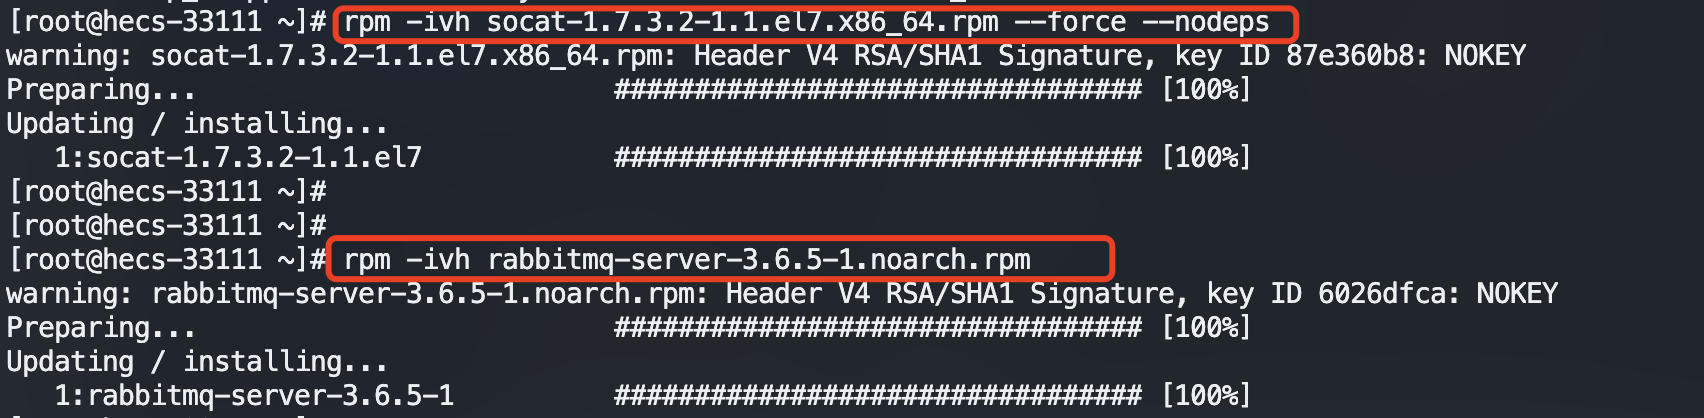
3. 安装RabbitMQ
1 | # 安装 |
安装socat报如下错误

执行
1 | rpm -ivh socat-1.7.3.2-1.1.el7.x86_64.rpm --force --nodeps |
继续安装rabbitmq
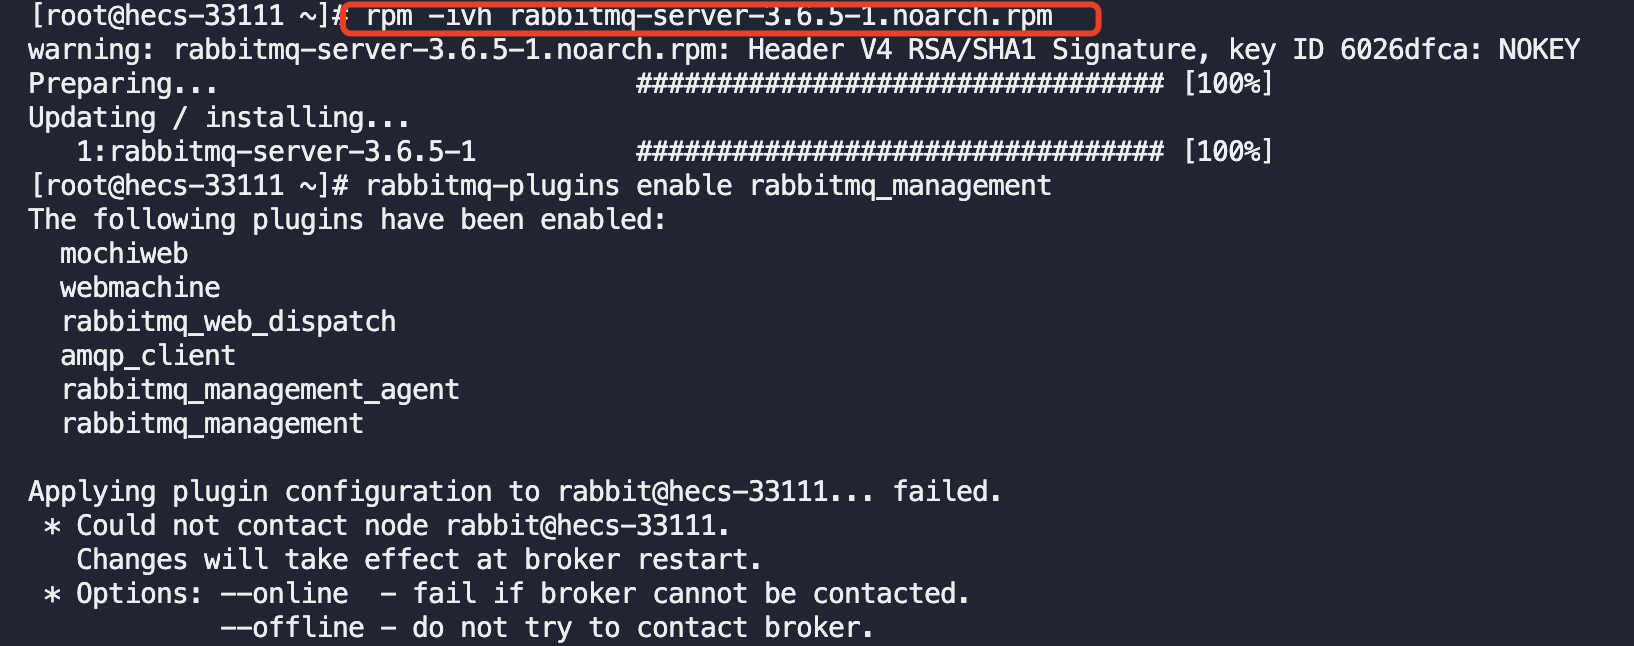
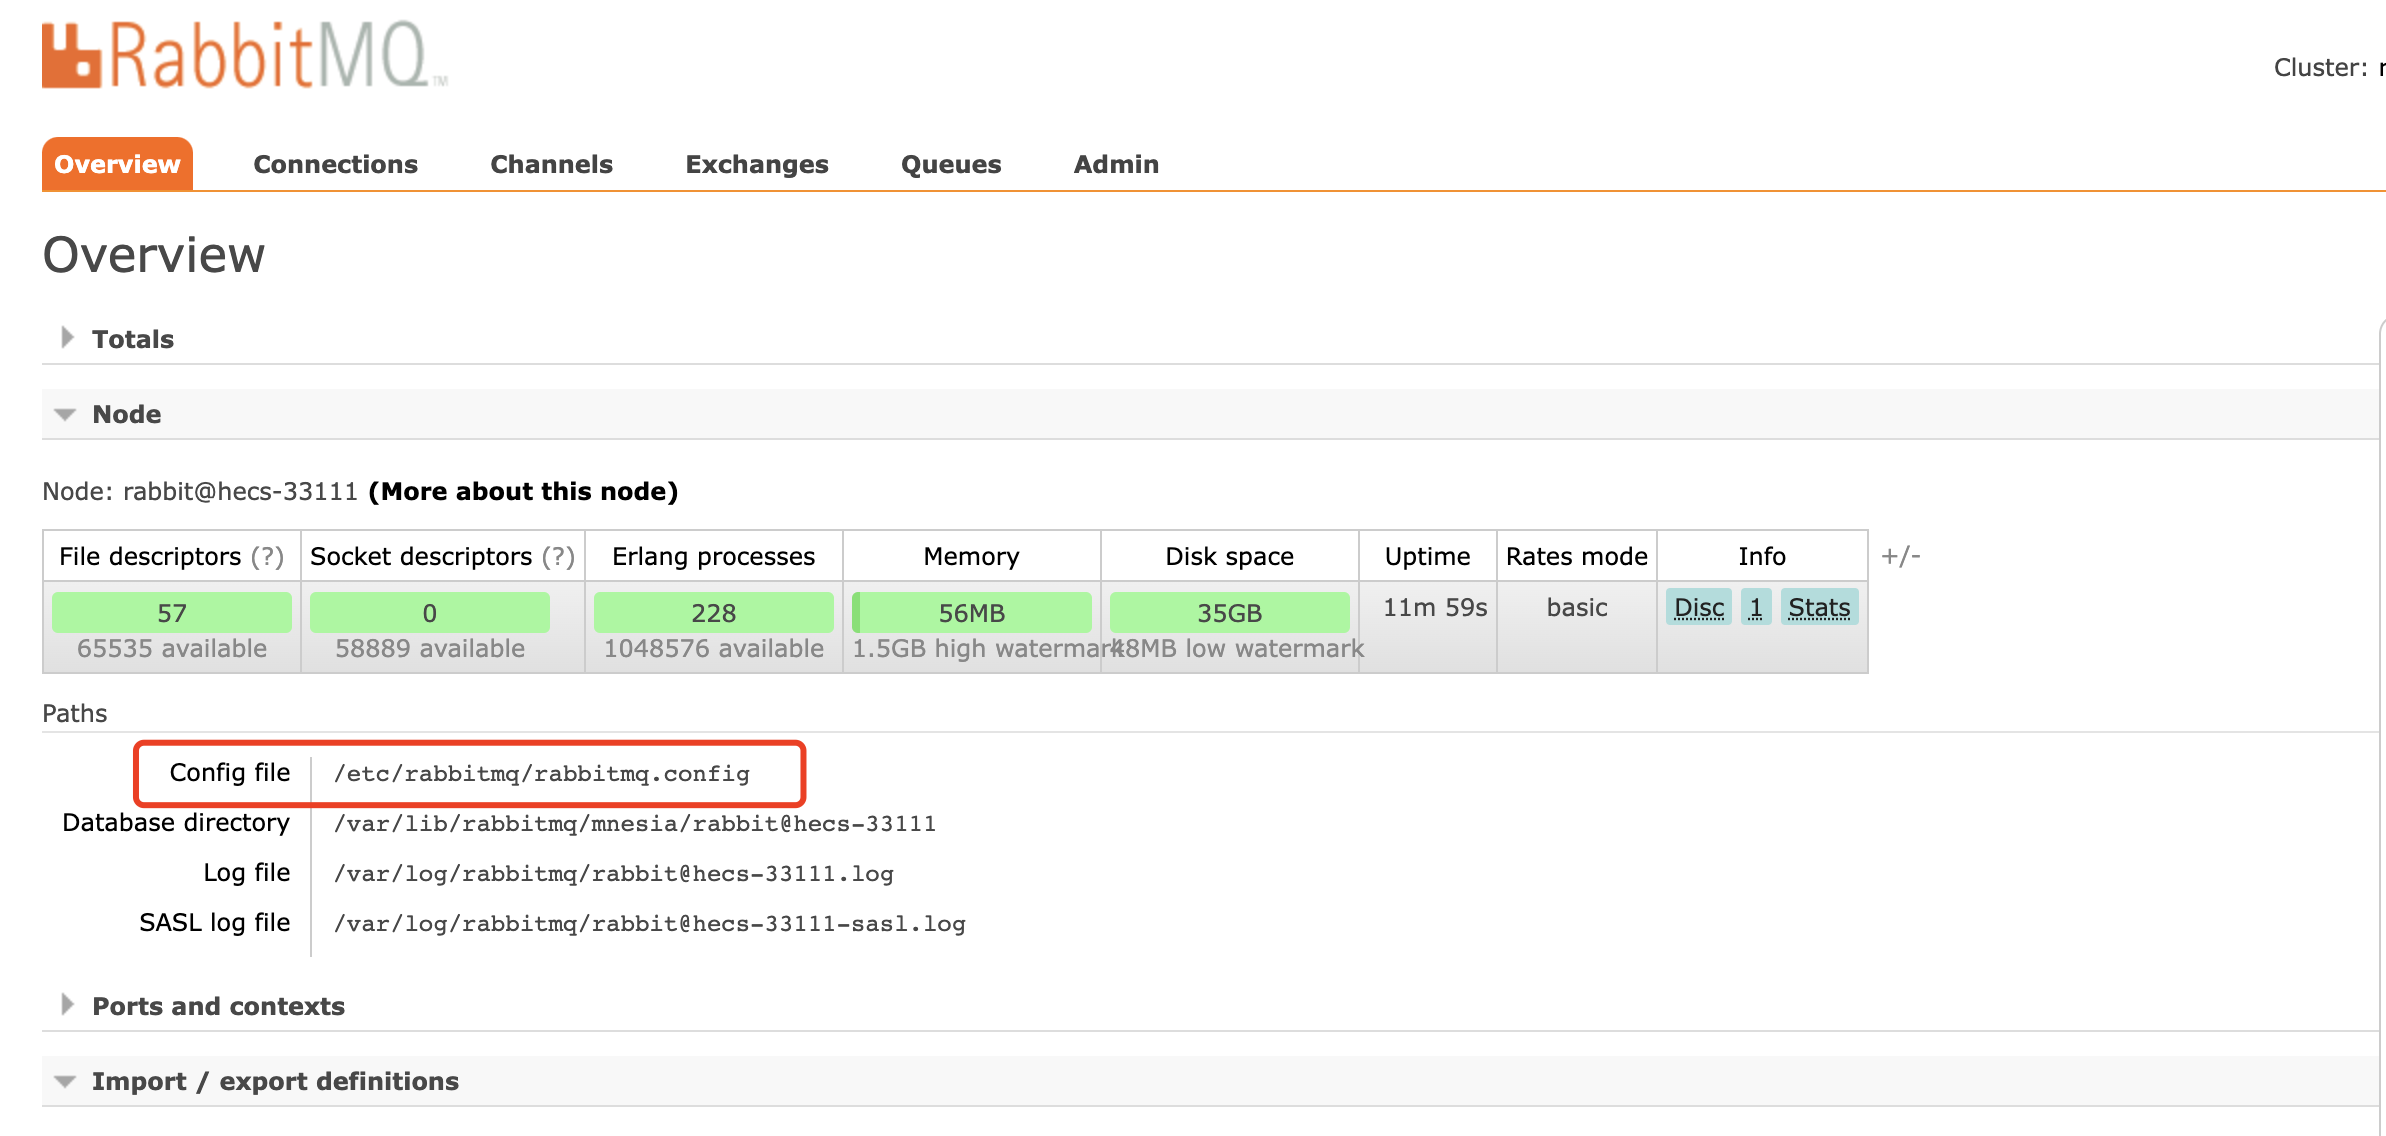
4. 开启管理界面及配置
1 | # 开启管理界面 |
5. 启动
1 | service rabbitmq-server start # 启动服务 |

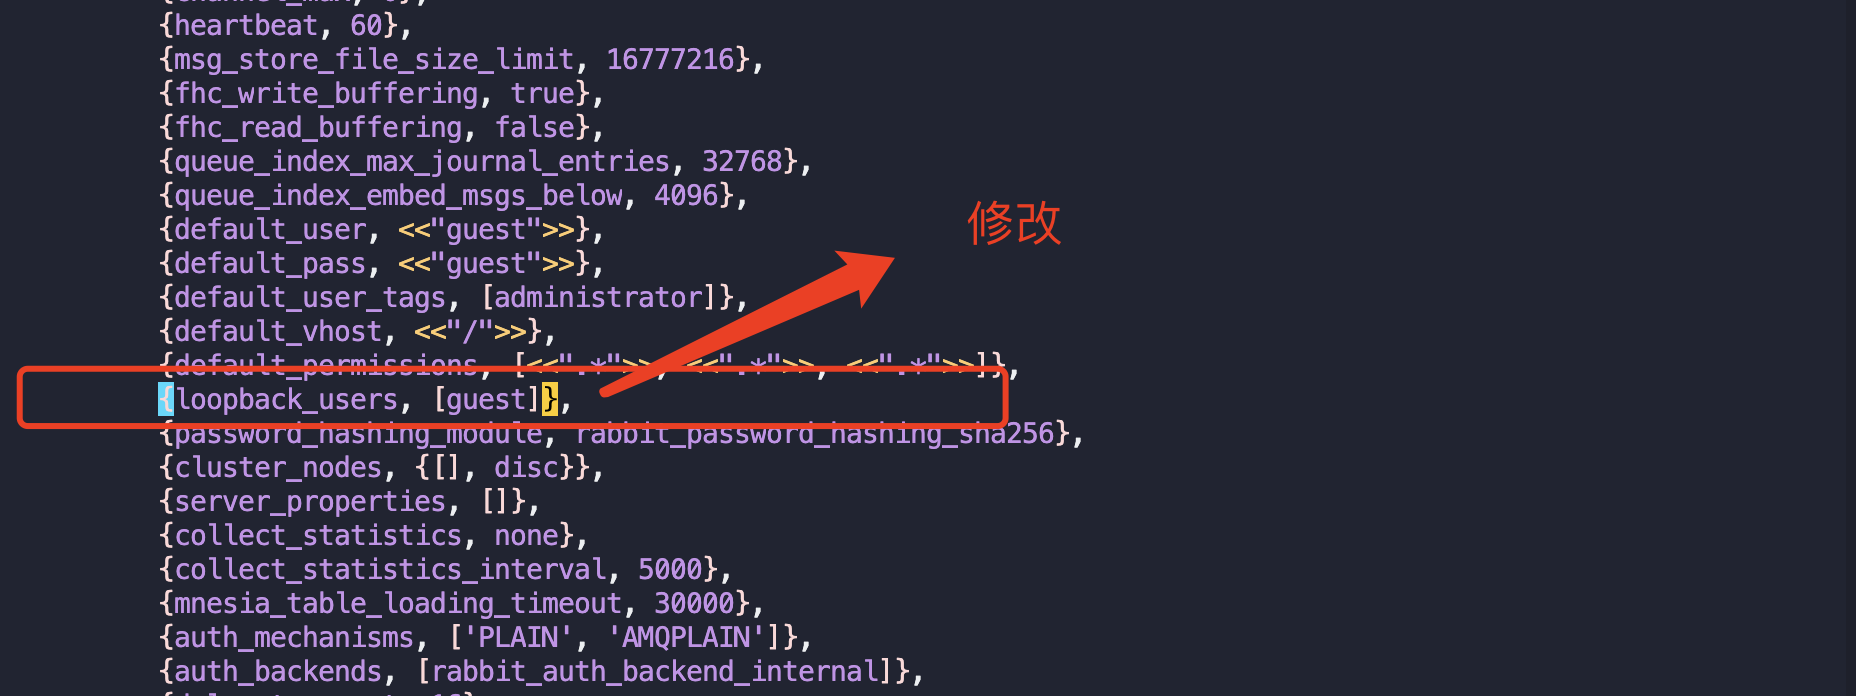
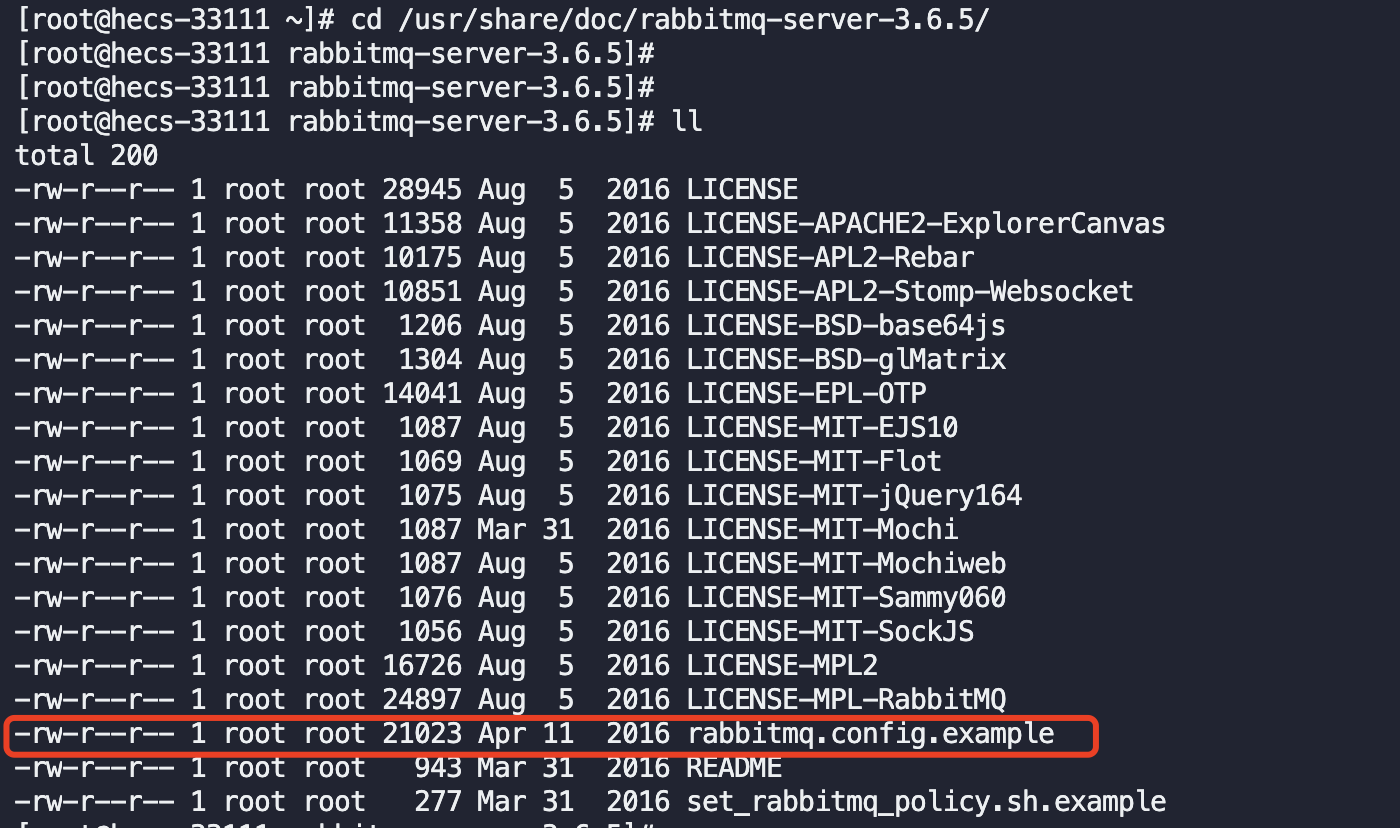
- 设置配置文件
1 | cd /usr/share/doc/rabbitmq-server-3.6.5/ |

重启使配置文件生效
1 | service rabbitmq-server restart # 重启服务 |
6. 配置虚拟主机及用户
6.1. 用户角色
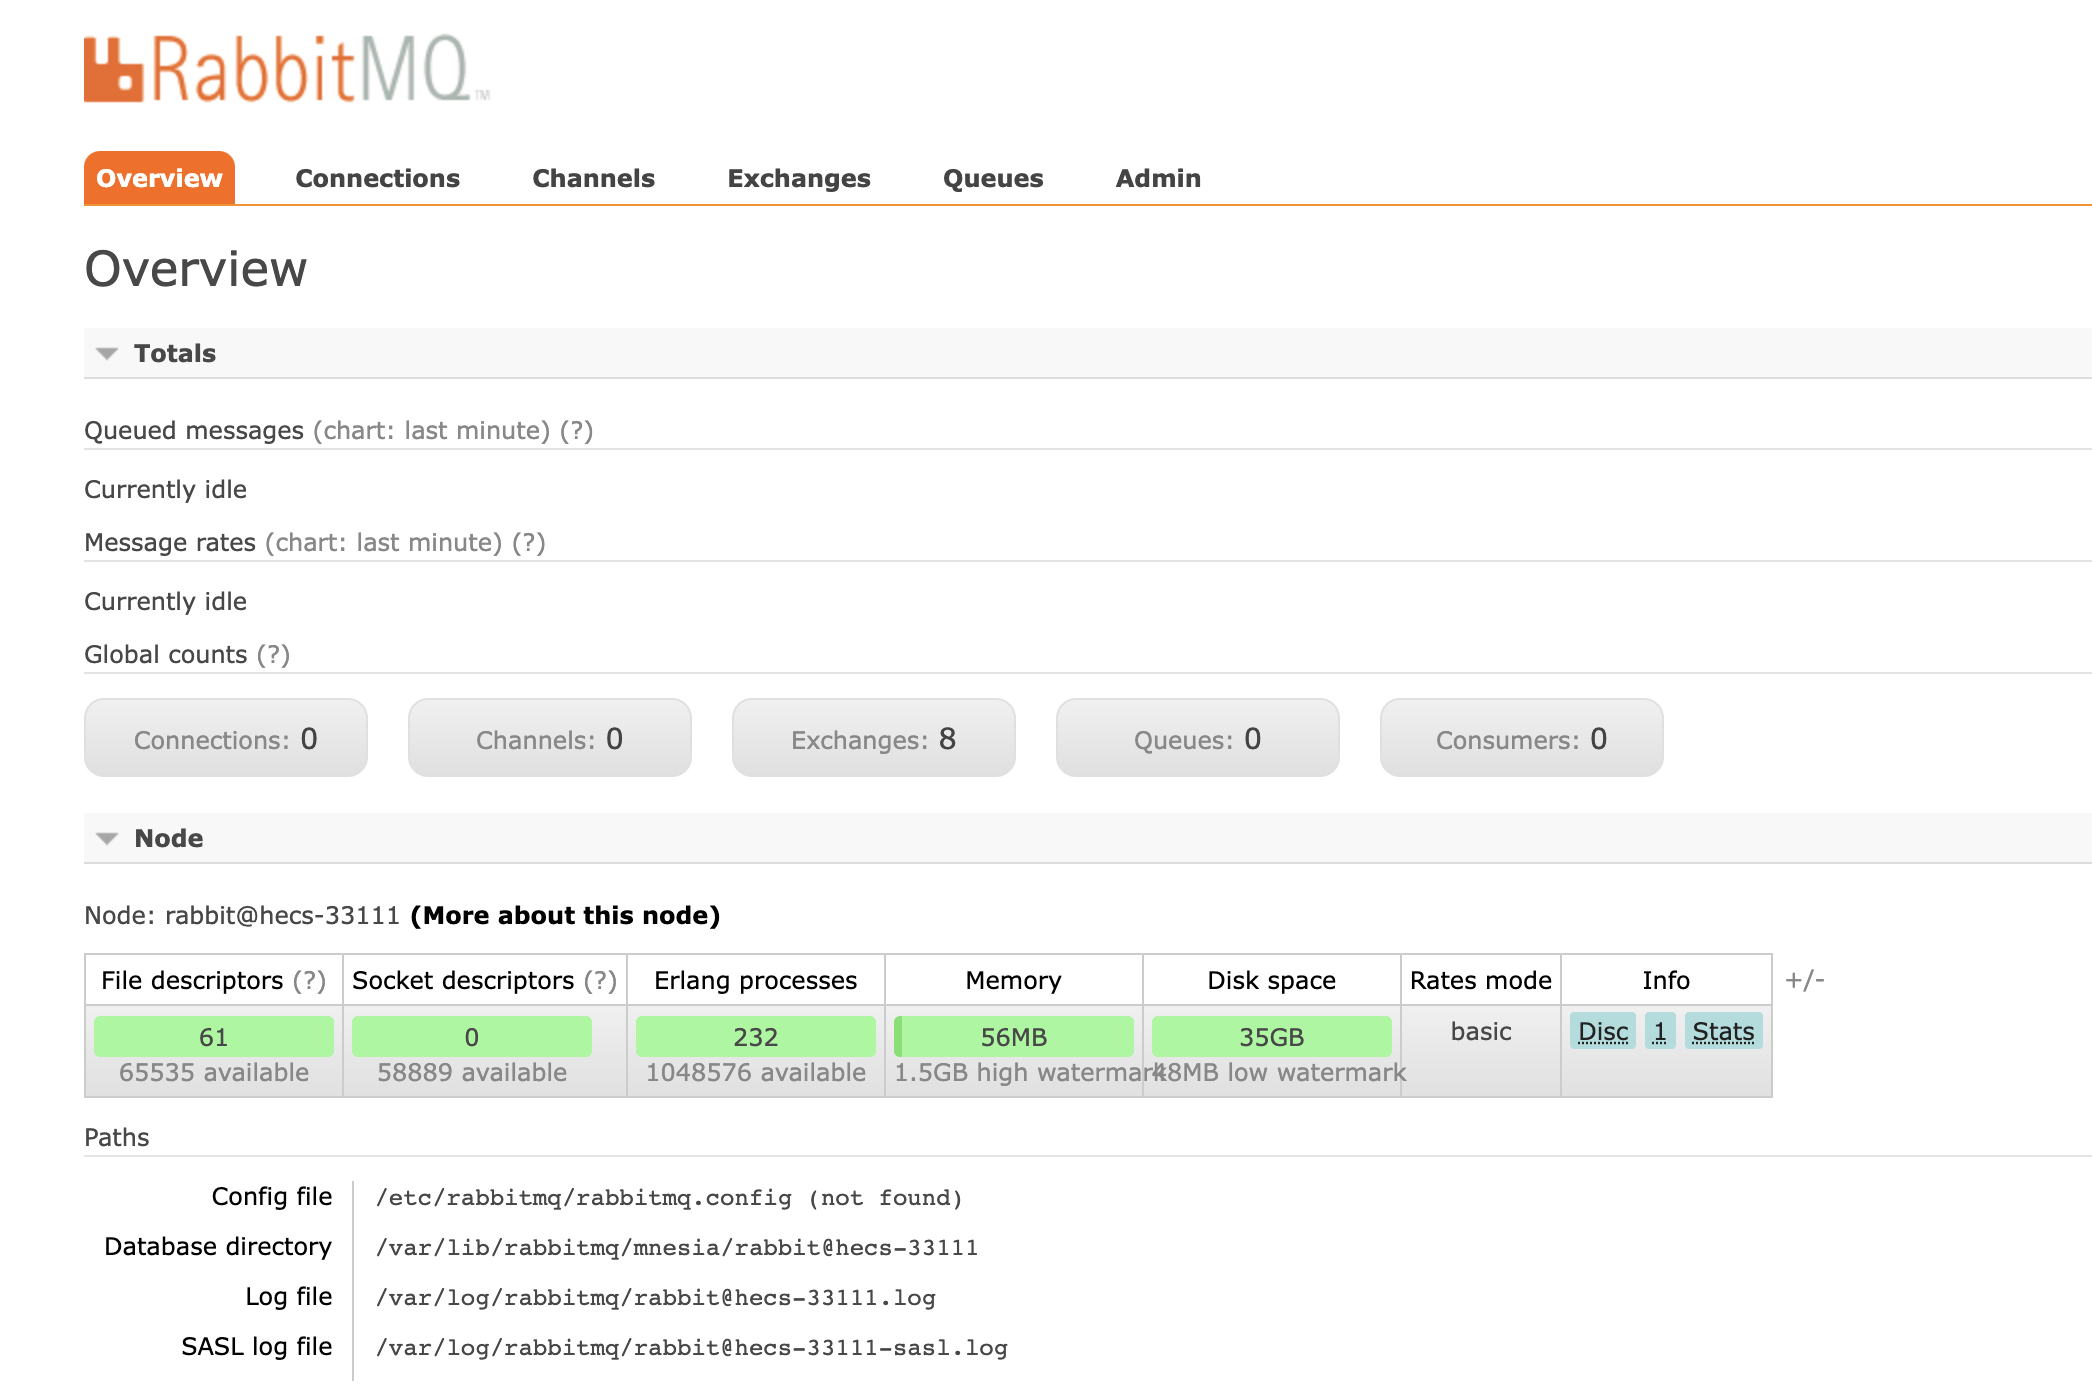
RabbitMQ在安装好后,可以访问http://ip地址:15672 ;其自带了guest/guest的用户名和密码;如果需要创建自定义用户;那么也可以登录管理界面后,如下操作:

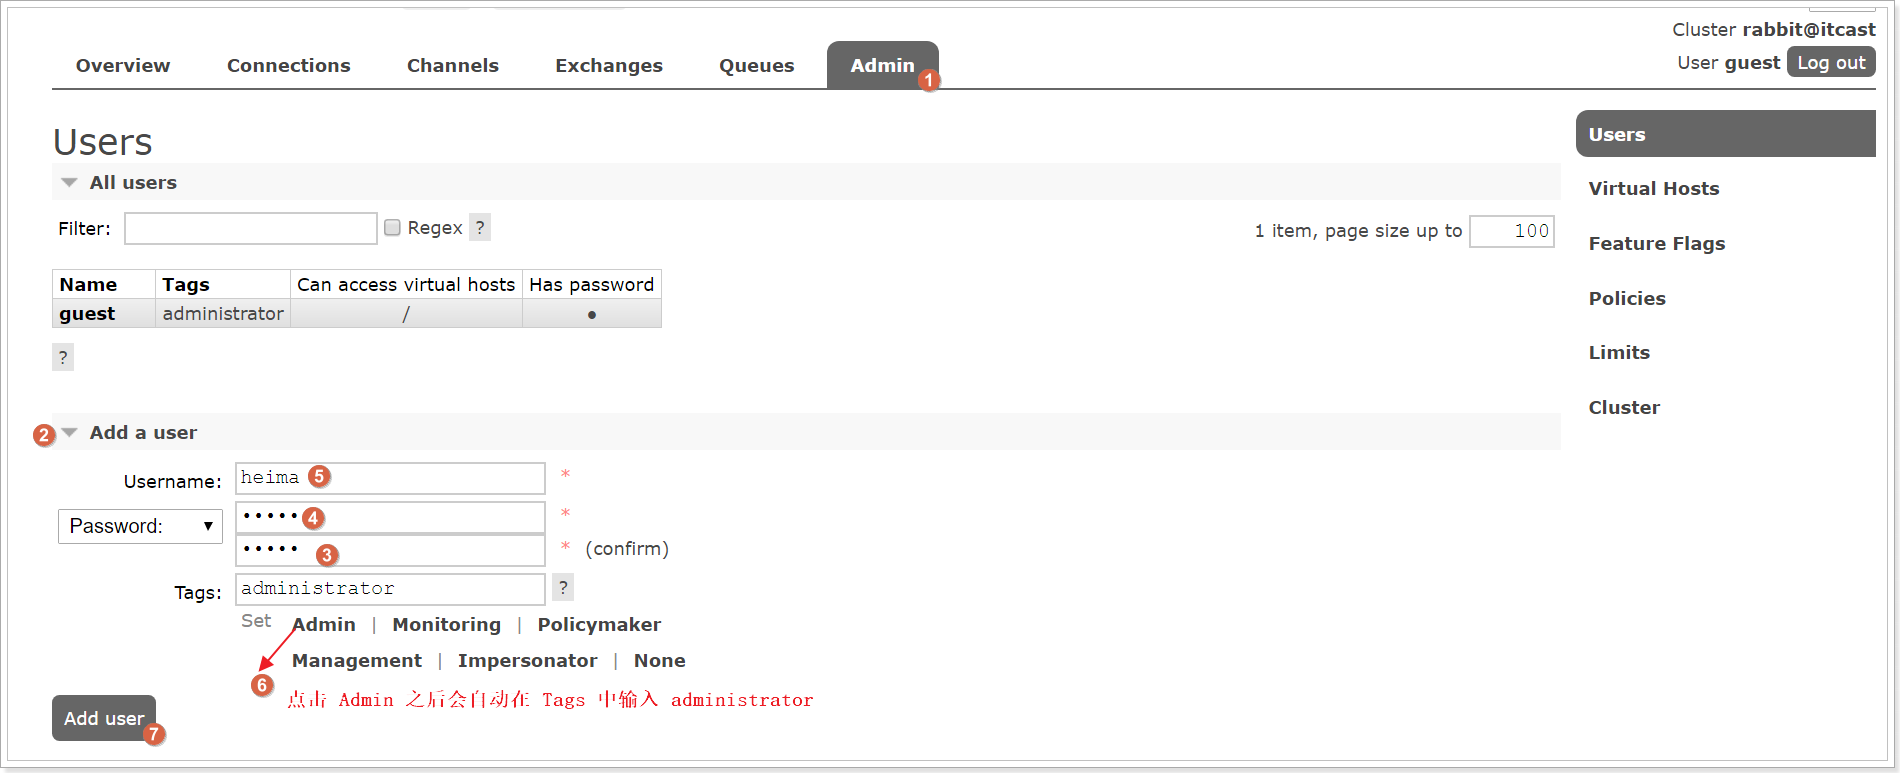
角色说明:
1、 超级管理员(administrator)
可登陆管理控制台,可查看所有的信息,并且可以对用户,策略(policy)进行操作。
2、 监控者(monitoring)
可登陆管理控制台,同时可以查看rabbitmq节点的相关信息(进程数,内存使用情况,磁盘使用情况等)
3、 策略制定者(policymaker)
可登陆管理控制台, 同时可以对policy进行管理。但无法查看节点的相关信息(上图红框标识的部分)。
4、 普通管理者(management)
仅可登陆管理控制台,无法看到节点信息,也无法对策略进行管理。
5、 其他
无法登陆管理控制台,通常就是普通的生产者和消费者。
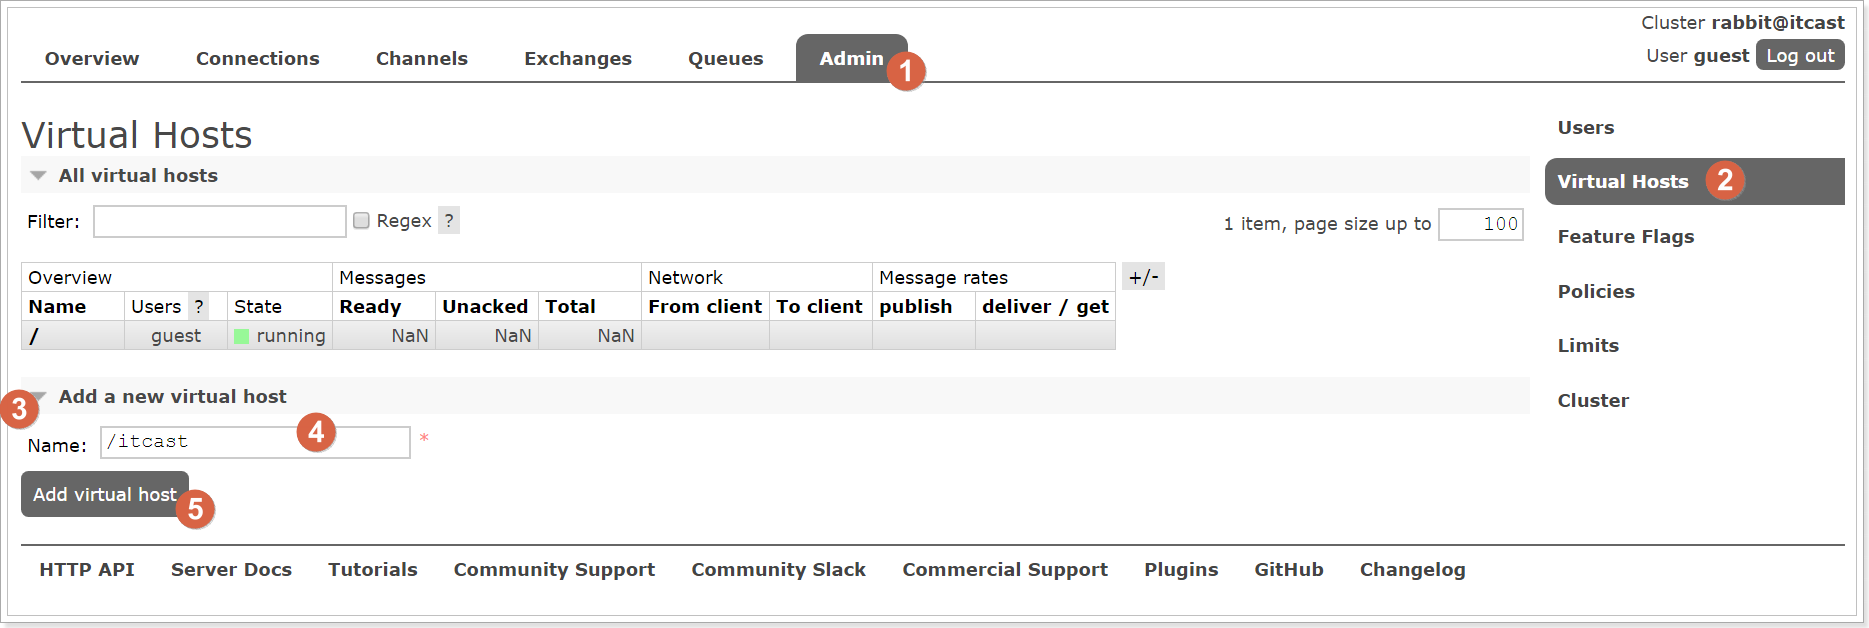
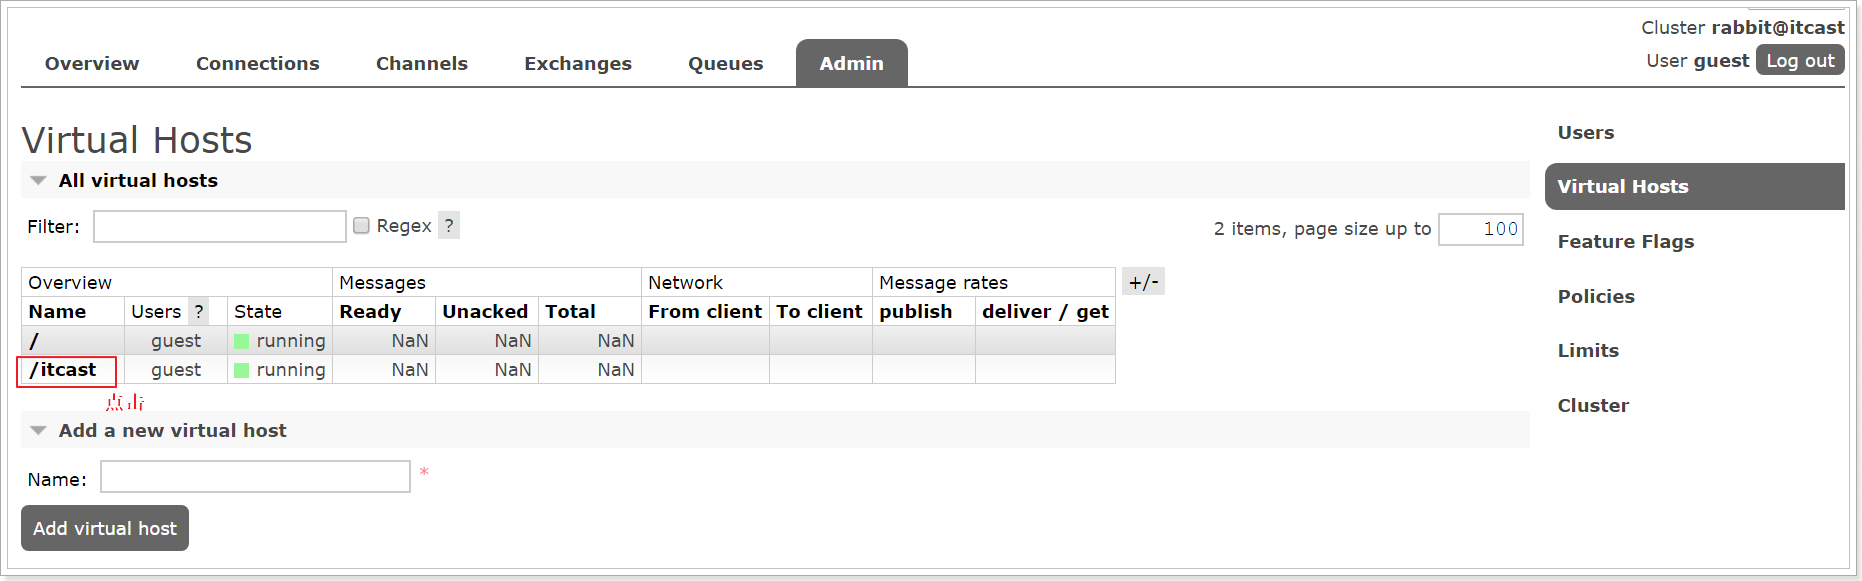
6.2. Virtual Hosts配置
像mysql拥有数据库的概念并且可以指定用户对库和表等操作的权限。RabbitMQ也有类似的权限管理;在RabbitMQ中可以虚拟消息服务器Virtual Host,每个Virtual Hosts相当于一个相对独立的RabbitMQ服务器,每个VirtualHost之间是相互隔离的。exchange、queue、message不能互通。 相当于mysql的db。Virtual Name一般以/开头。
6.2.1. 创建Virtual Hosts
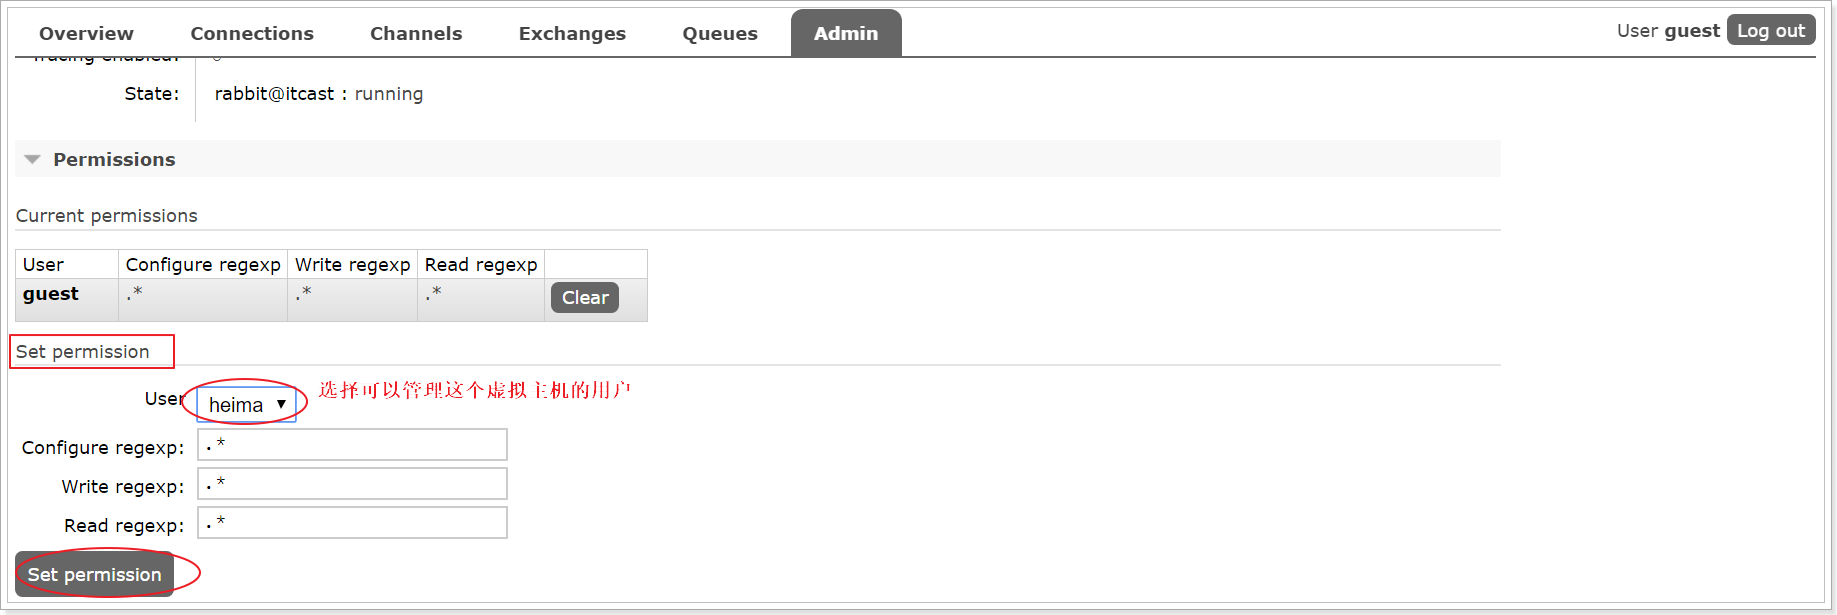
6.2.2. 设置Virtual Hosts权限
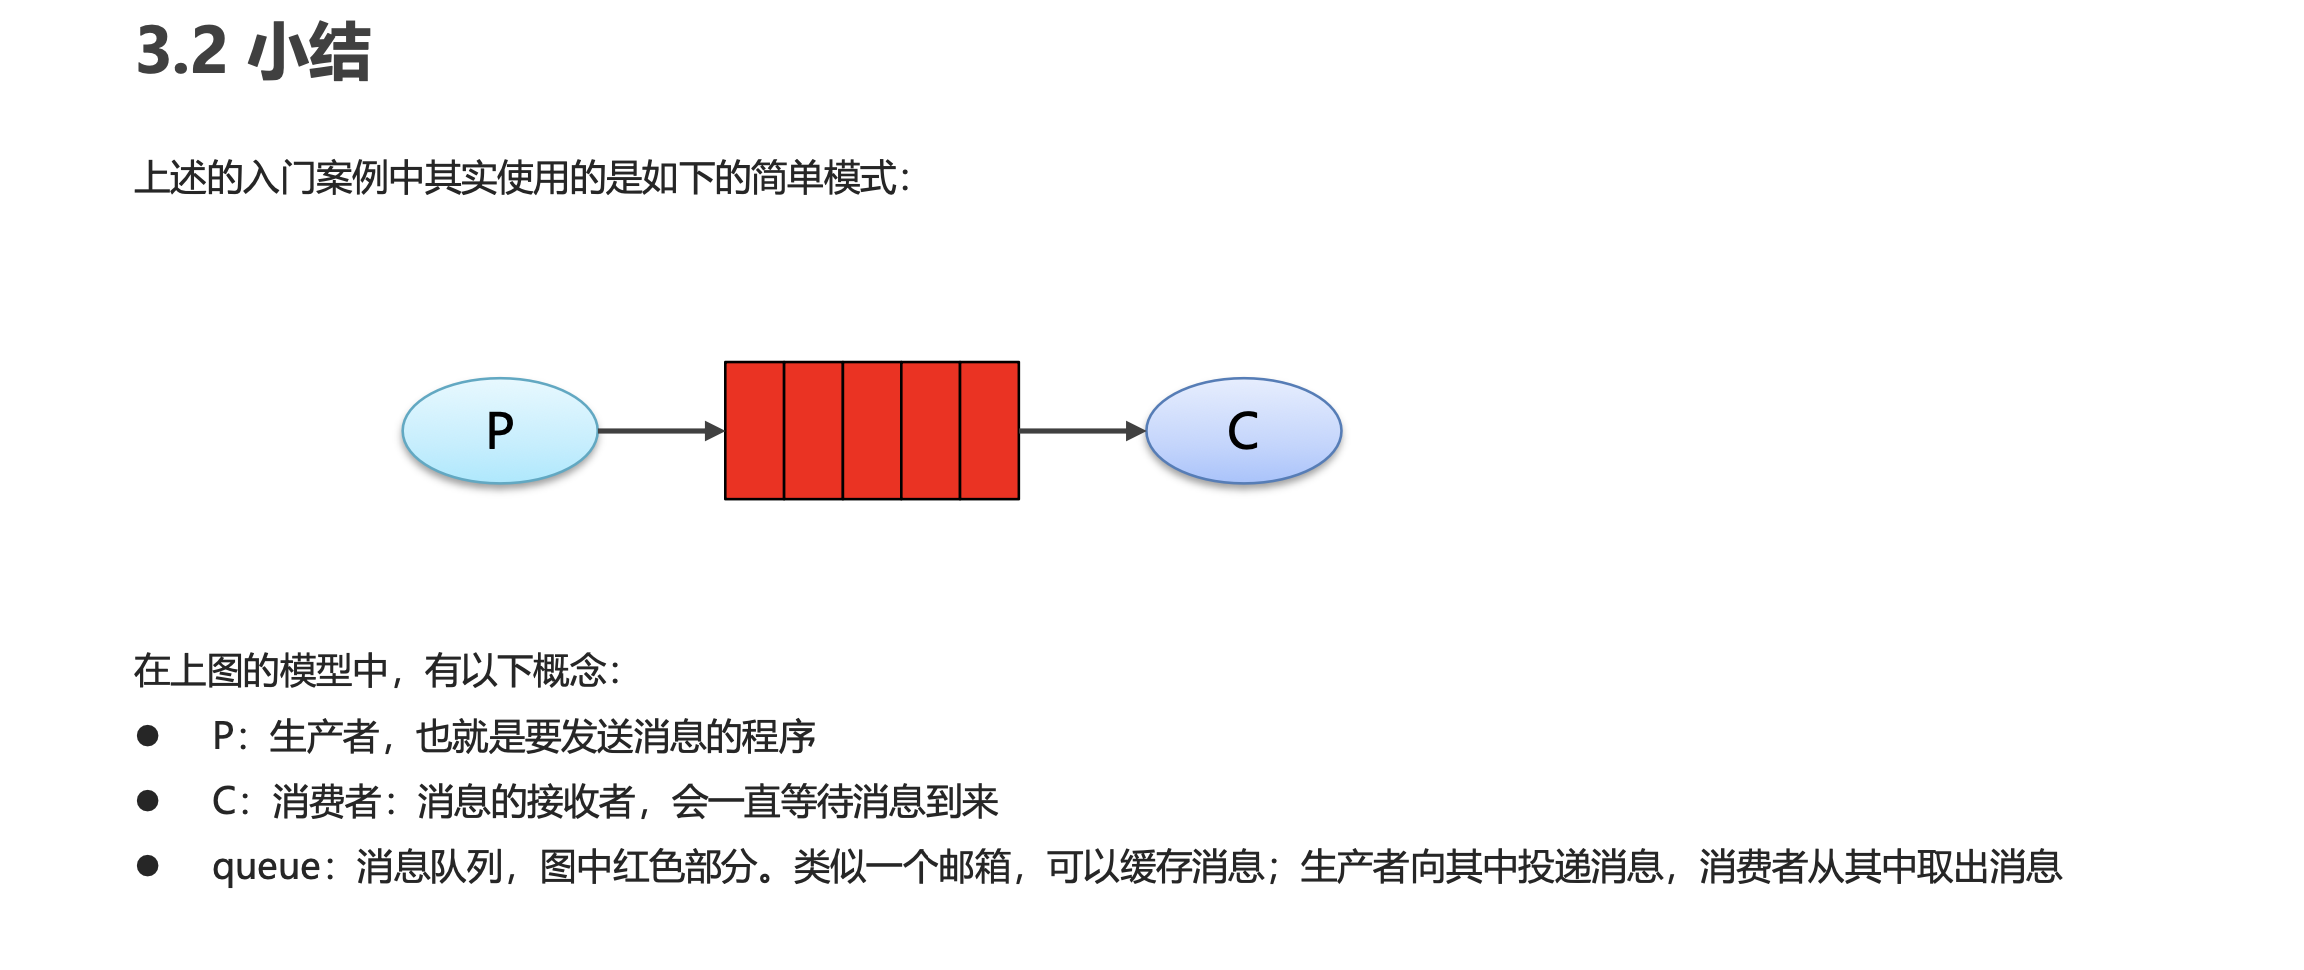
RabbitMQ快速入门
入门程序

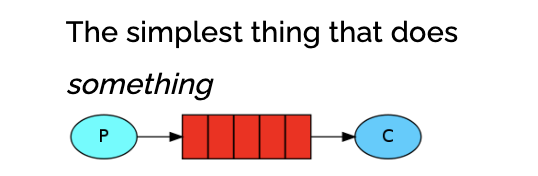
装备两个maven模块,并导入依赖
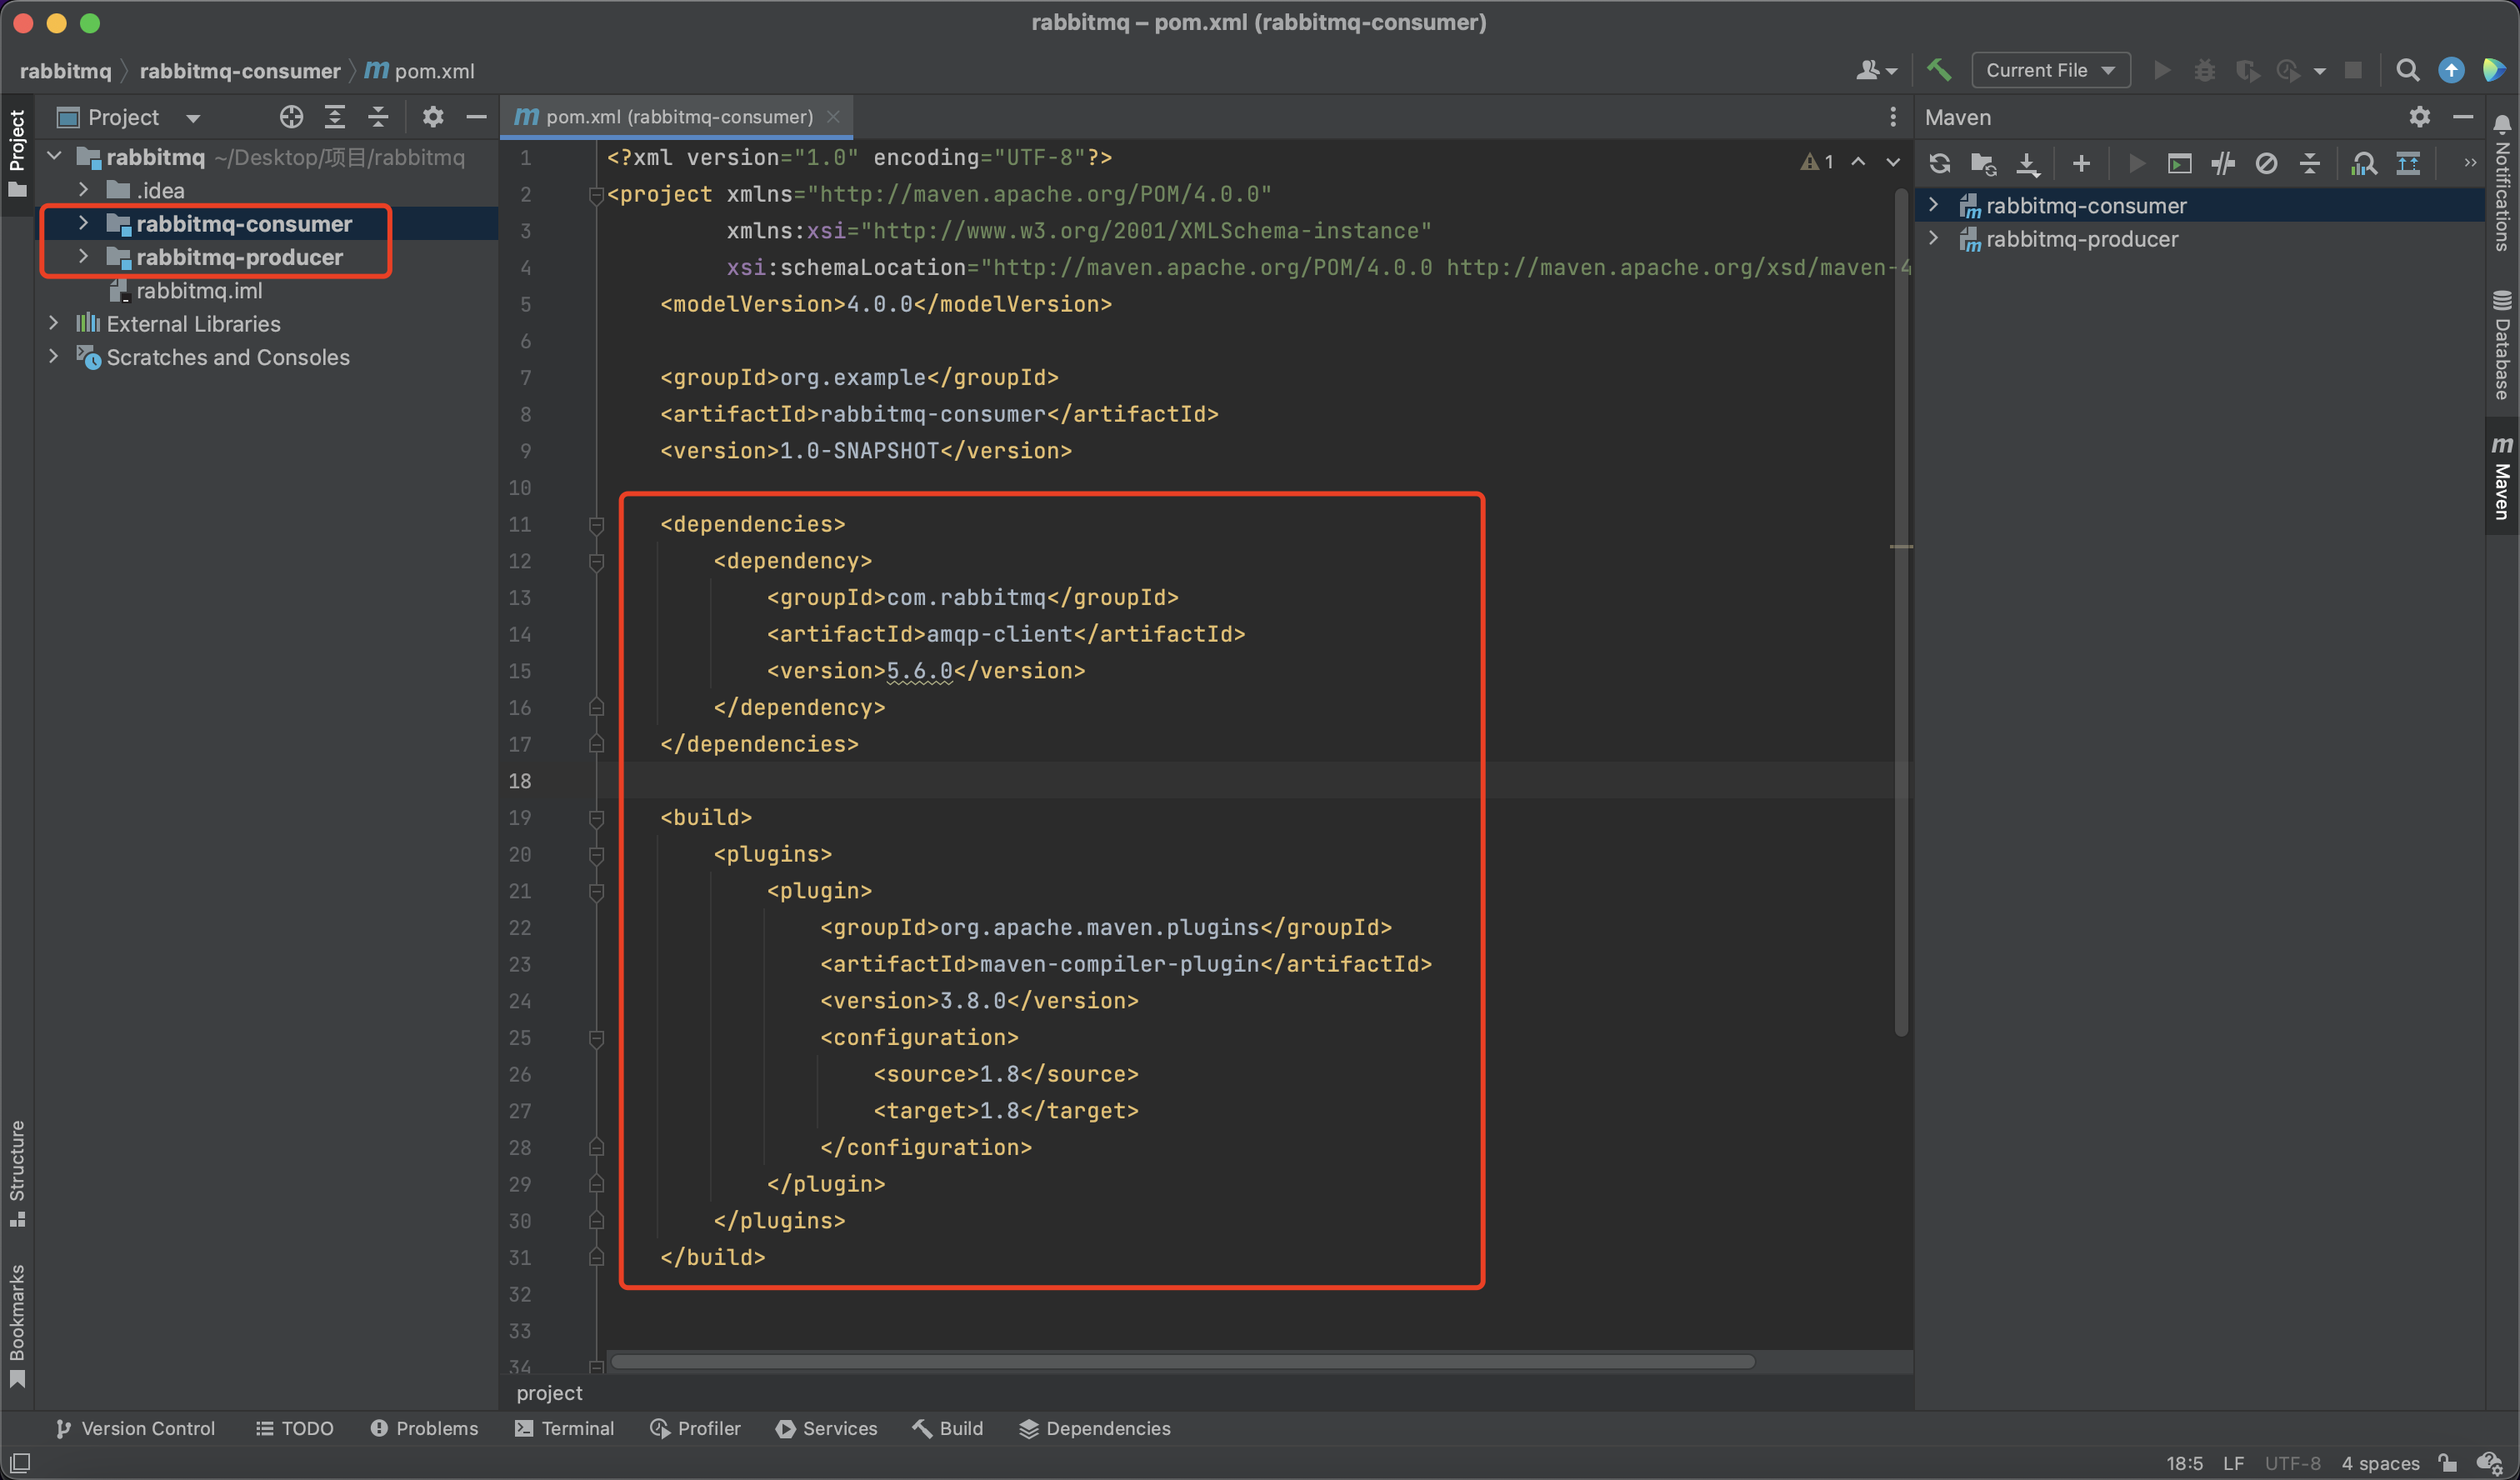
1 | <dependencies> |

生产者

1 | package com.itheima.producer; |
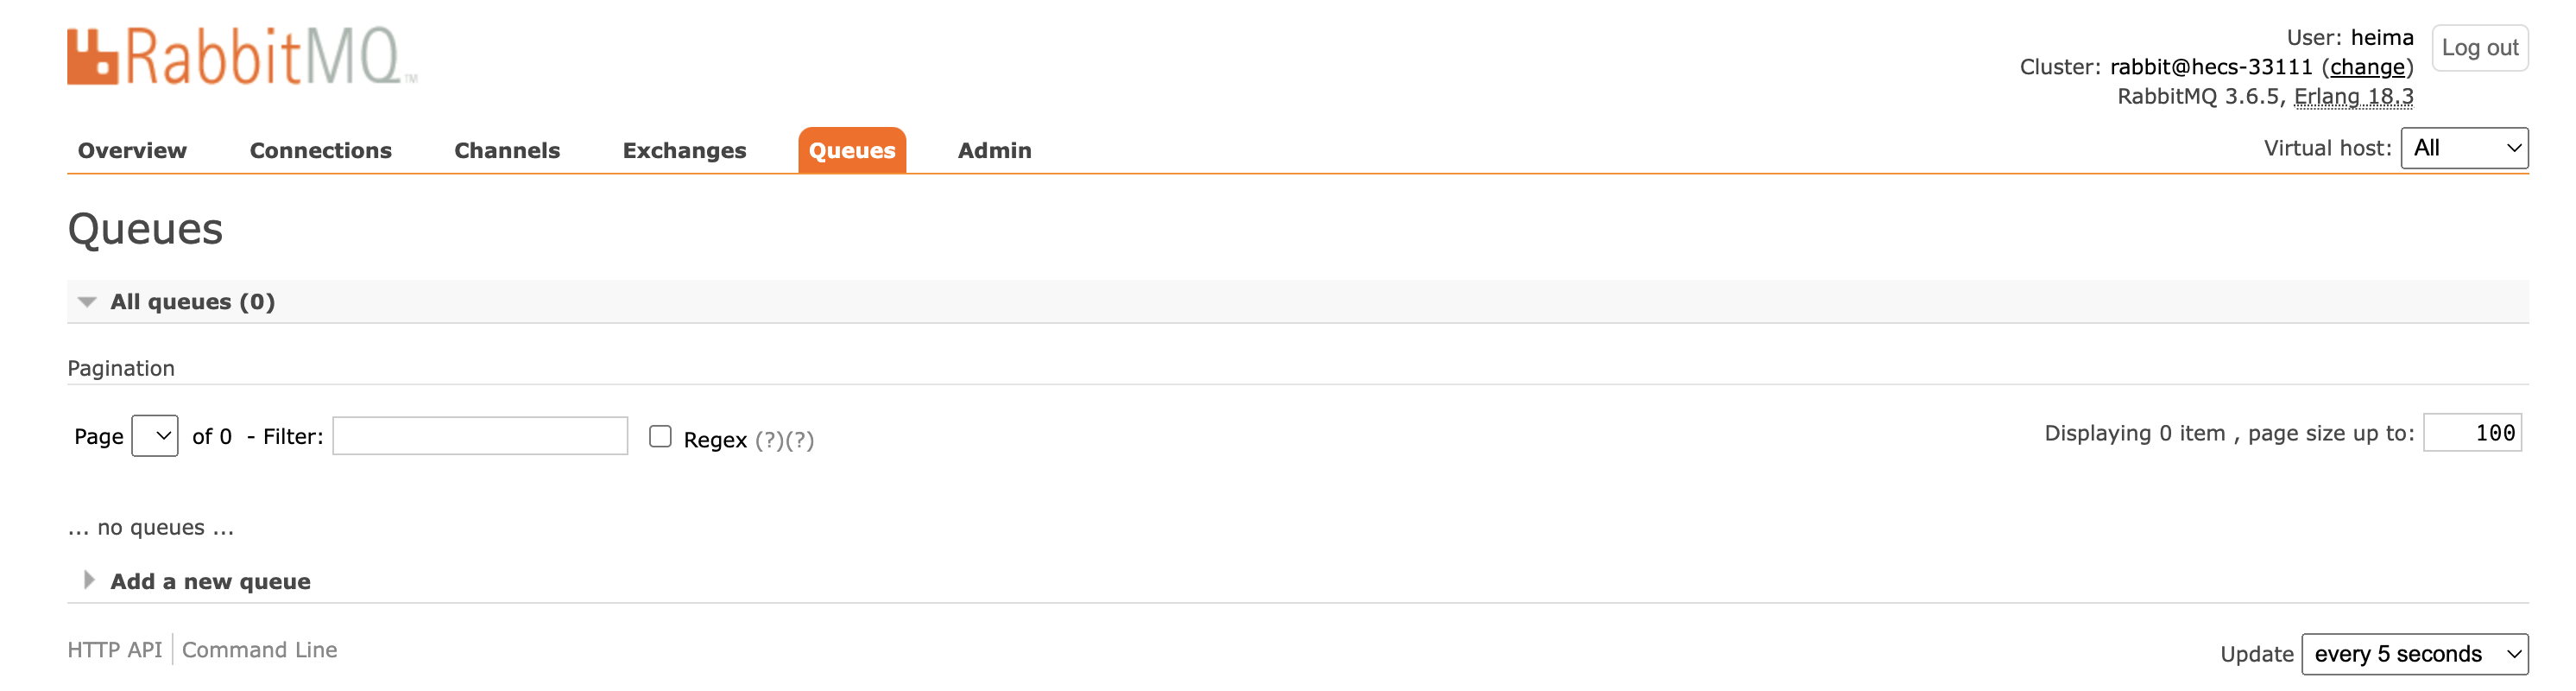
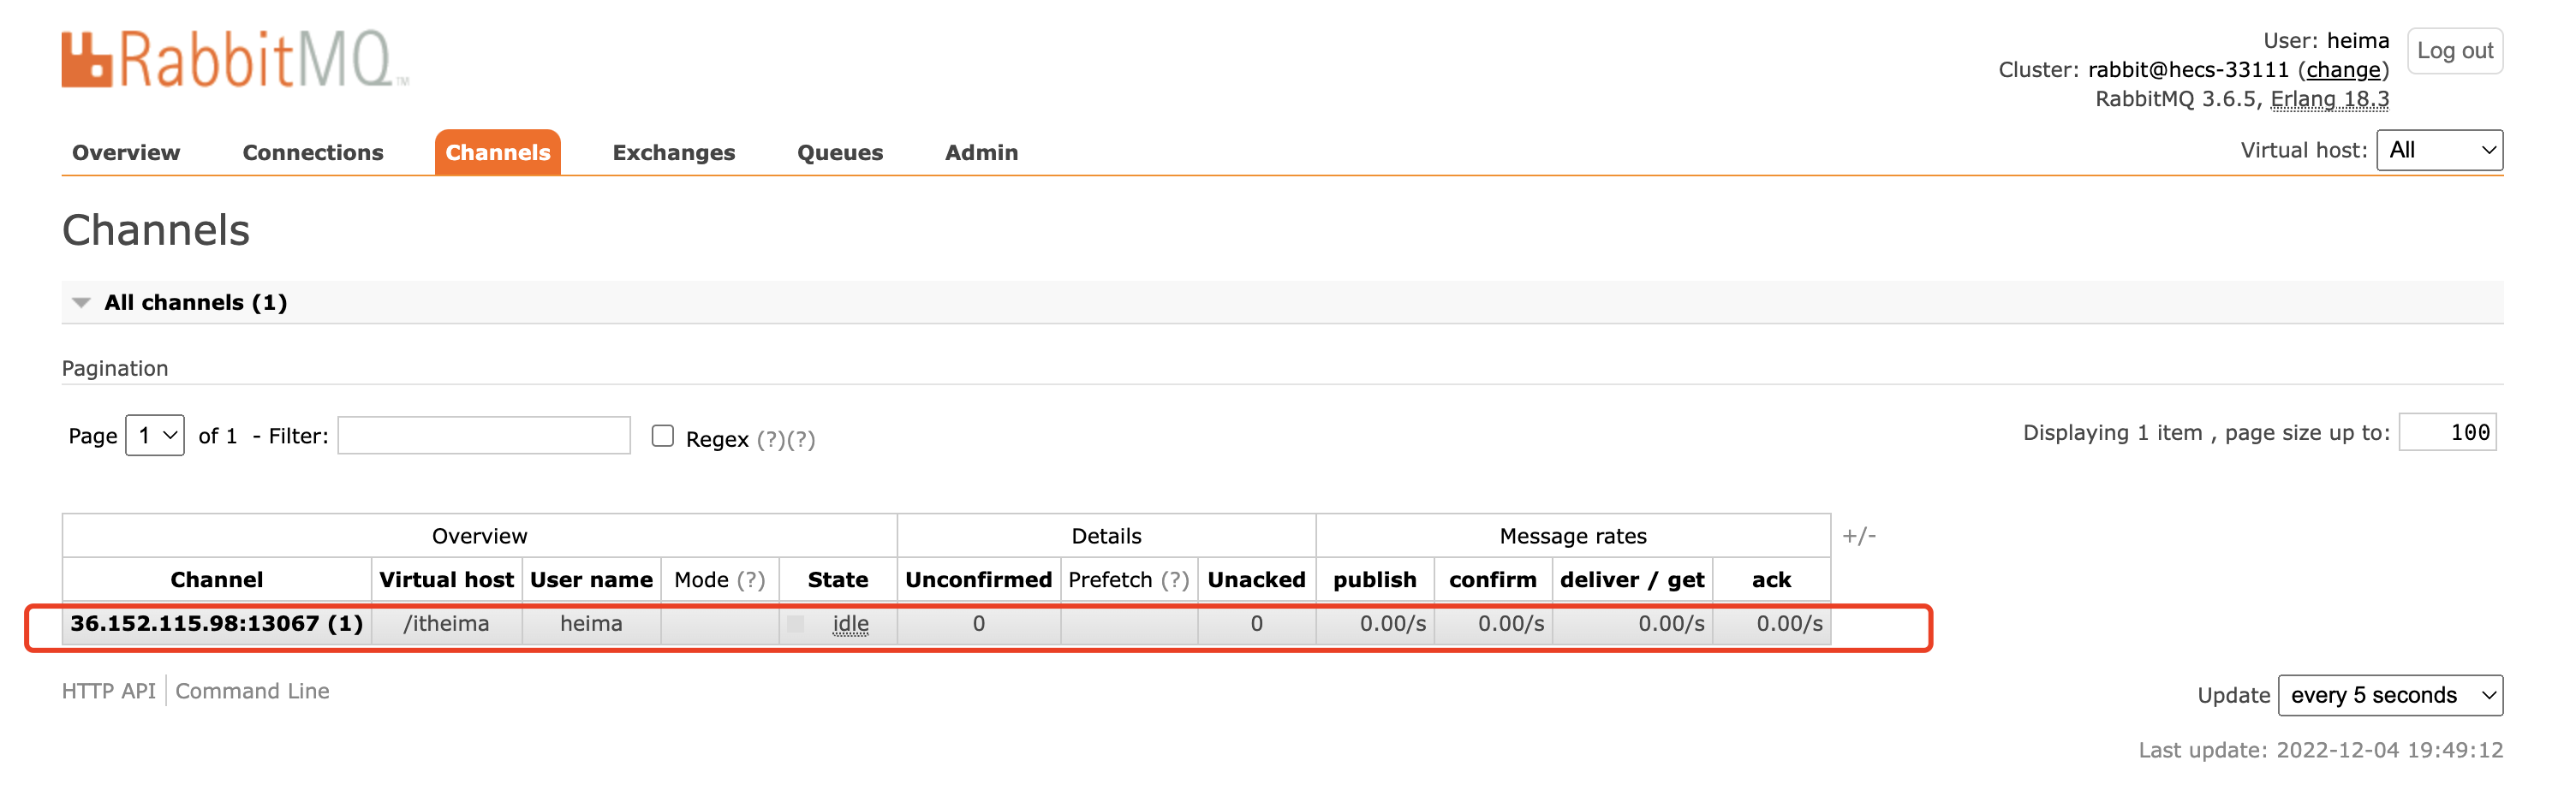
观察执行前队列情况
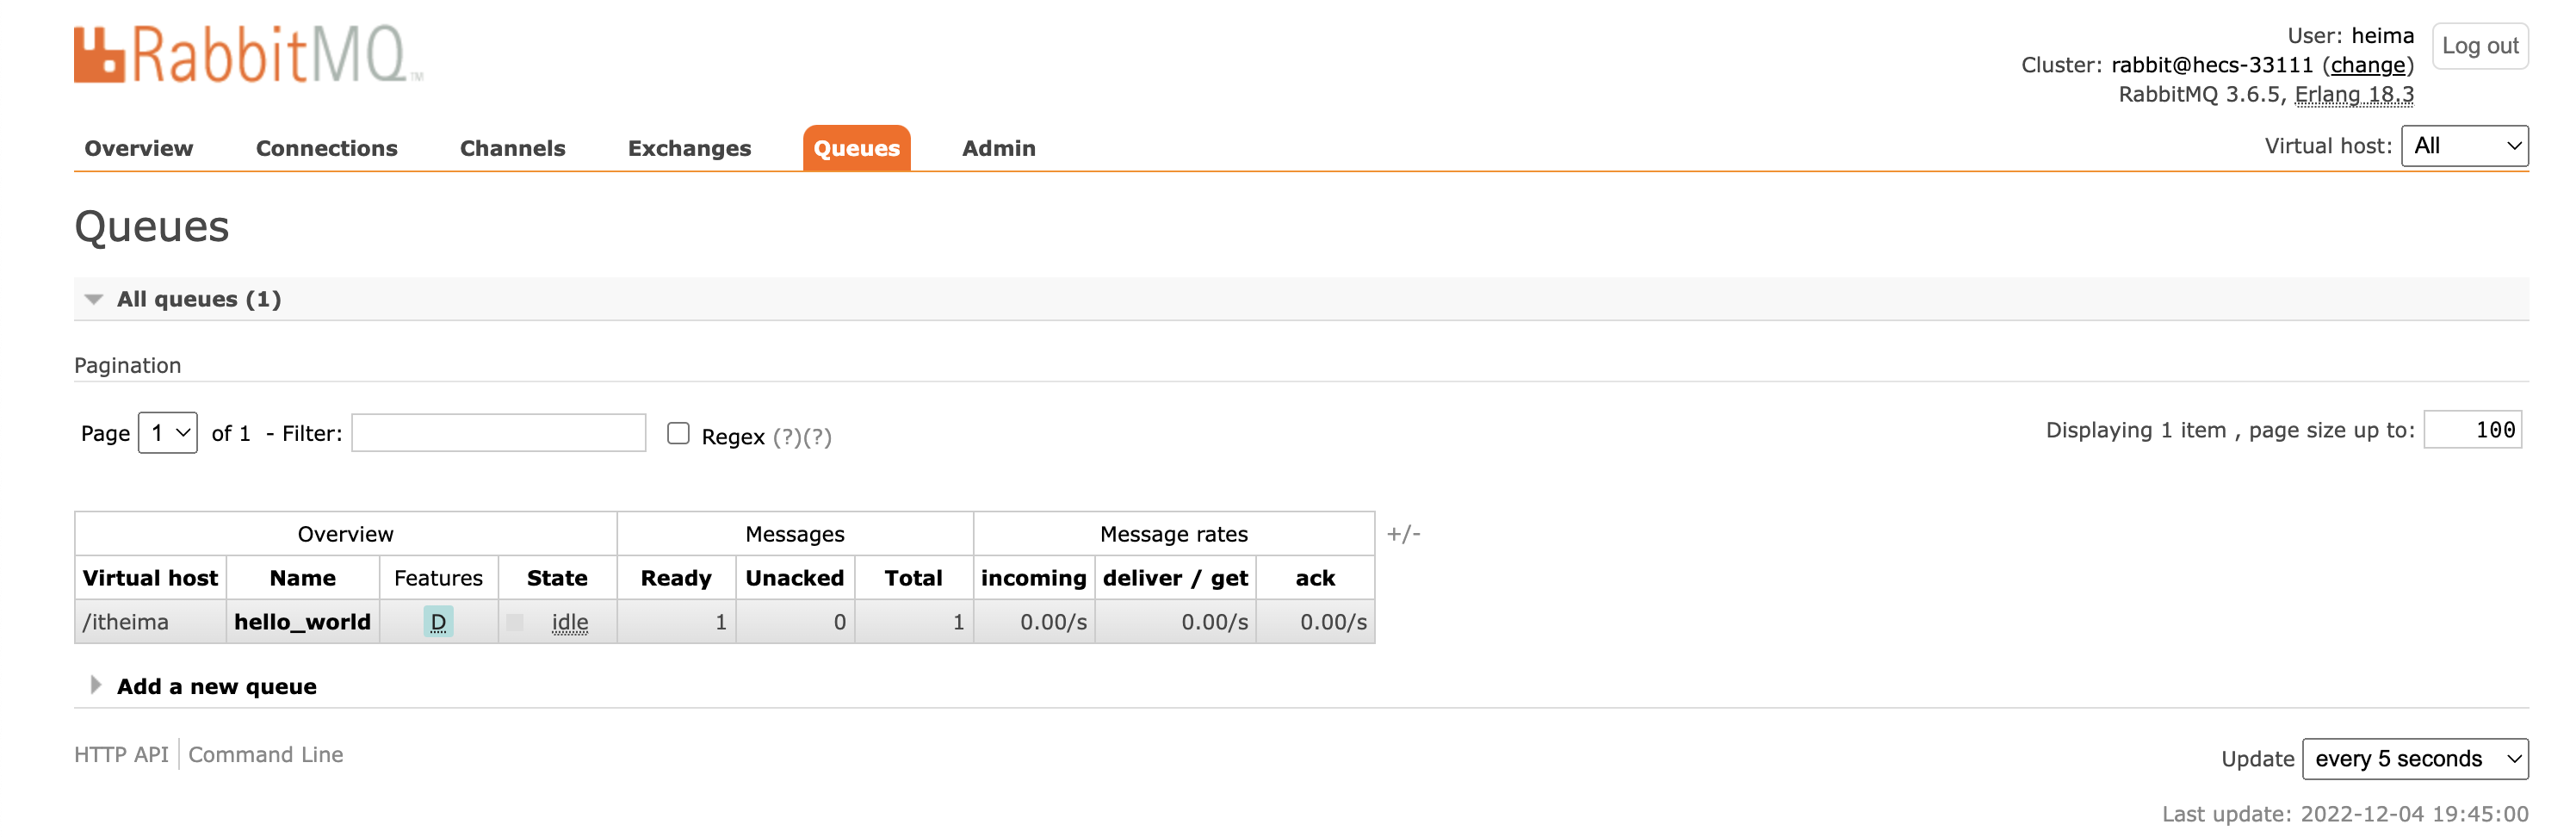
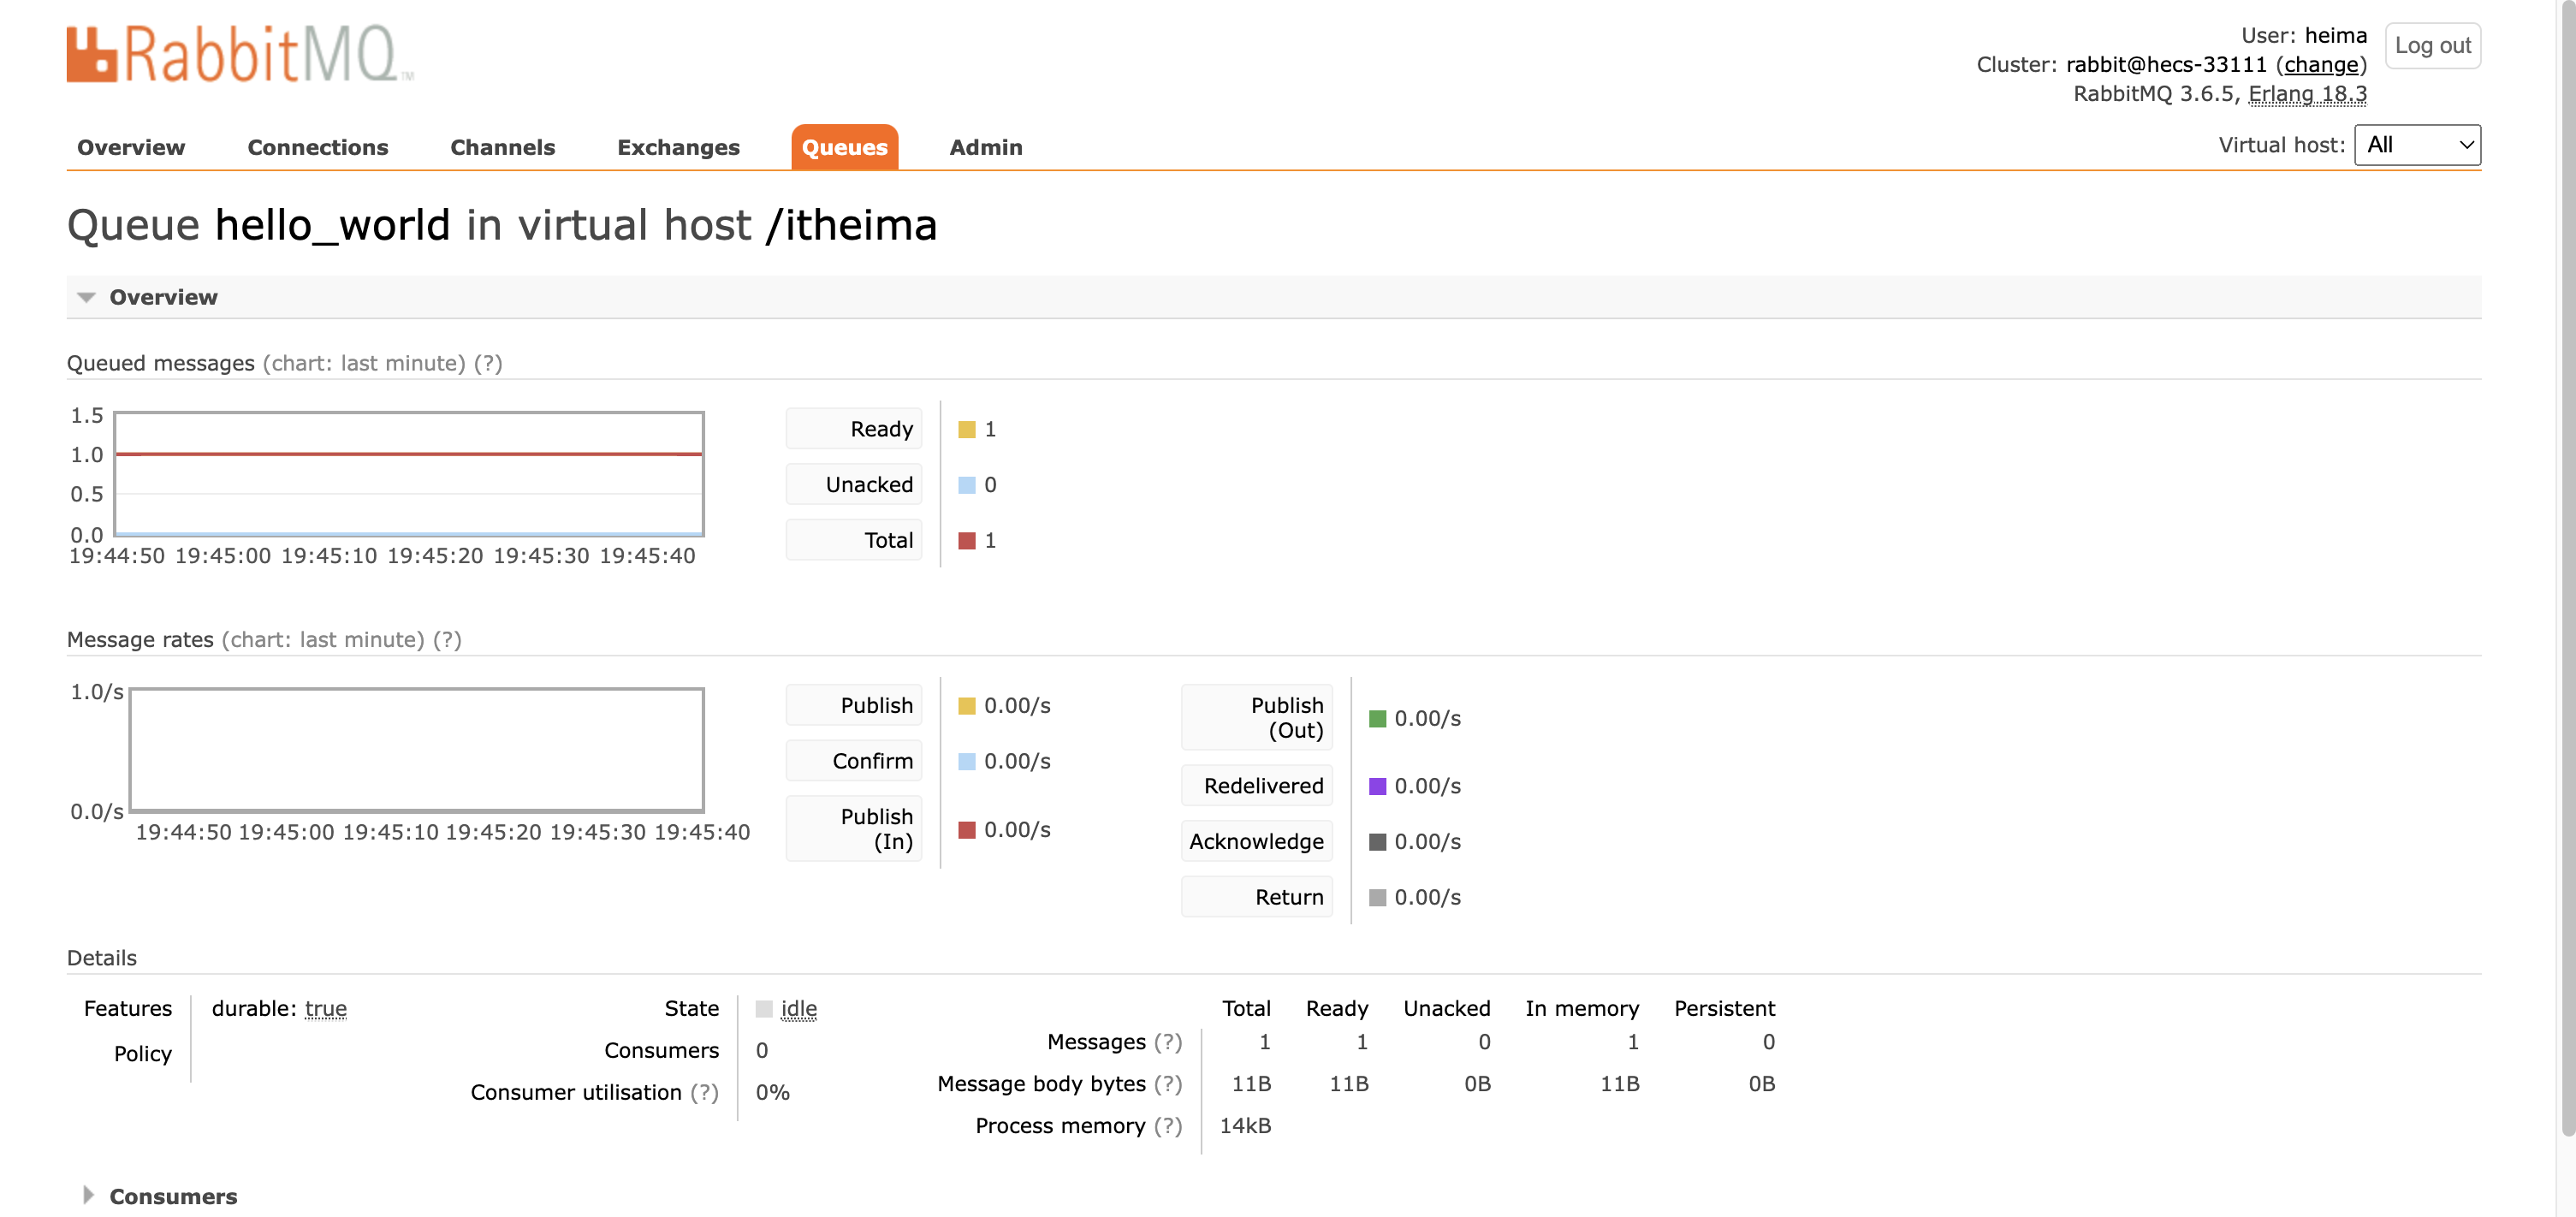
执行后

取消关闭通道
1 | // channel.close(); |

消费者

1 | package com.itheima.consumer; |
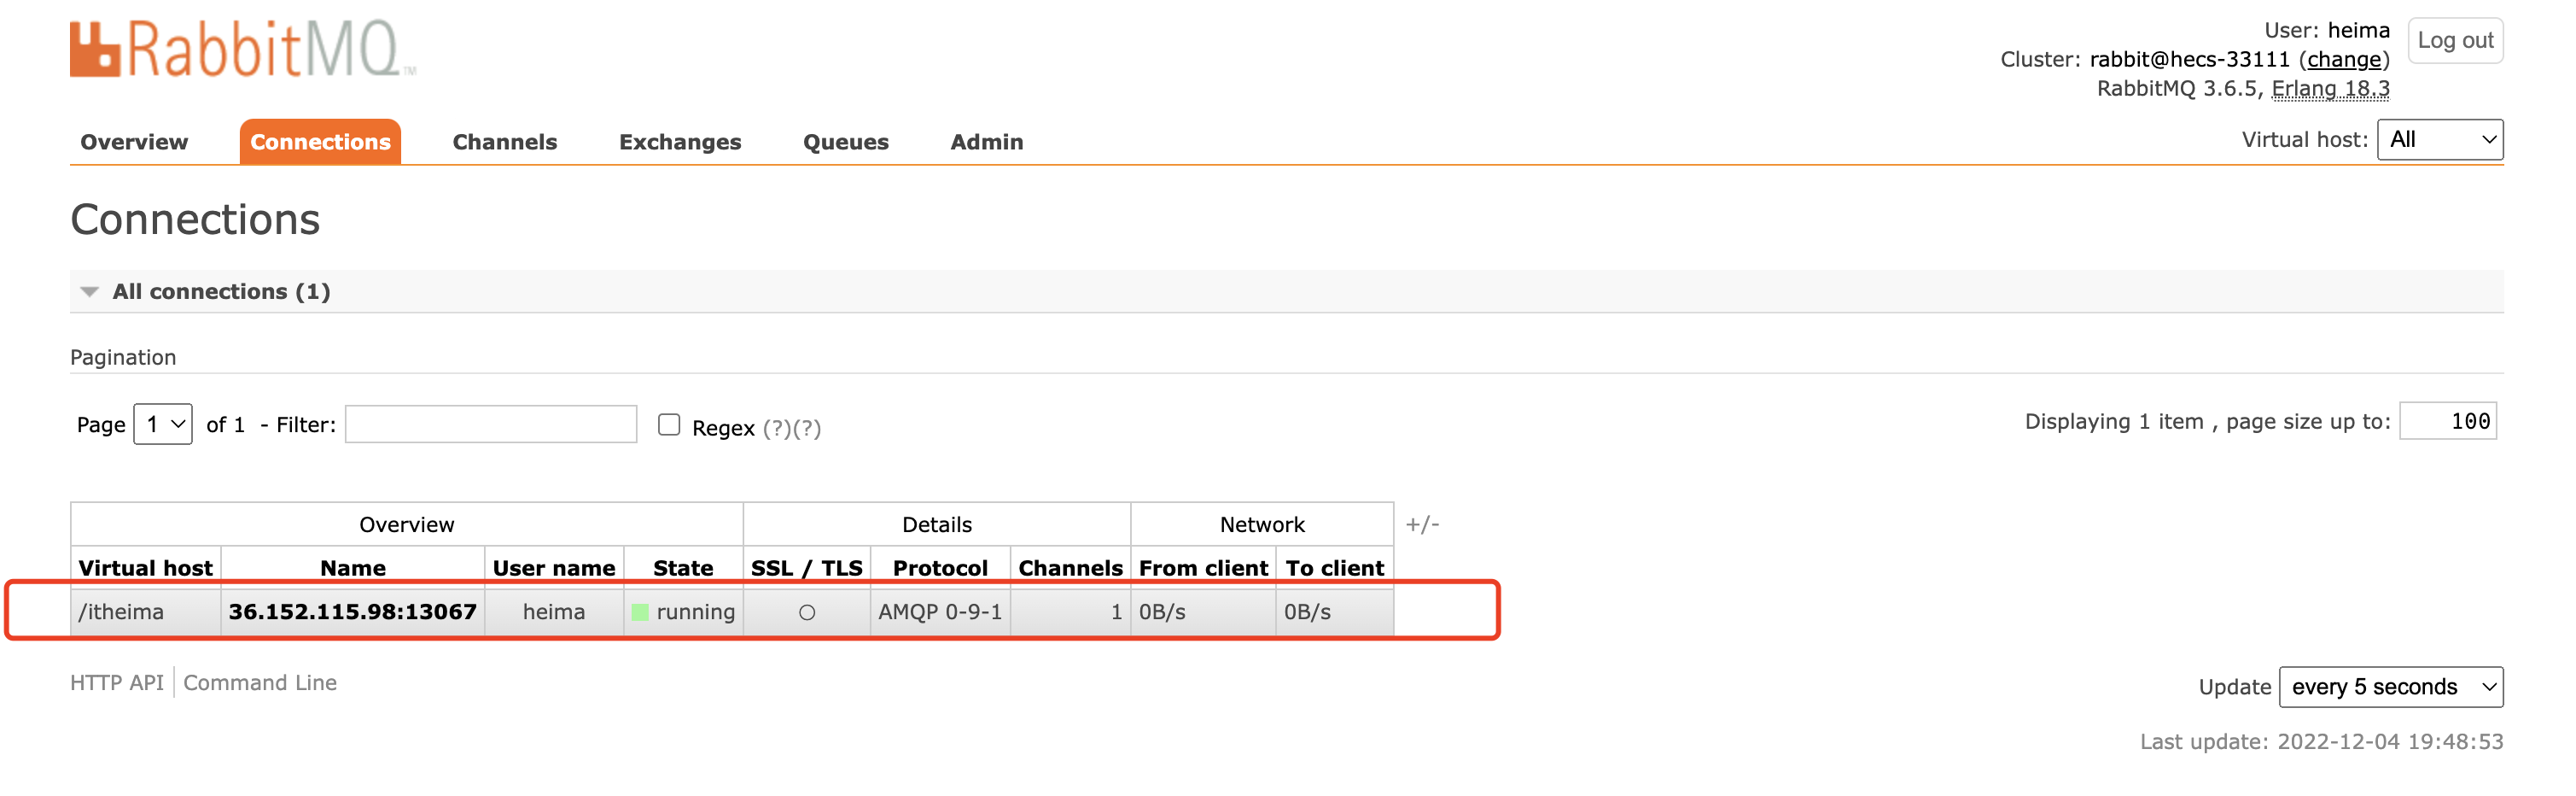
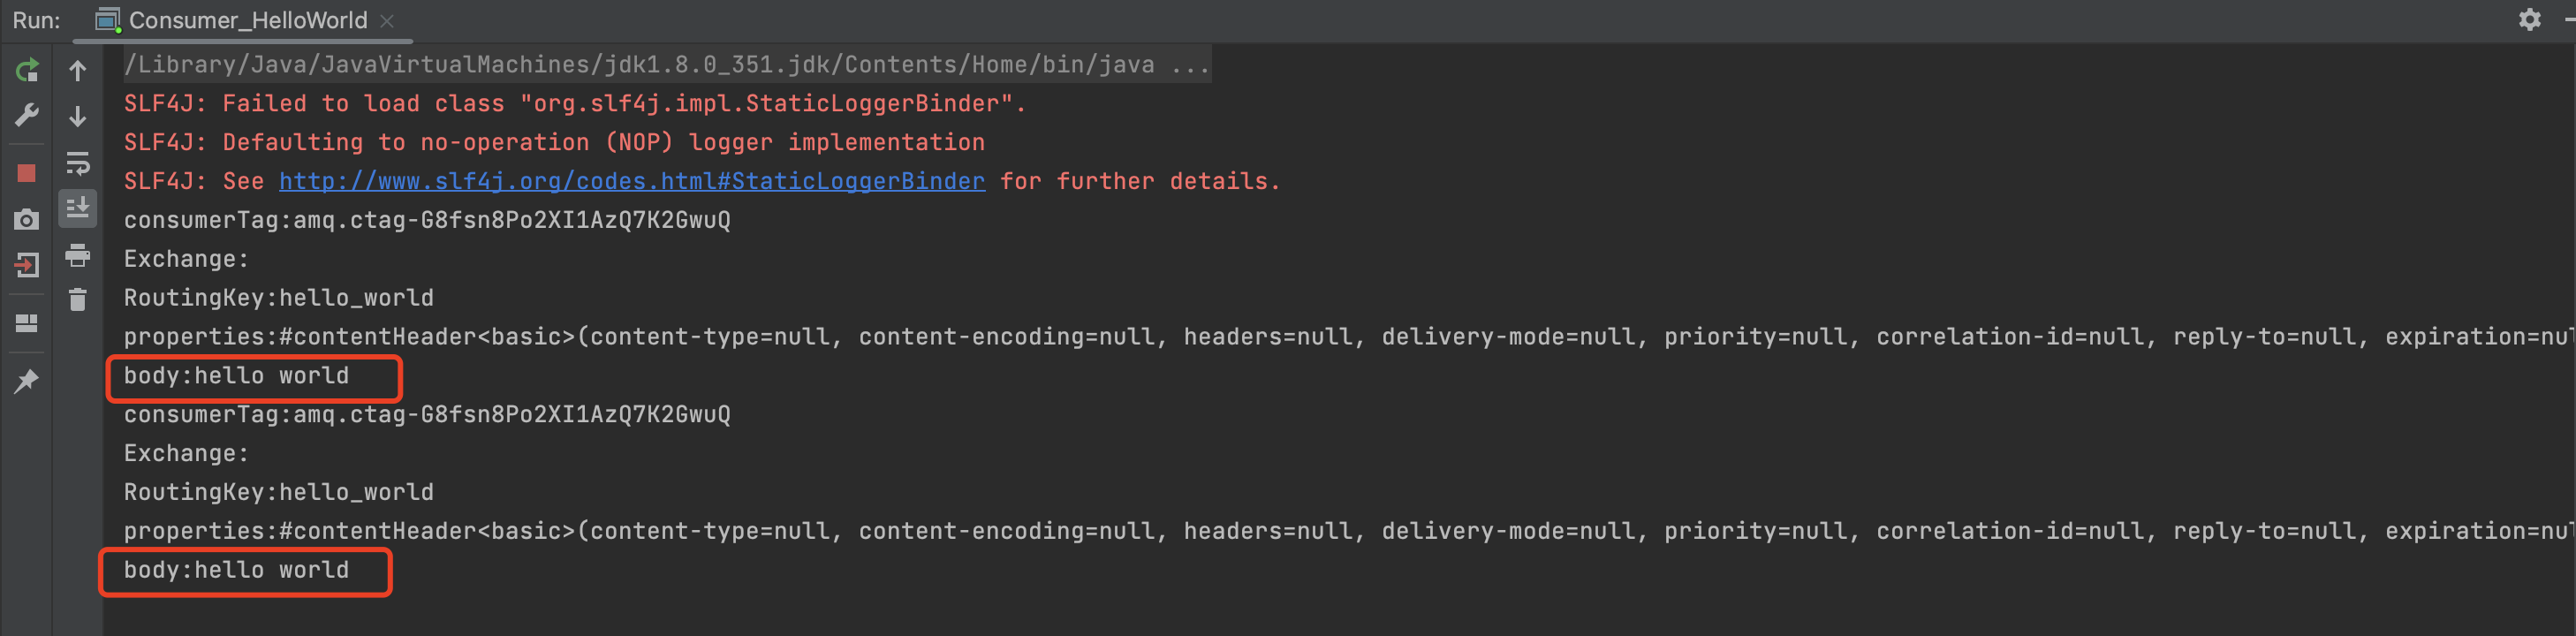
执行
小结
RabbitMQ的工作模式
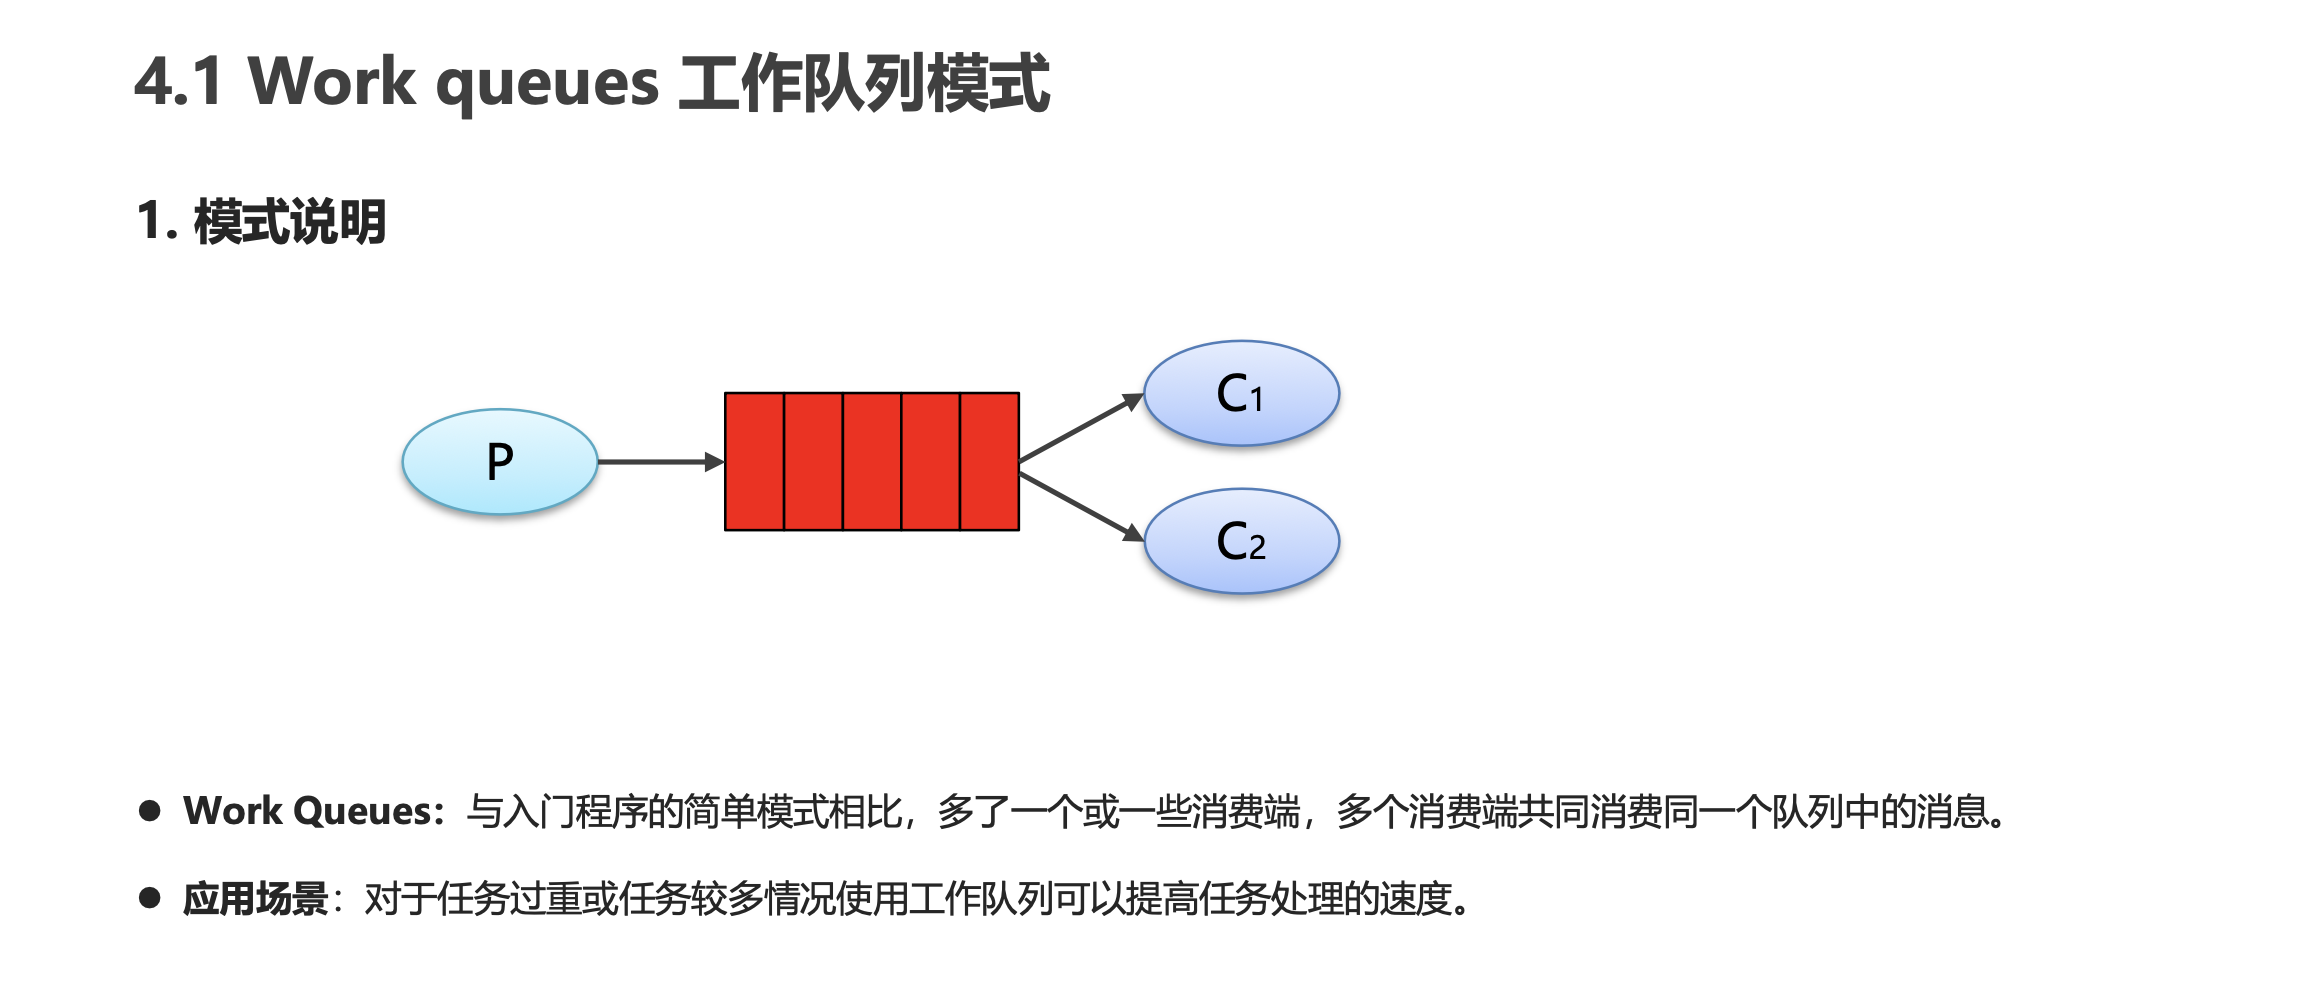
Work queues工作队列模式
模式说明
代码编写
生产者
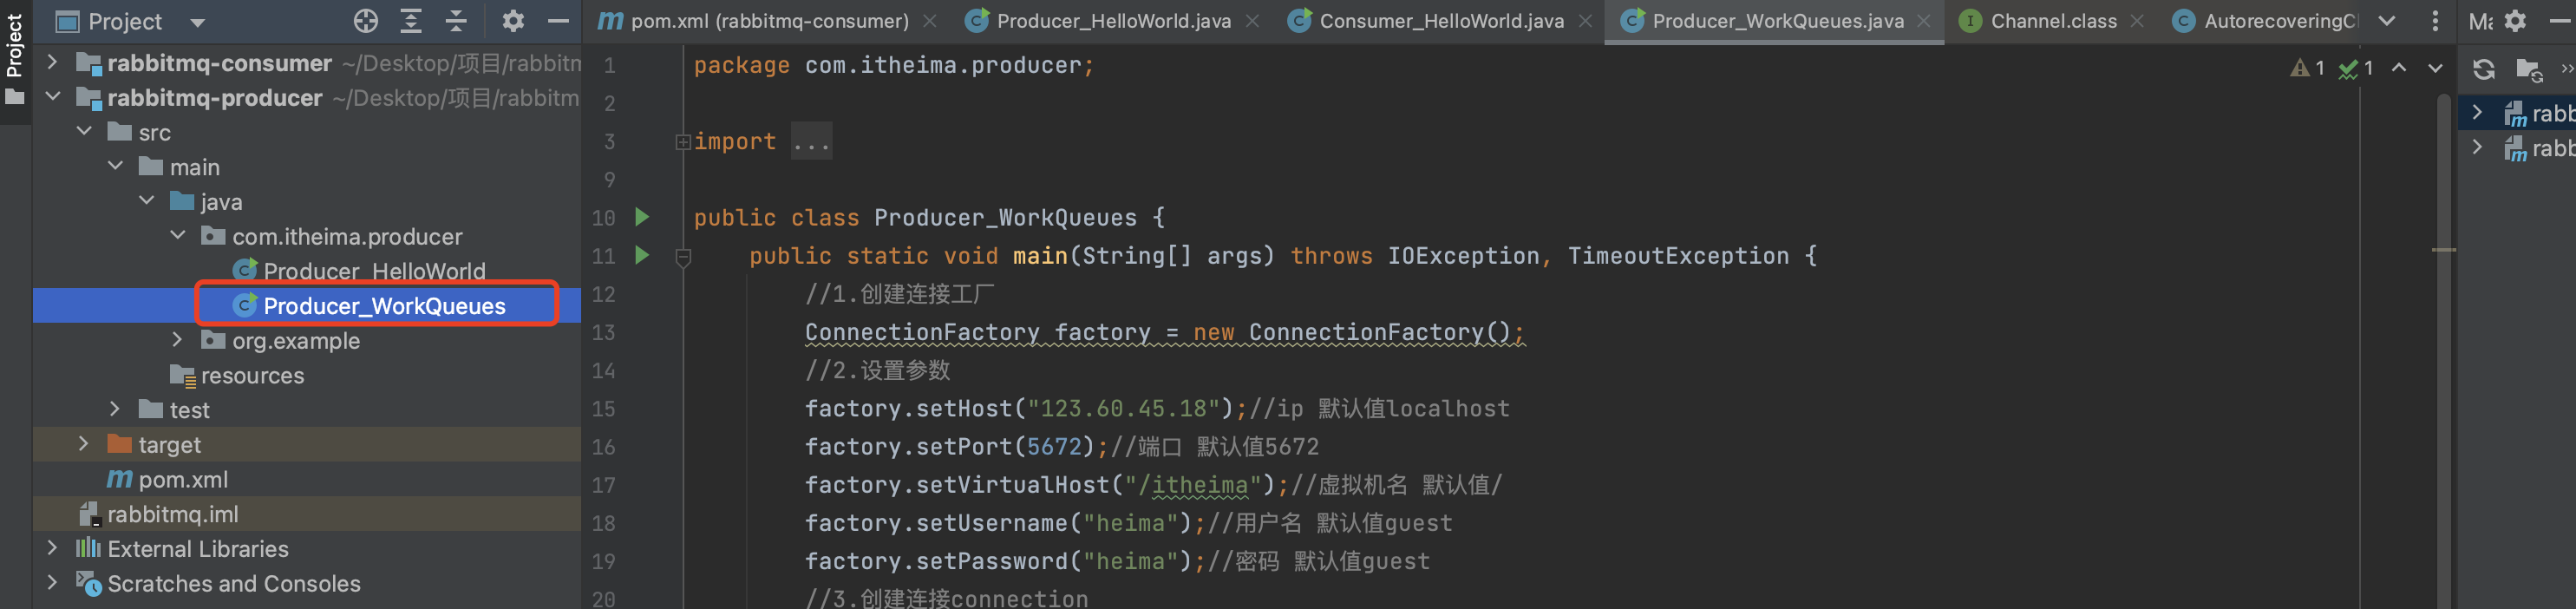
1 | package com.itheima.producer; |
消费者
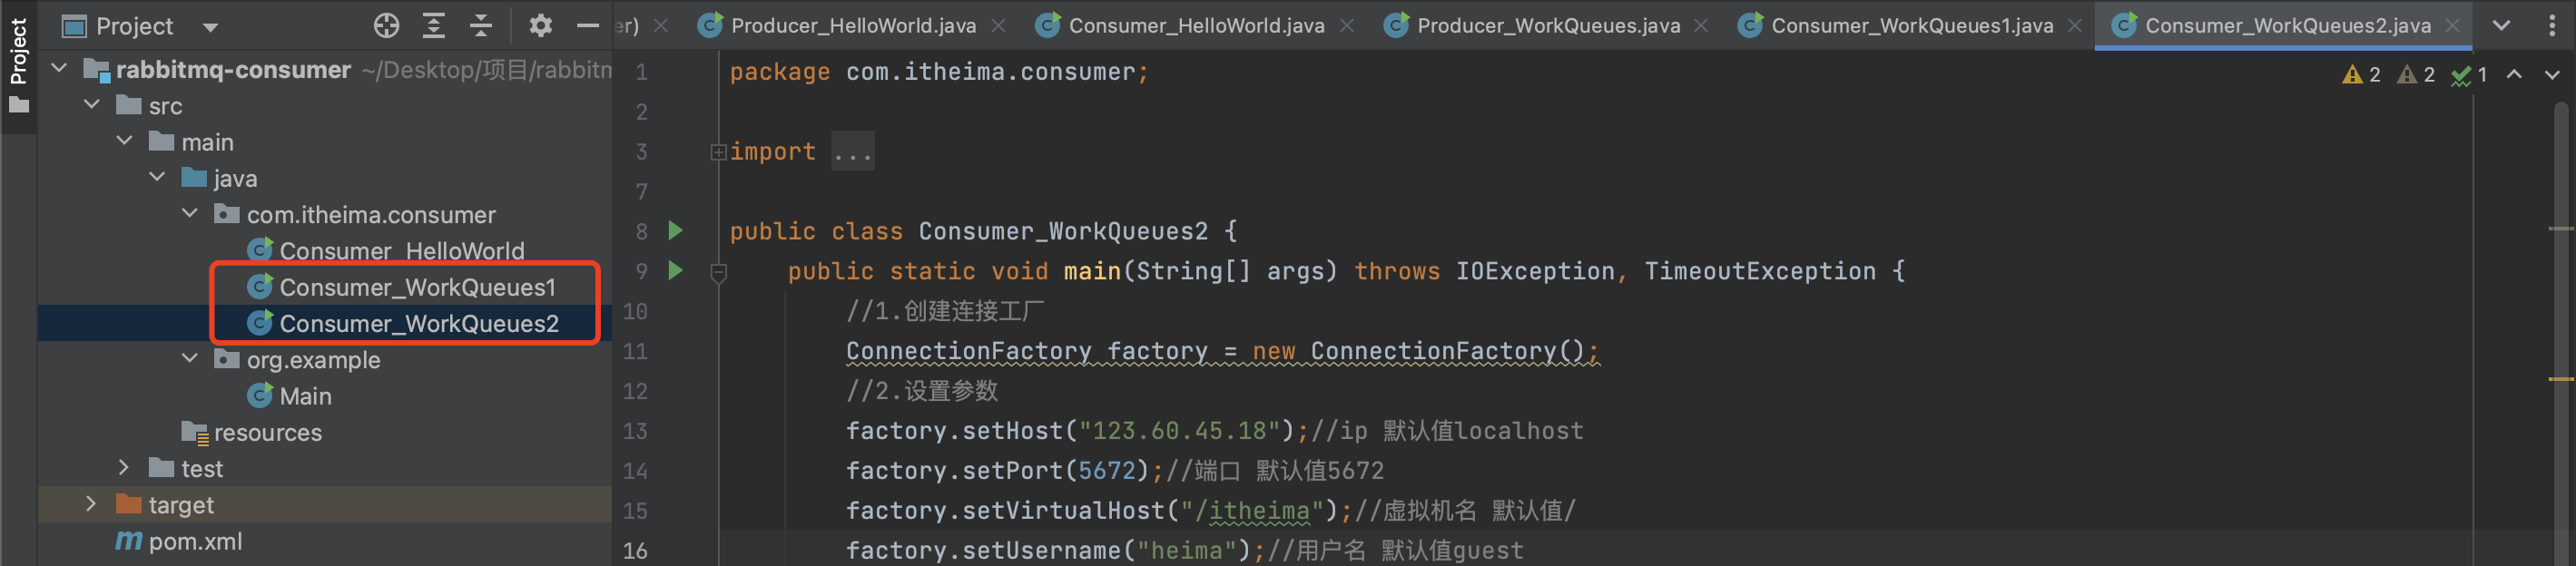
1 | package com.itheima.consumer; |
开启两个消费者

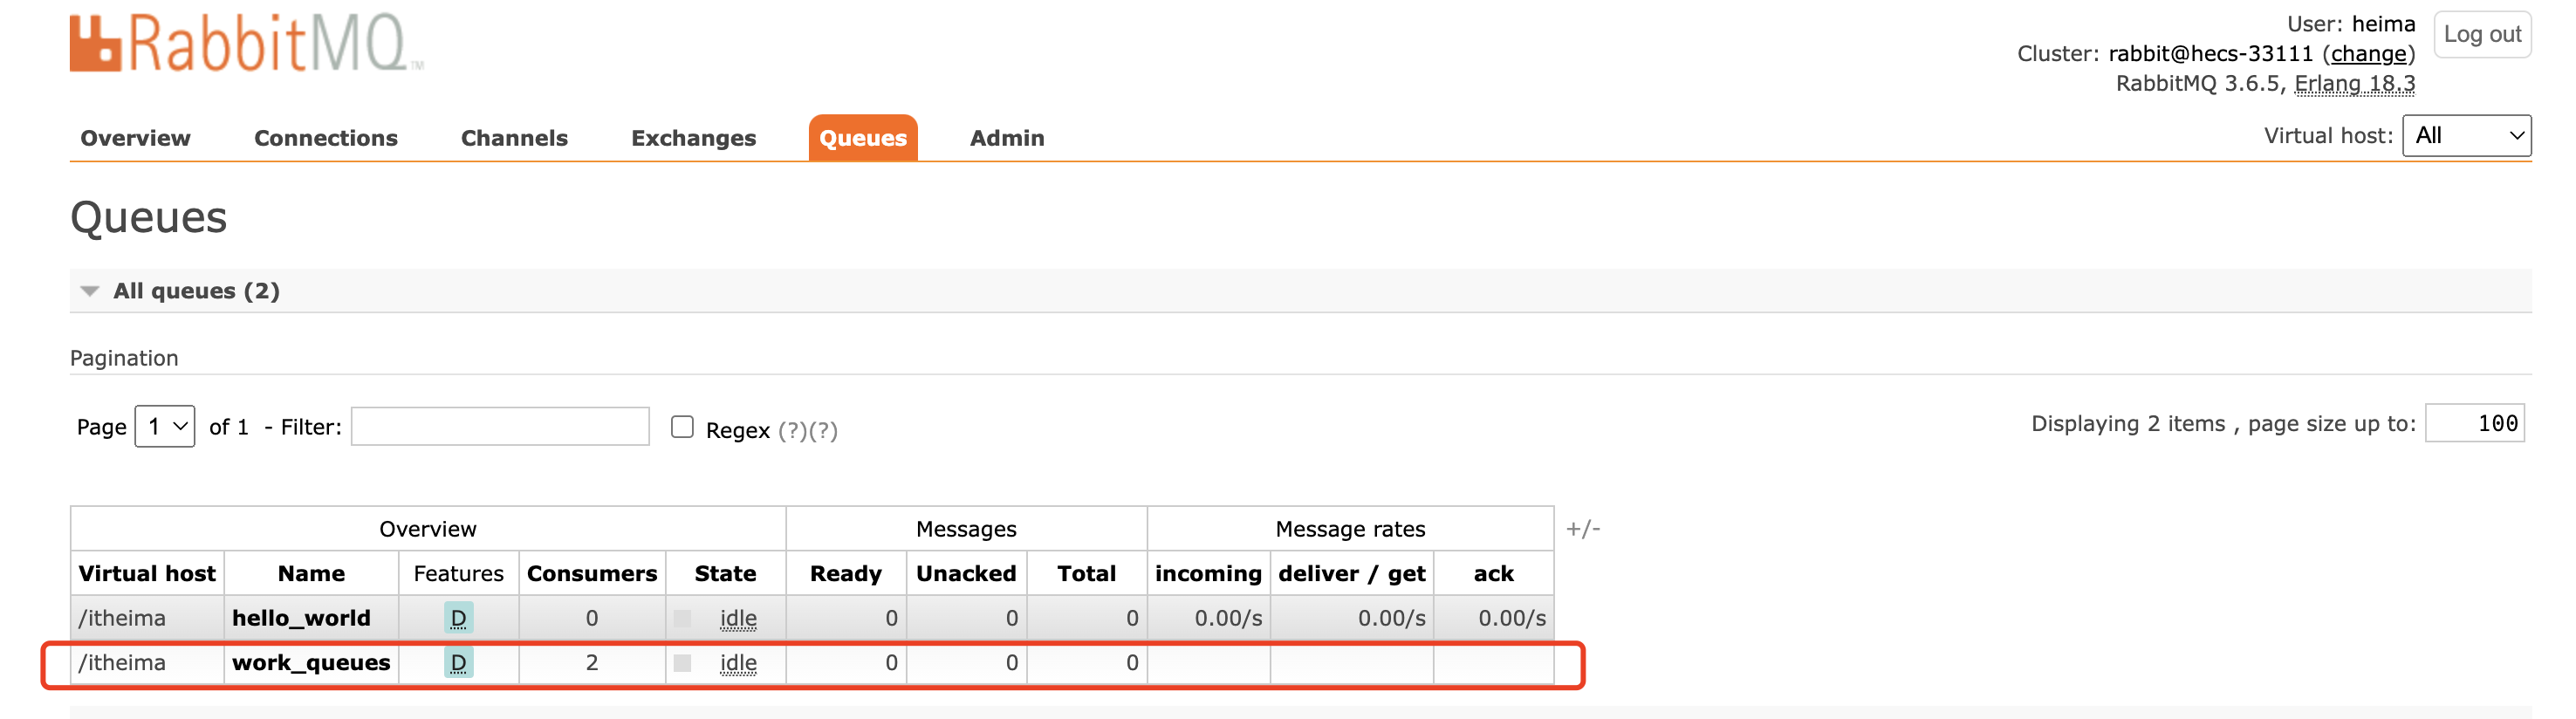
生产者生产消息


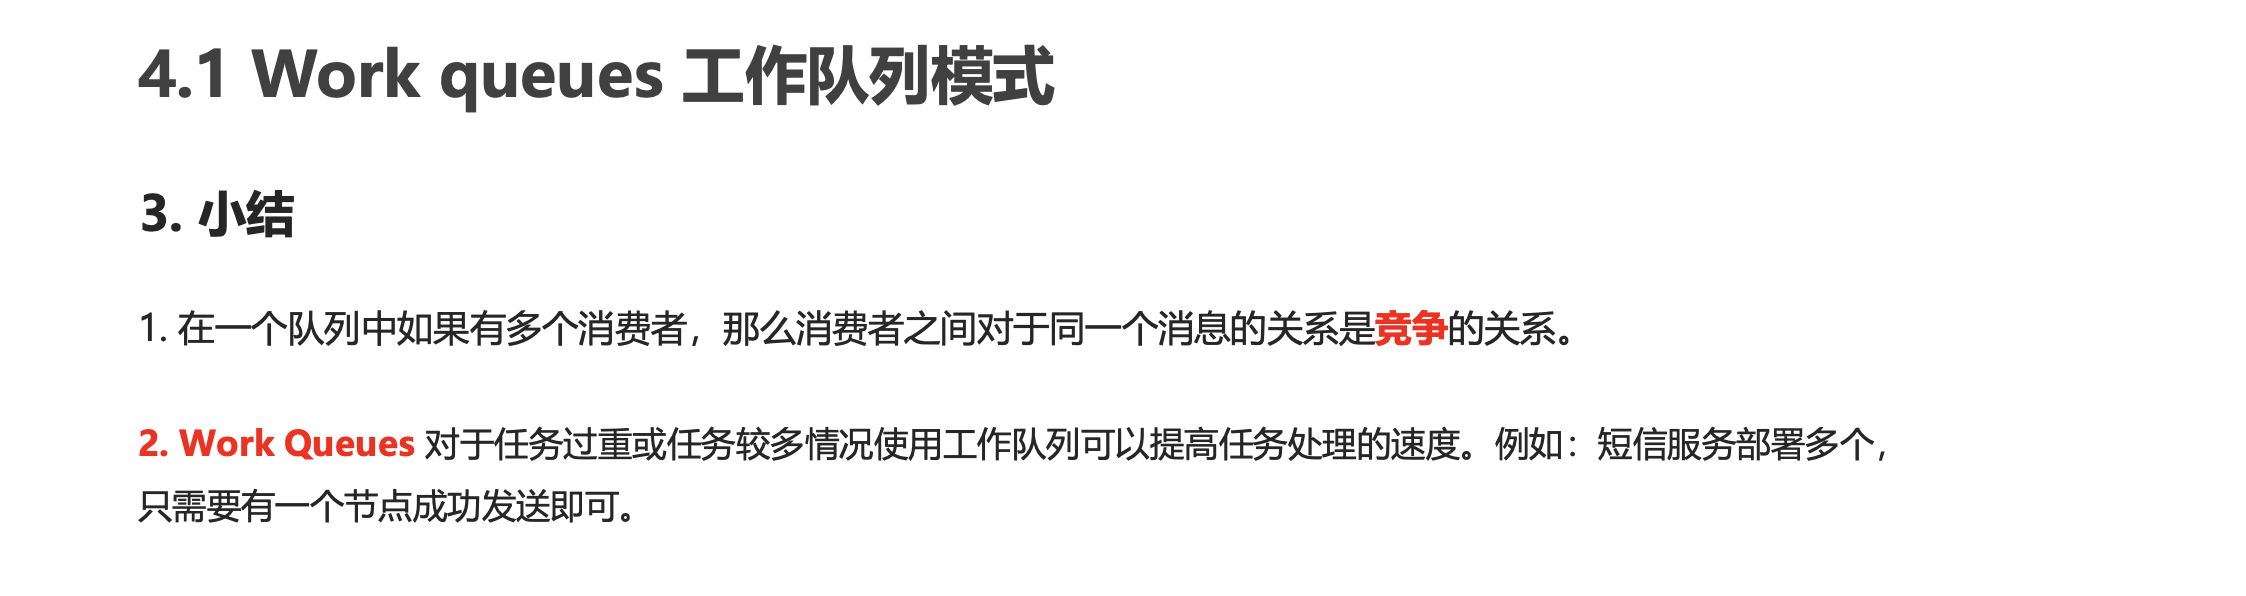
小结
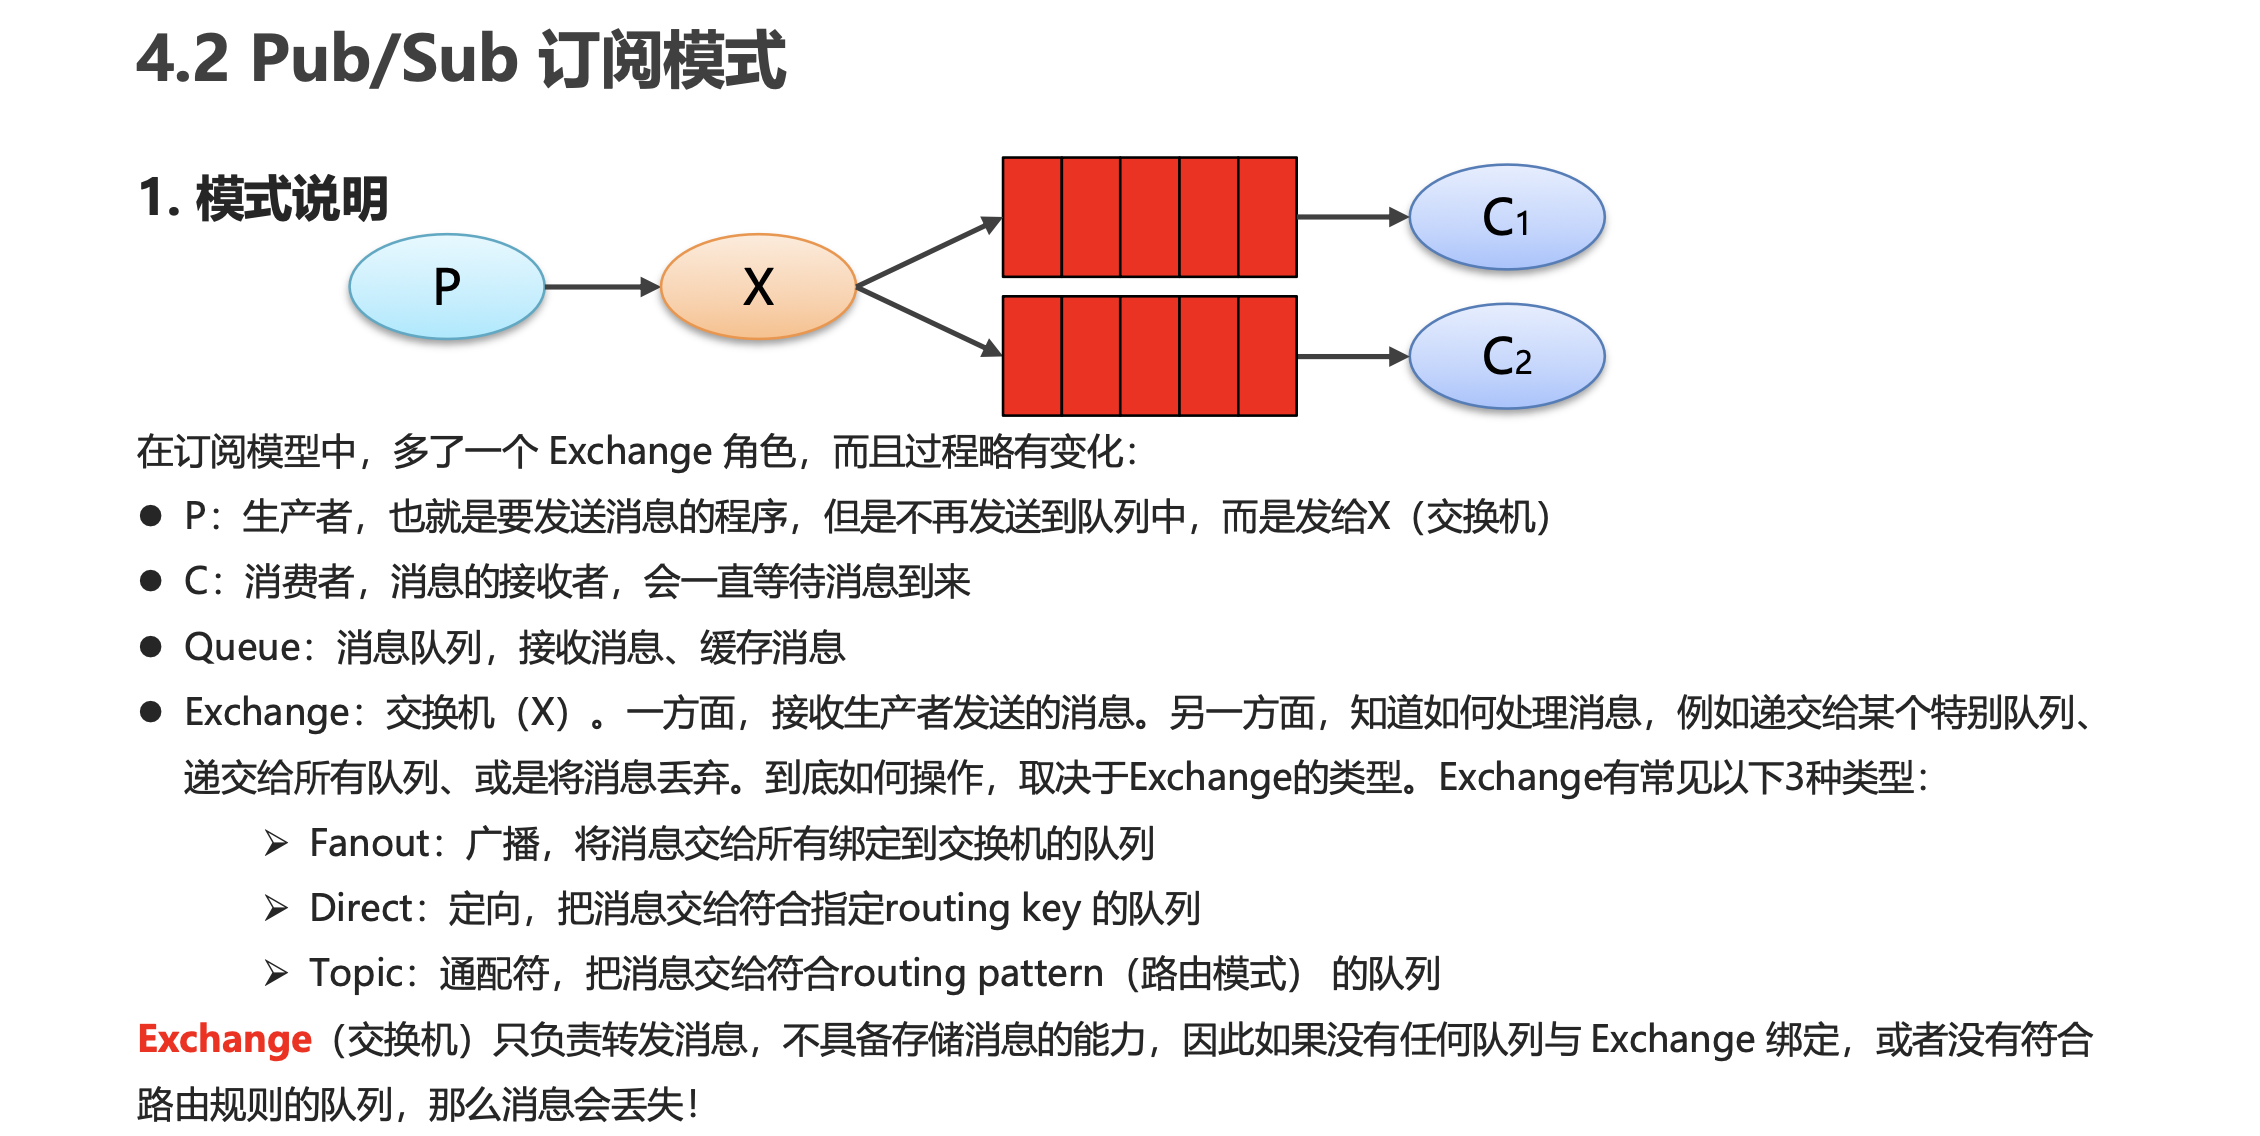
Pub/Sub 订阅模式
模式说明
代码编写
生产者
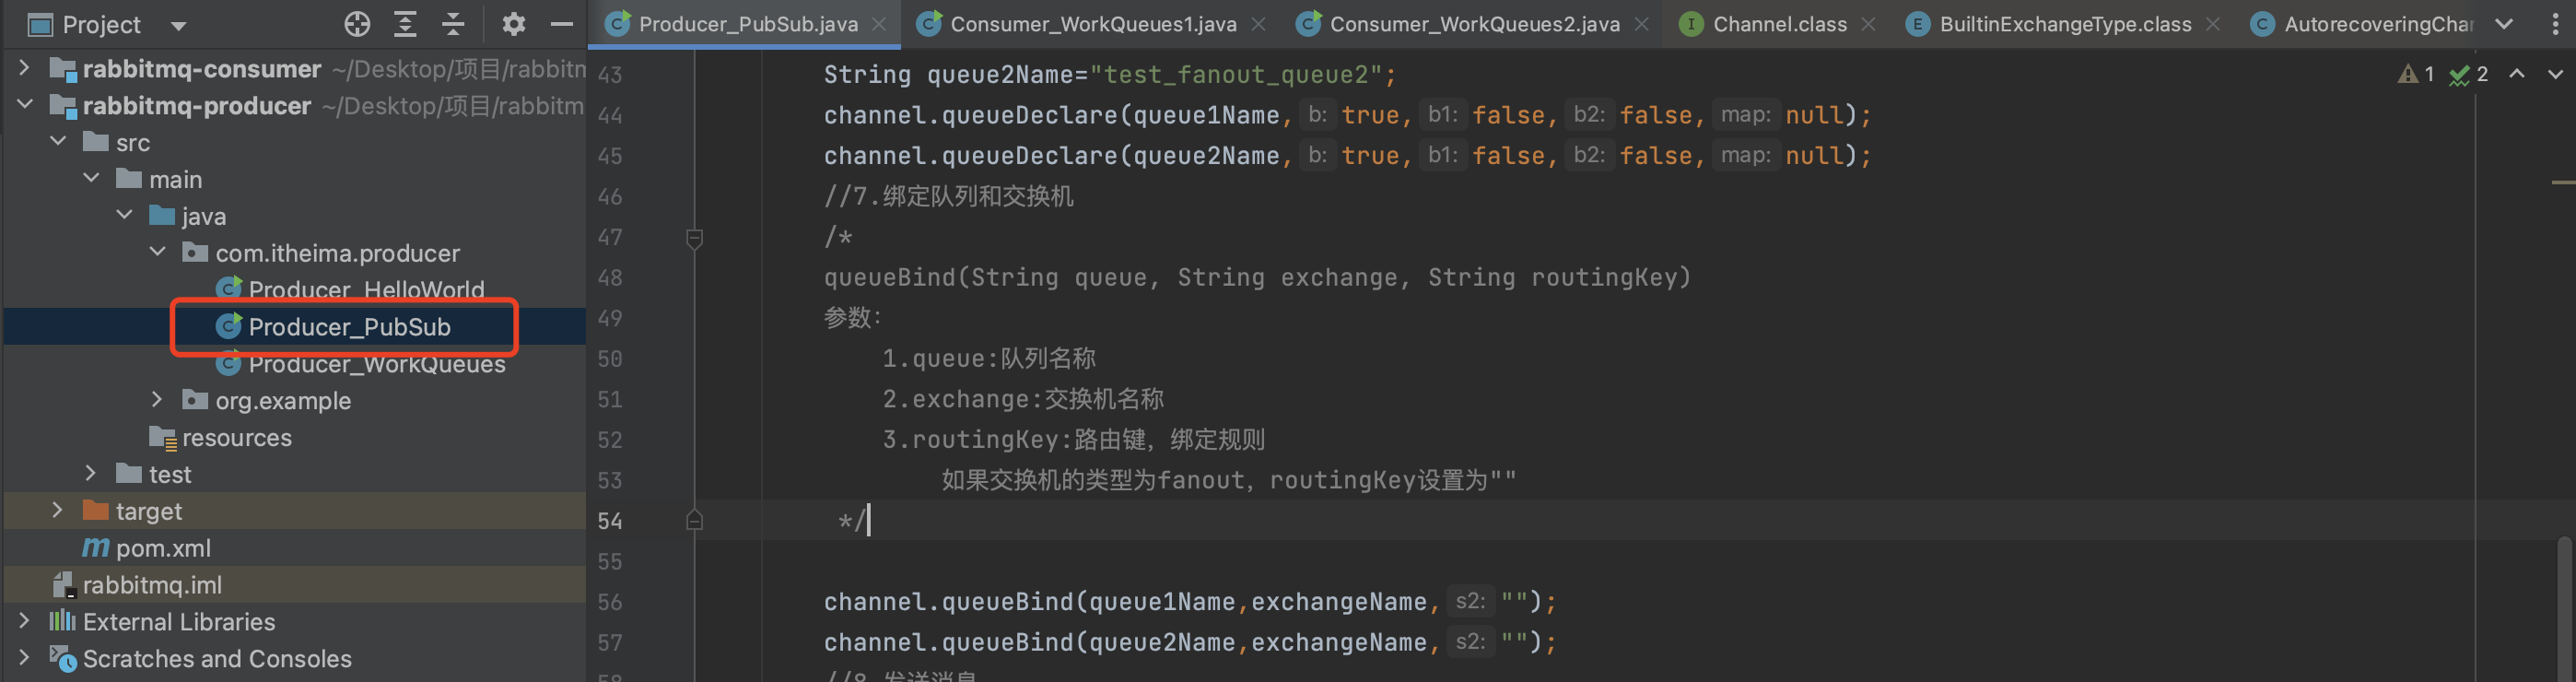
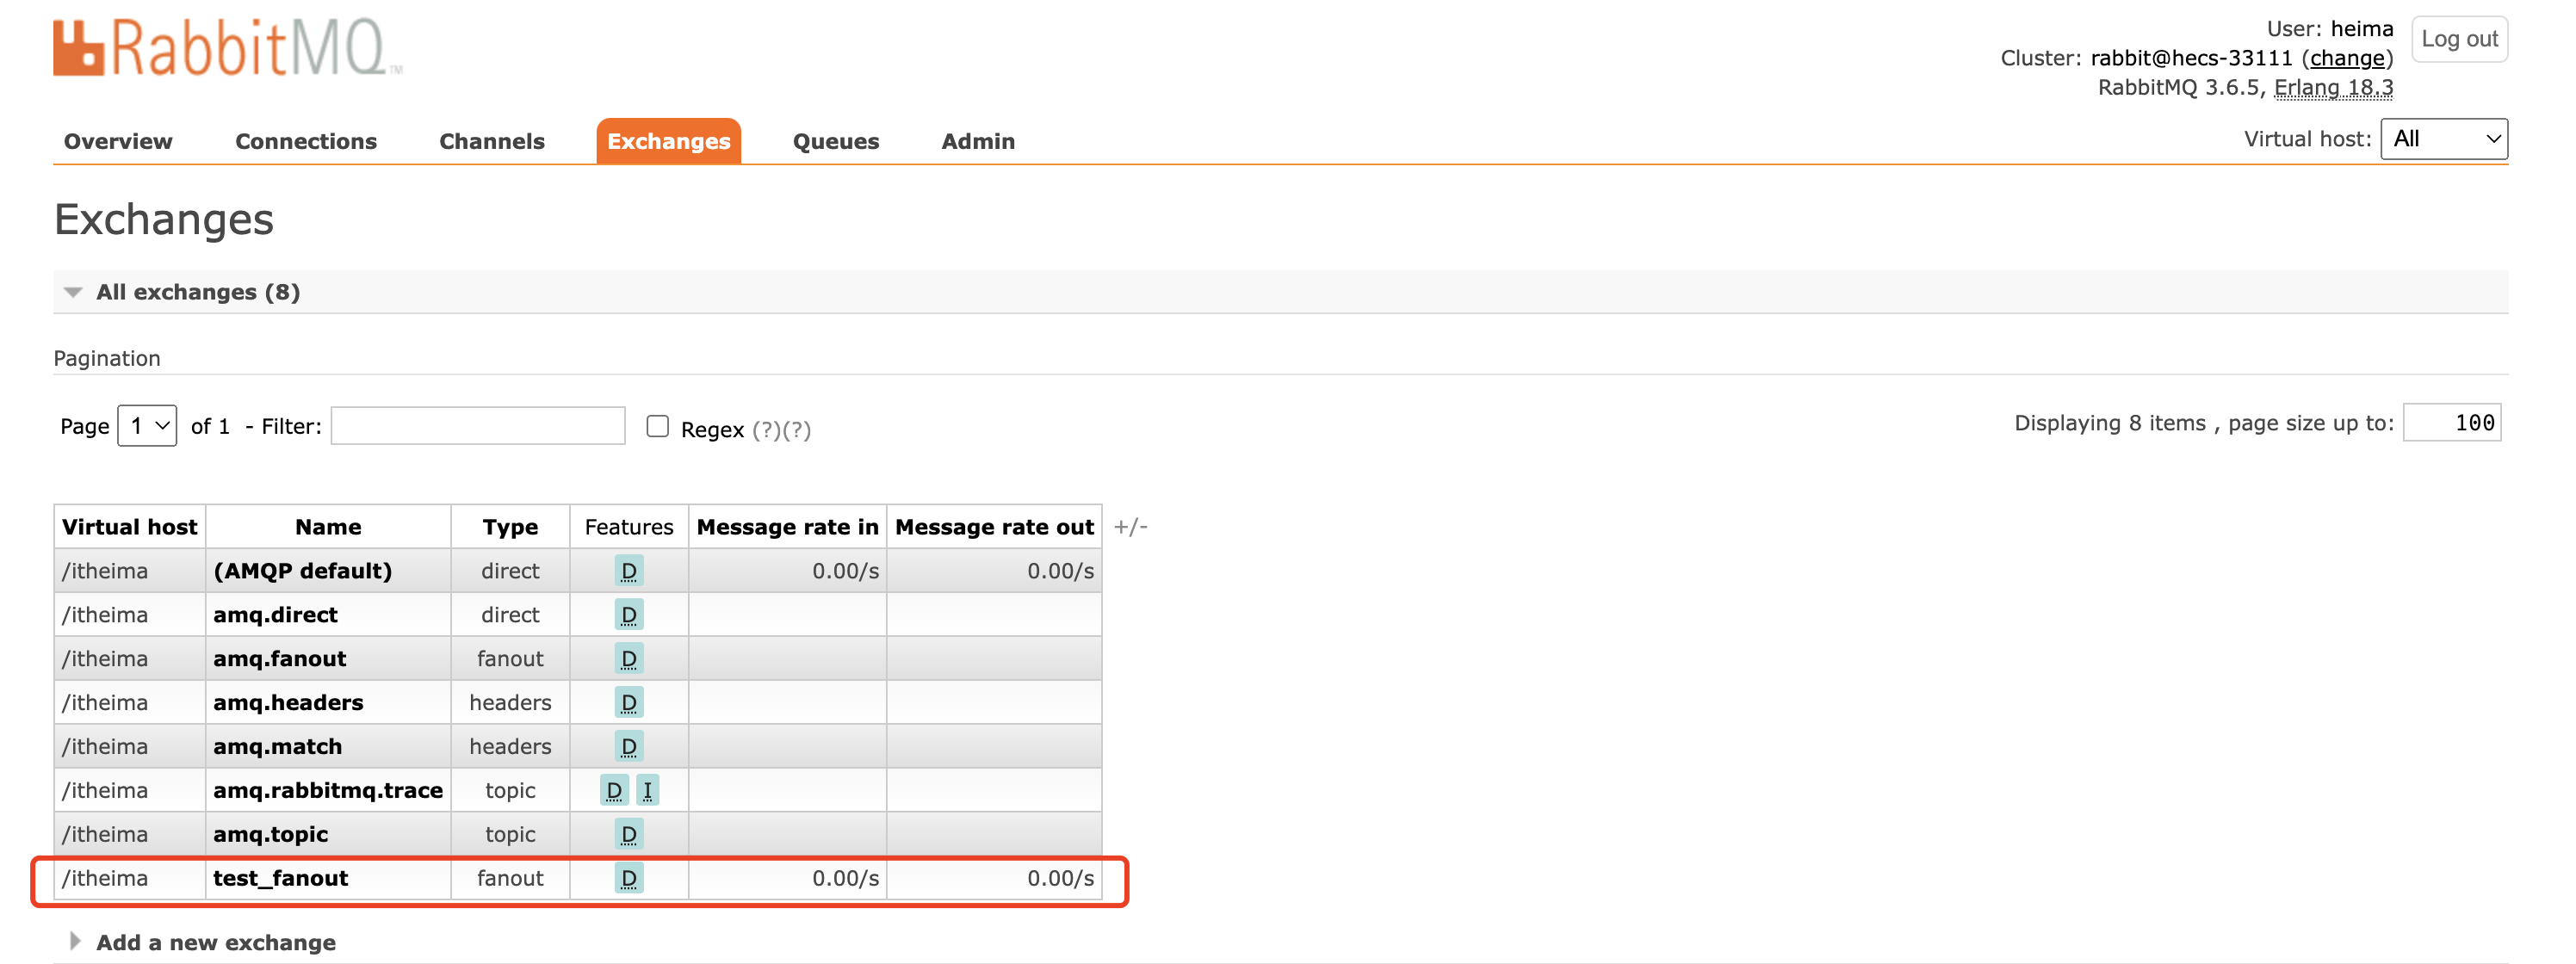
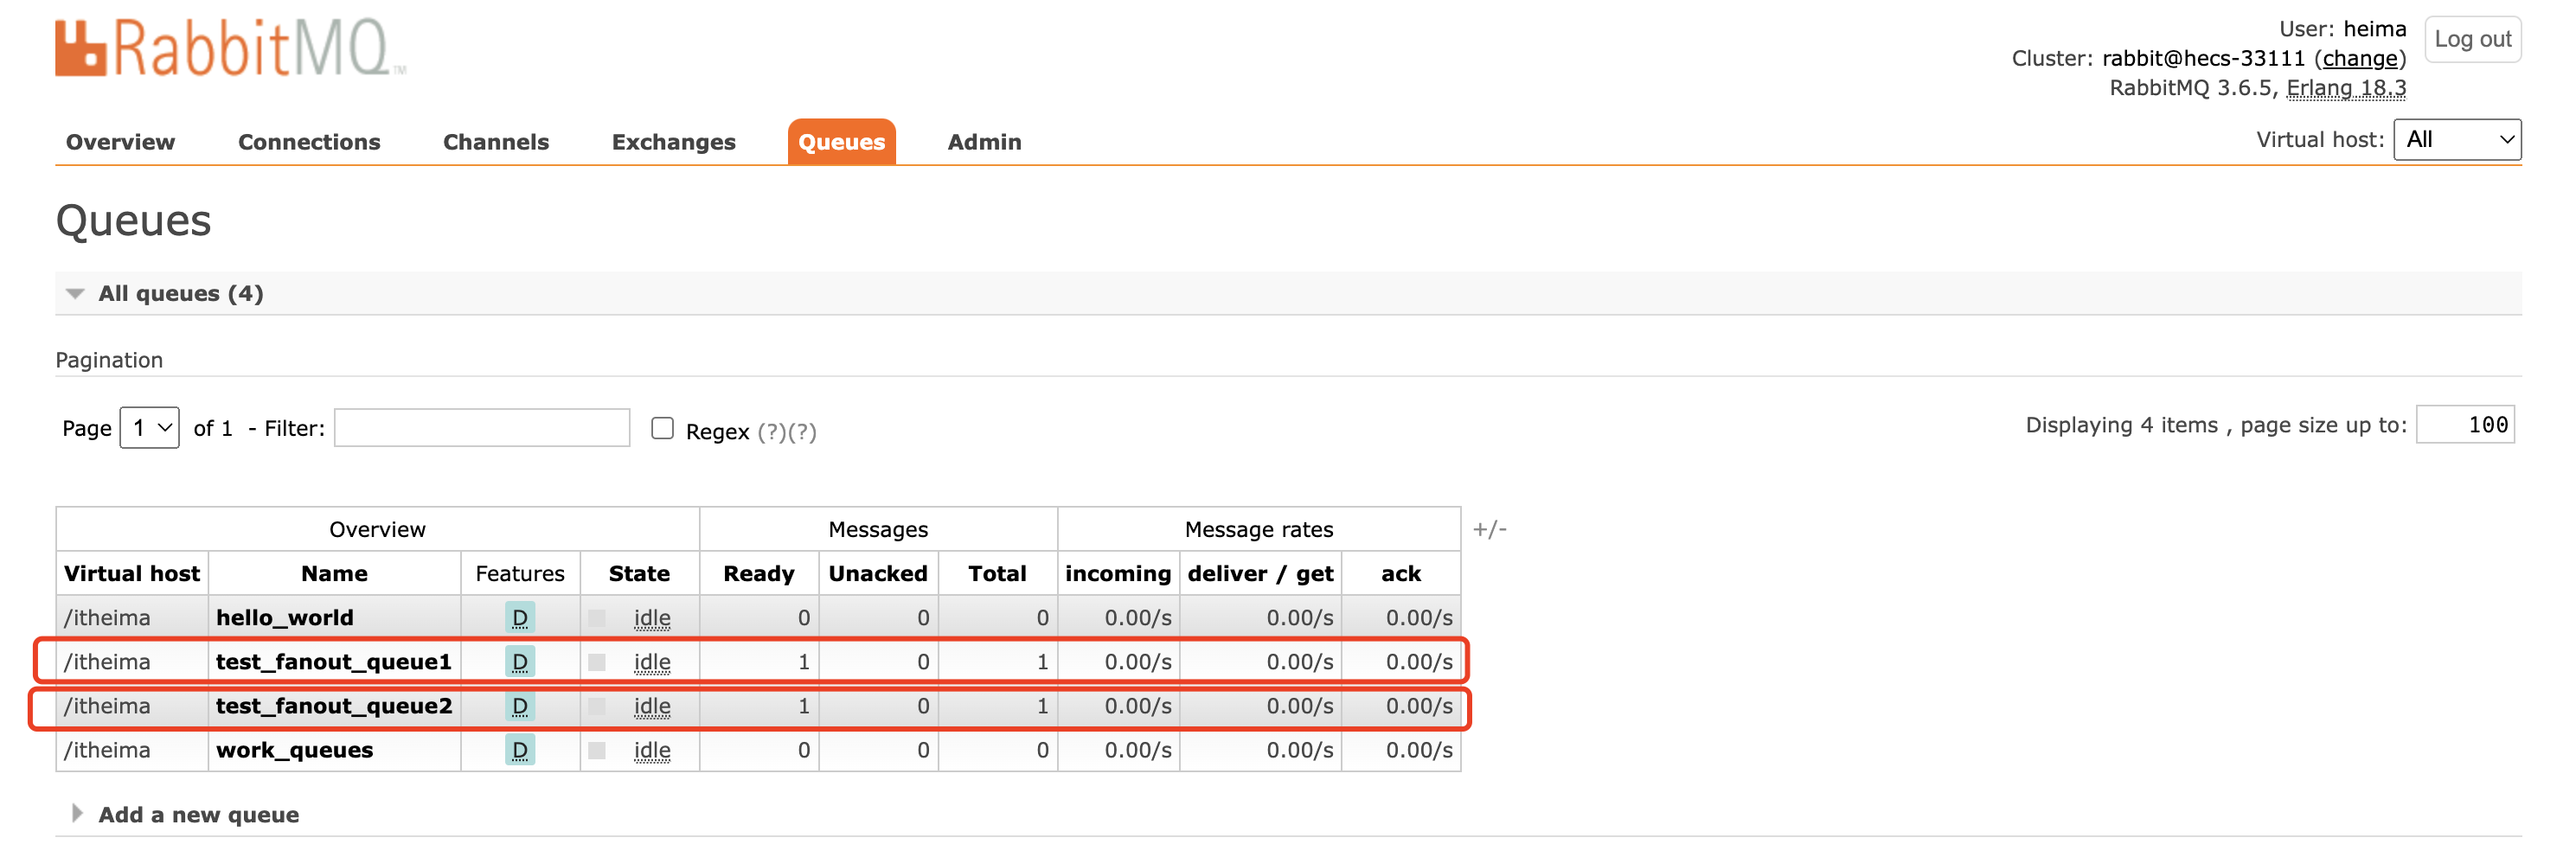
1 | package com.itheima.producer; |
消费者1
1 | package com.itheima.consumer; |
启动

消费者2
1 | package com.itheima.consumer; |

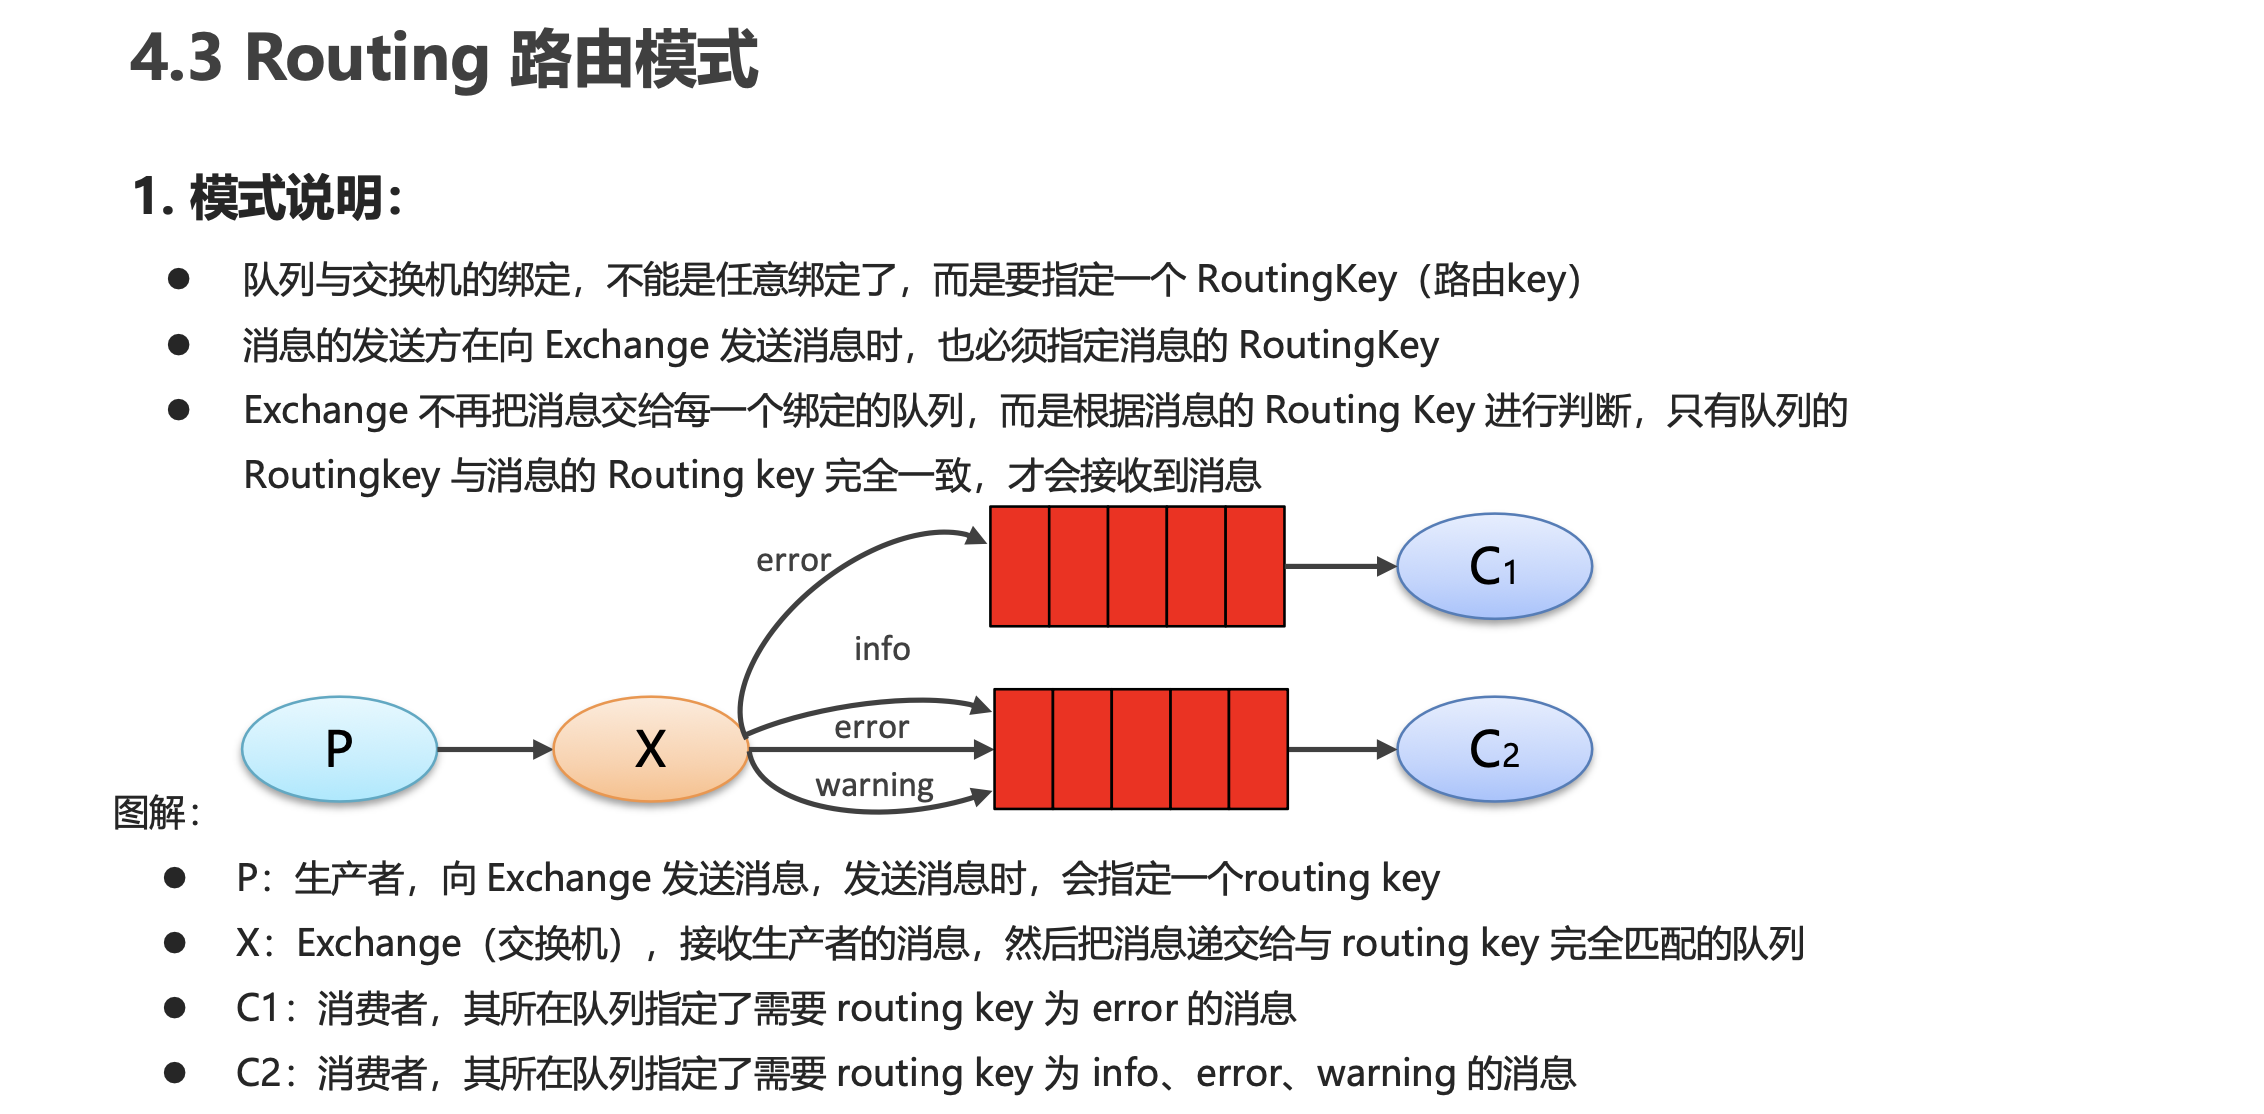
Routing路由模式
模式说明
代码编写
生产者
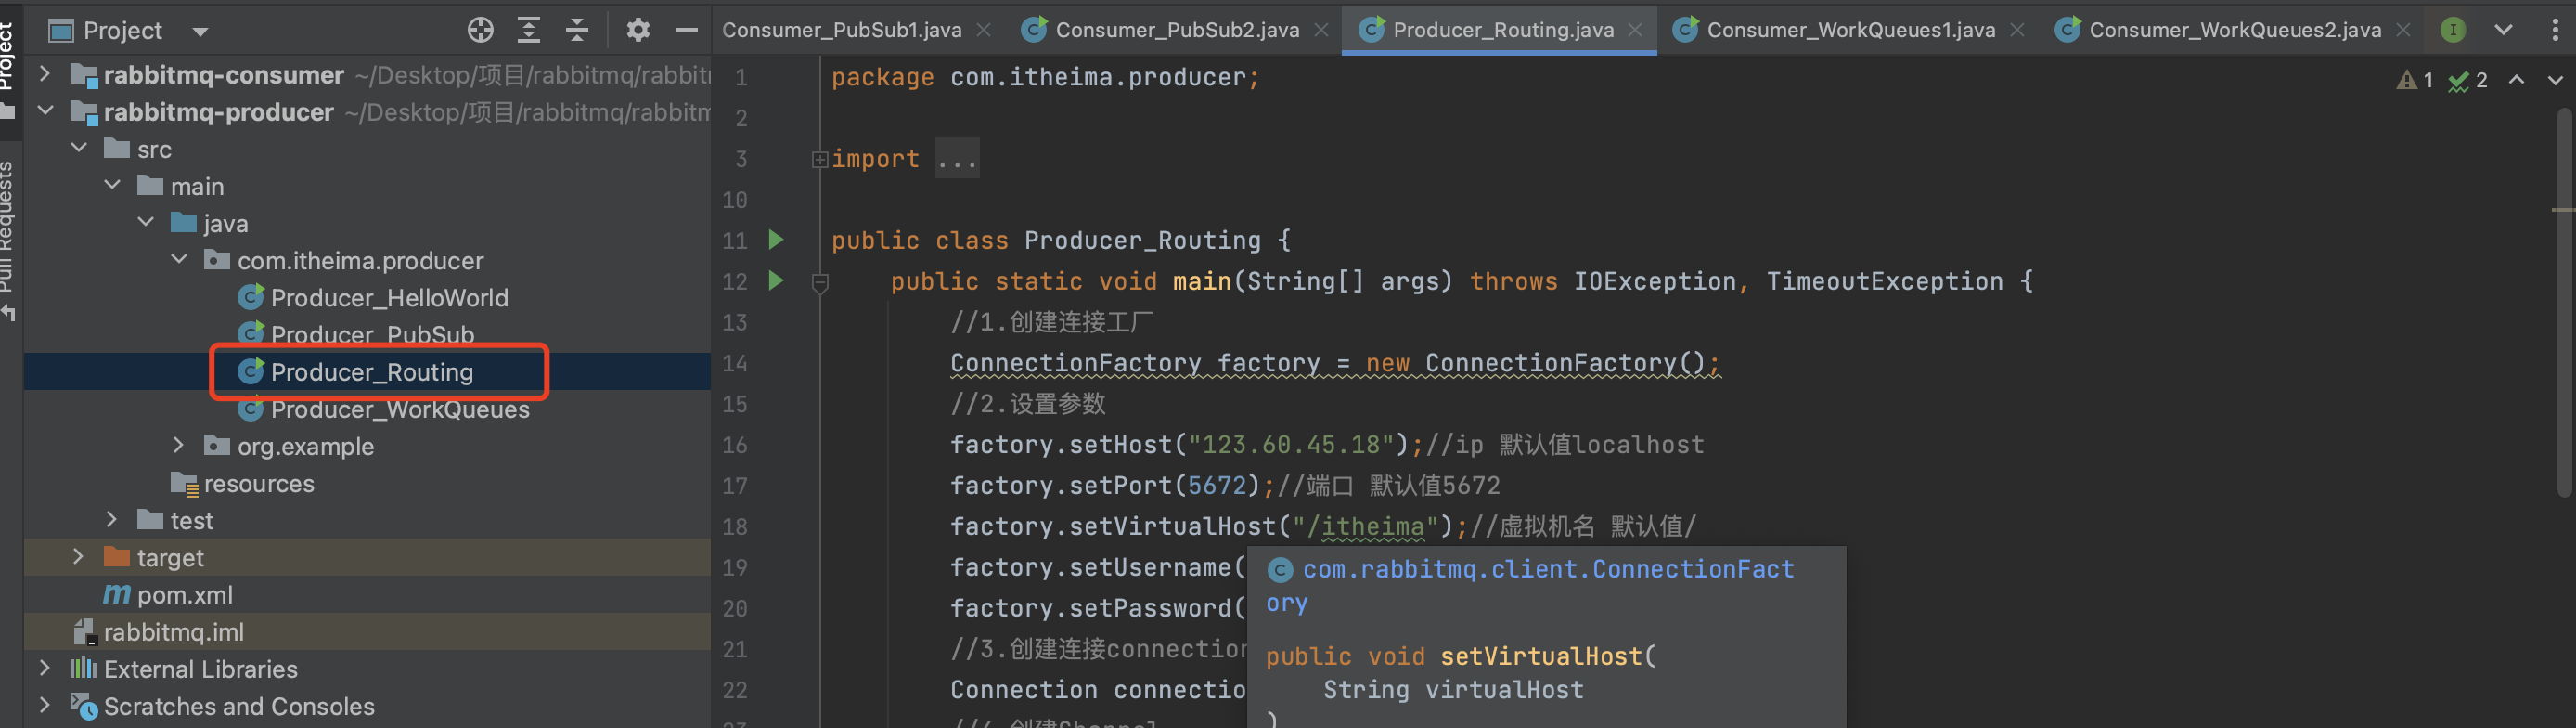
1 | package com.itheima.producer; |
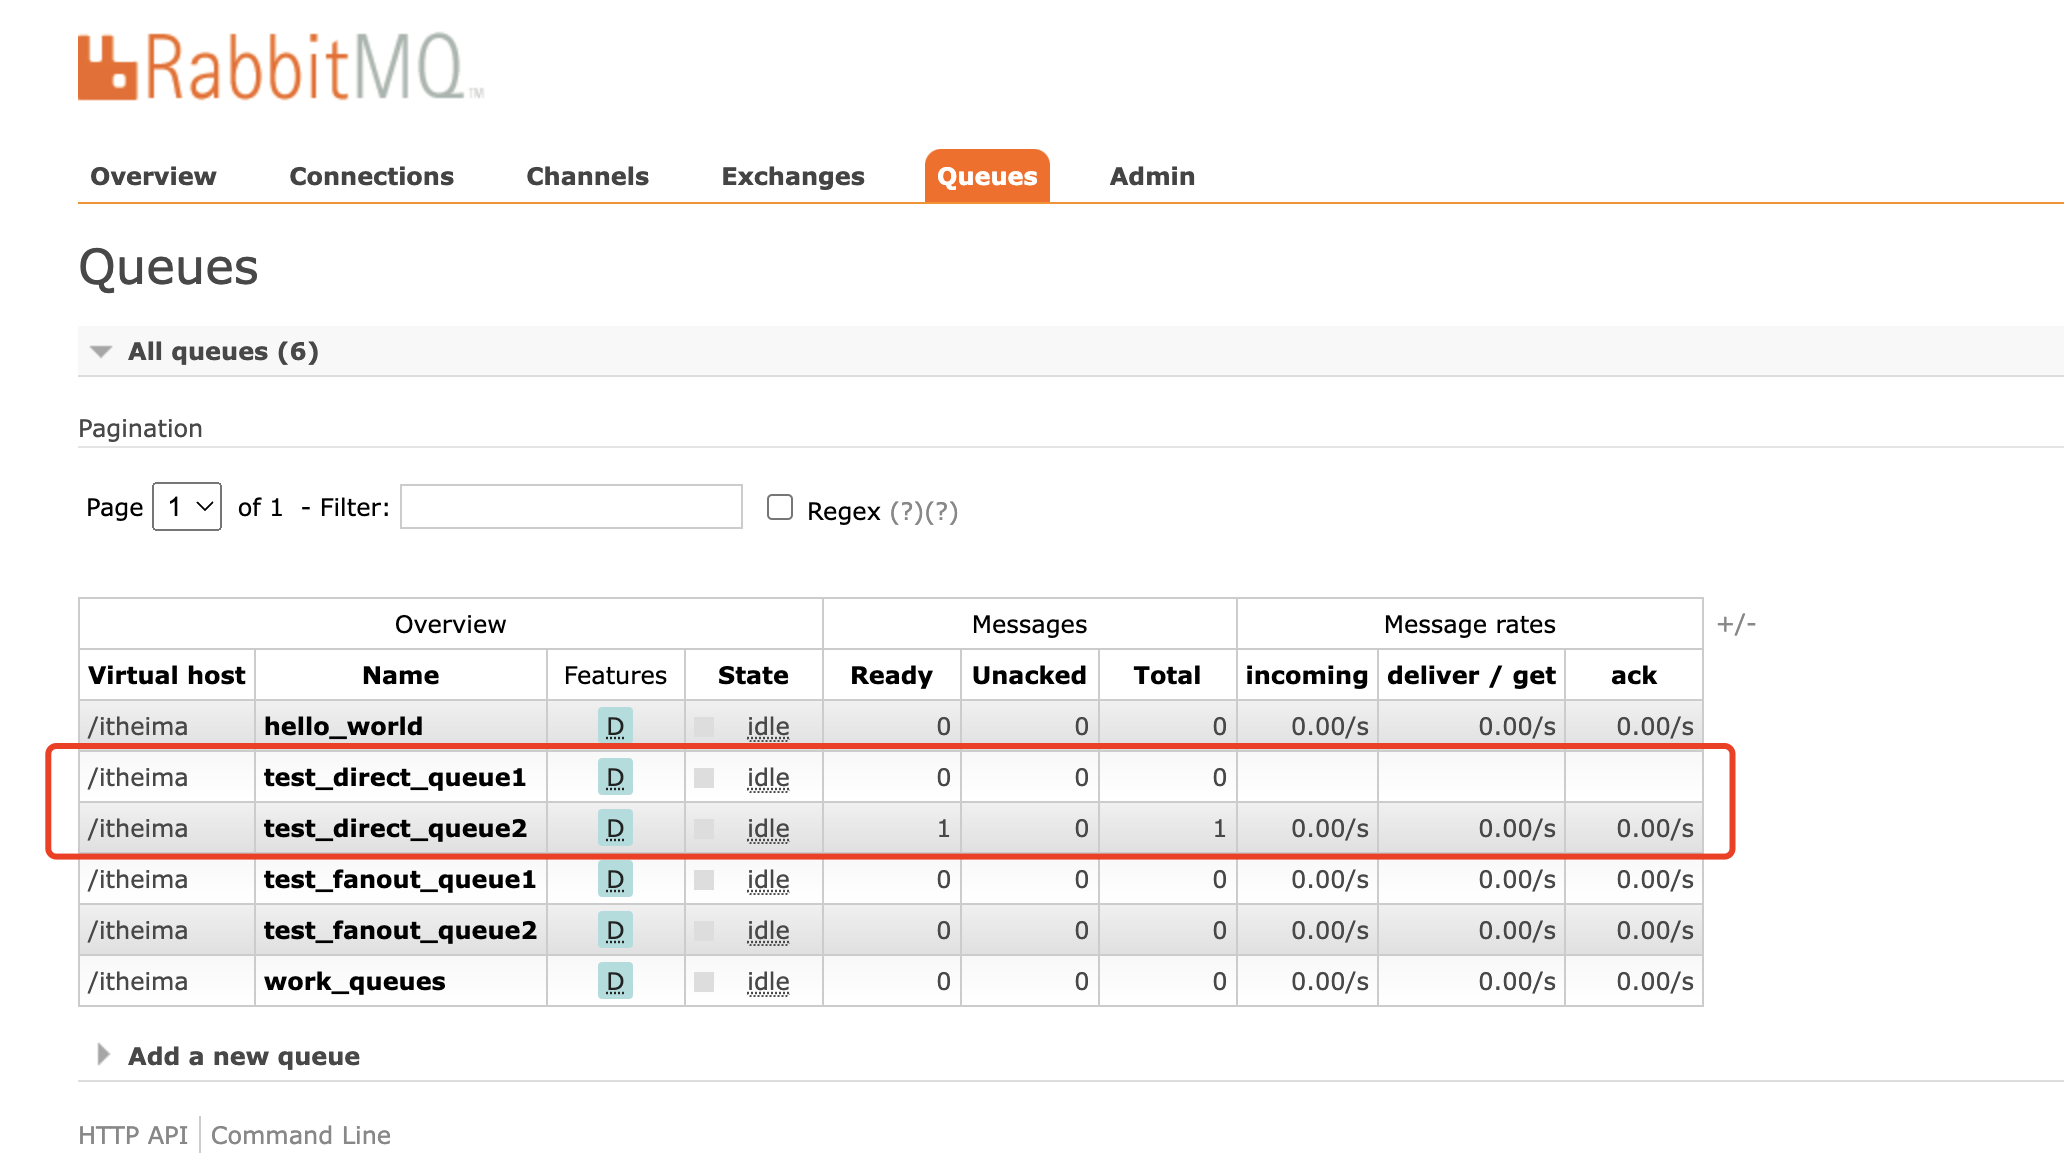
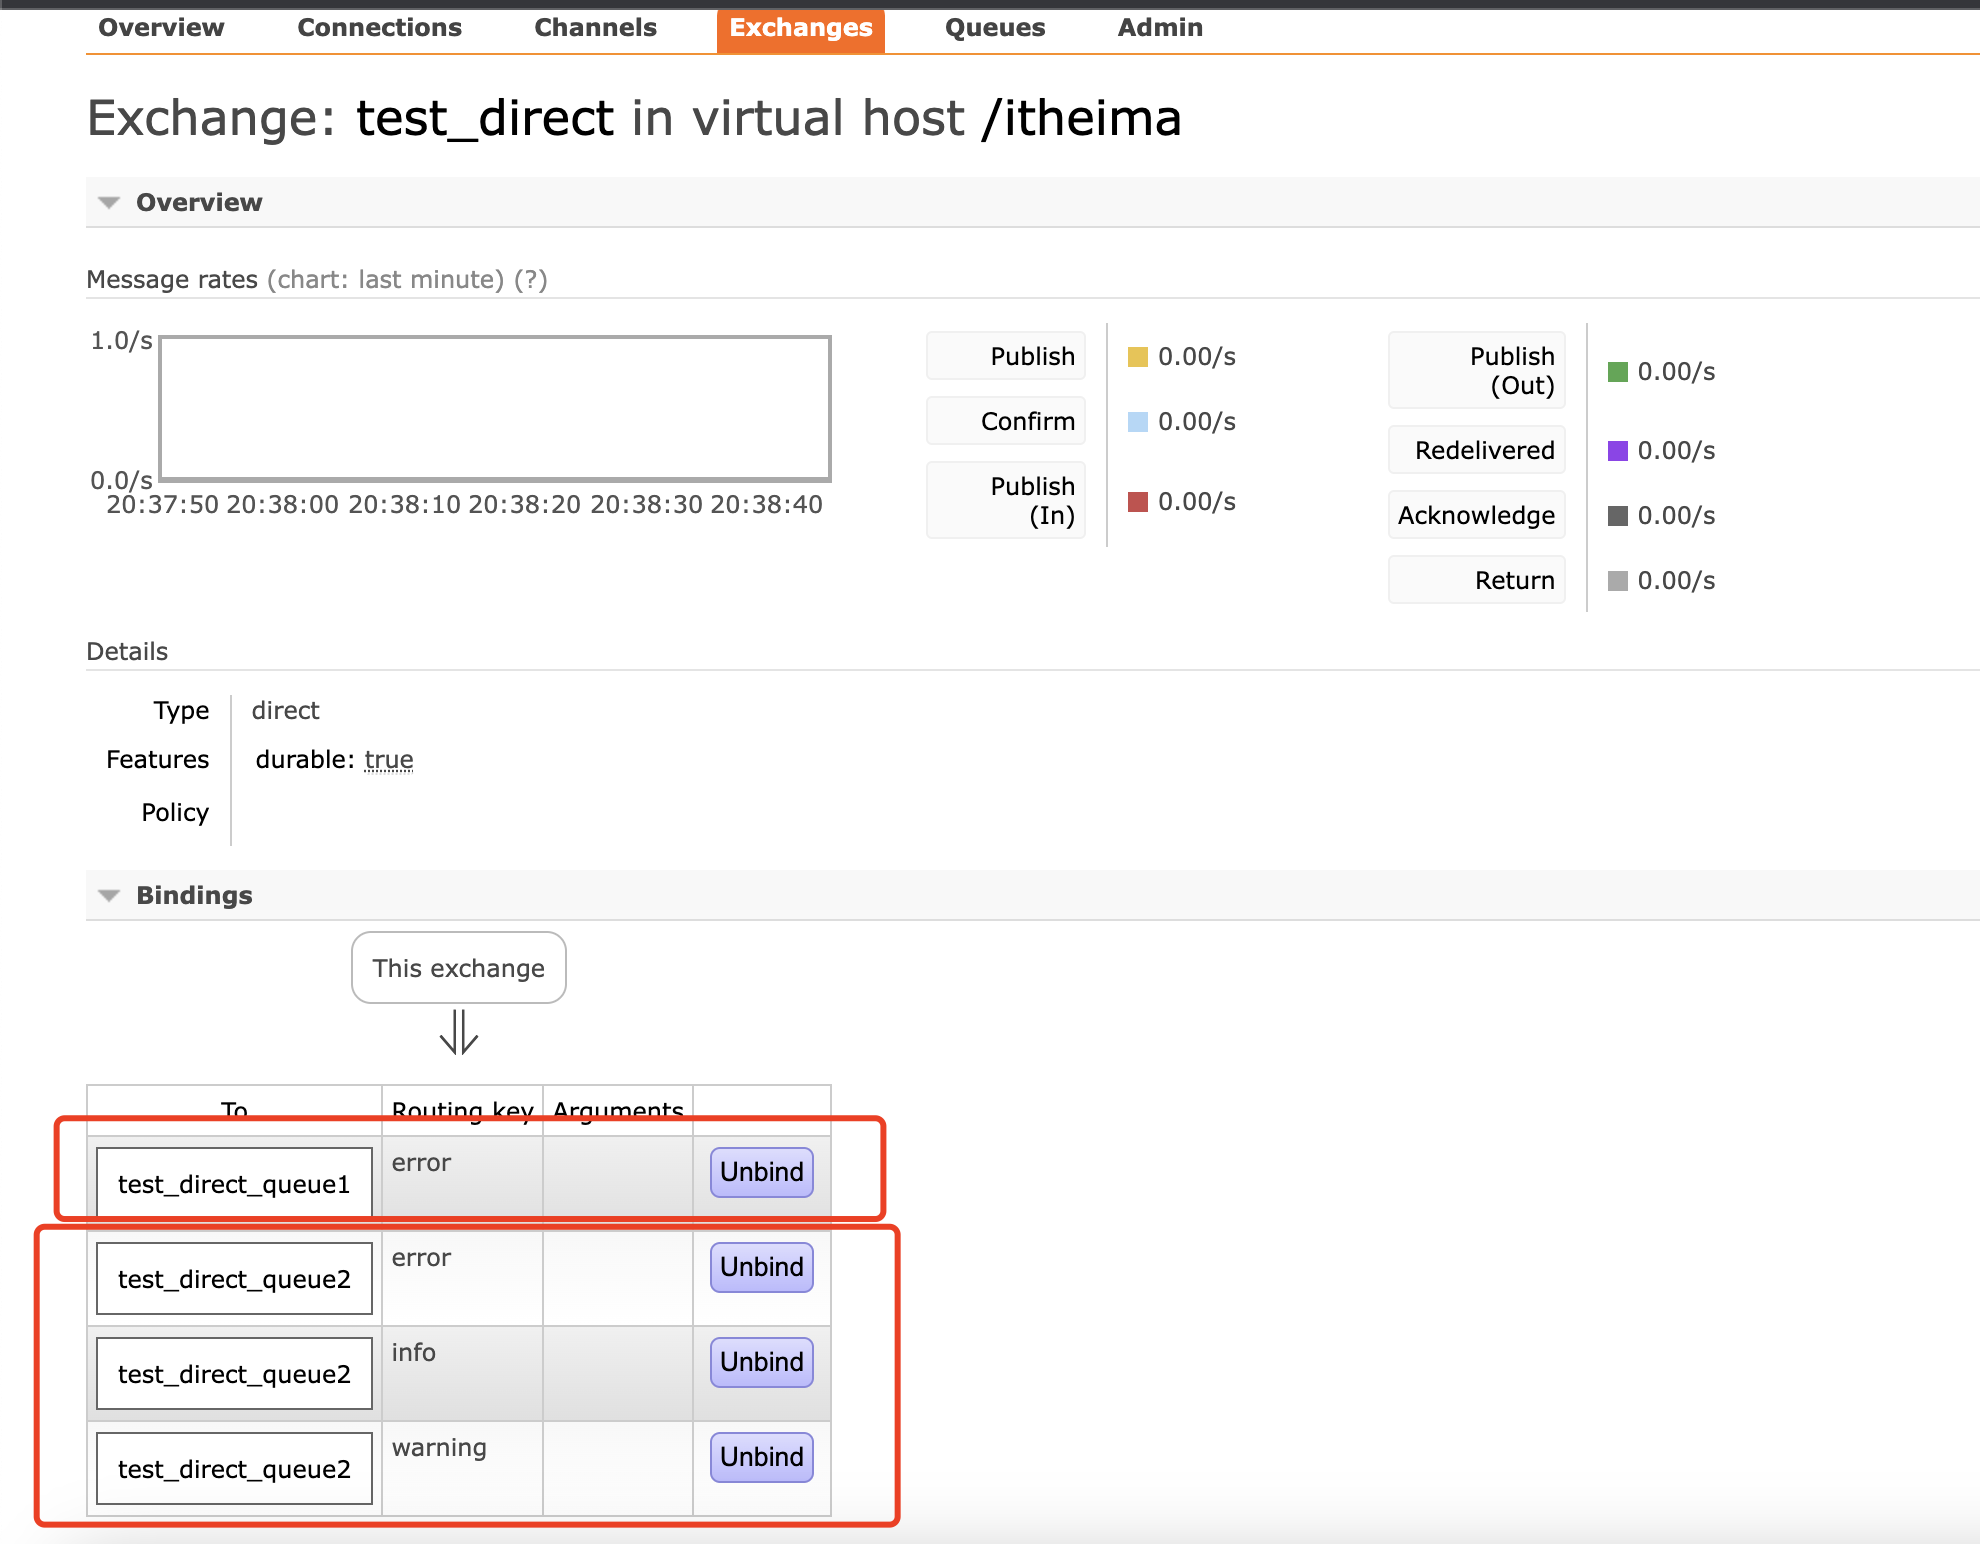
执行后观察队列
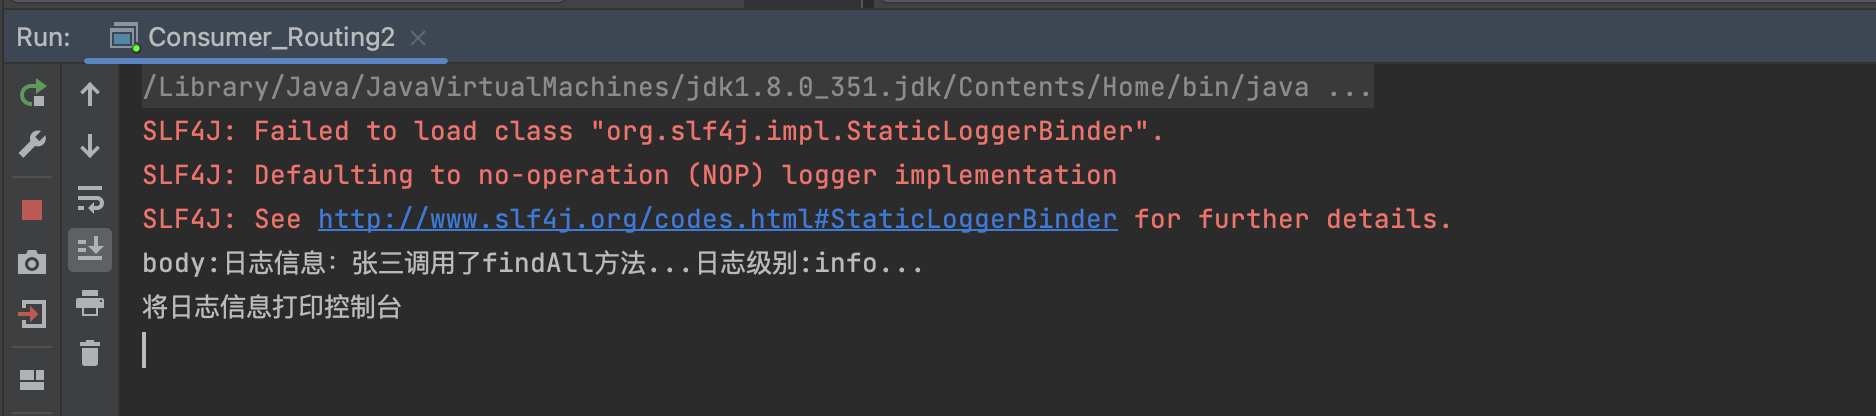
消费者1 控制台打印info级别信息
1 | package com.itheima.consumer; |
消费者2 数据库保存error级别信息
队列无信息消费
生产者 生产一个error级别信息

观察消费者


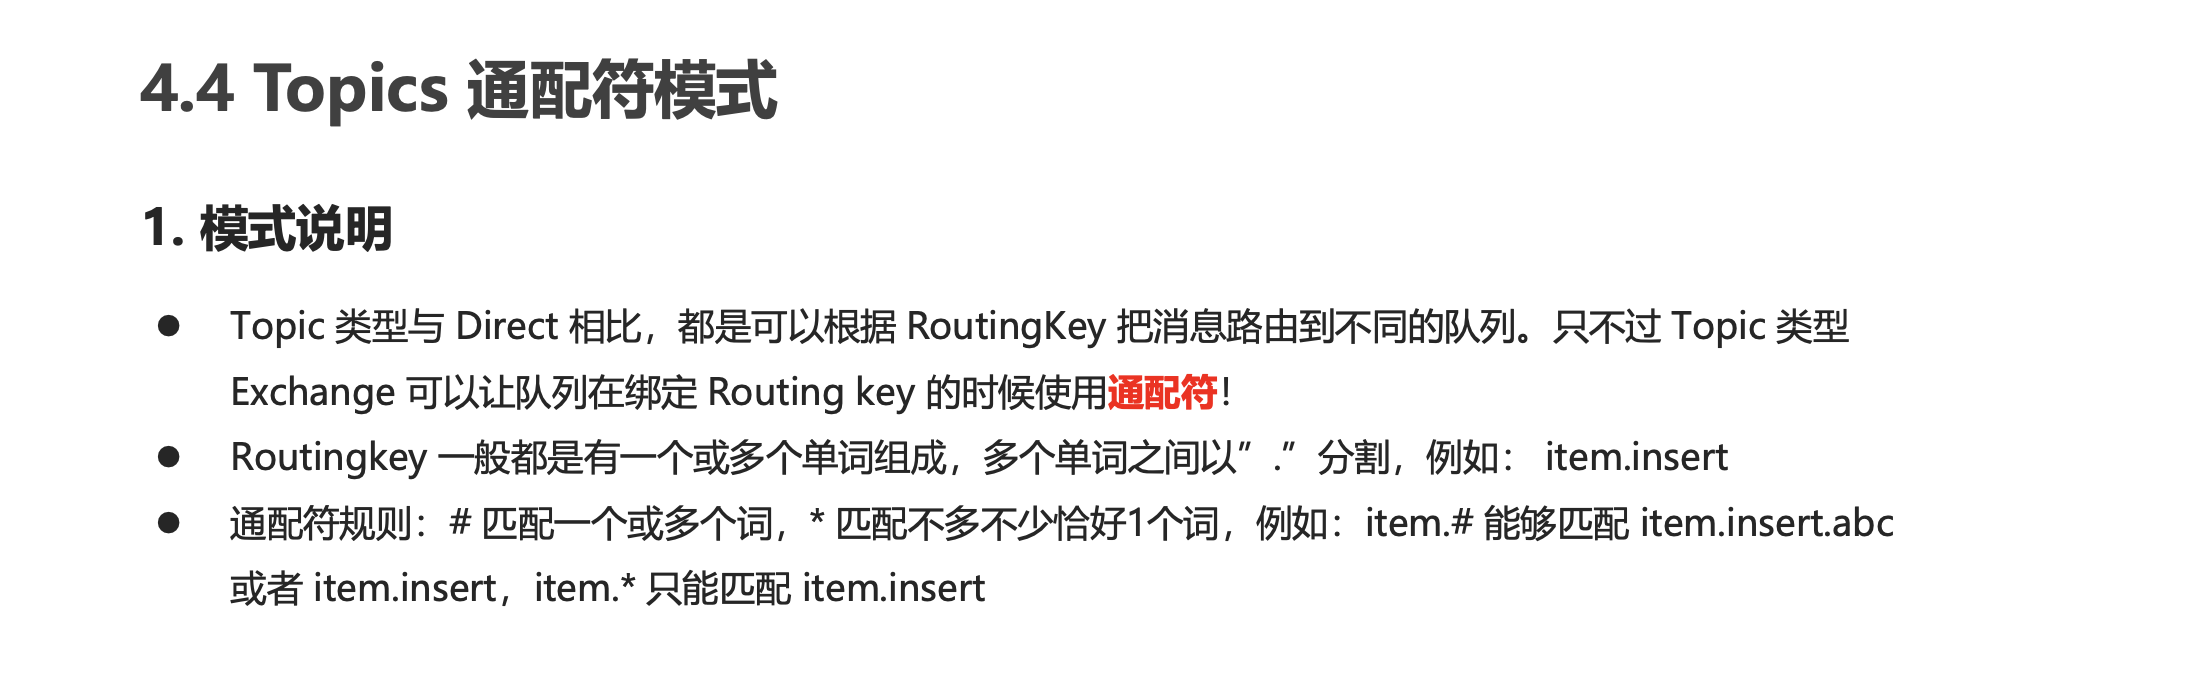
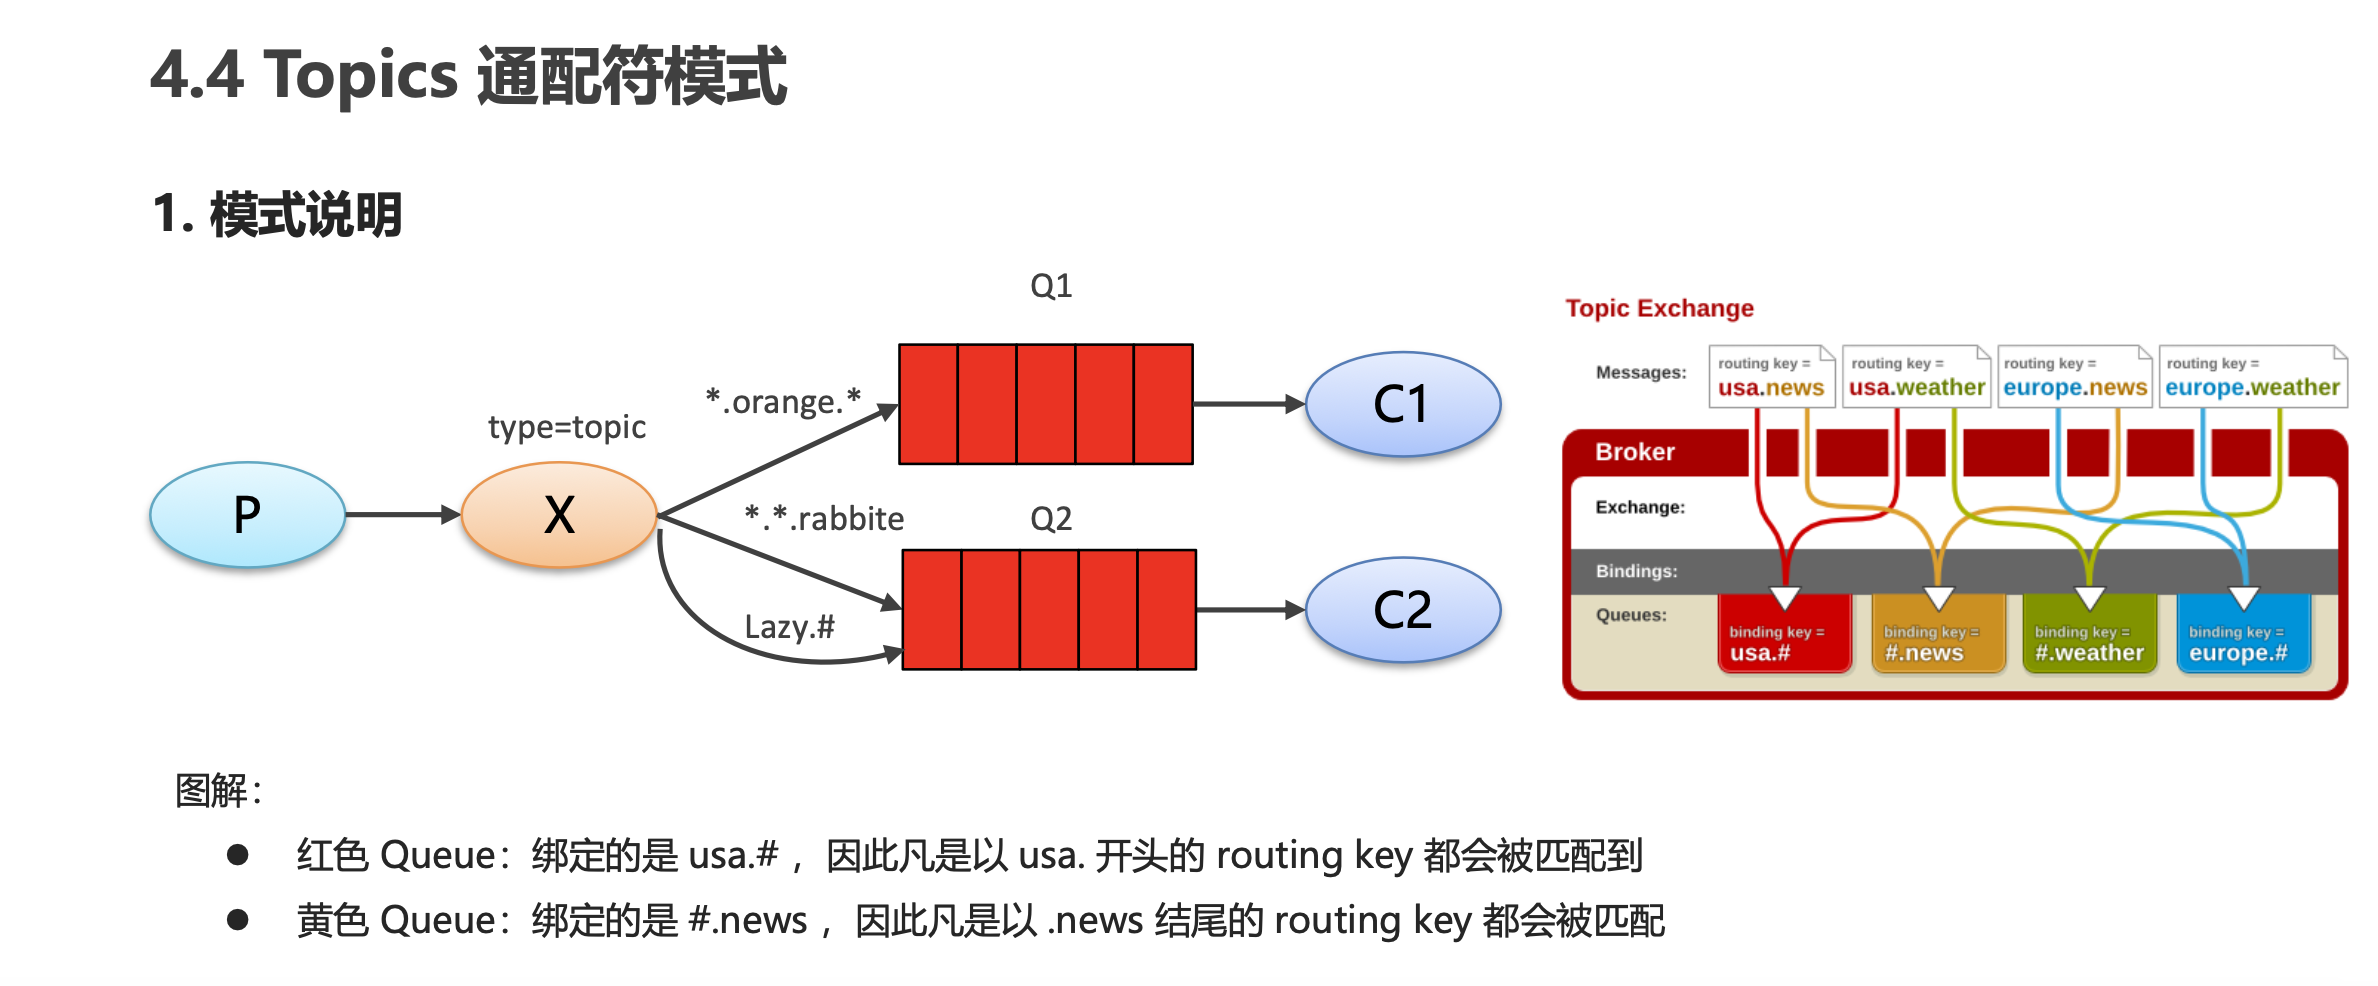
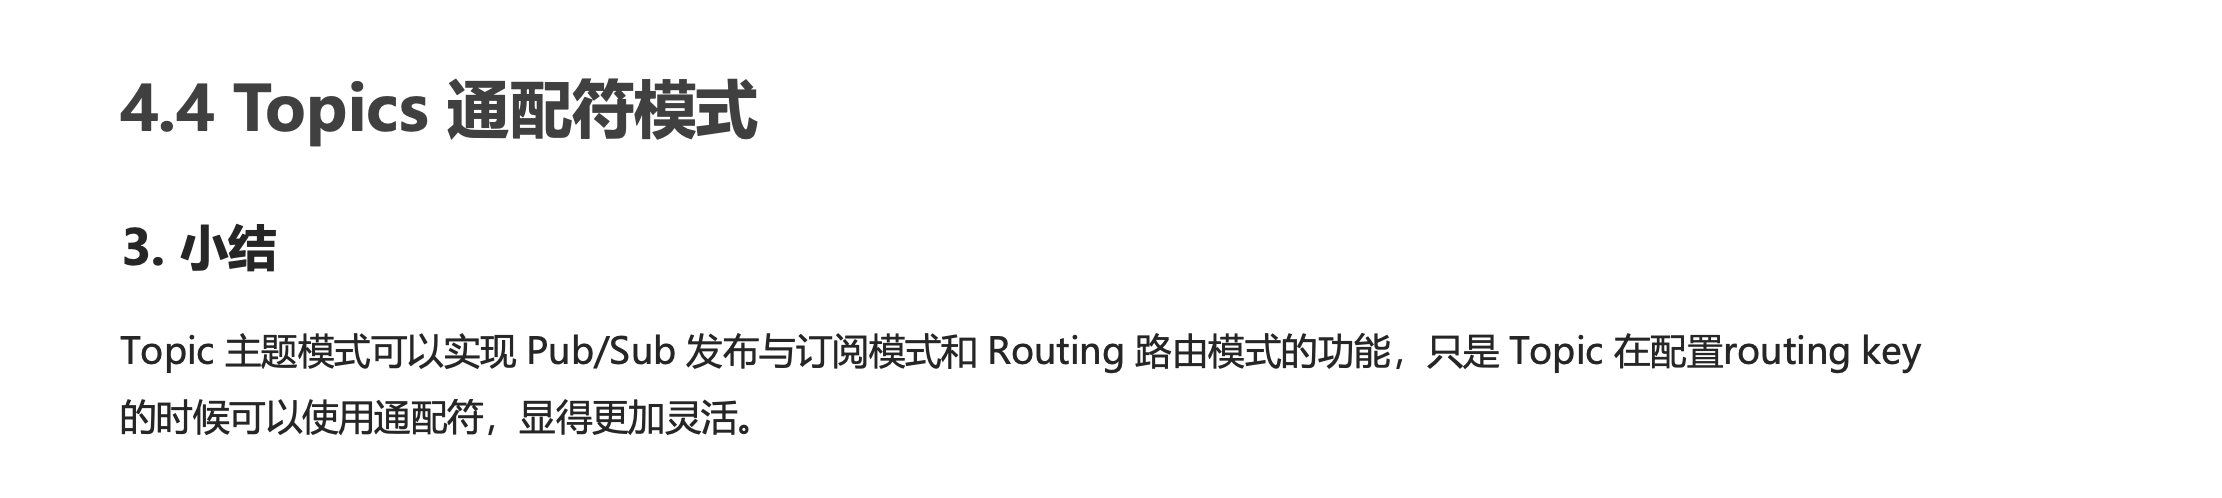
Topics通配符模式
模式说明
代码编写
生产者
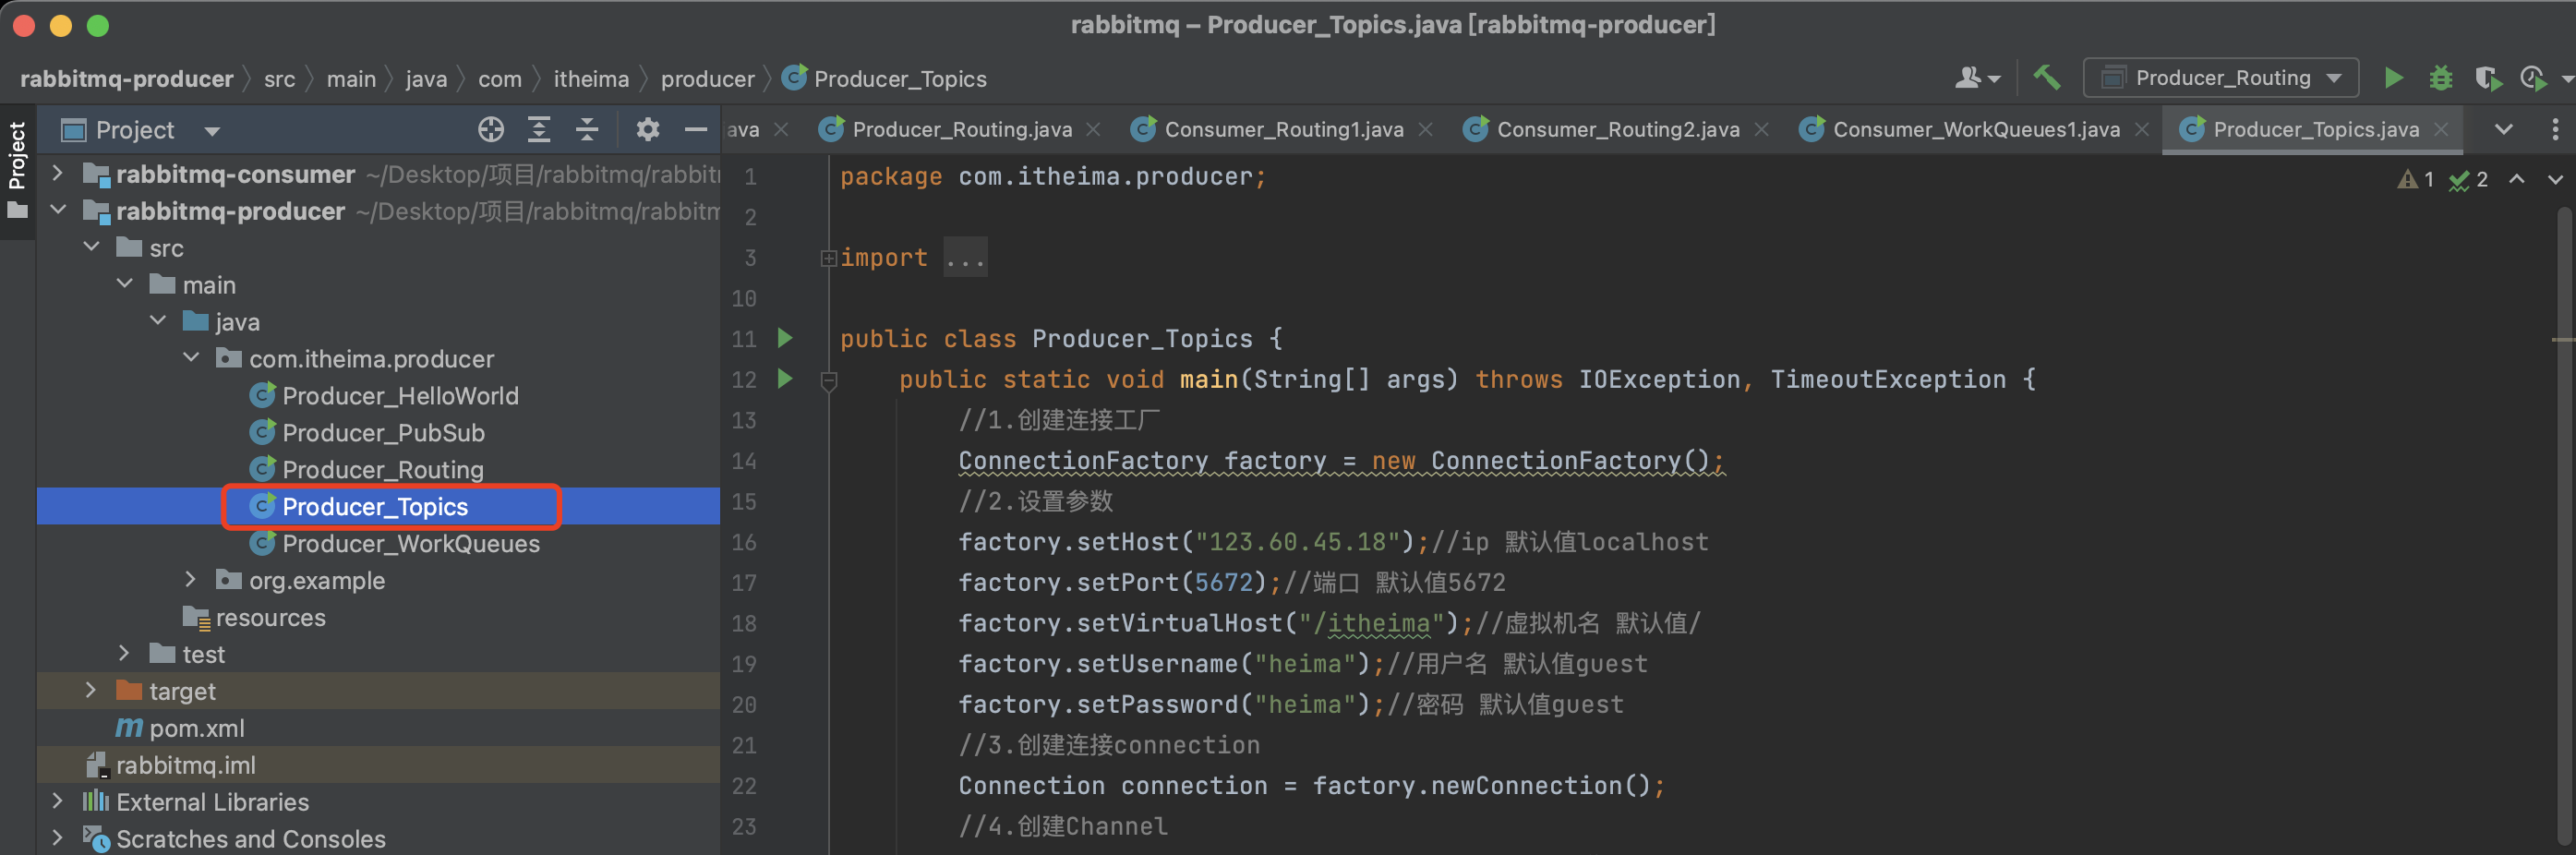
1 | package com.itheima.producer; |
执行

queue1

queue2

消费者
消费者1
1 | package com.itheima.consumer; |
消费者2
1 | package com.itheima.consumer; |
分别执行


生产者修改routingkey,并发送消息

观察消费者1无法收到消息,消费者2成功收到消息


生产者再次修改routingkey,并发送消息


小结
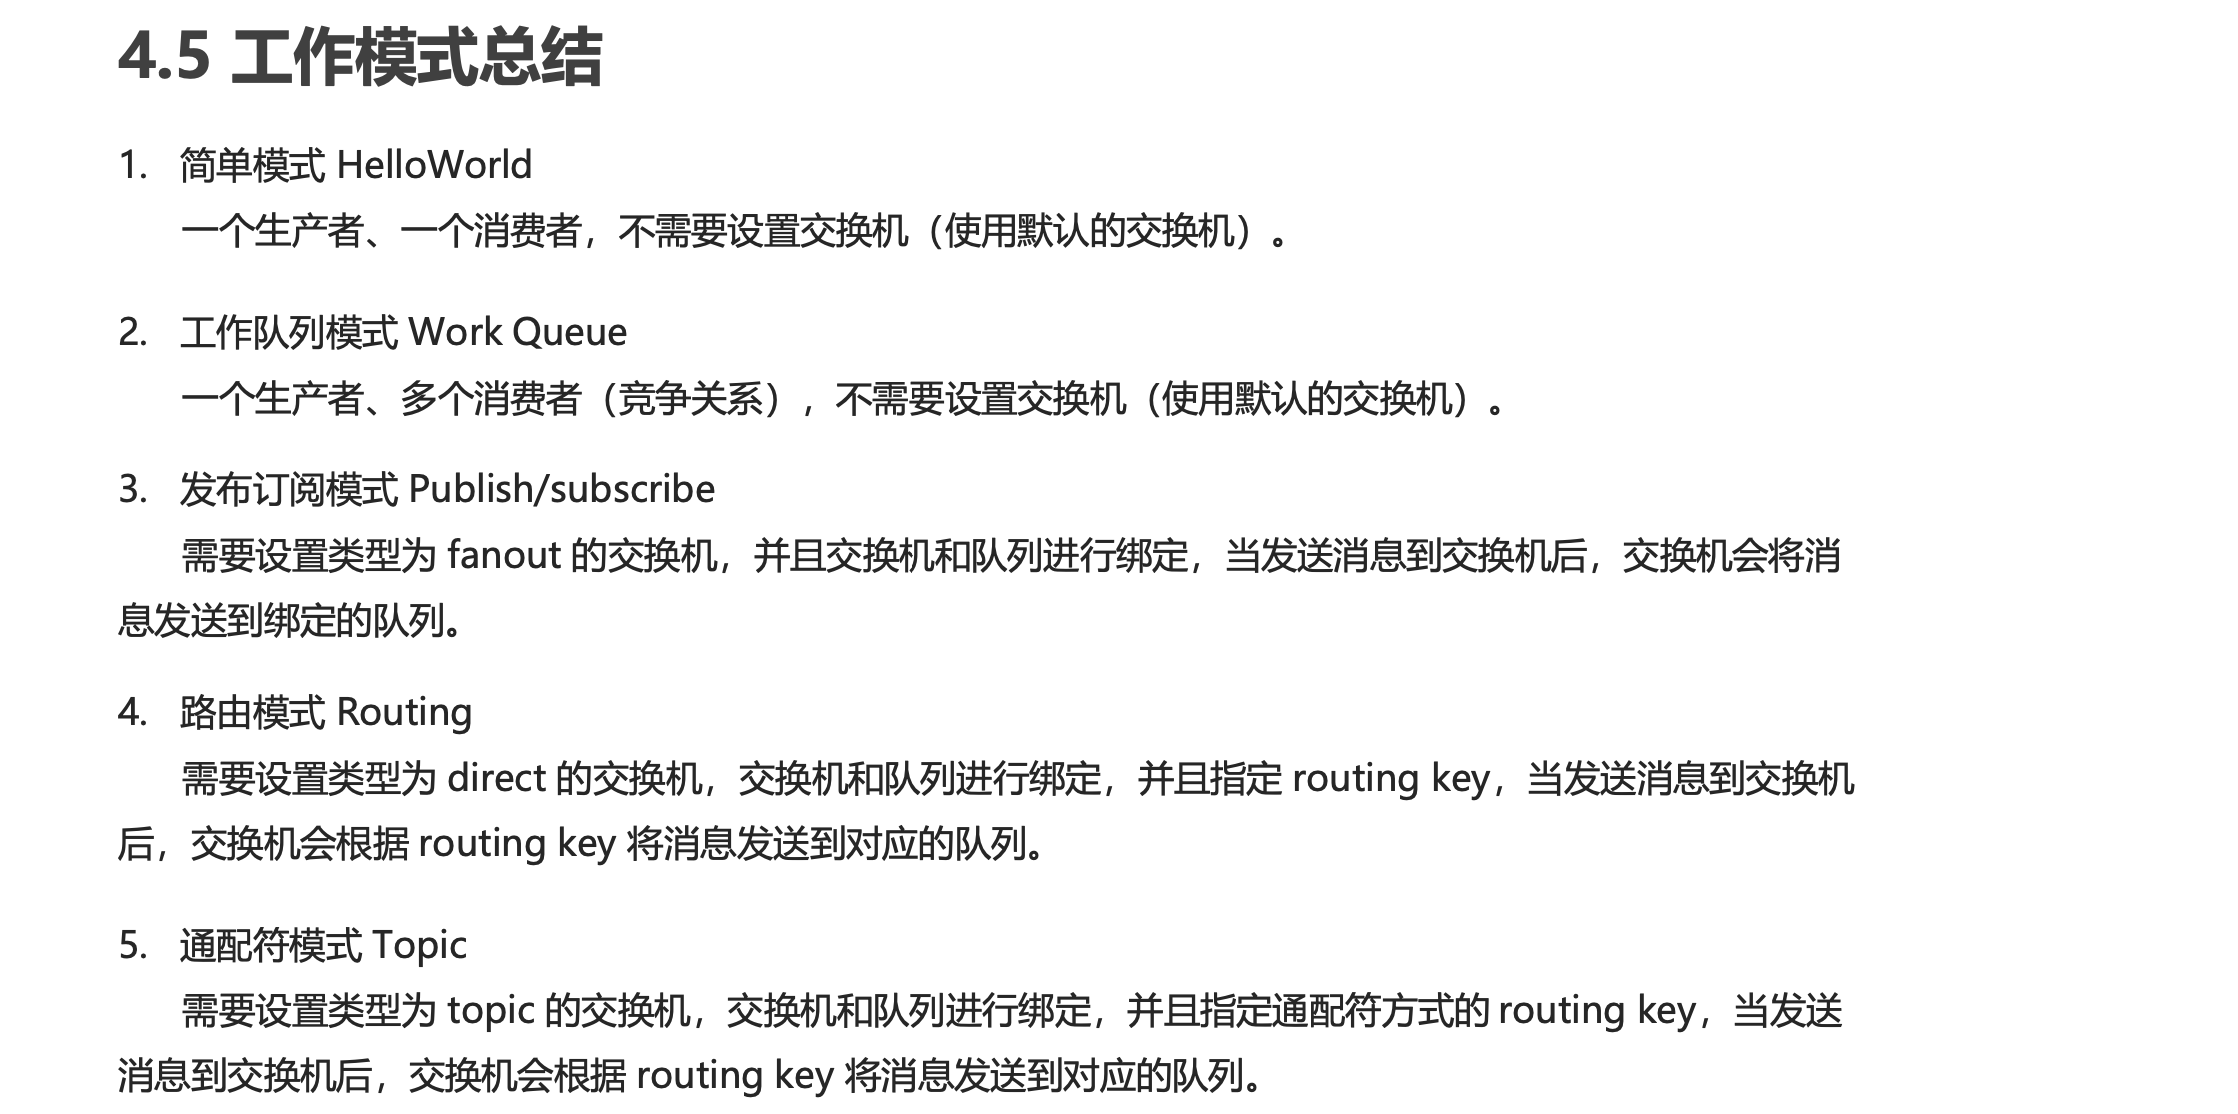
工作模式总结
Spring整合RabbitMQ
生产者

1 | <dependencies> |
编写配置文件
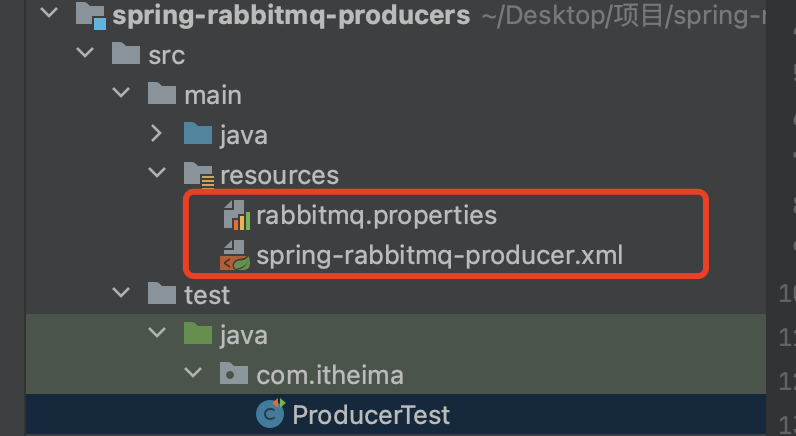
rabbitmq.properties
1 | rabbitmq.host=123.60.45.18 |
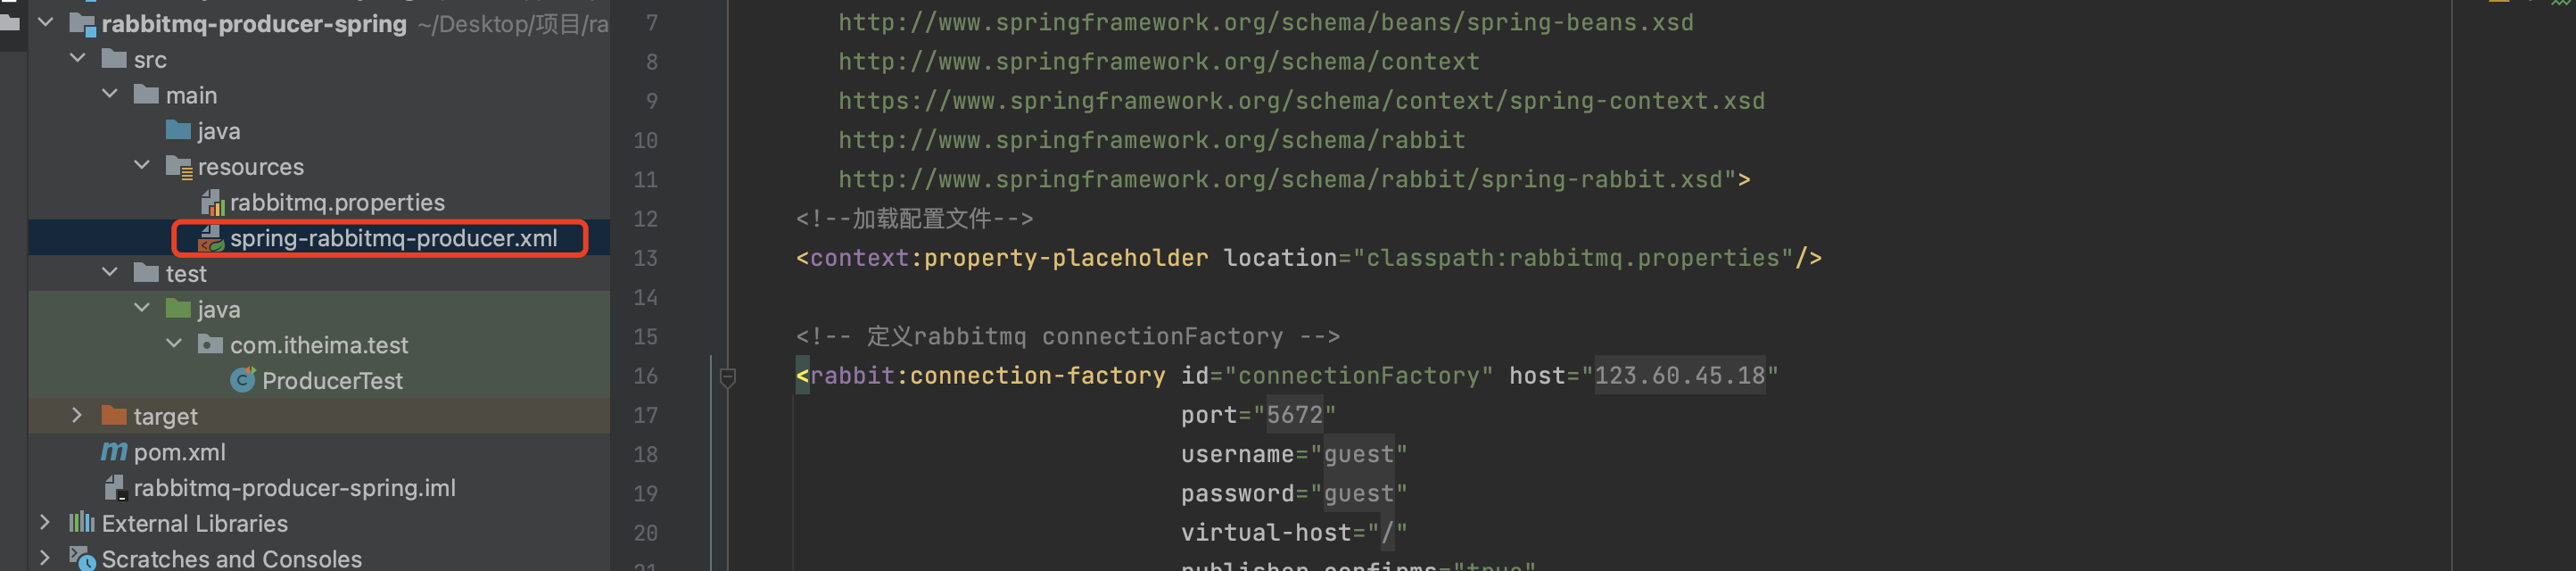
spring-rabbitmq-producer.xml
1 |
|
测试方法
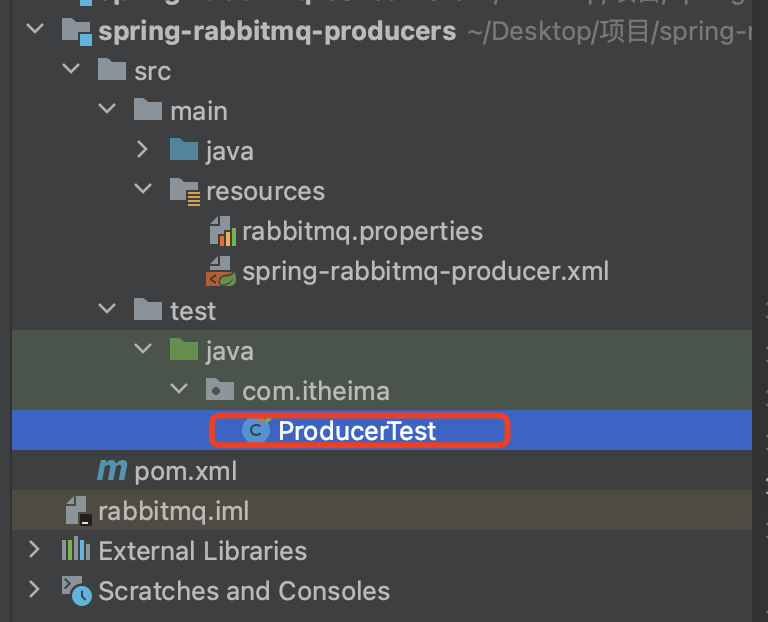
1 | package com.itheima; |
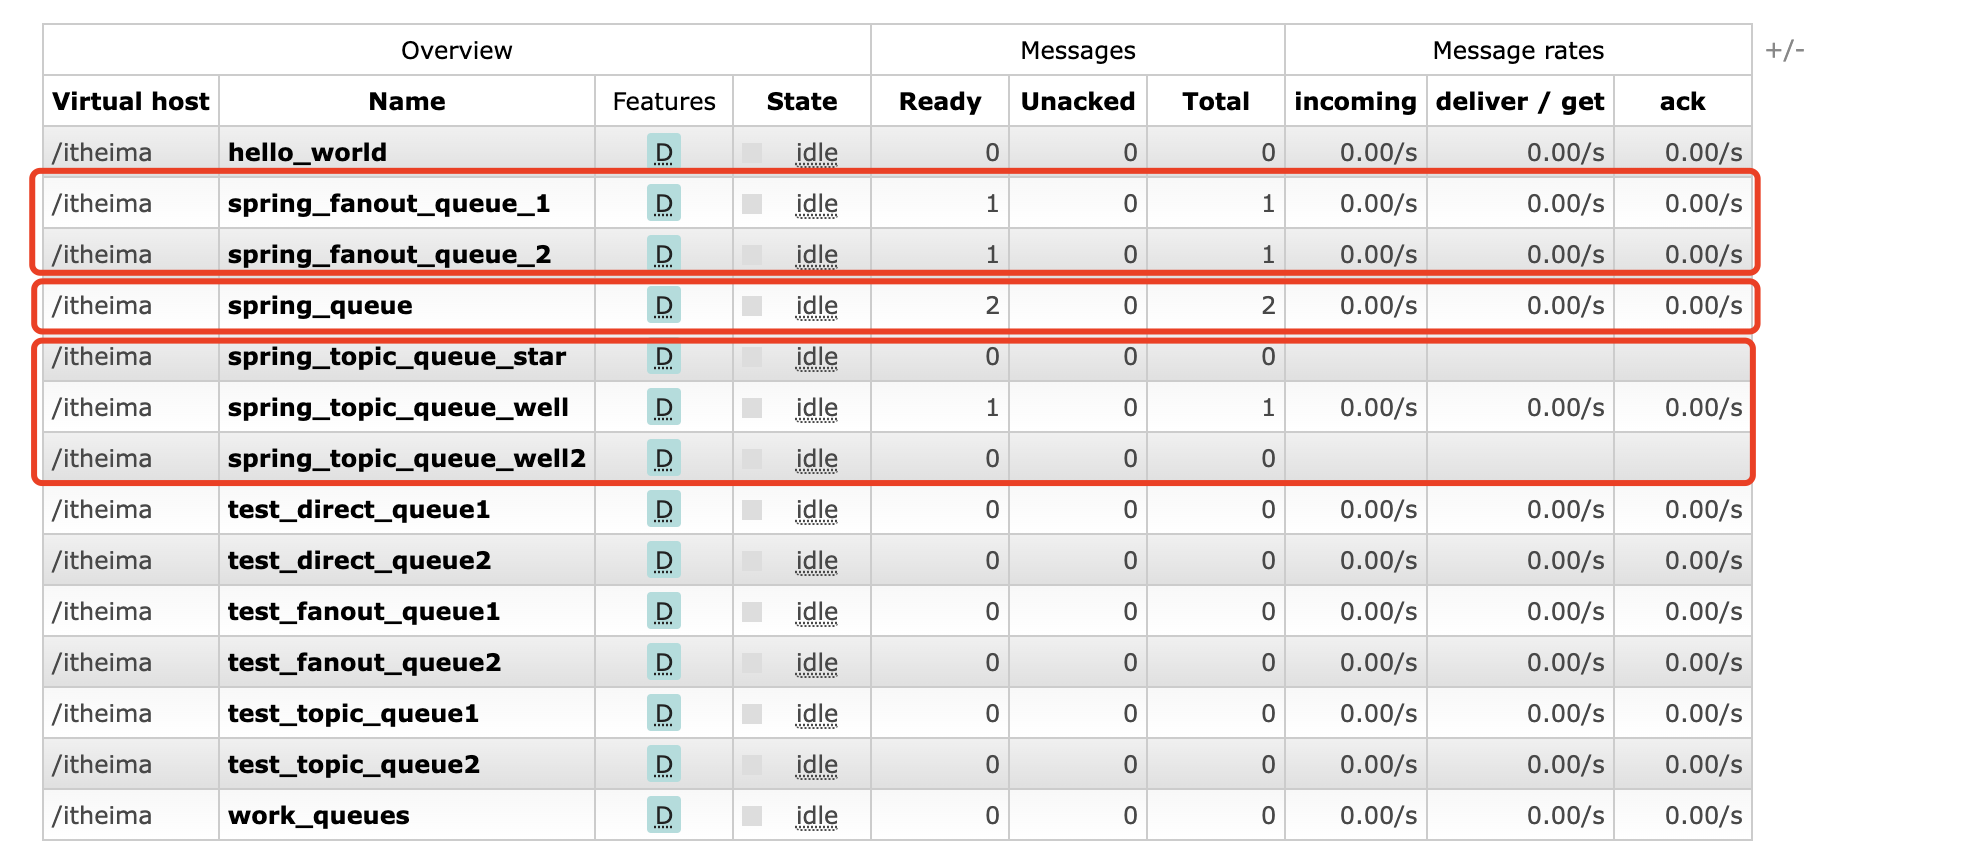
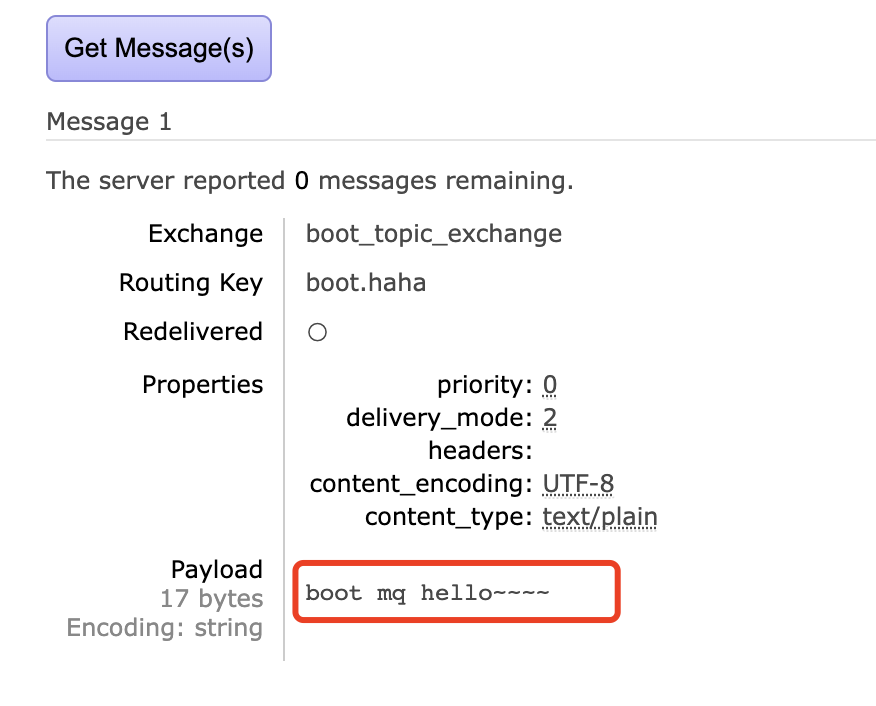
观察消息情况
消费者
编写配置文件

rabbitmq.properties
1 | rabbitmq.host=123.60.45.18 |
spring-rabbitmq-consumer.xml
1 | <beans xmlns="http://www.springframework.org/schema/beans" xmlns:xsi="http://www.w3.org/2001/XMLSchema-instance" xmlns:context="http://www.springframework.org/schema/context" xmlns:rabbit="http://www.springframework.org/schema/rabbit" xsi:schemaLocation="http://www.springframework.org/schema/beans http://www.springframework.org/schema/beans/spring-beans.xsd http://www.springframework.org/schema/context https://www.springframework.org/schema/context/spring-context.xsd http://www.springframework.org/schema/rabbit http://www.springframework.org/schema/rabbit/spring-rabbit.xsd"> |
编写监听器
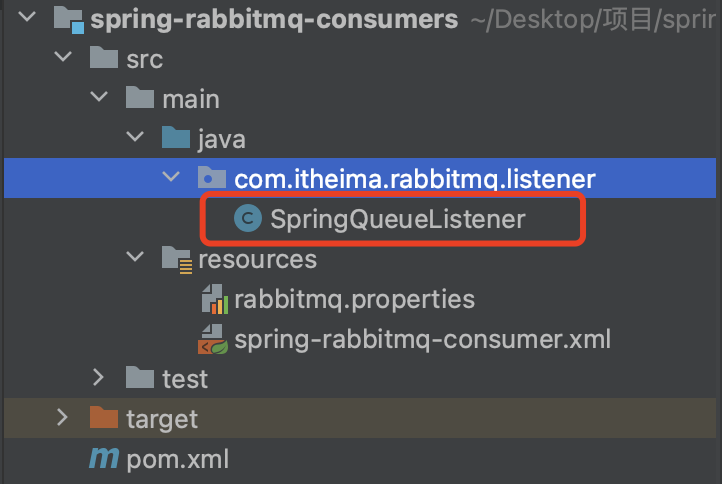
1 | package com.itheima.rabbitmq.listener; |
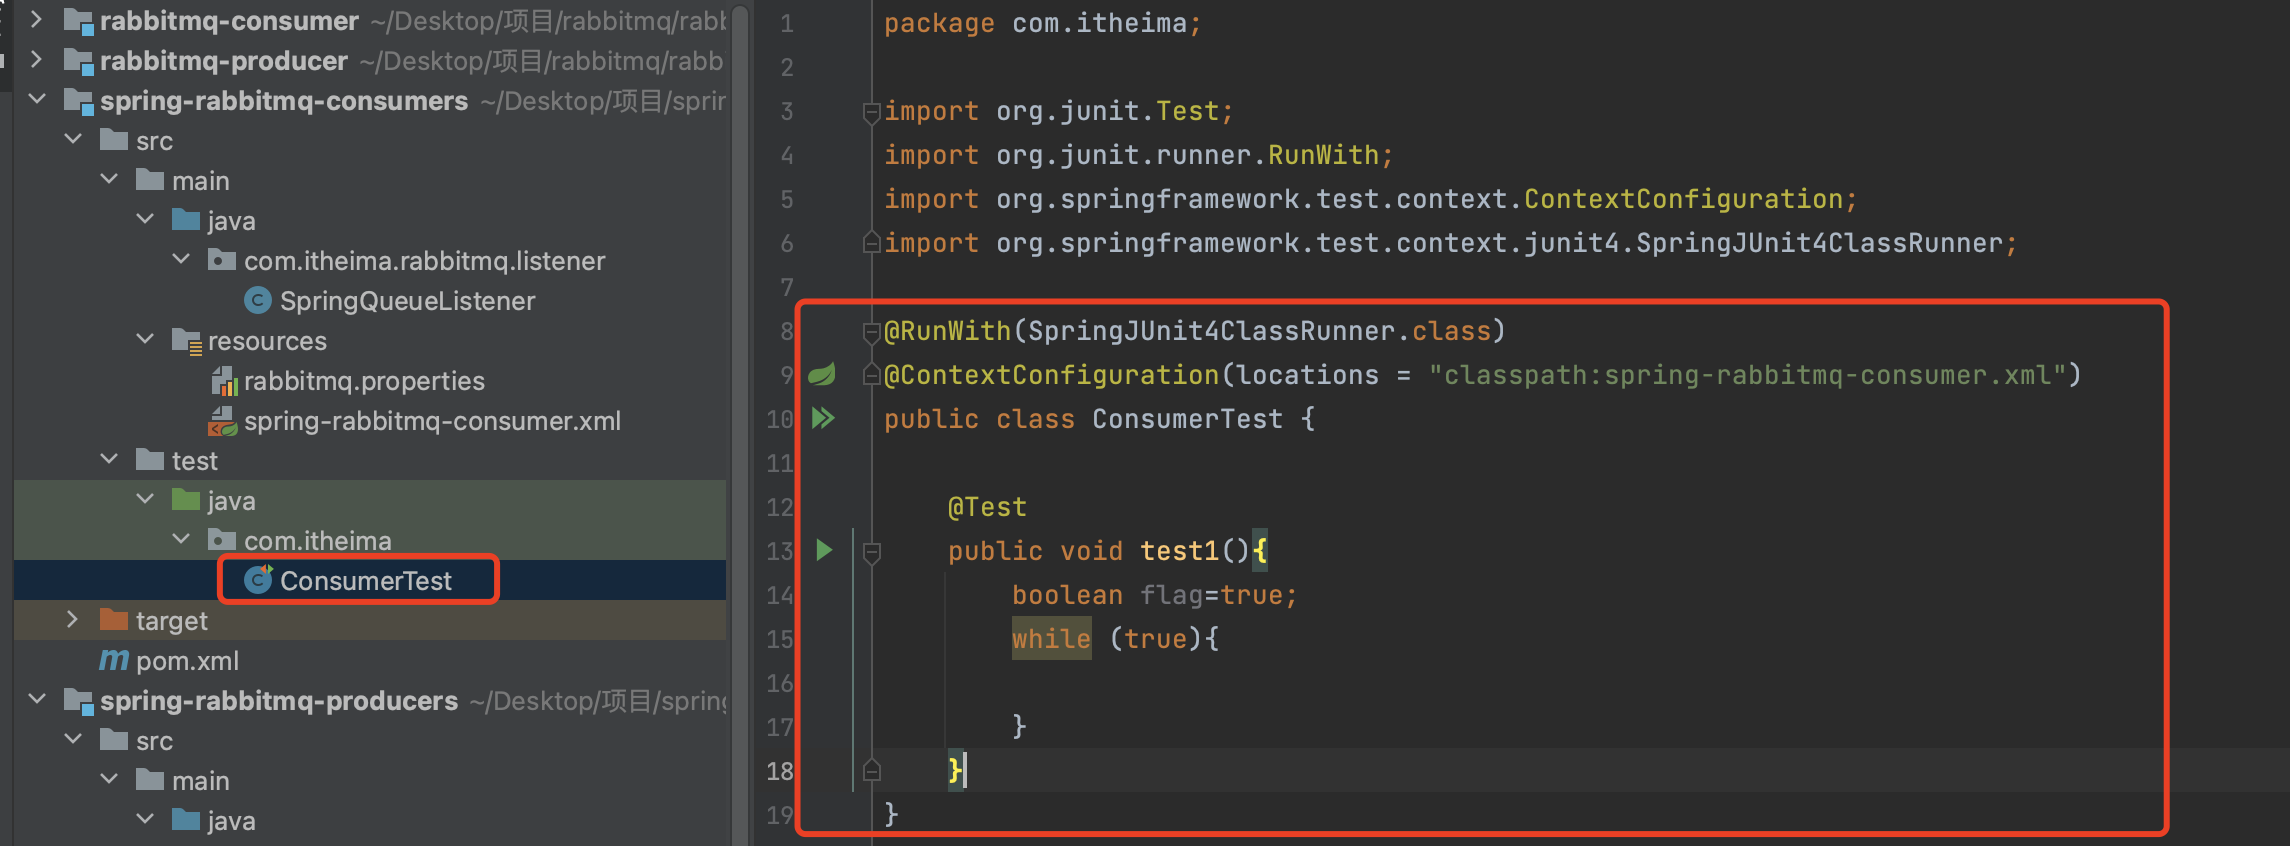
编写测试方法启动服务监听
SpringBoot整合RabbitMQ
生产者
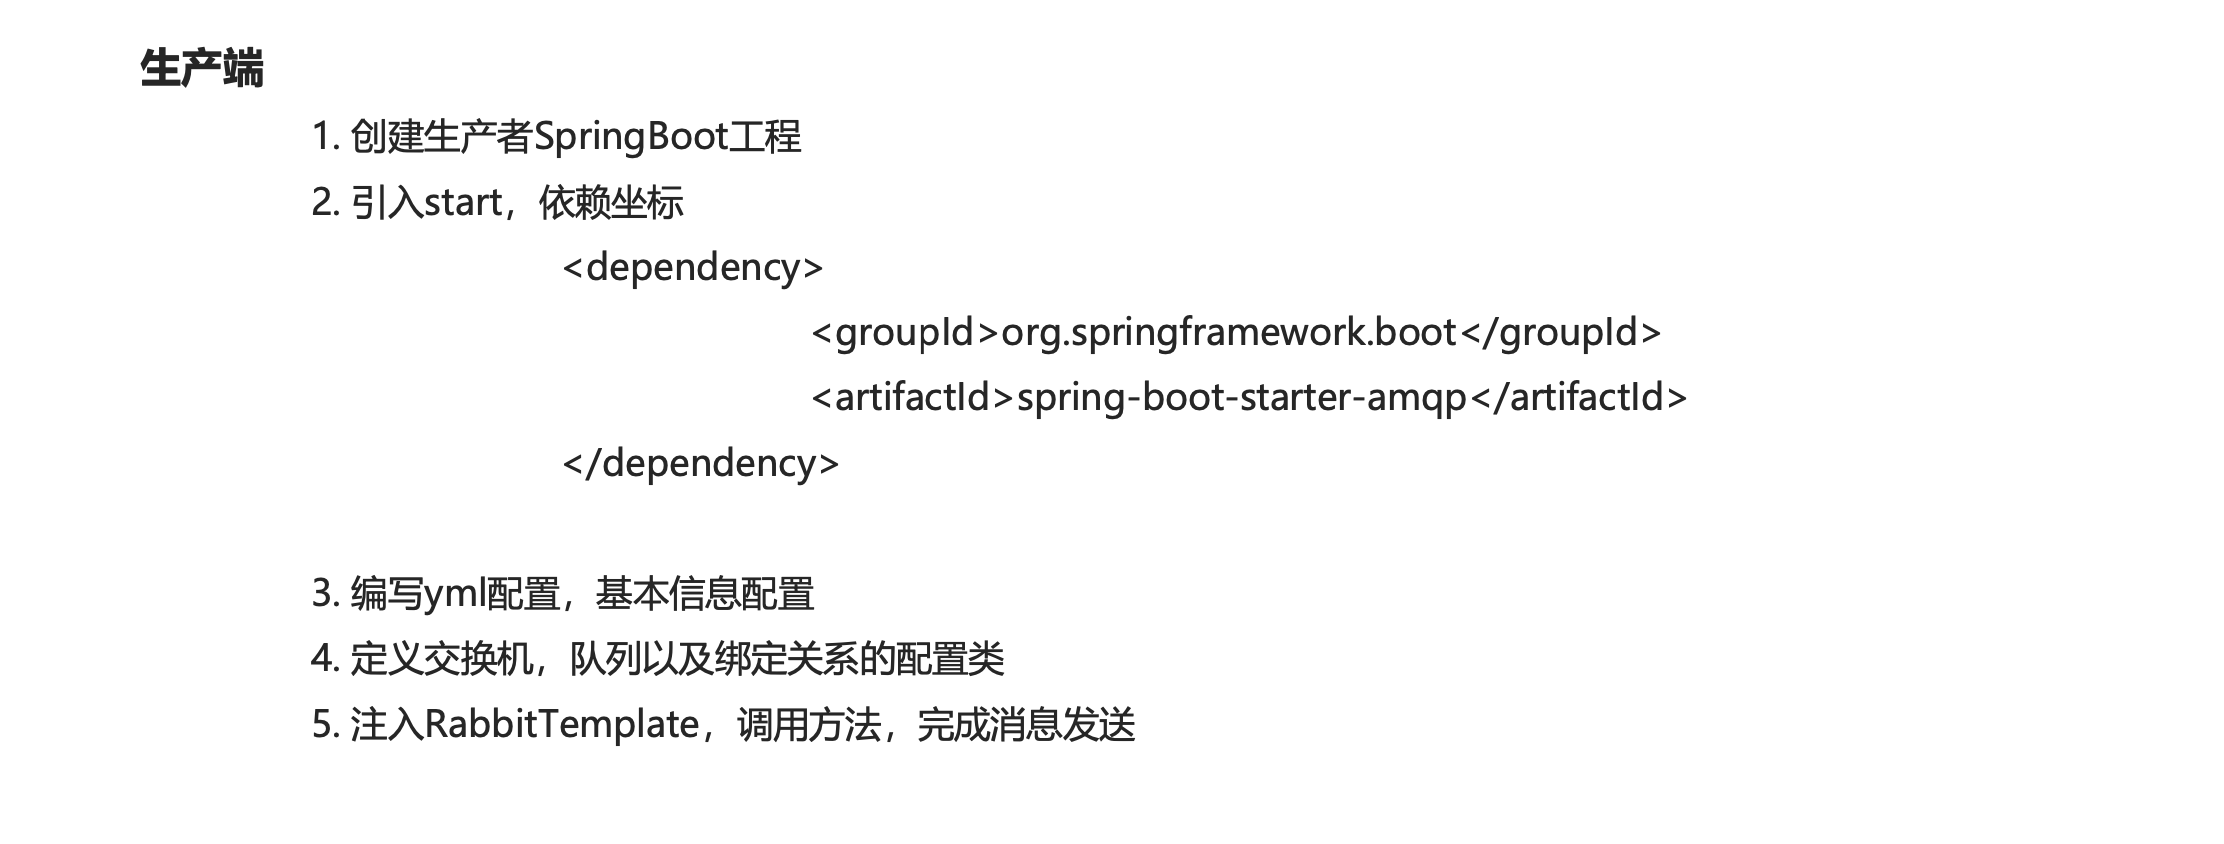
创建springboot工程并引入依赖
1 |
|
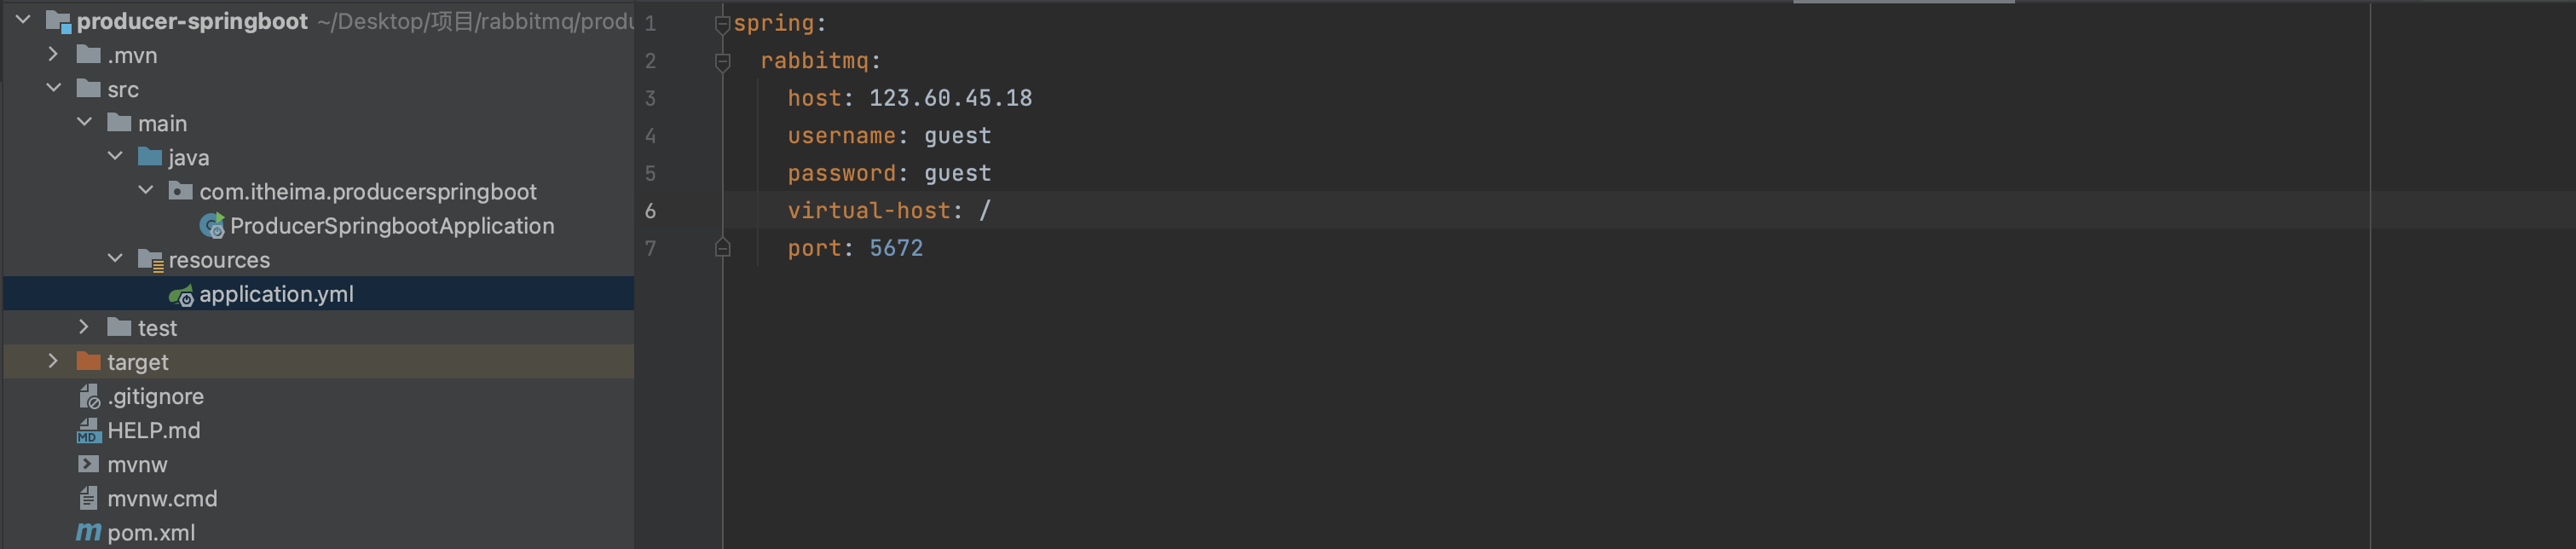
配置文件
1 | spring: |
编写配置类

1 | package com.itheima.producerspringboot.rabbitmq.config; |
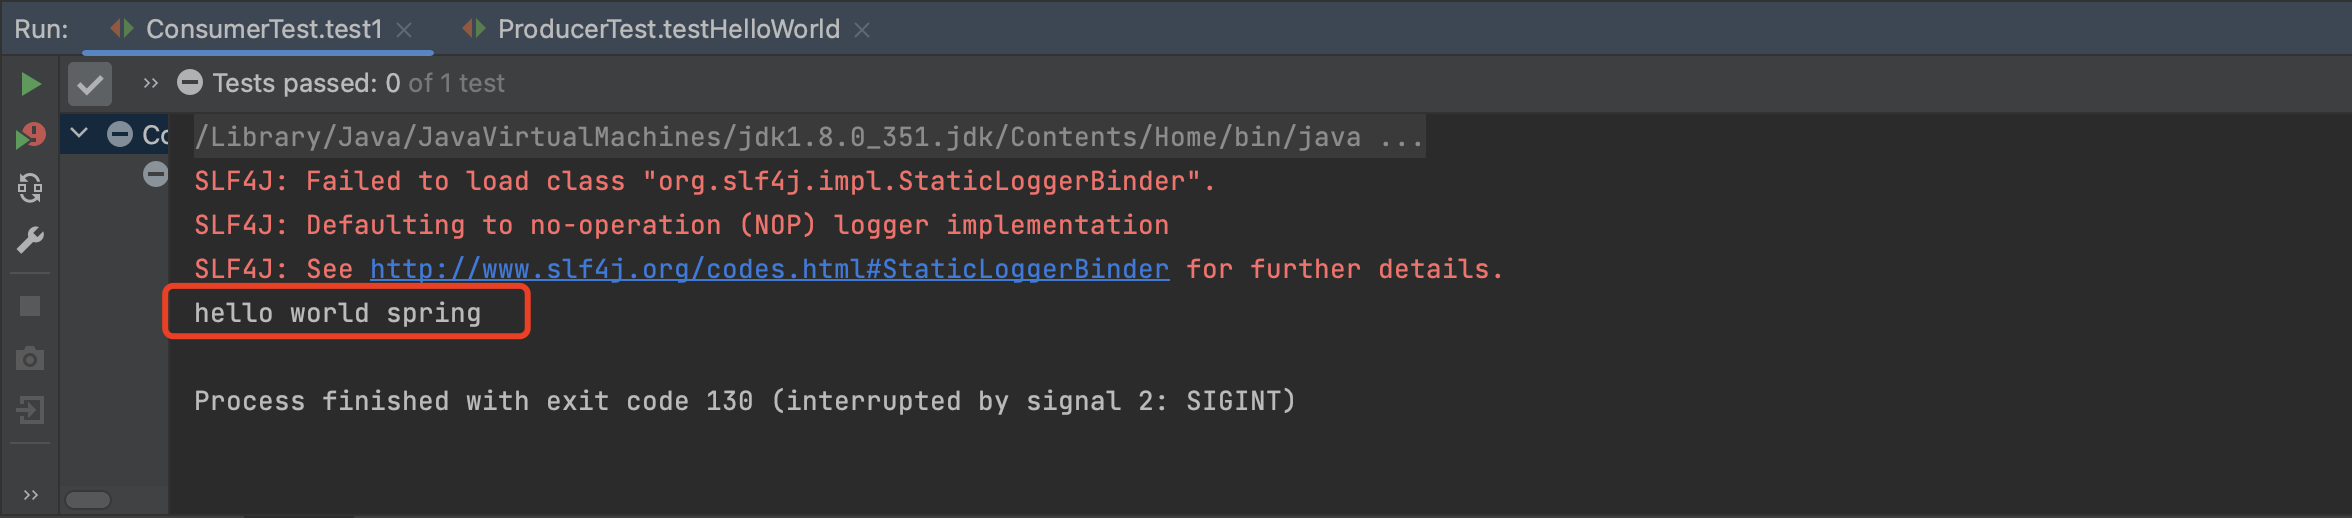
编写测试方法
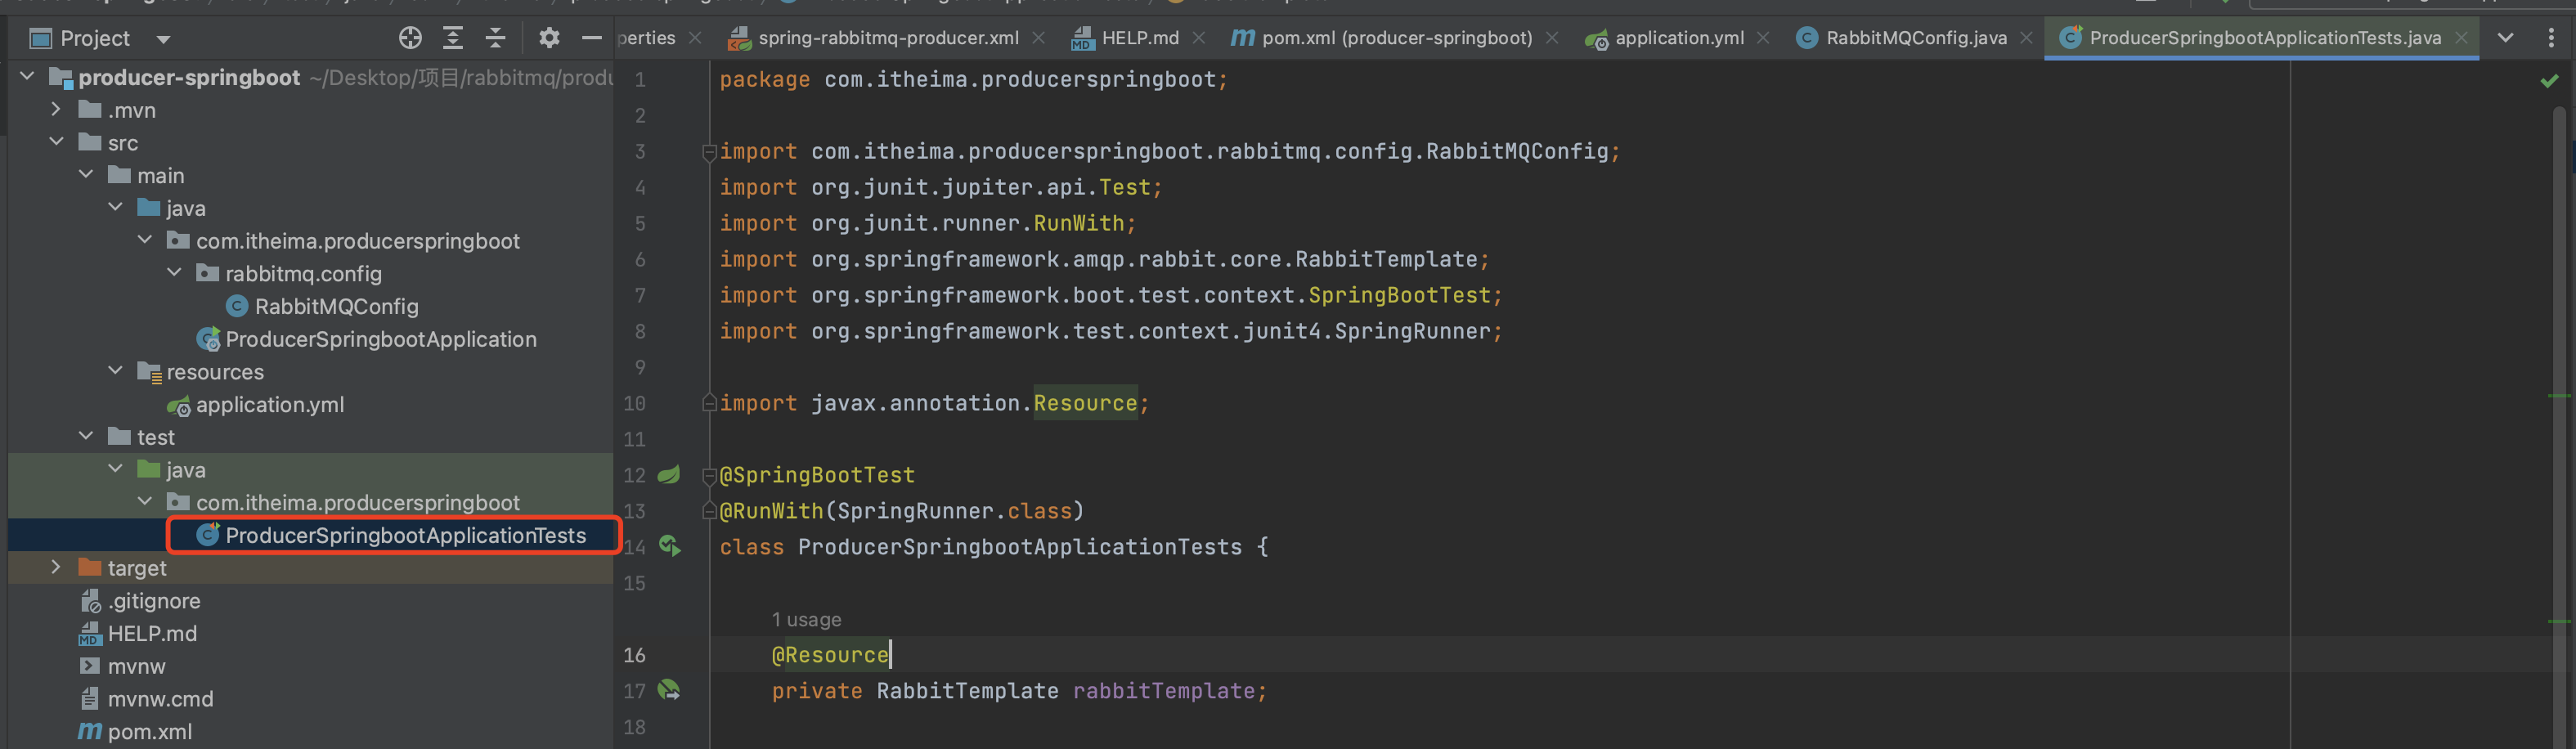
1 | package com.itheima.producerspringboot; |

消费者
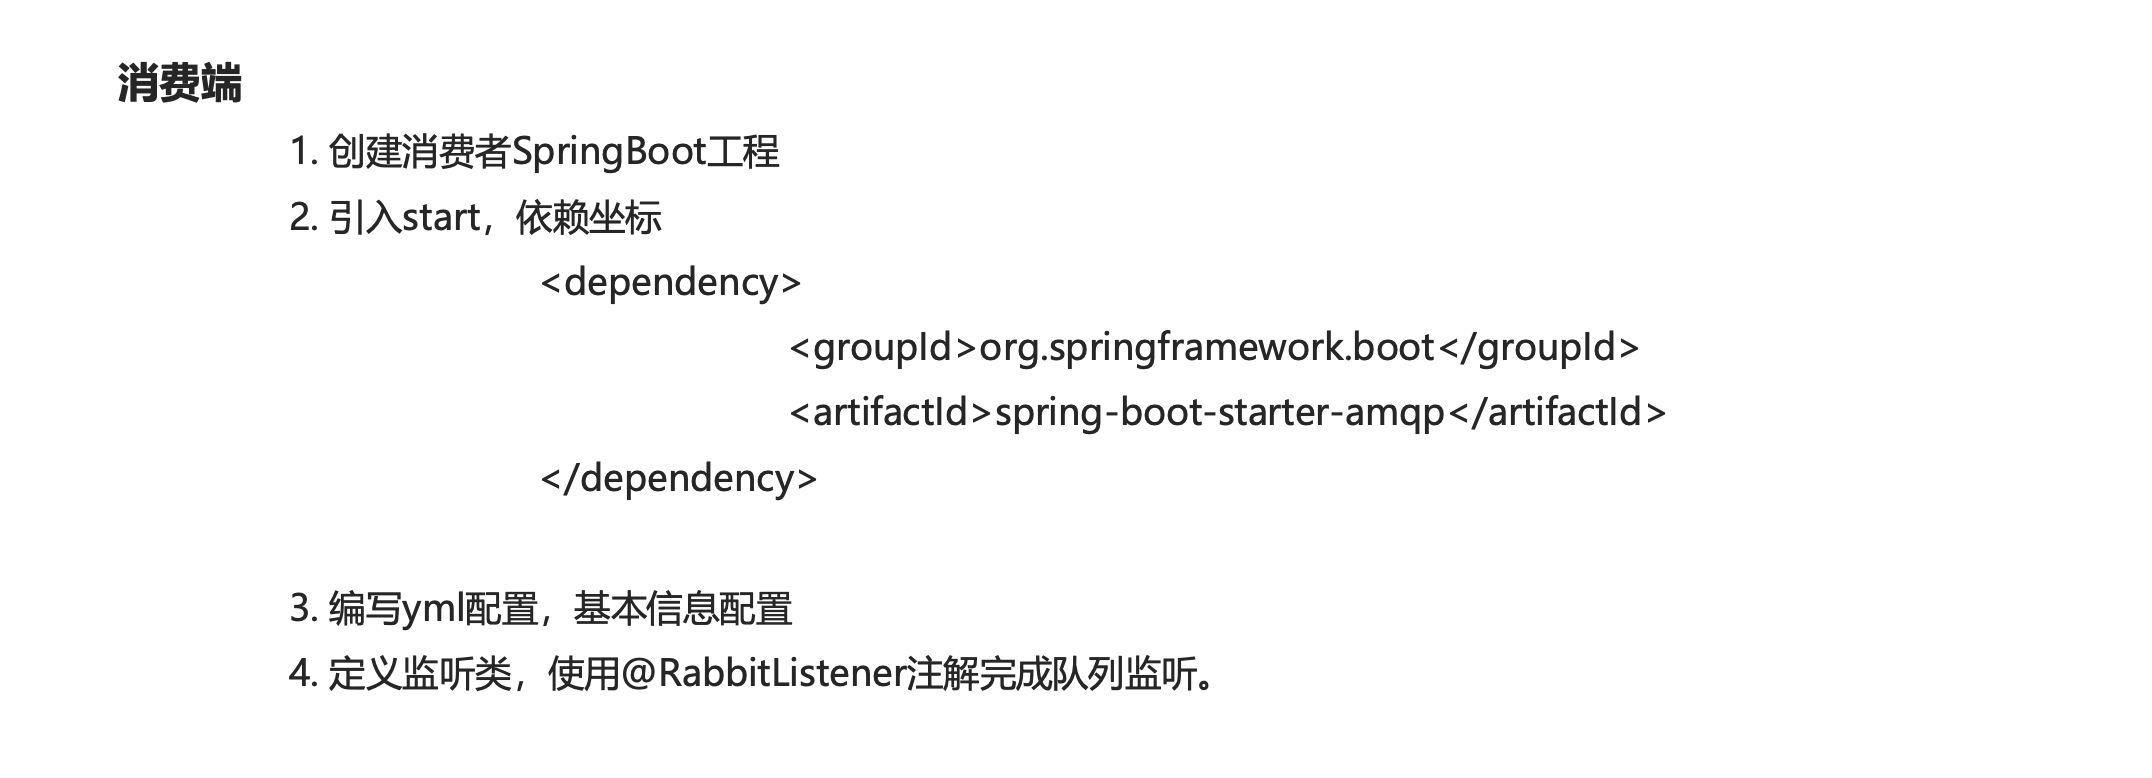
编写监听类
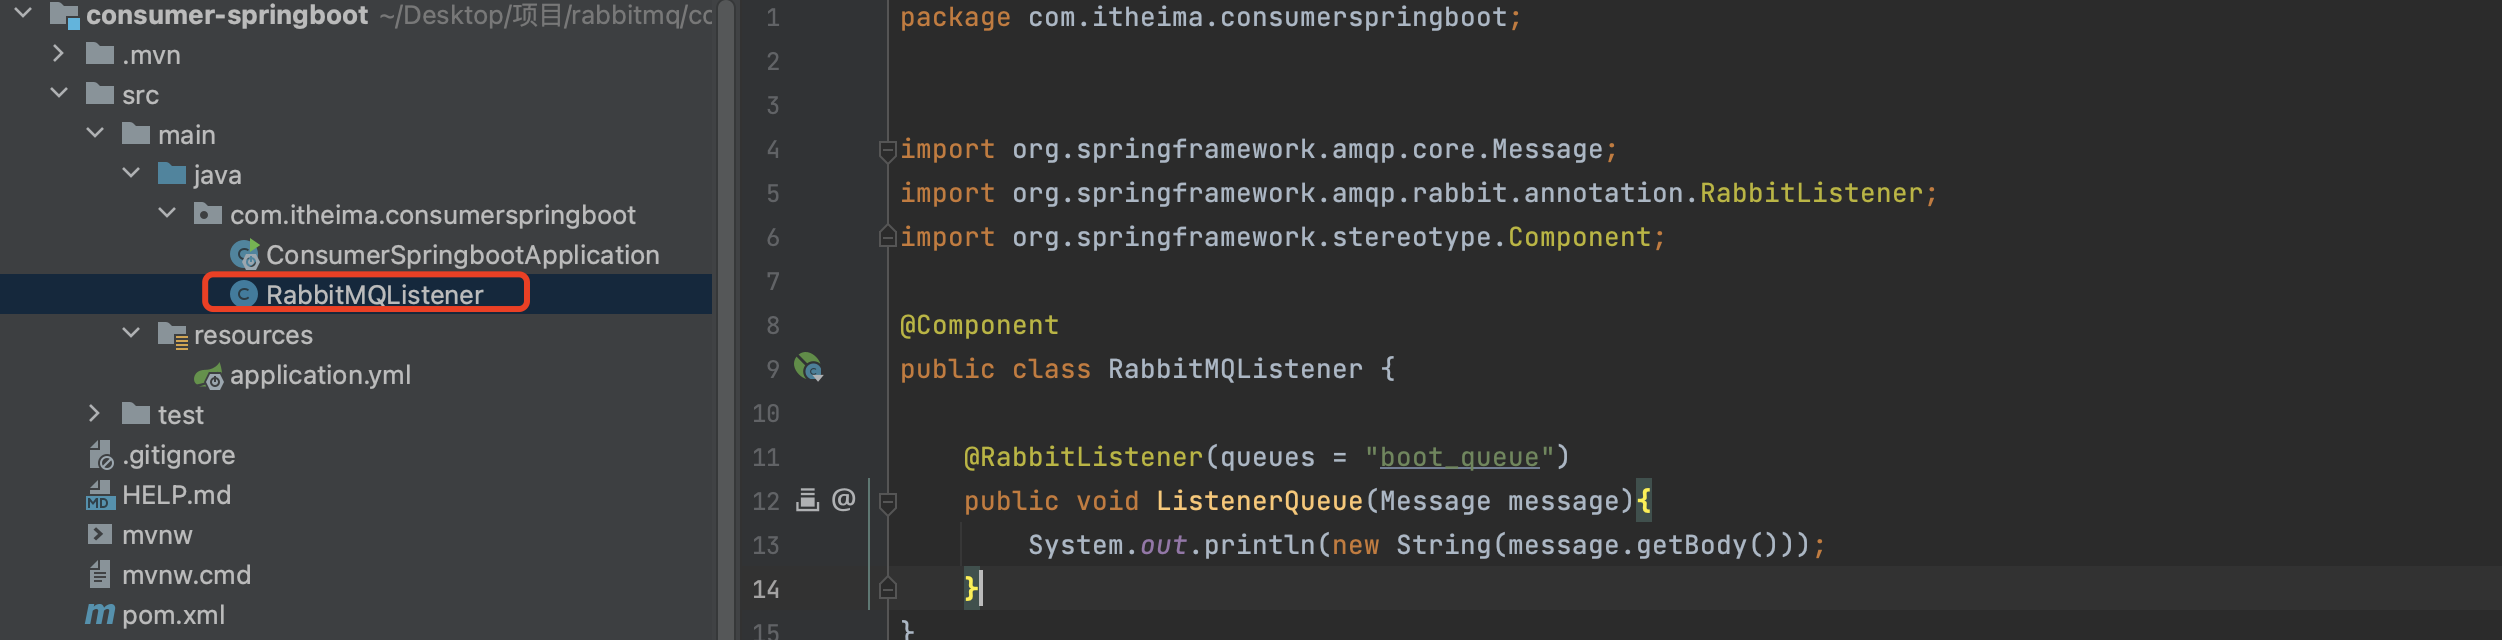
1 | package com.itheima.consumerspringboot; |
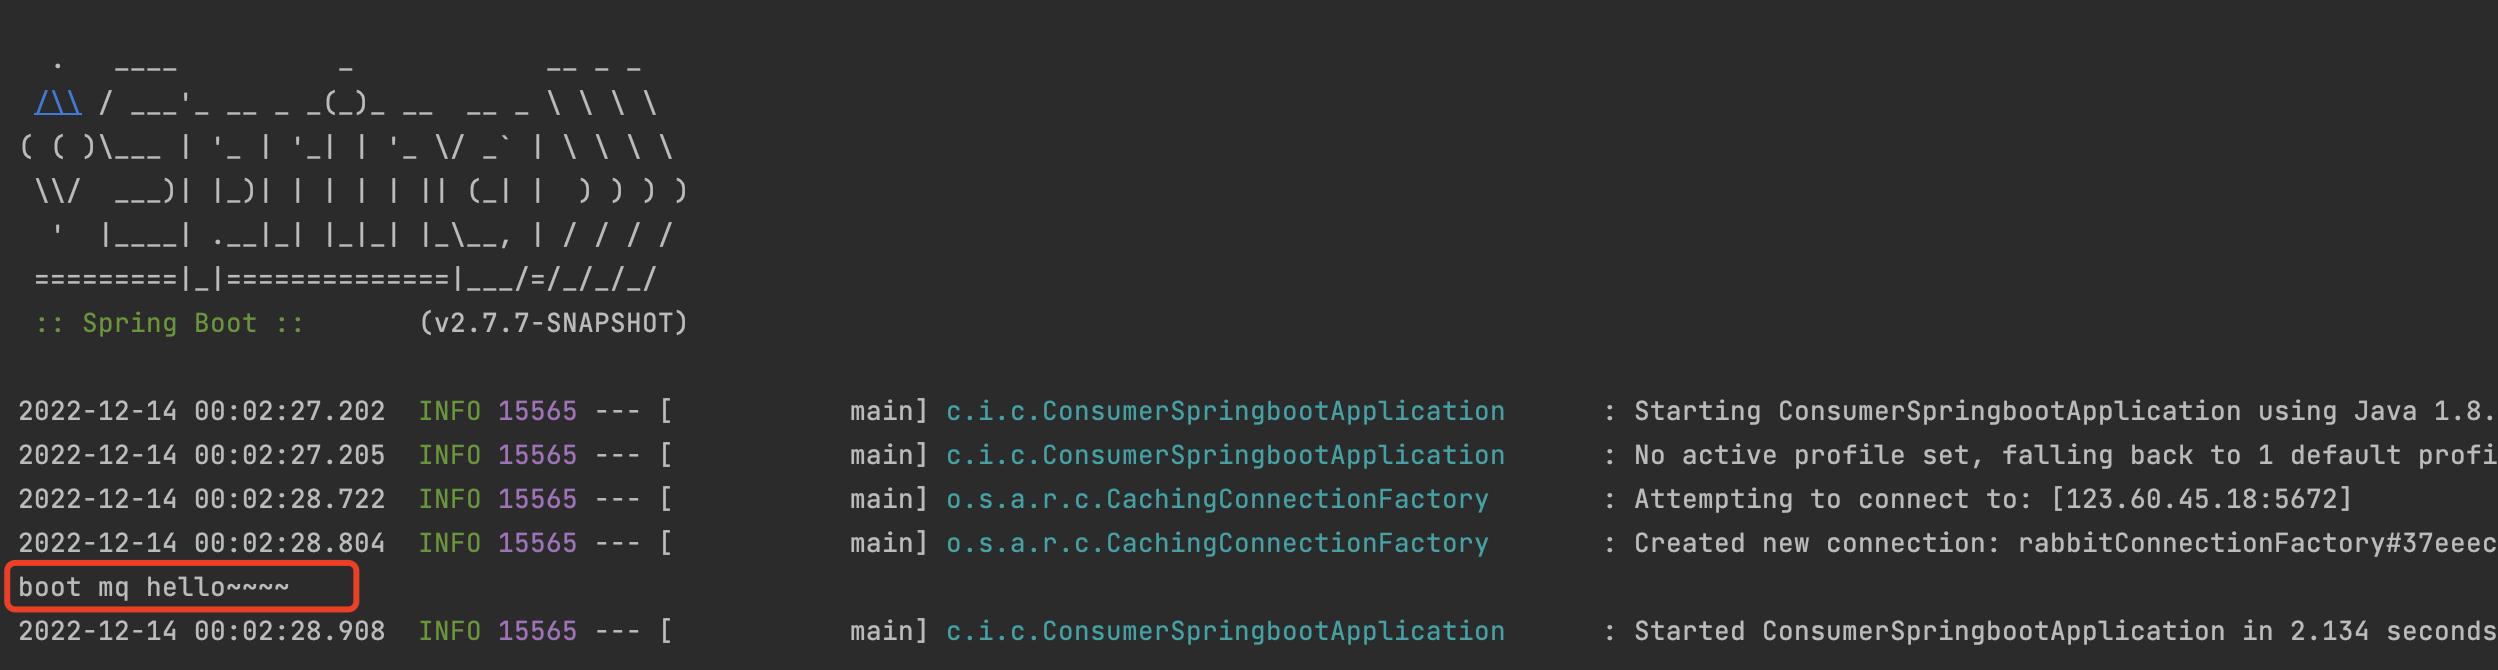
启动消费者springboot
小结

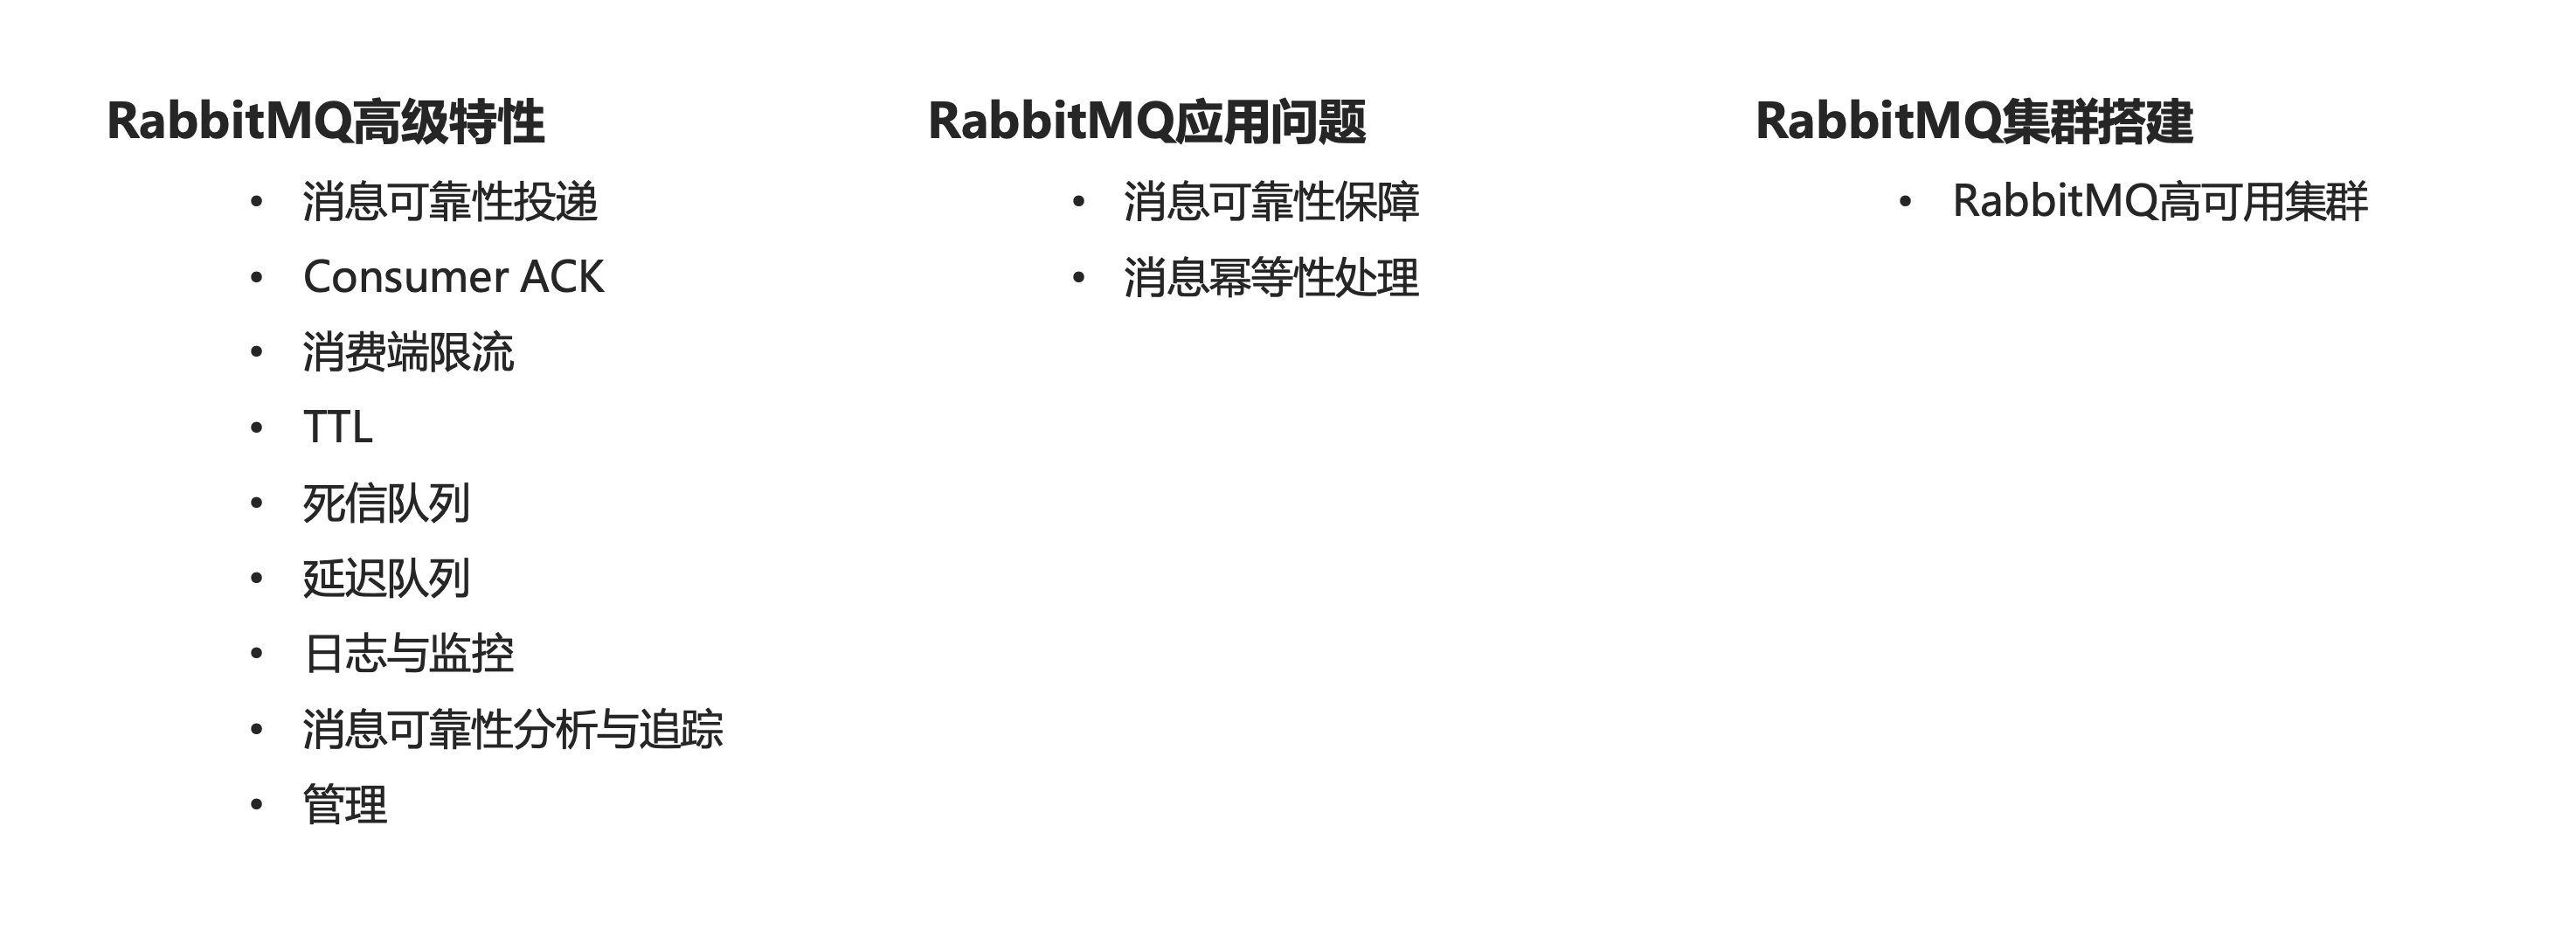
RabbitMQ高级特性
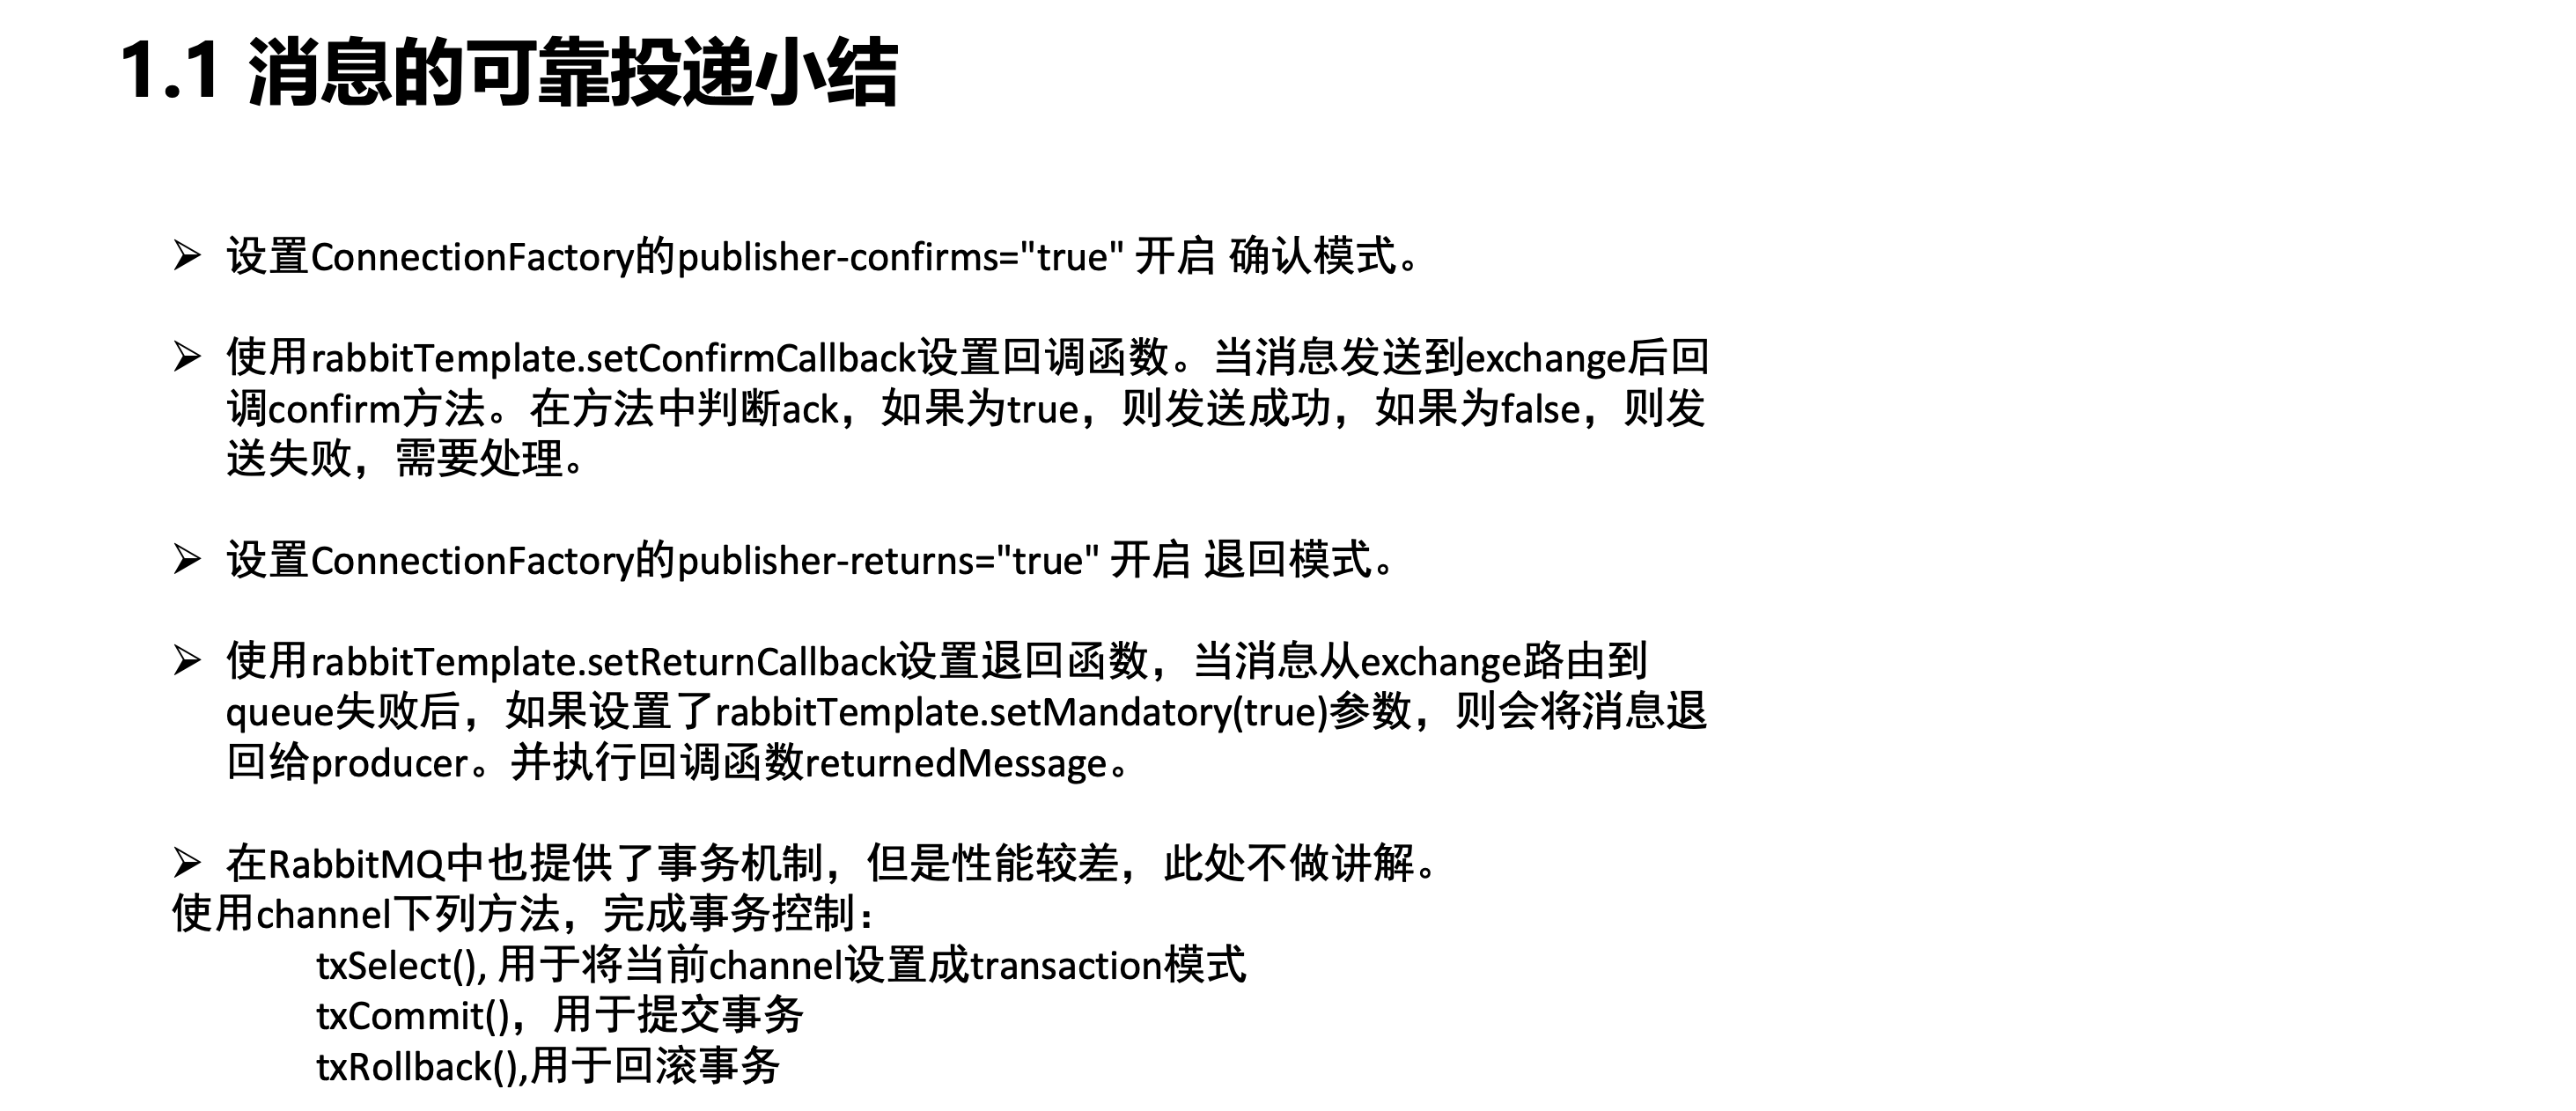
消息的可靠投递
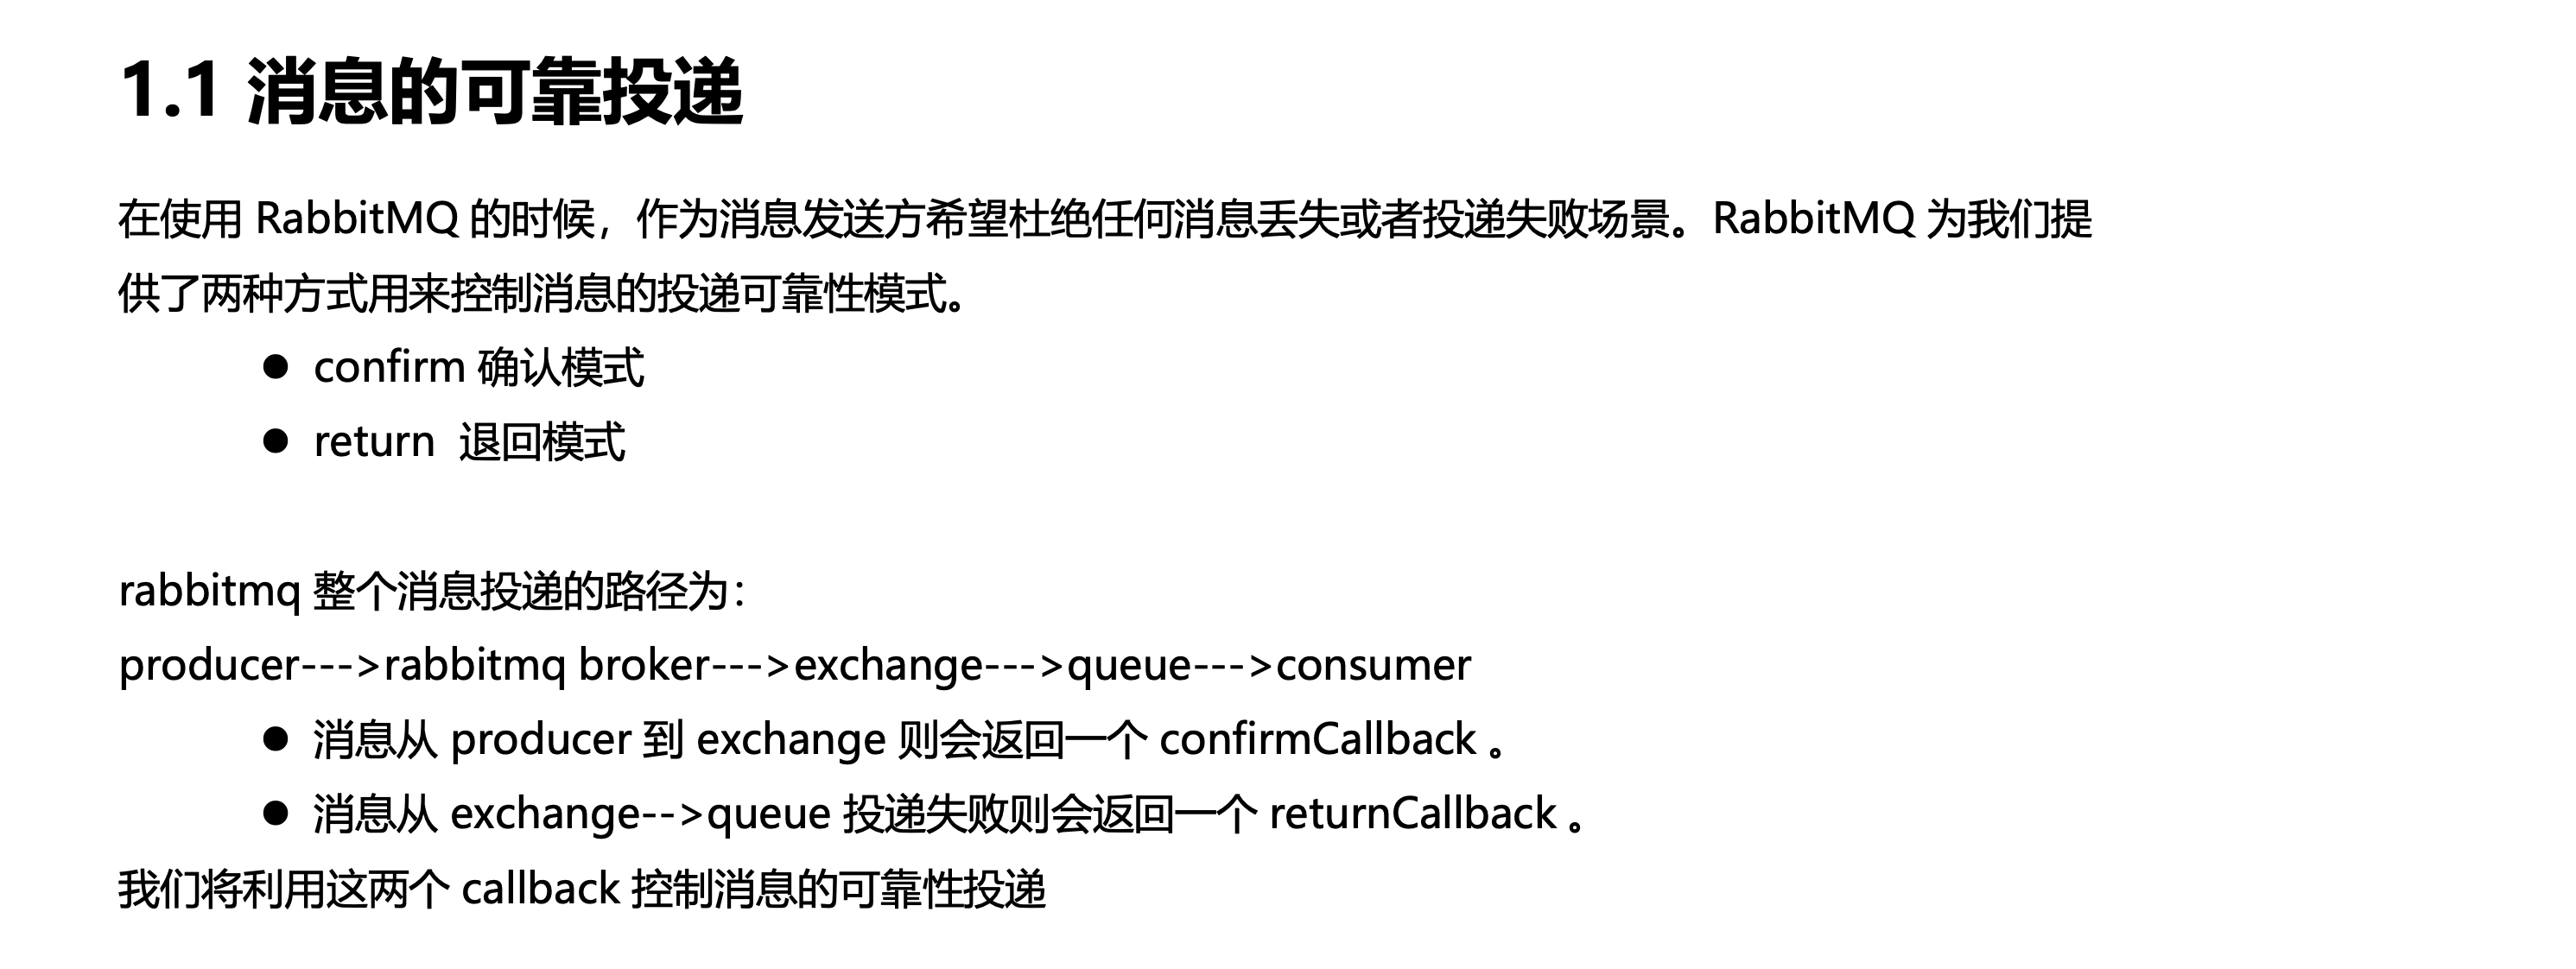
confirm模式
生产者
创建一个基于spring的工程
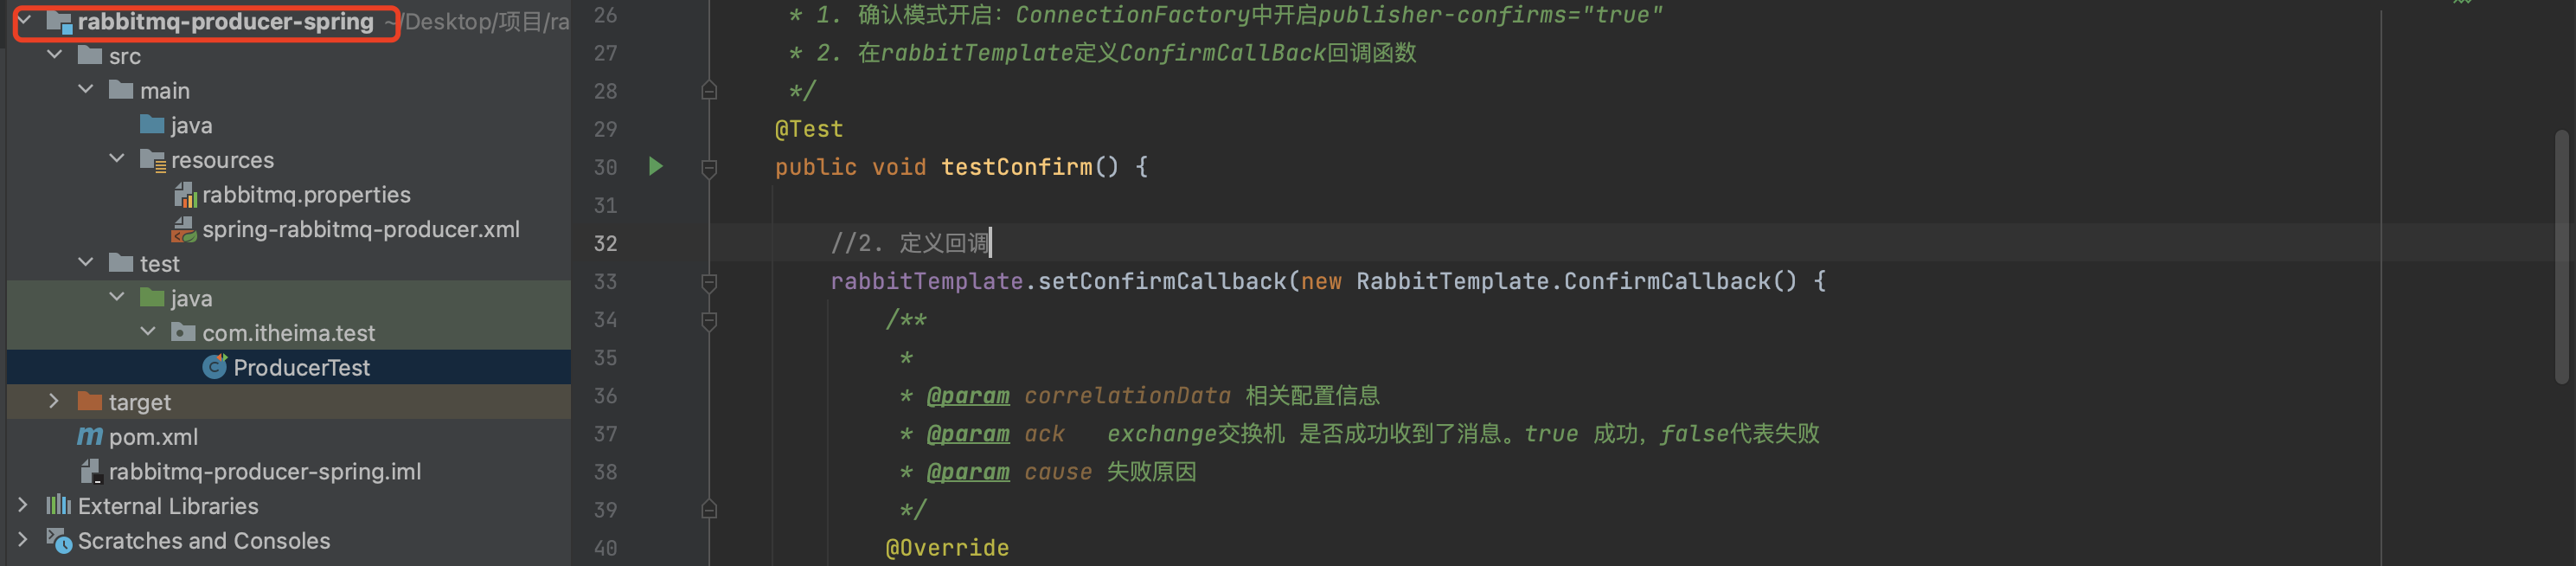
编写配置文件
1 |
|
编写测试类及测试方法

1 | package com.itheima.test; |
执行测试方法

模拟交换机名称错误,并发送消息
1 | //3. 发送消息 |

return模式
开启return模式

编写return模式测试方法并开启处理失败消息的模式
1 |
|
routingkey错误并执行测试方法

小结
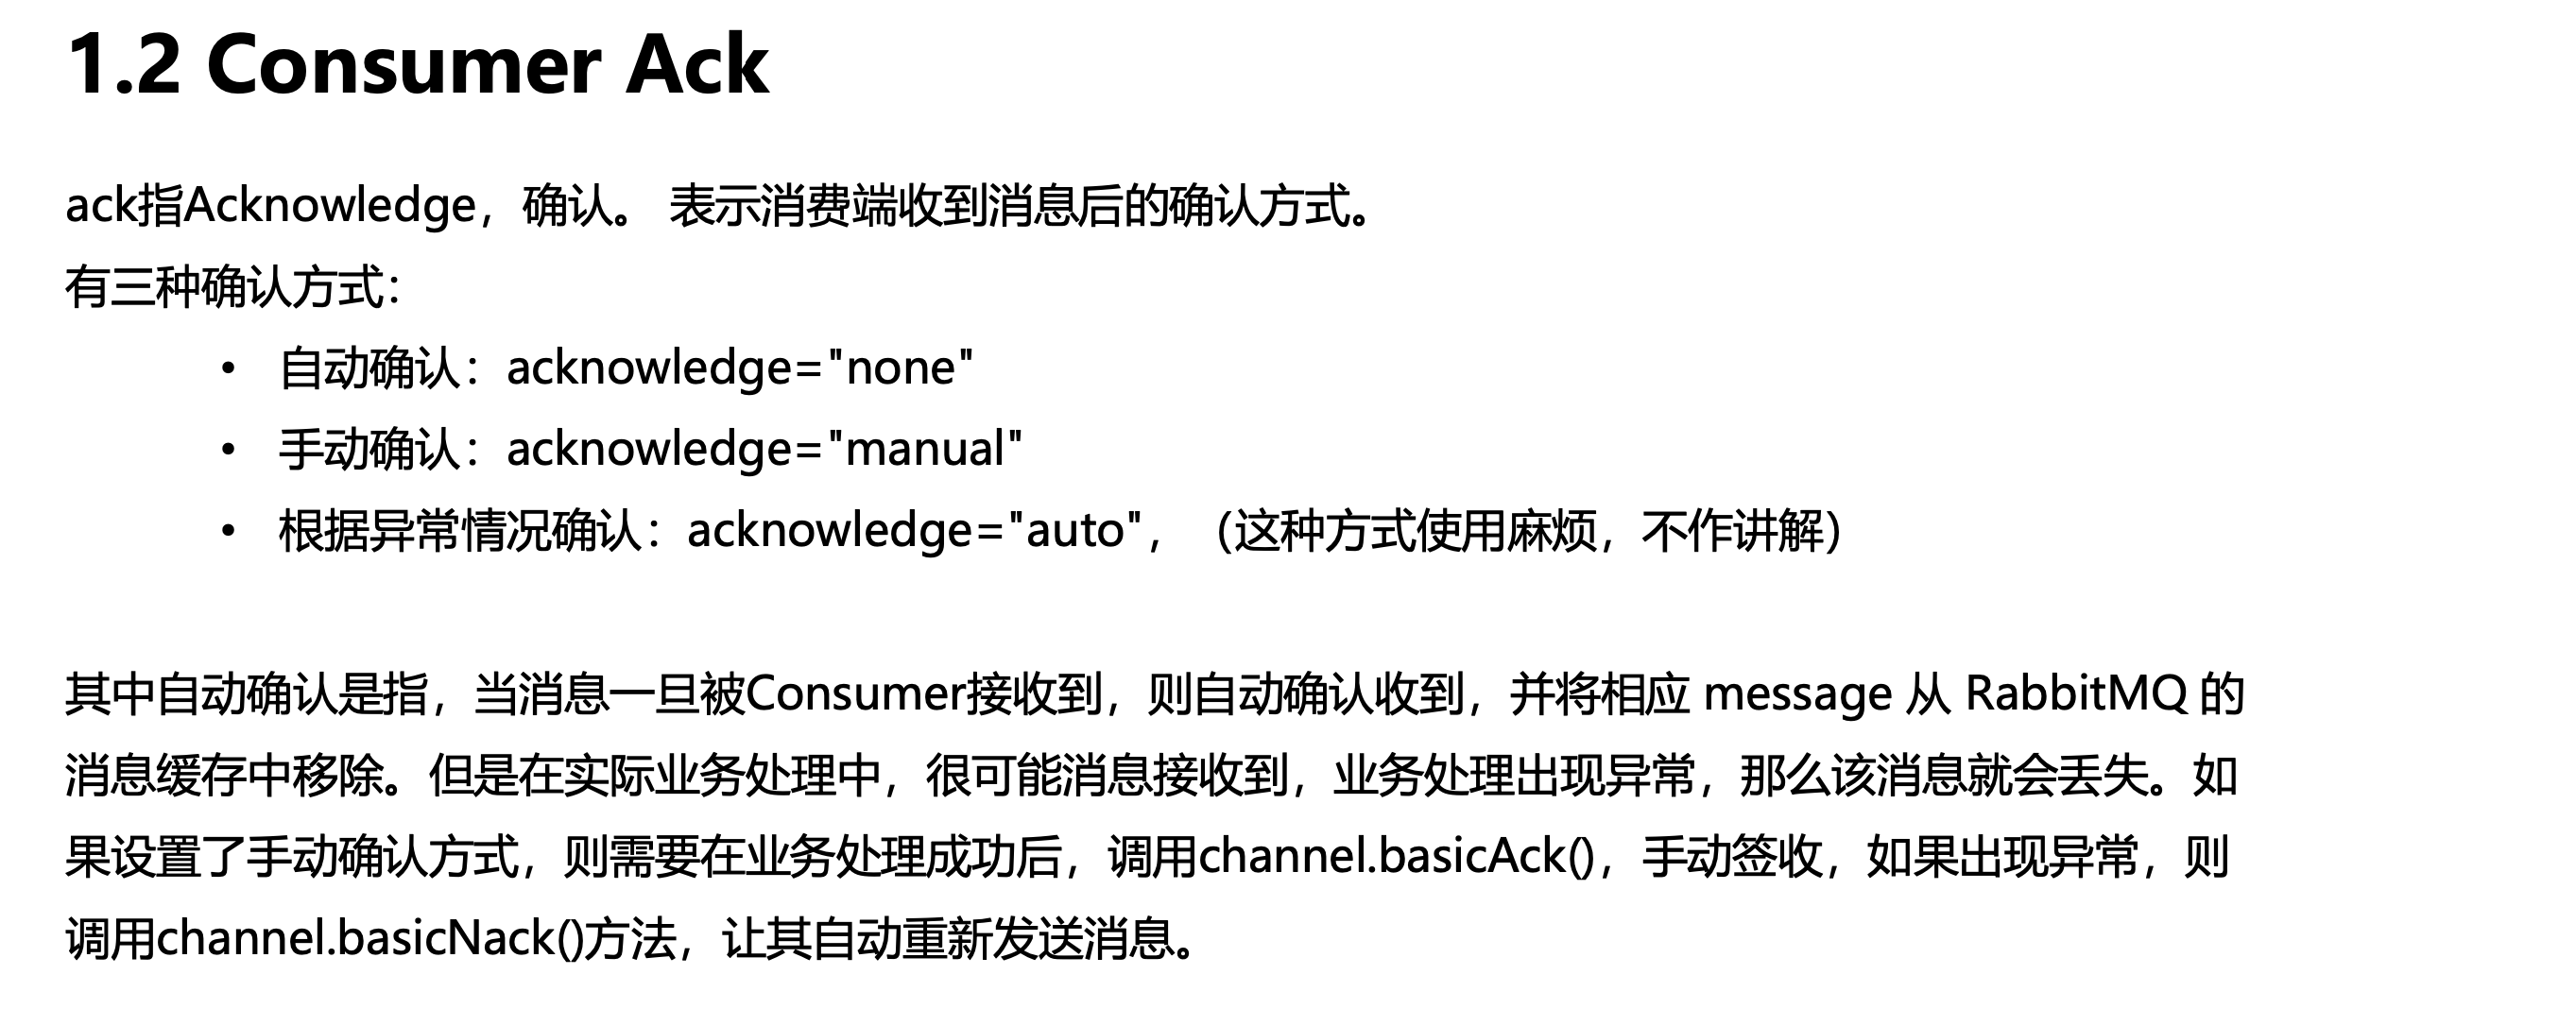
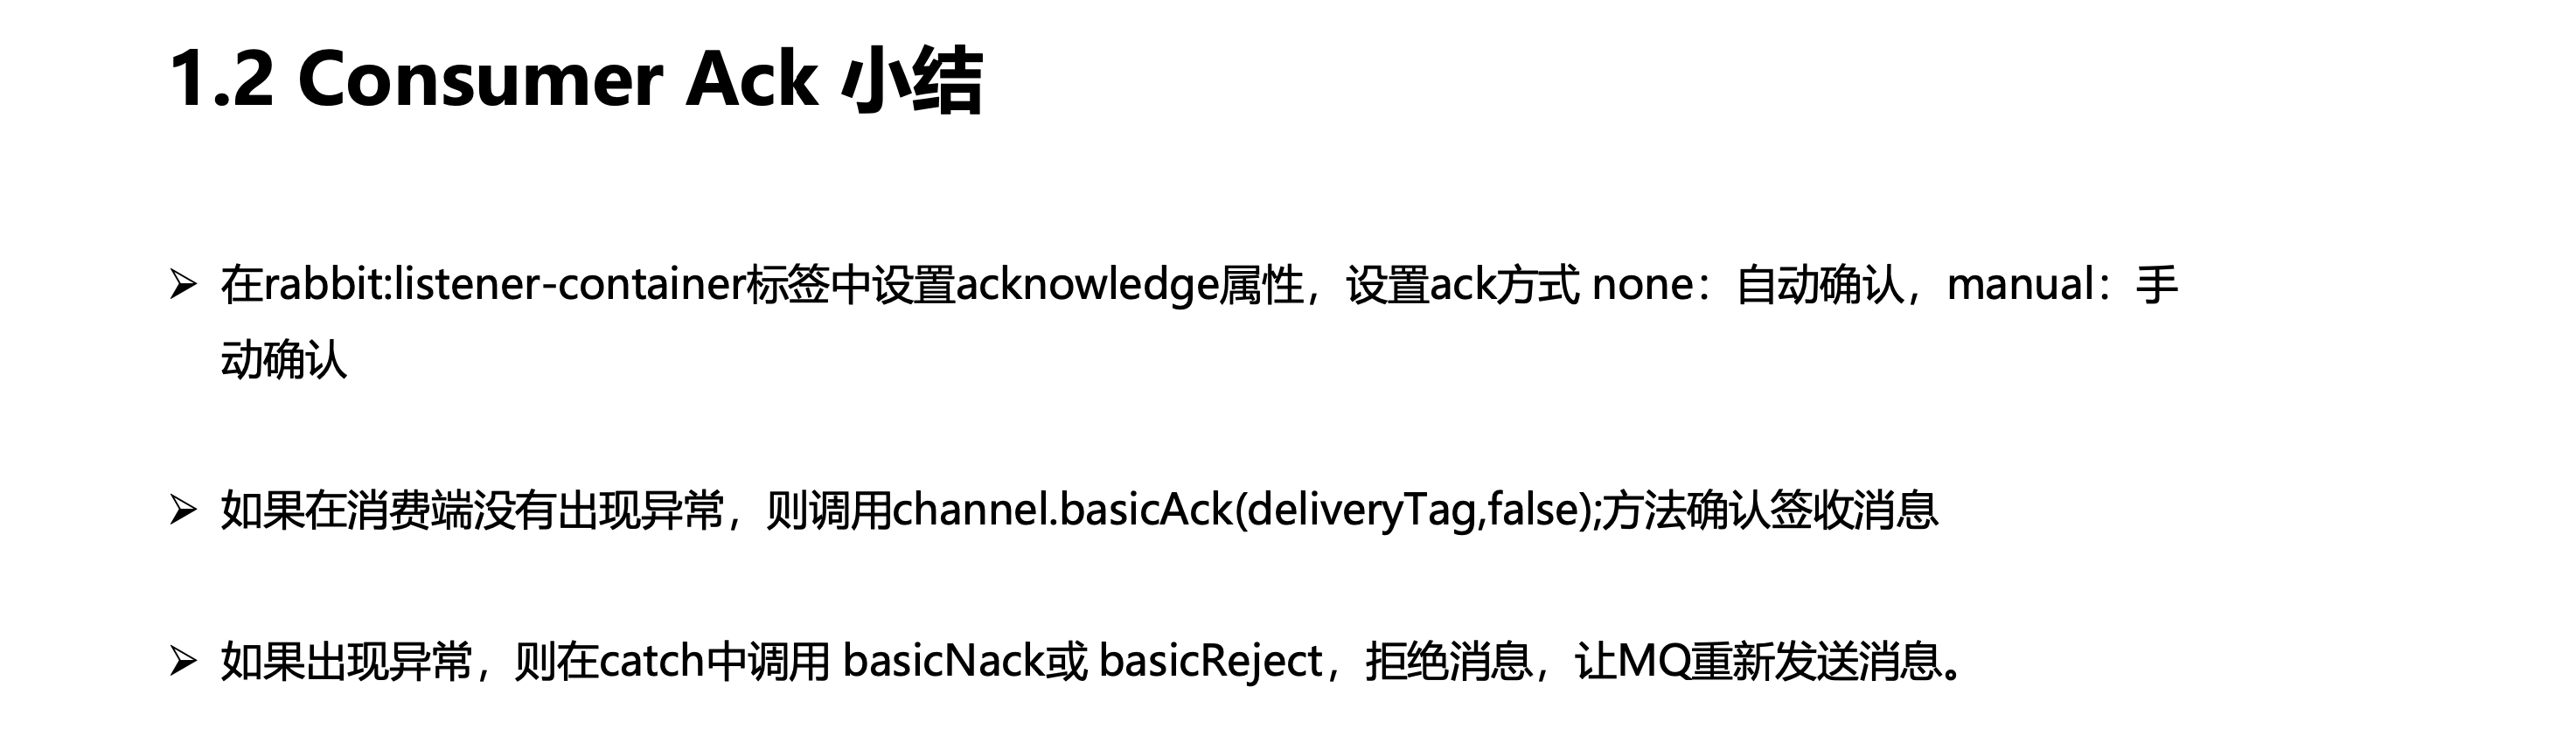
Consumer Ack
创建一个spring工程

定义监听器
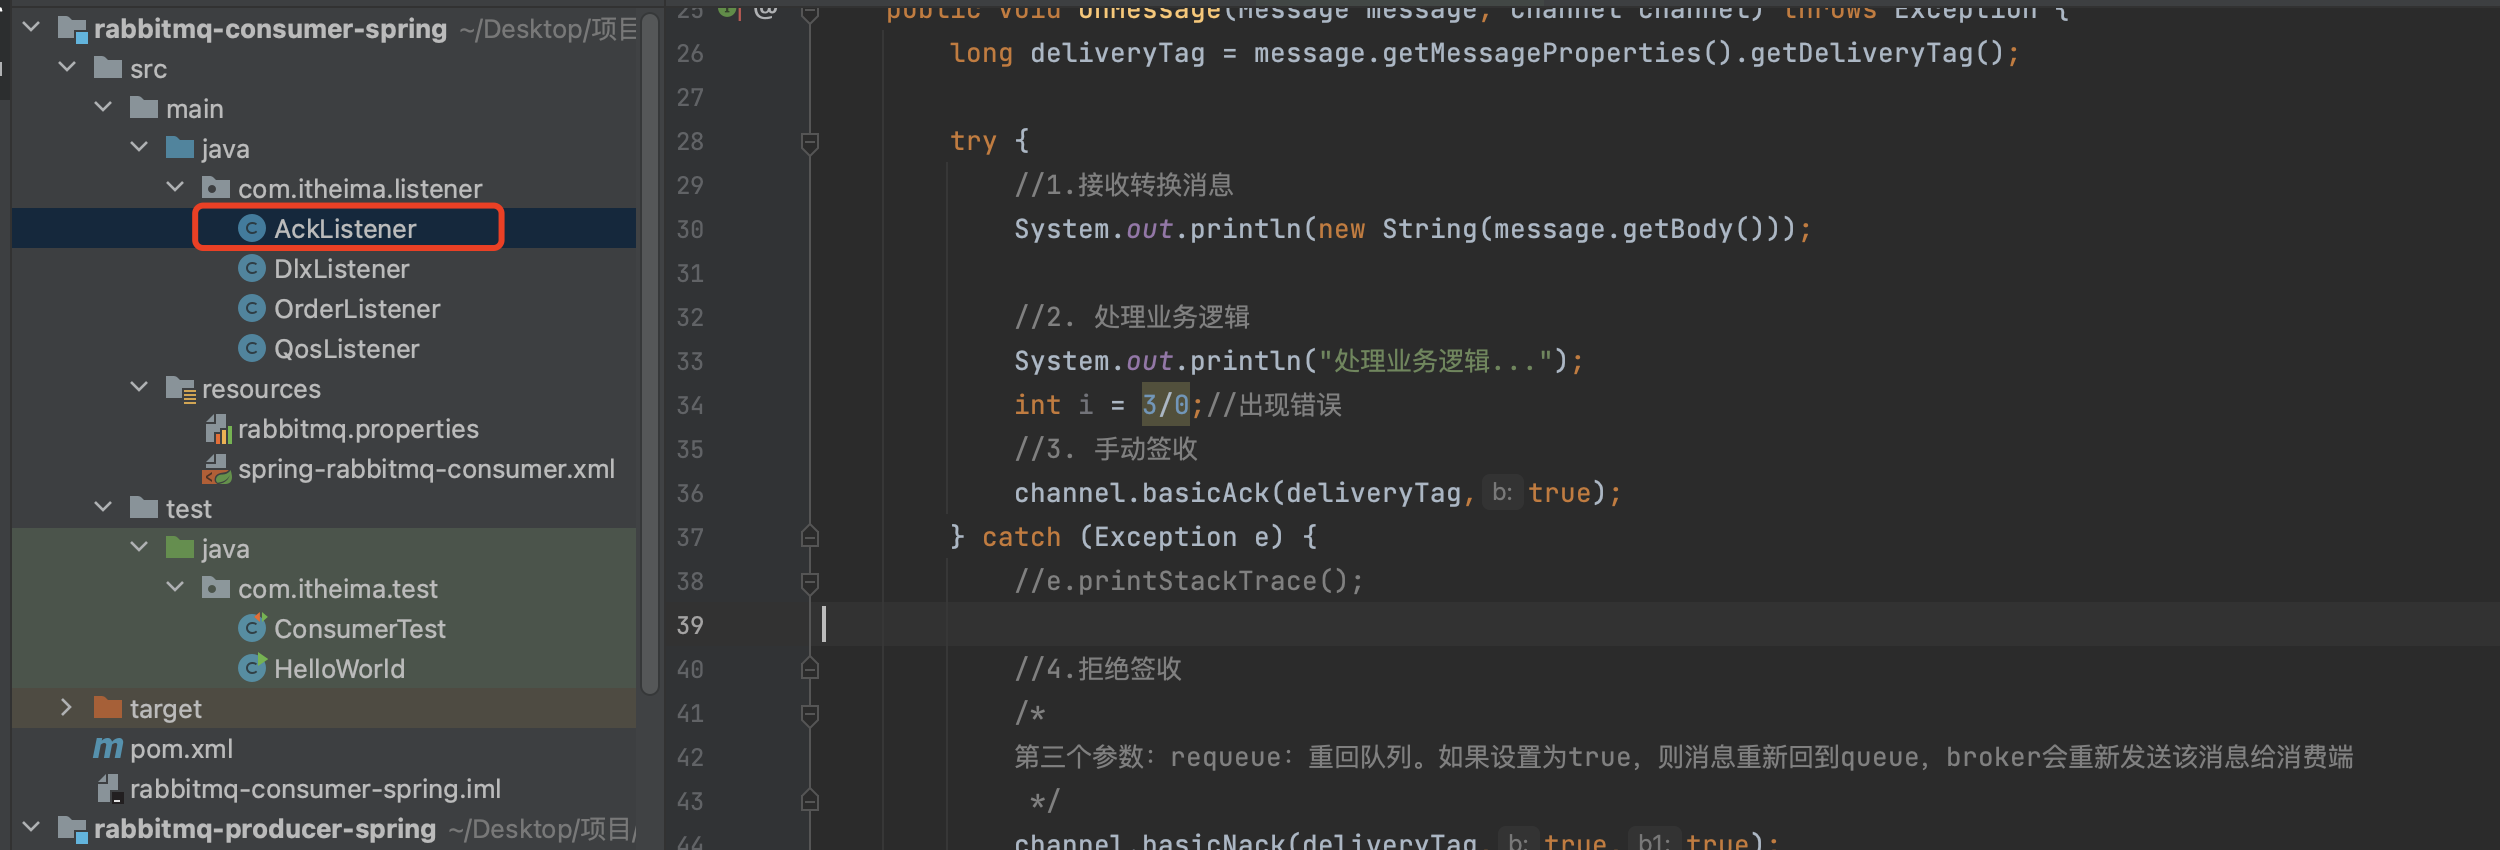
1 | package com.itheima.listener; |
修改spring配置文件,并开启手动签收
1 |
|
编写测试方法并启动
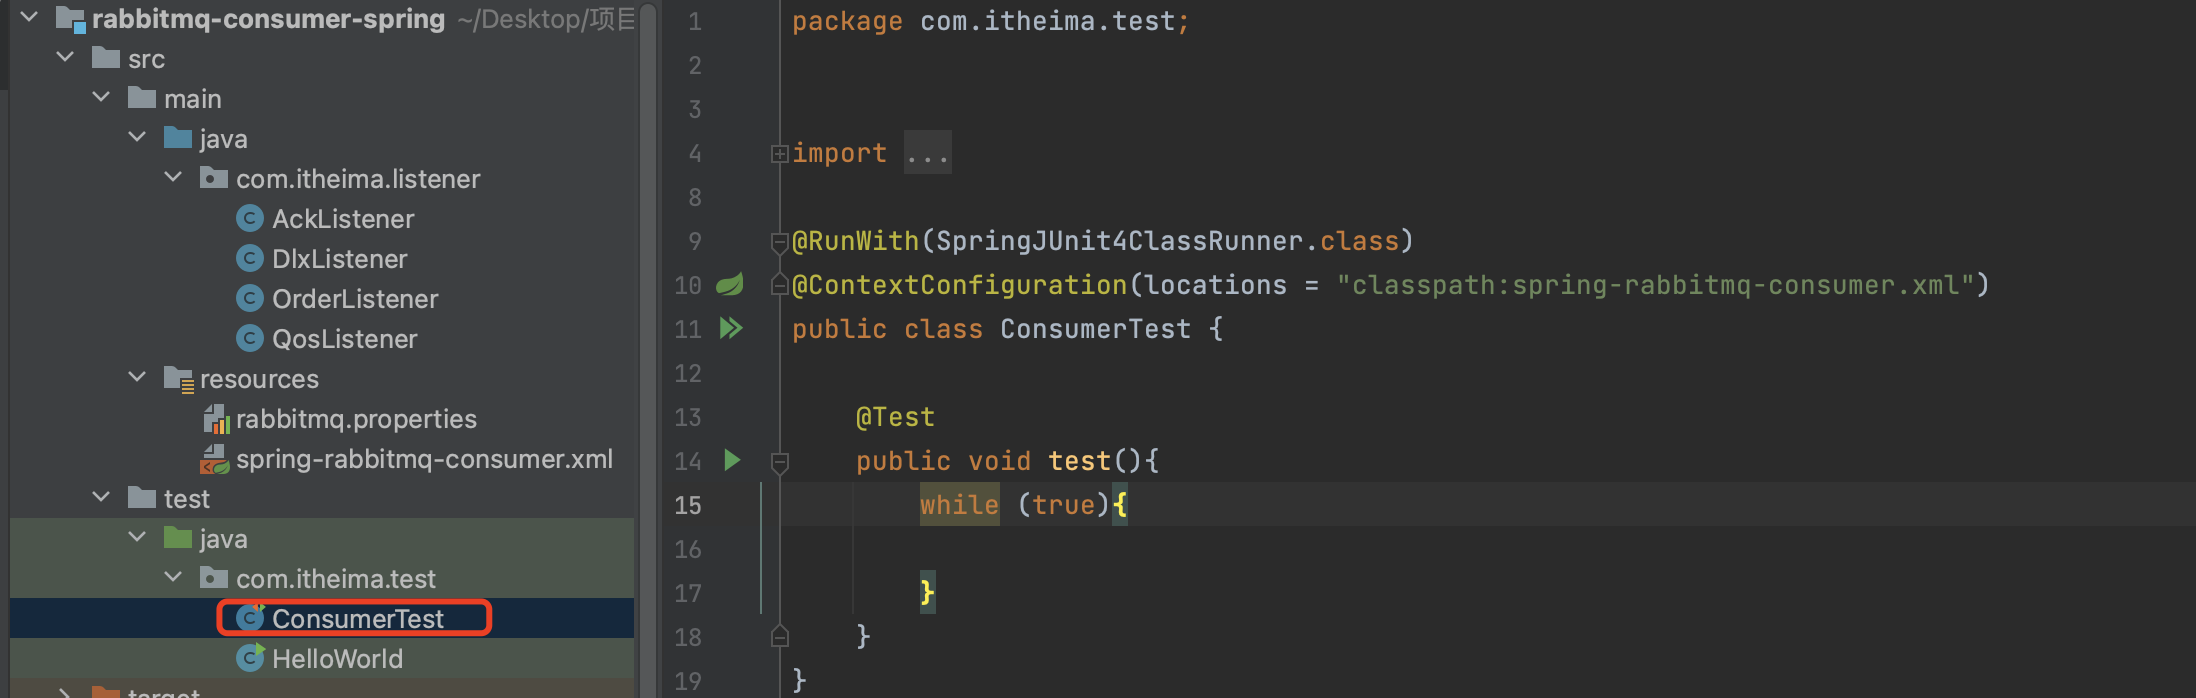
1 | package com.itheima.test; |
生产者发送消息

观察消费者监听情况

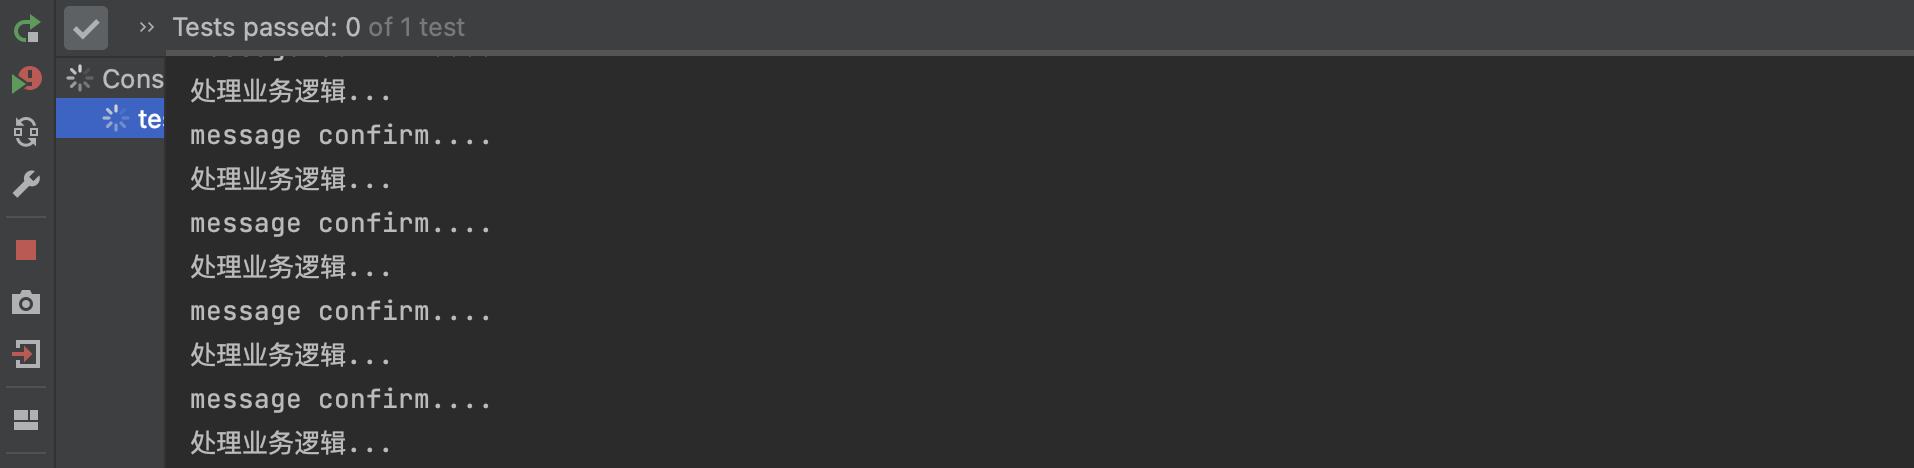
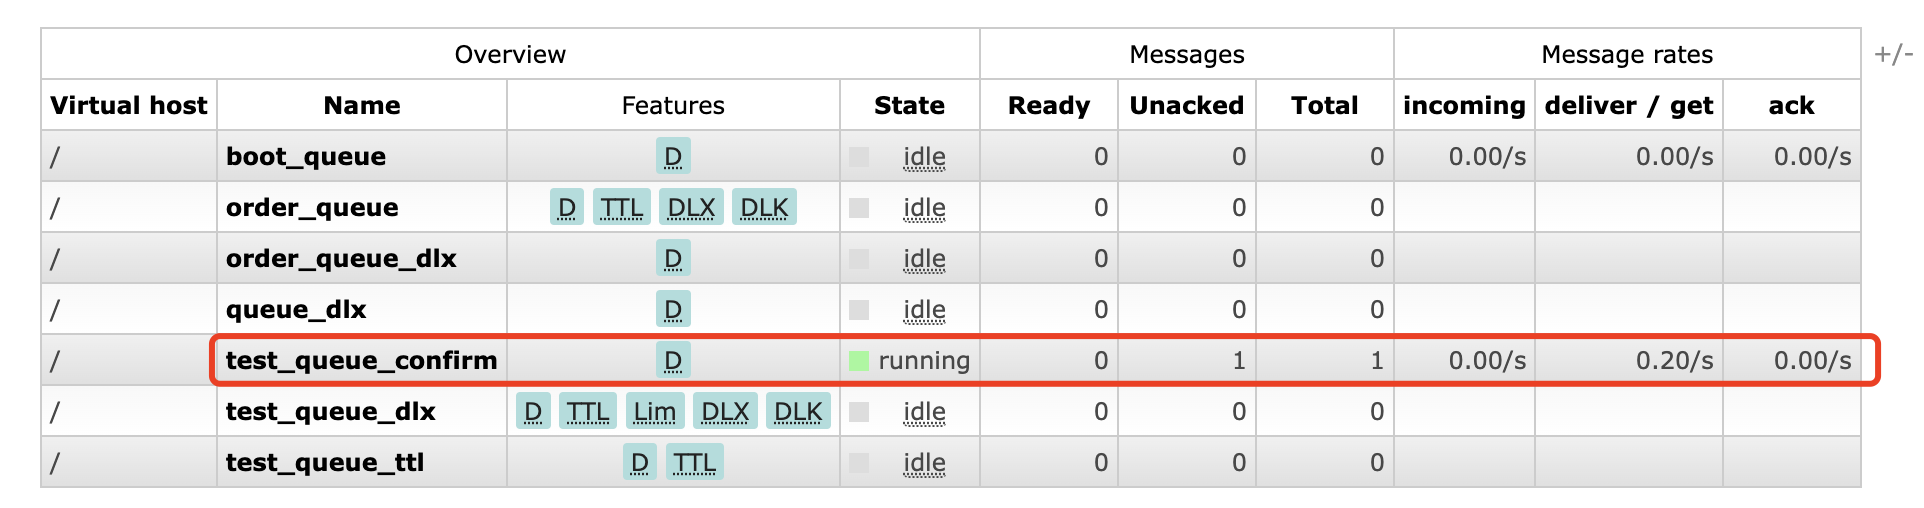
模拟出错的情况
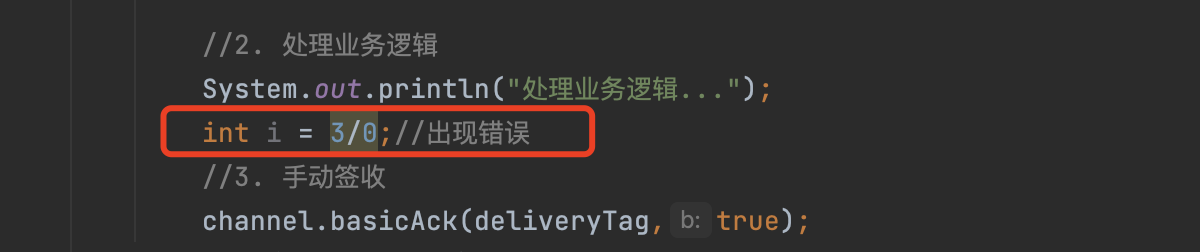
消费者监听情况–不断的重发
小结
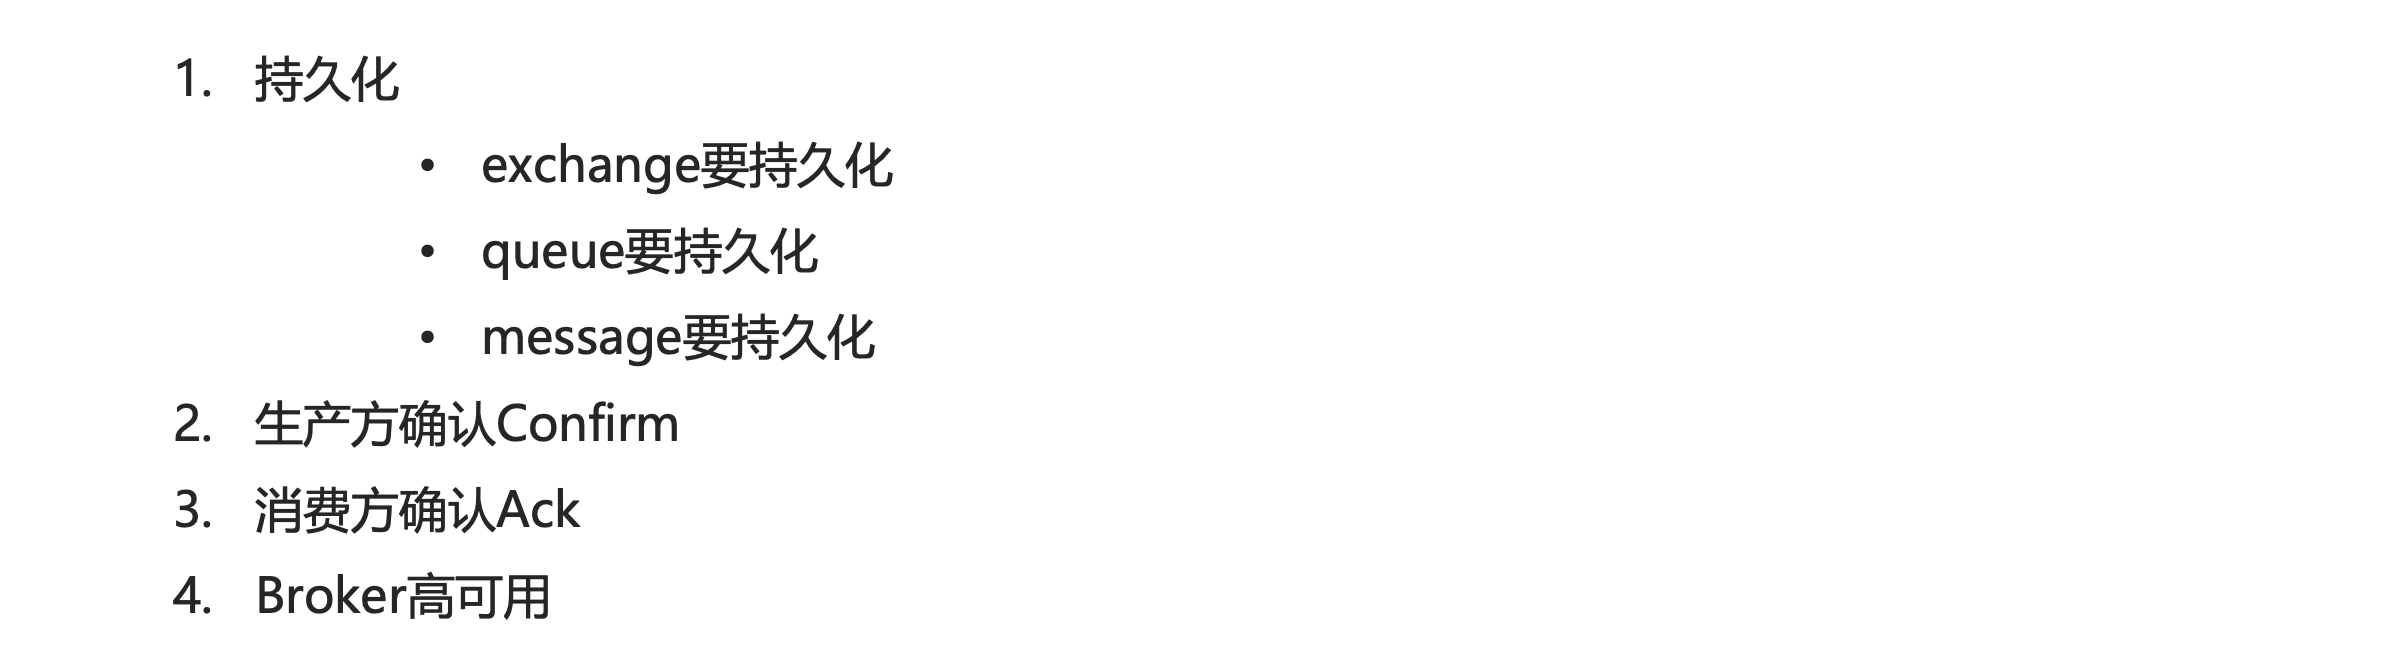
消息可靠性总结
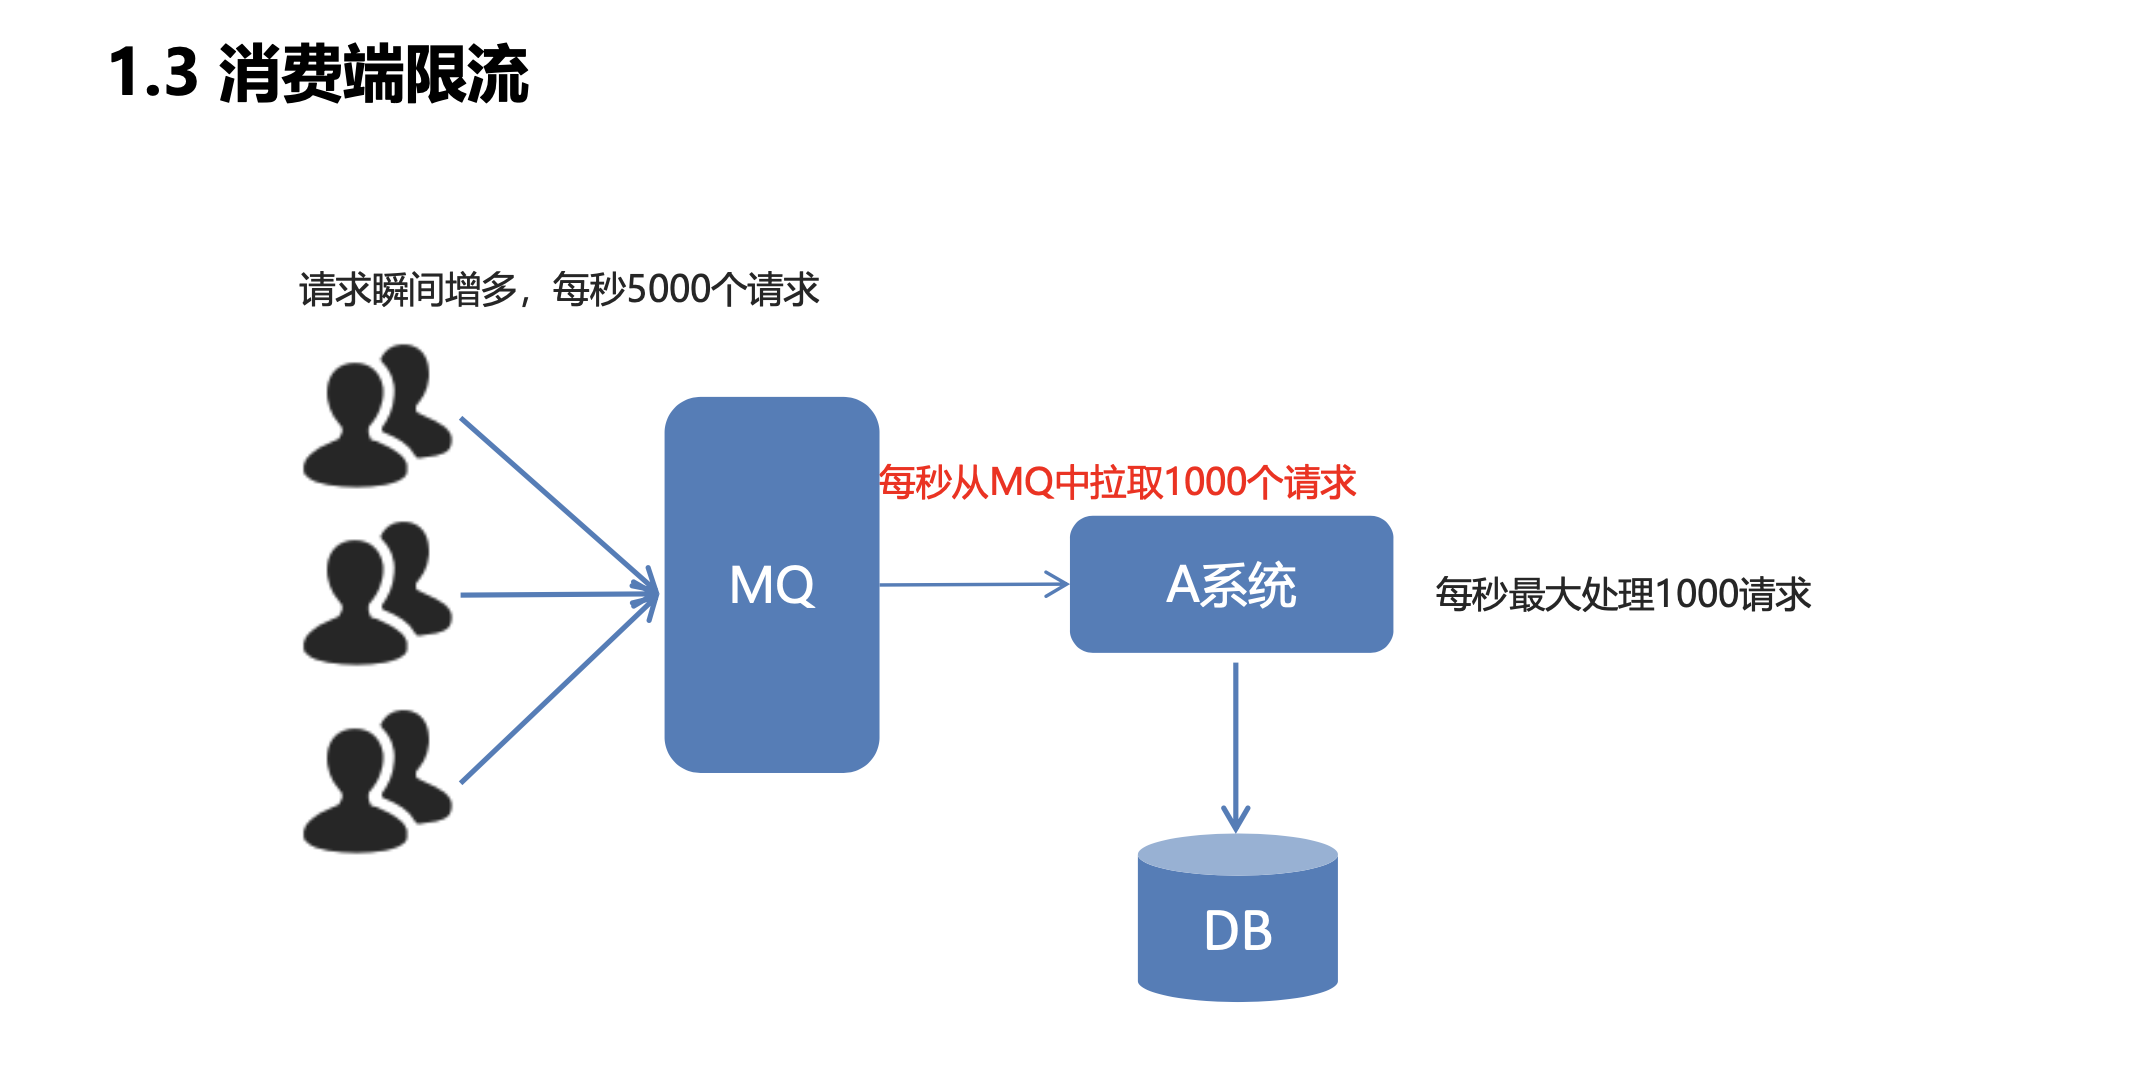
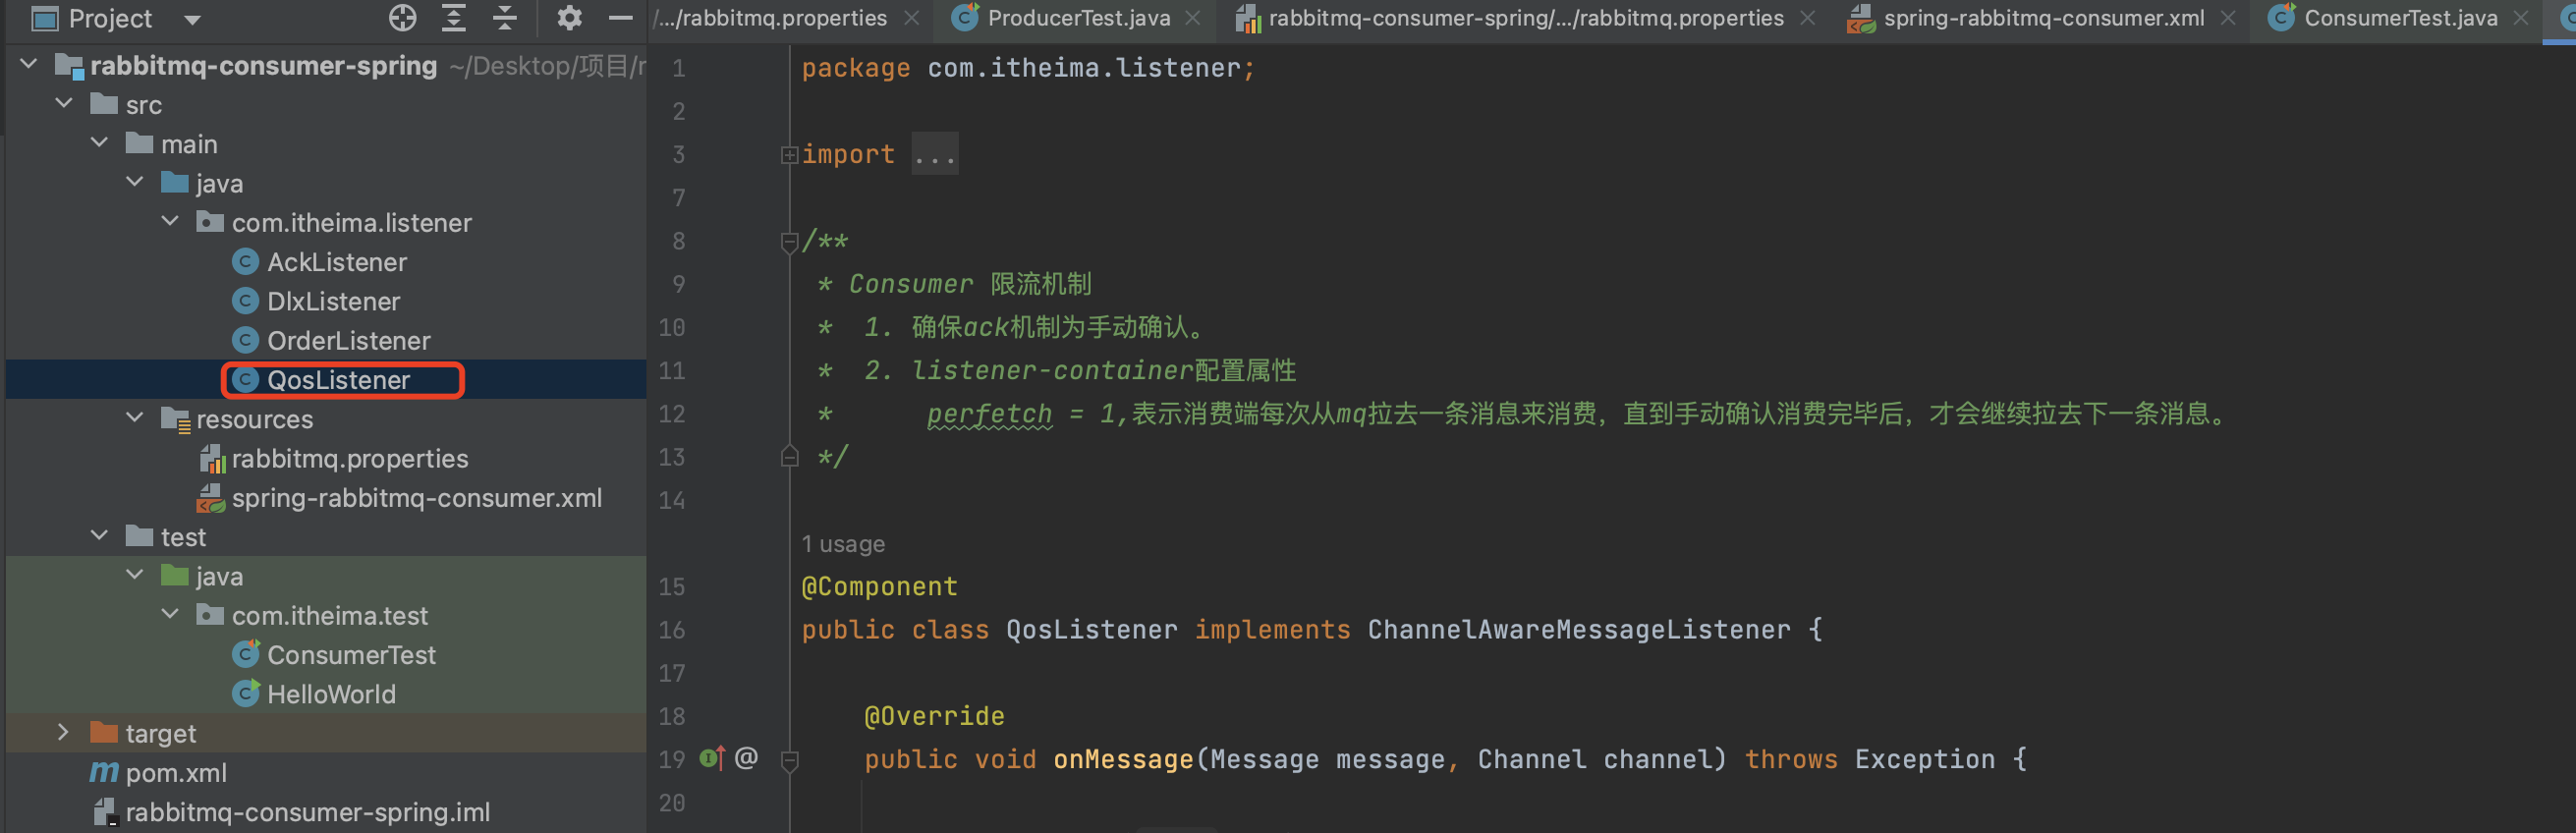
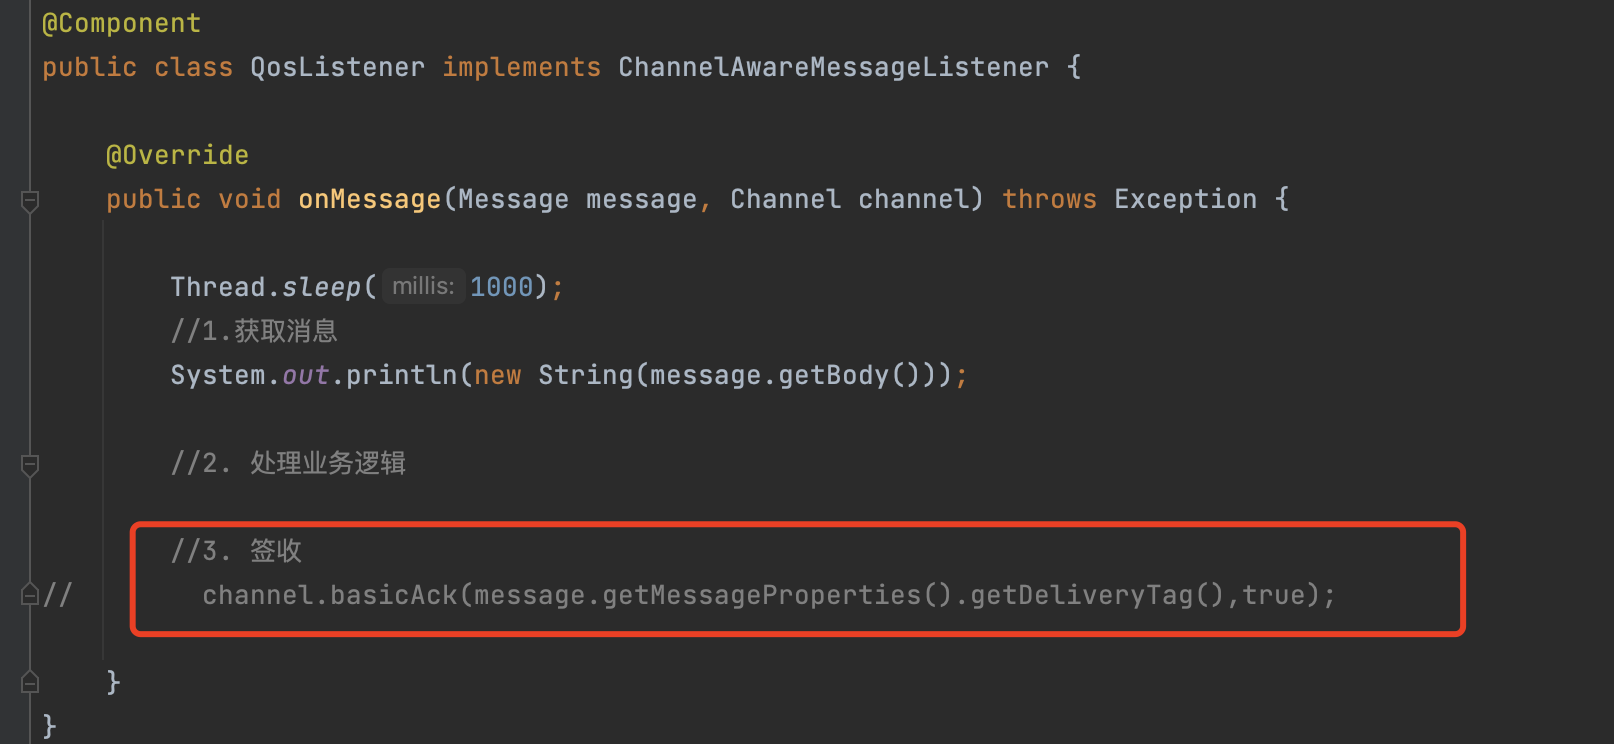
消费端限流
编写监听器
1 | package com.itheima.listener; |
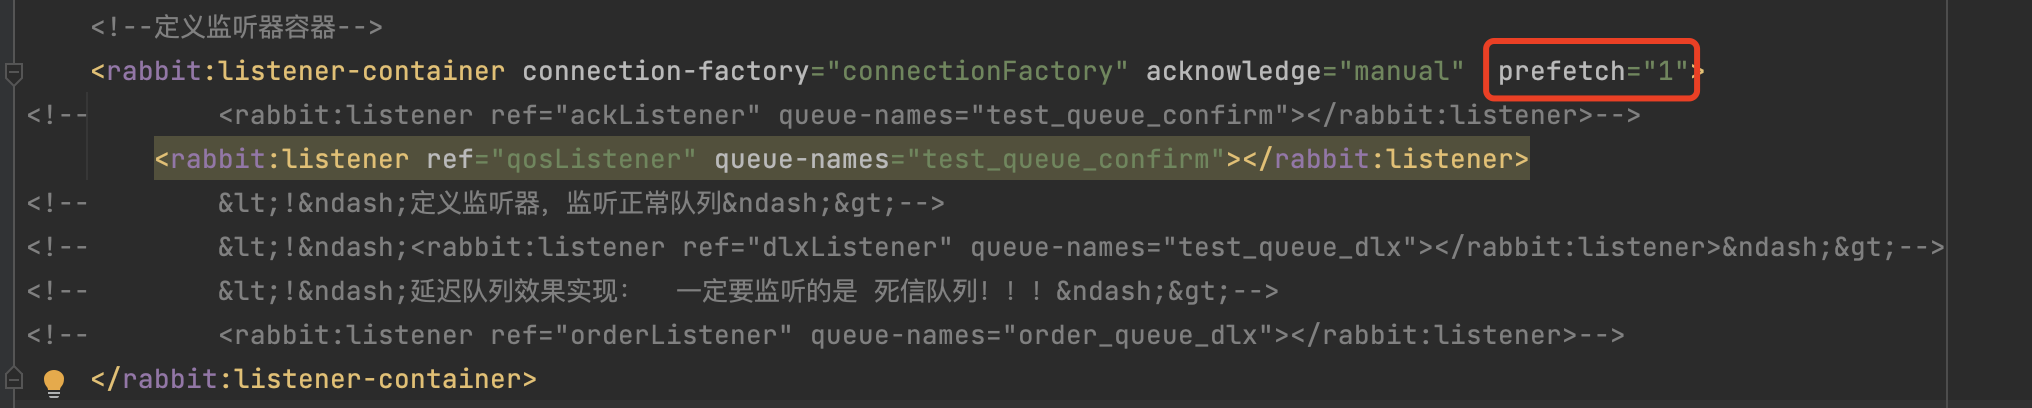
改写spring配置
spring-rabbitmq-consumer.xml
1 | <!--定义监听器容器--> |
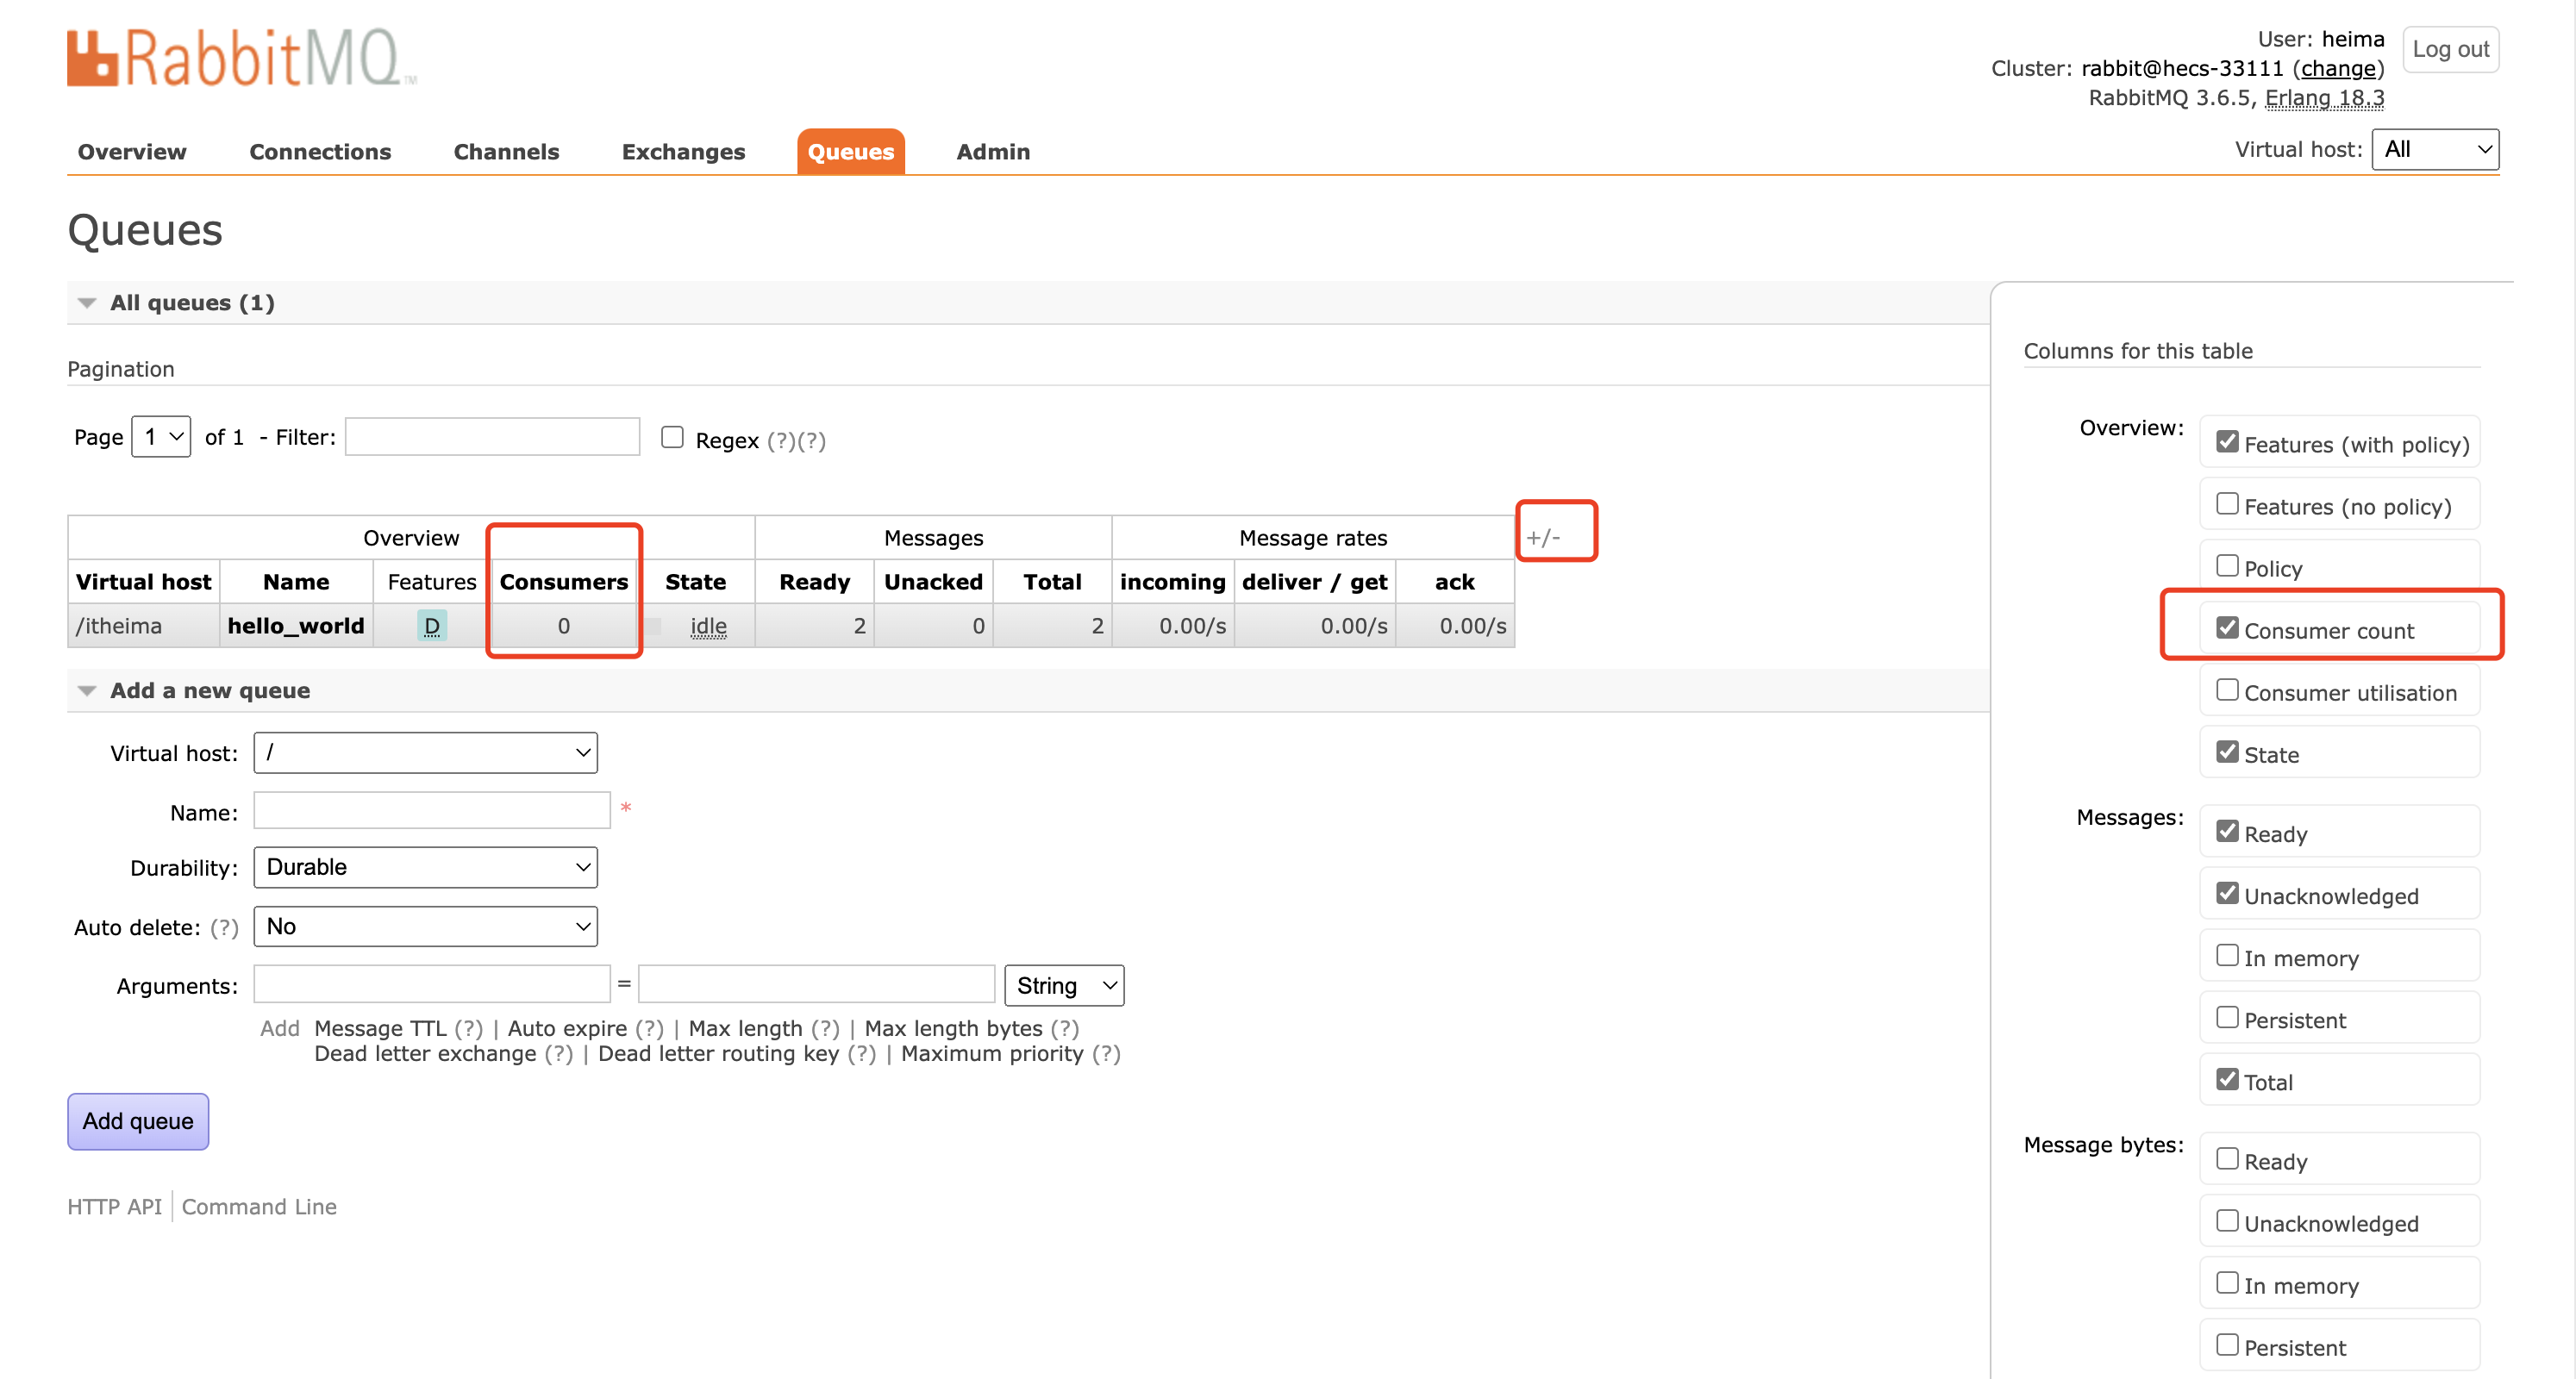
实验1:模拟监听器不加prefetch 以及消费端不签收

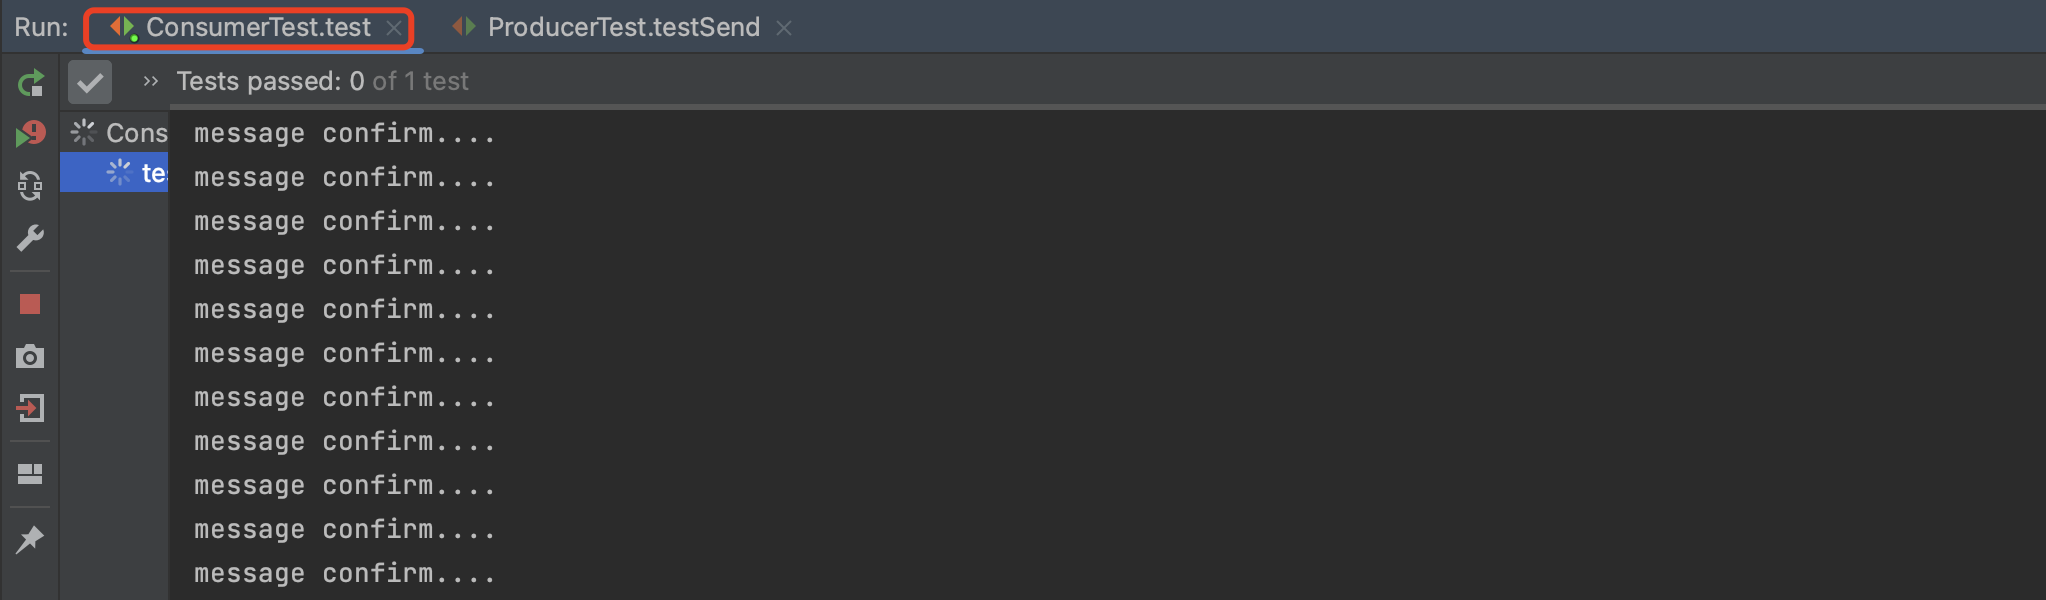
生产者发送十条数据,并观察消费者,可见一次性获取了所有的十条消息
1 |
|
实验2:模拟监听器加上prefetch 以及消费端不签收
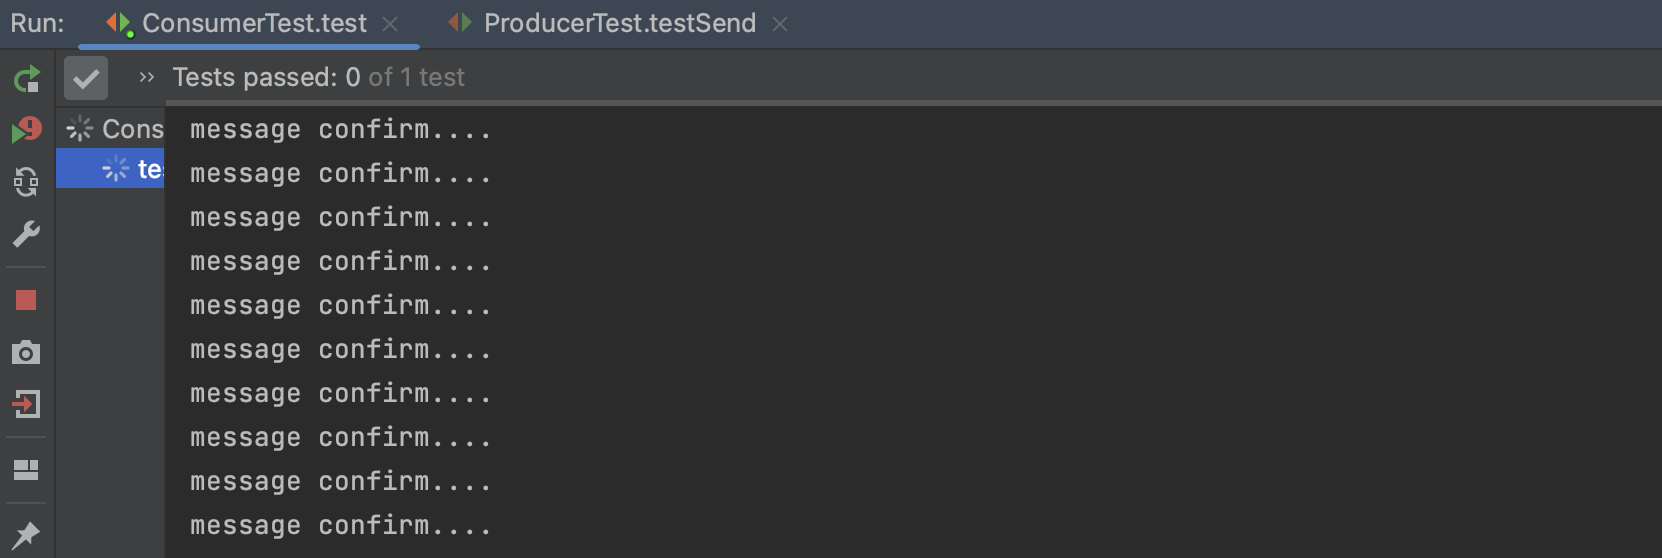
生产者重新发送10条数据,可见消费者仅接收到一条消息

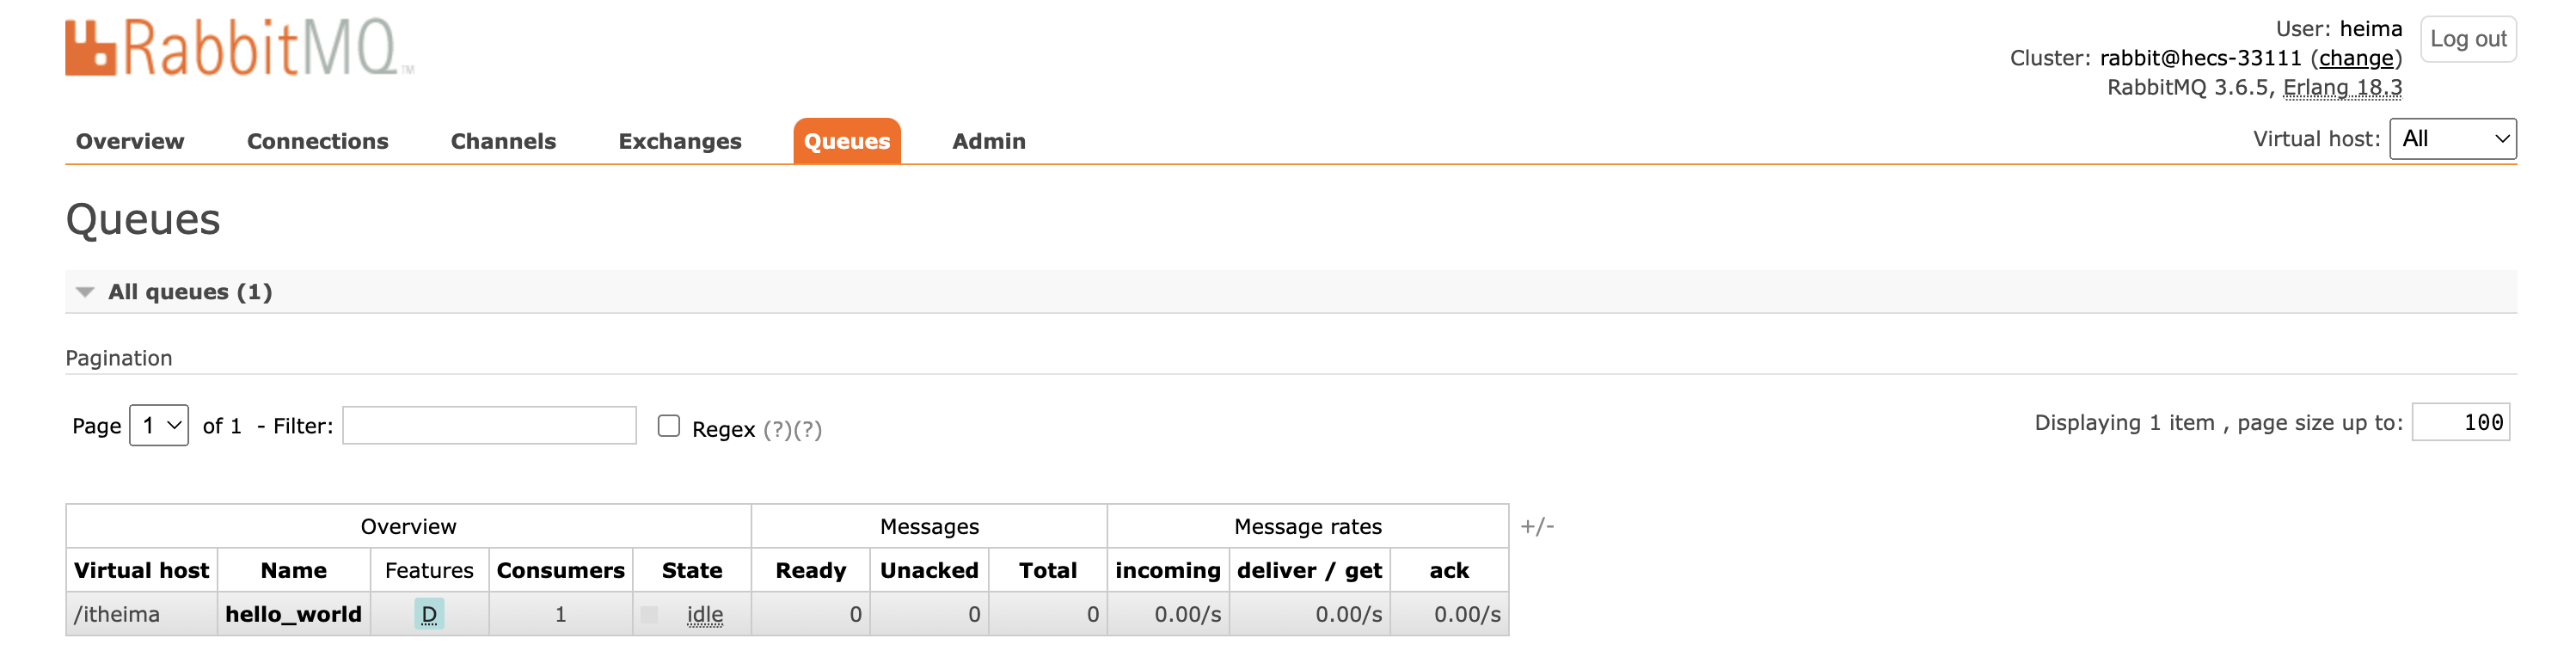
实验3:打开消费端签收,可以观察到消费端依次消费每次打印一行。
TTL
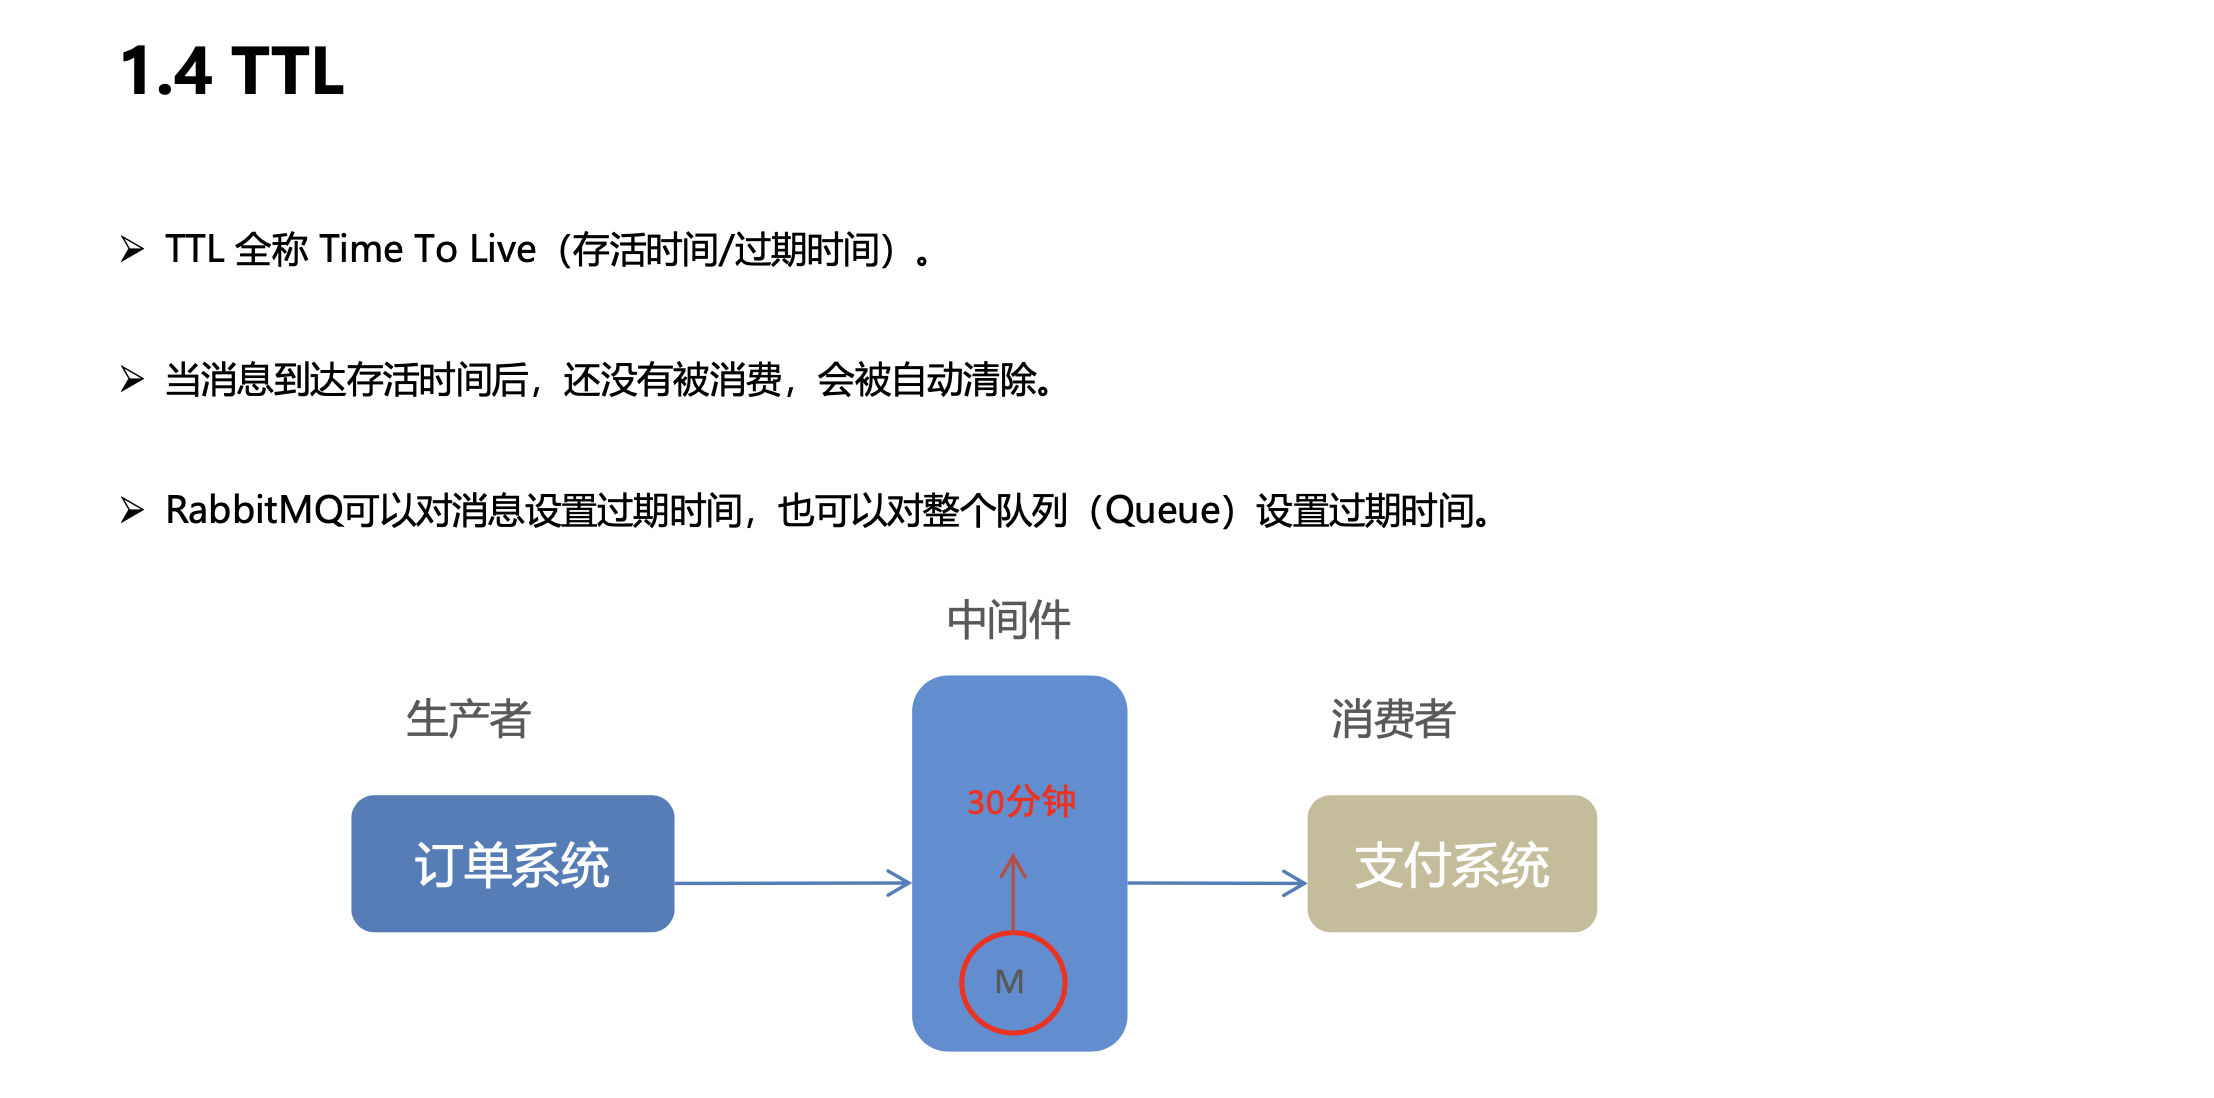
设置整个队列的过期时间
编写spring配置
spring-rabbitmq-producer.xml
1 | <!--ttl--> |
编写测试方法
ProducerTest.java
1 |
|
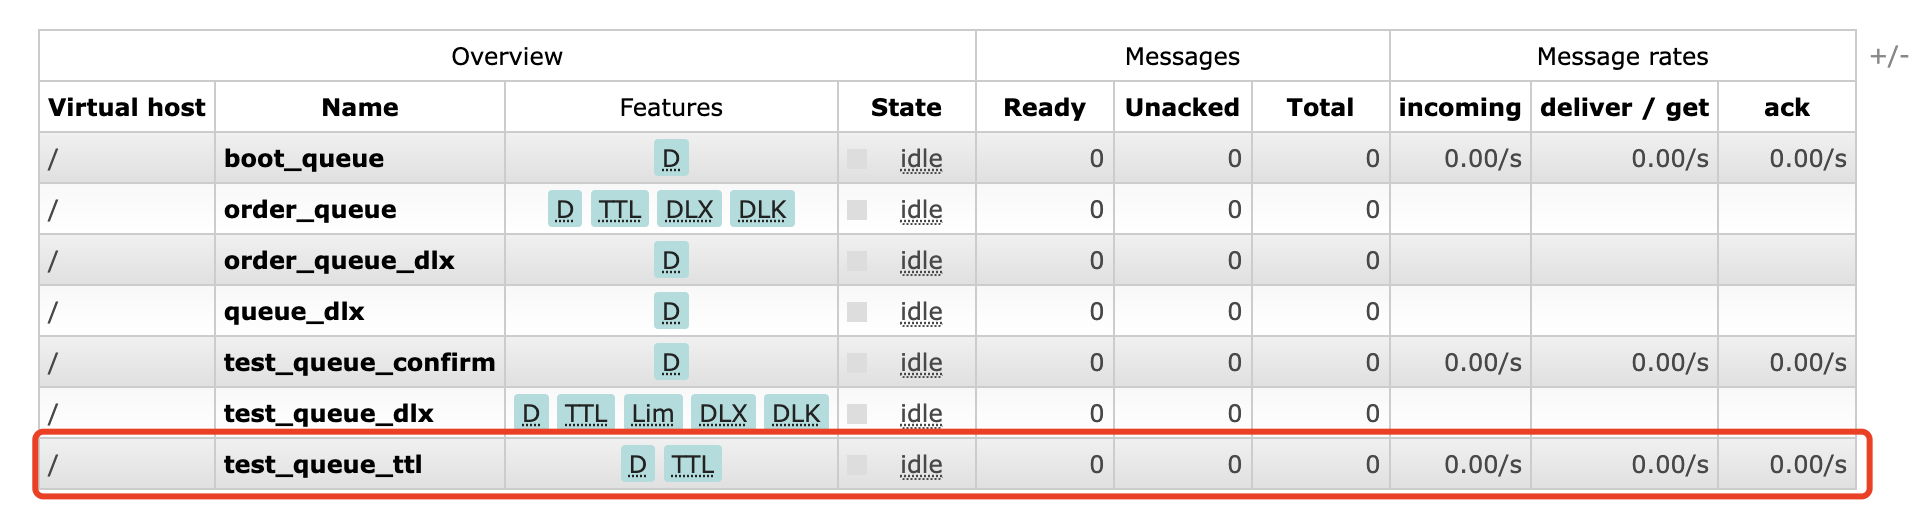
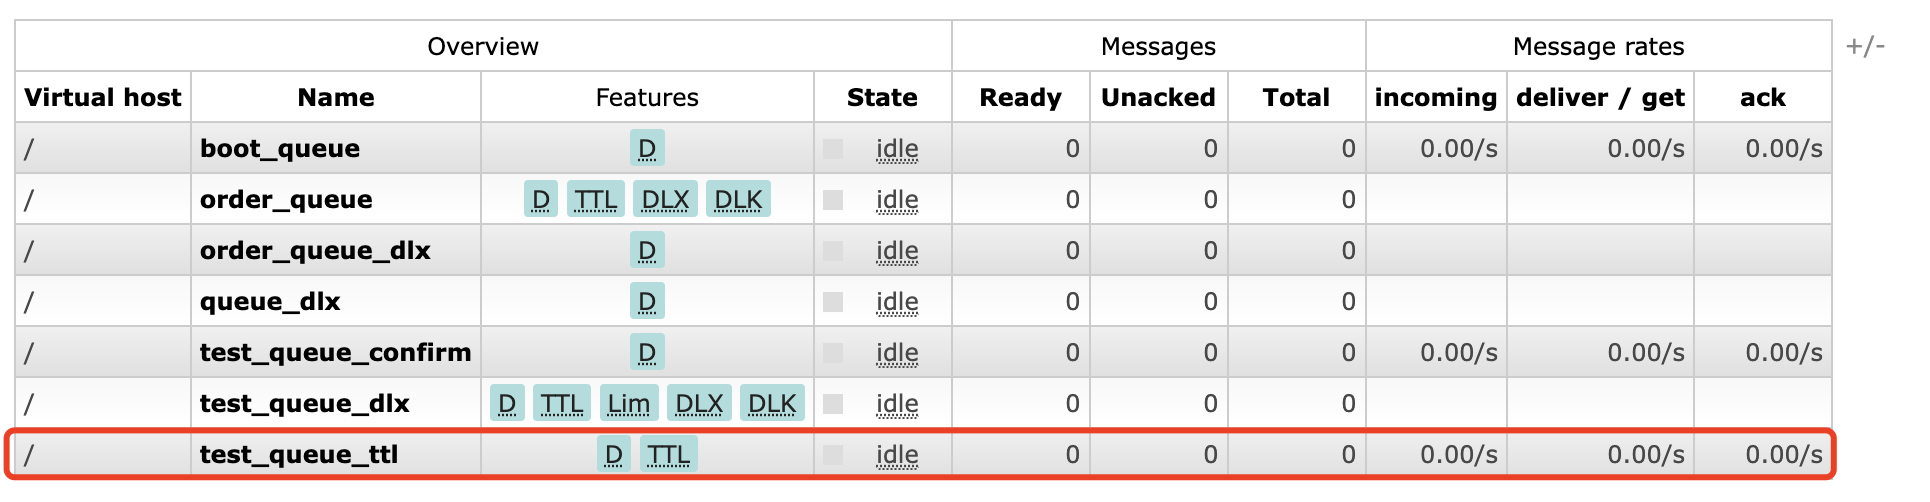
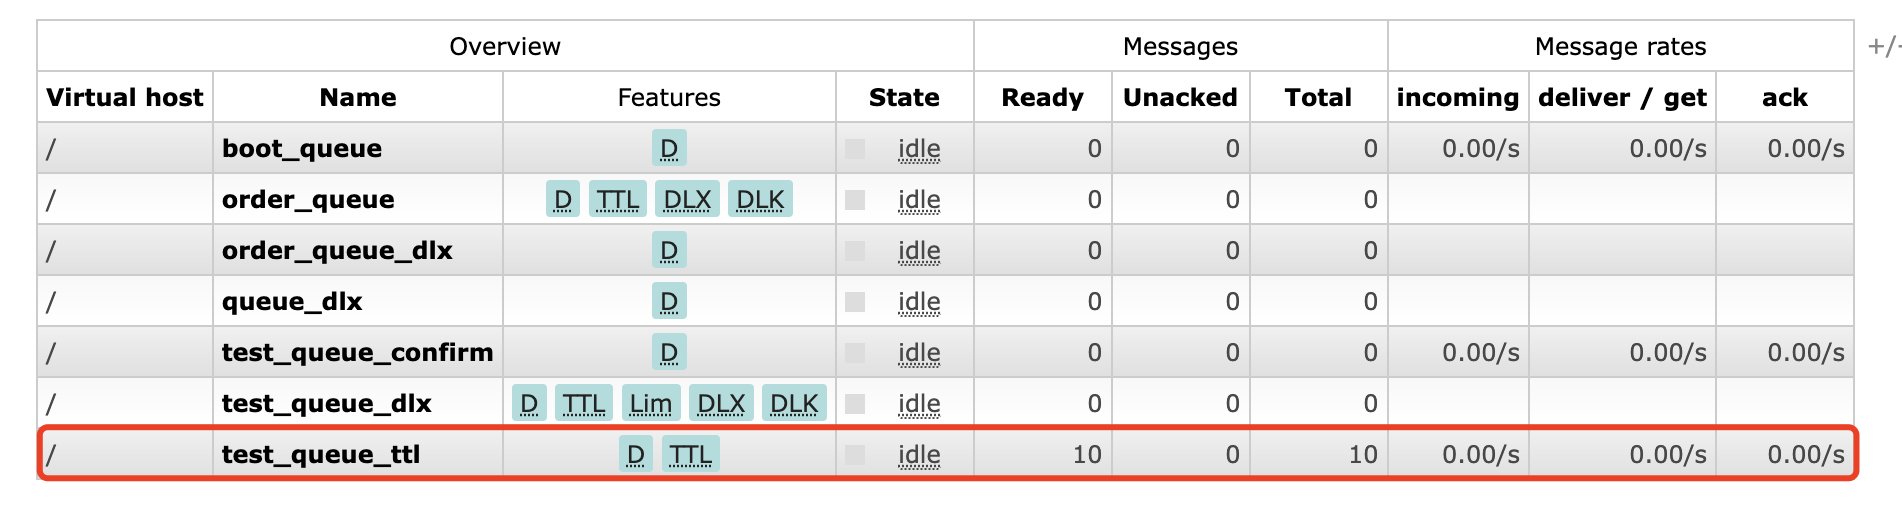
测试运行观察
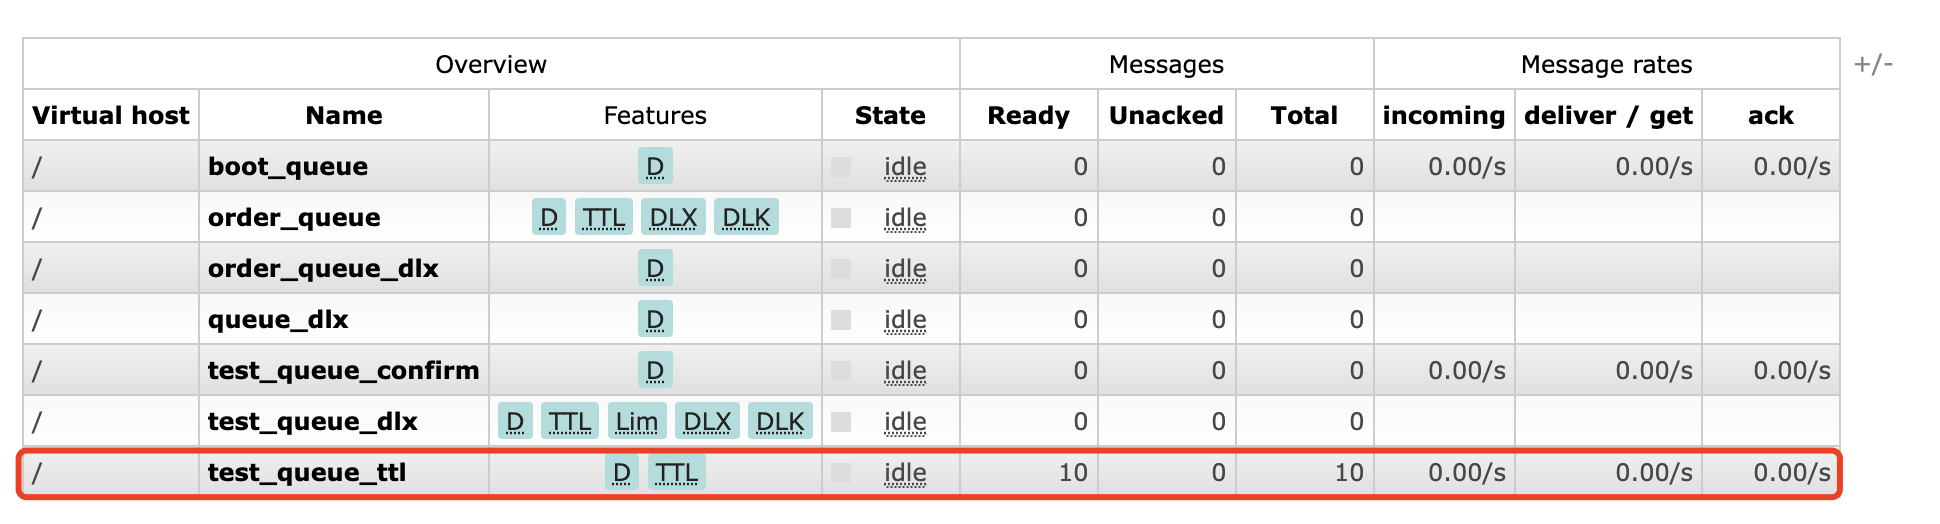
10s后消失
设置单个消息的过期时间
编写测试方法
1 | /** |
测试运行并观察
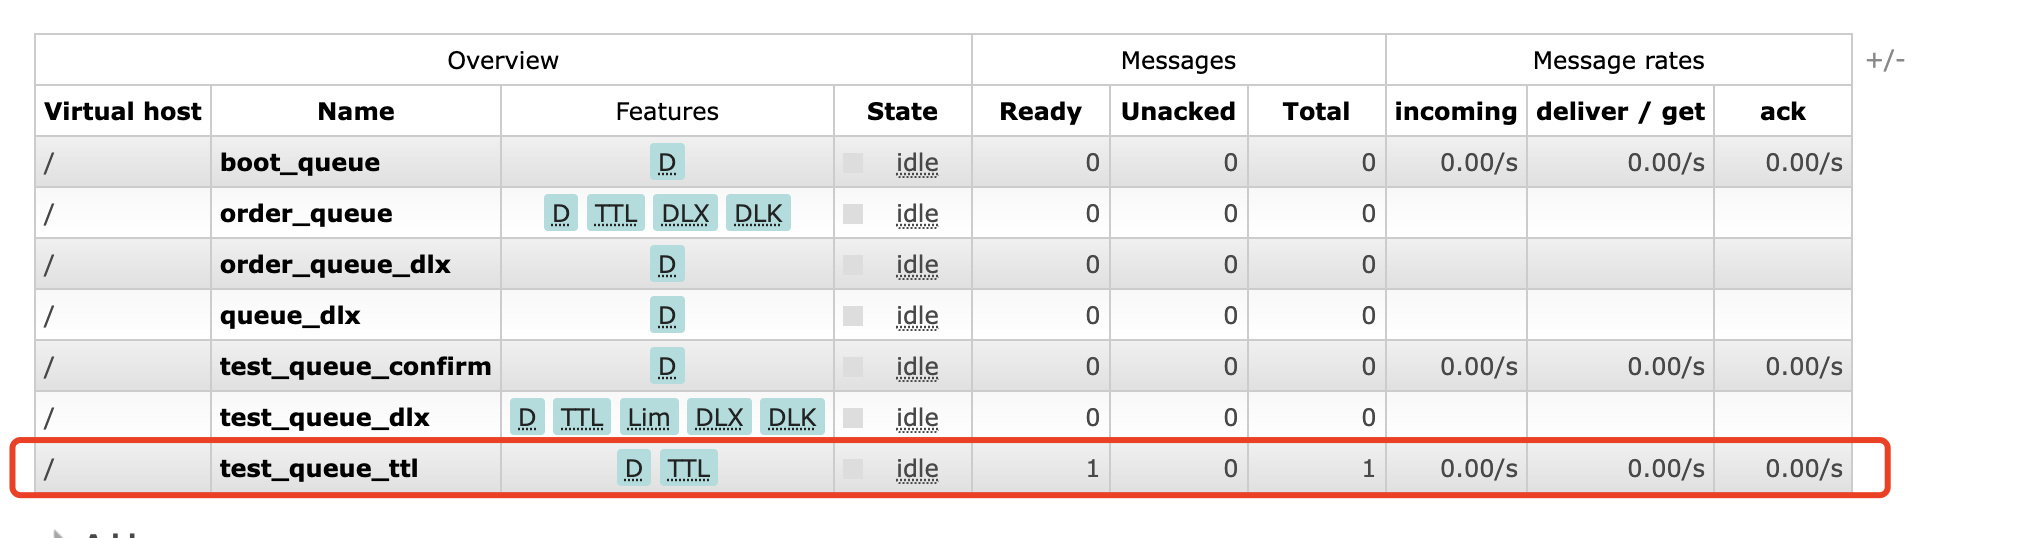
5s后消失
测试单个消息非队列顶部设置超时时间
1 | /** |
观察设置单个超时时间的消息不会消失
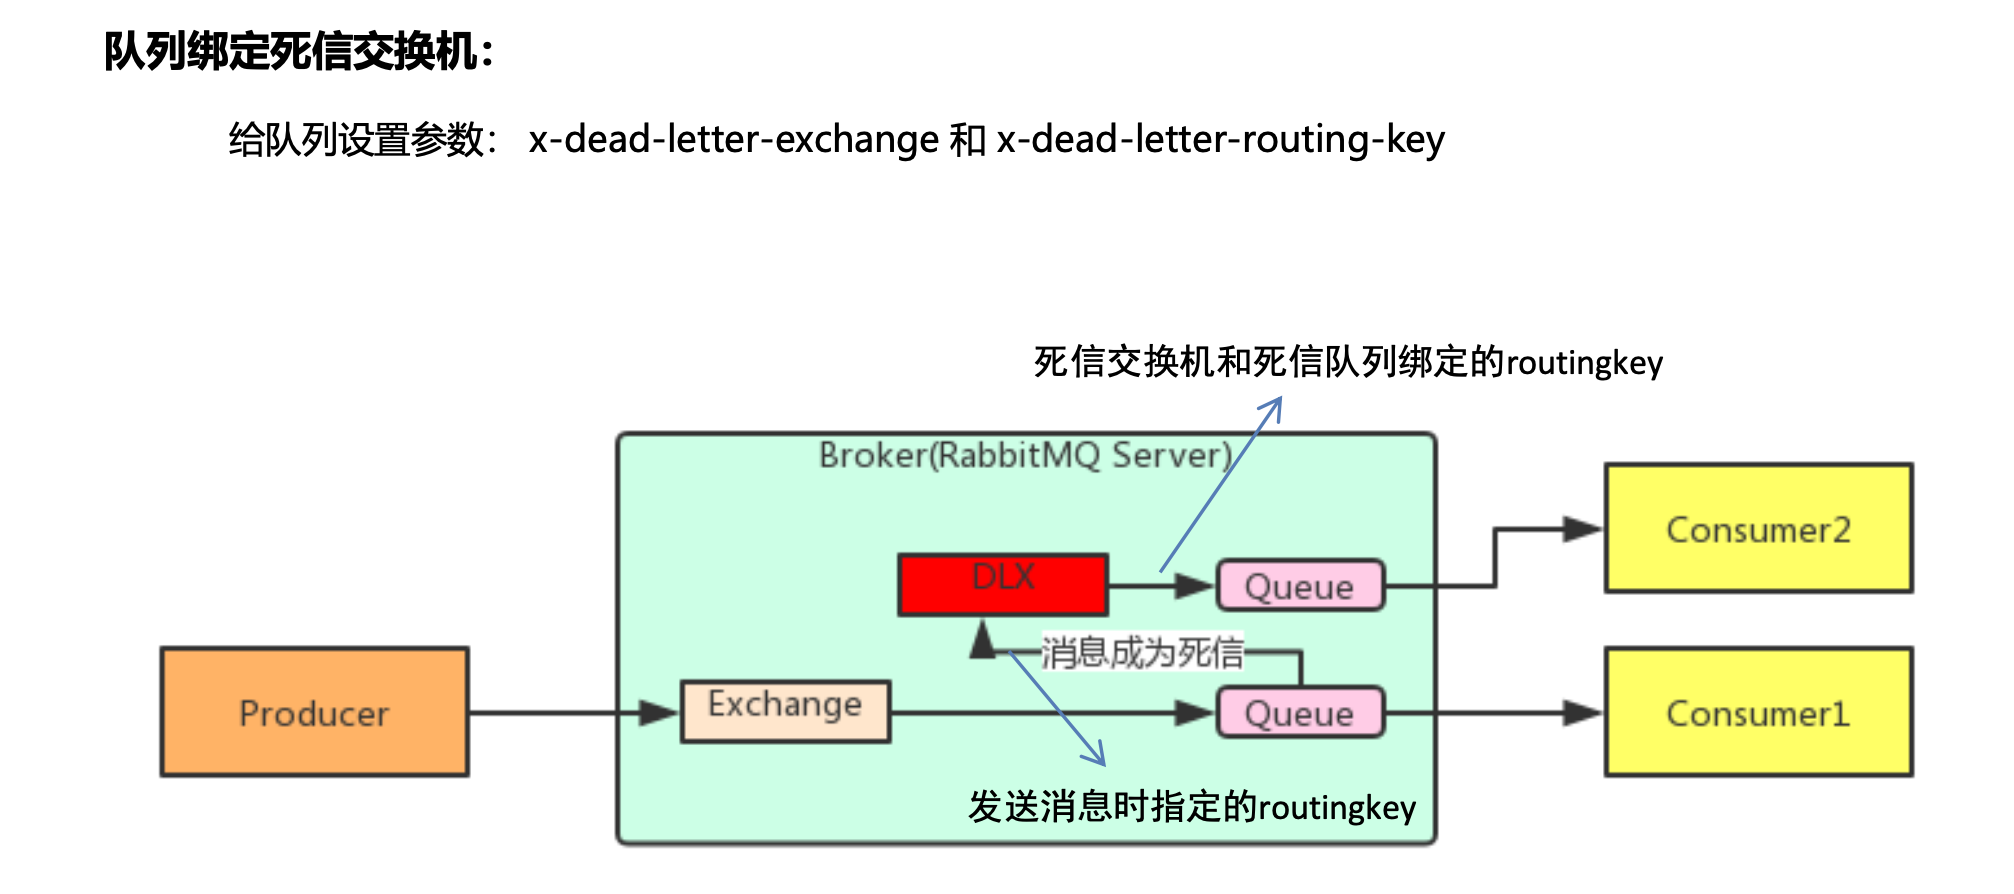
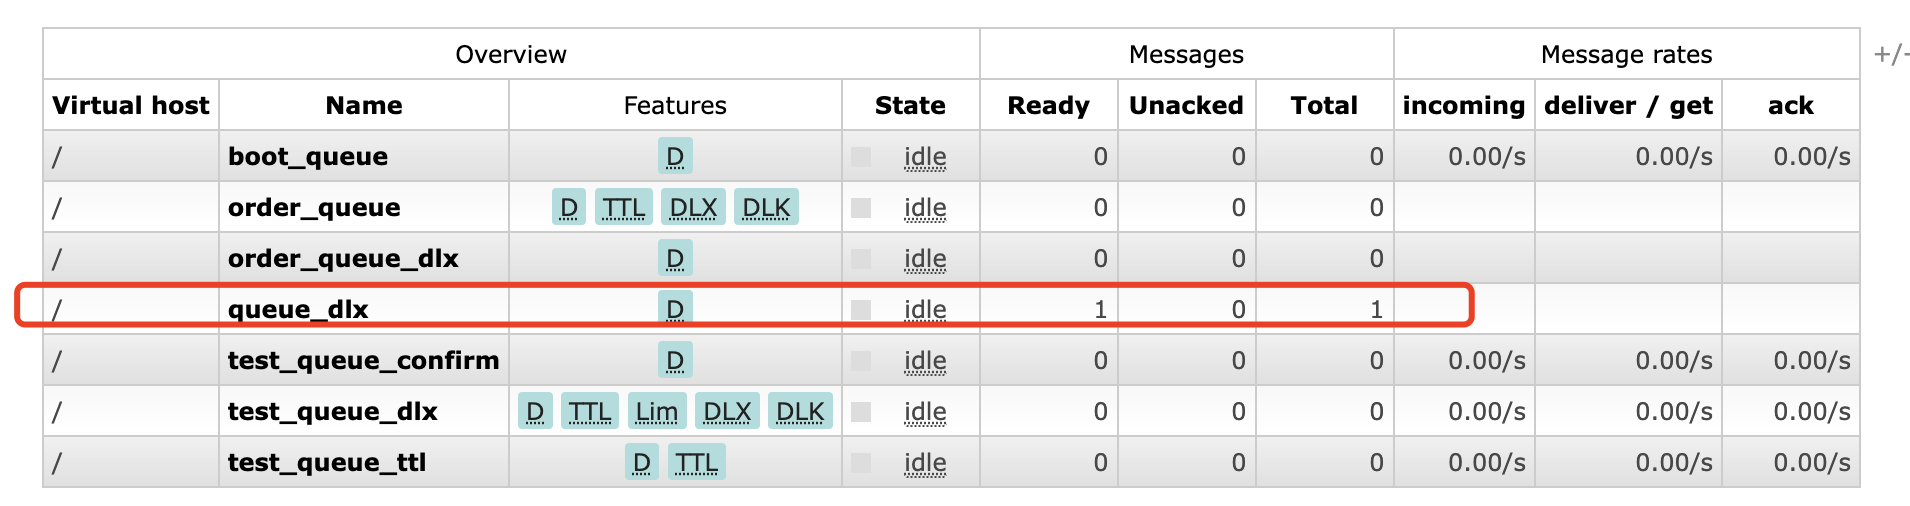
死信队列


编写spring配置
spring-rabbitmq-producer.xml
1 |
|
测试过期时间
编写测试方法
1 |
|
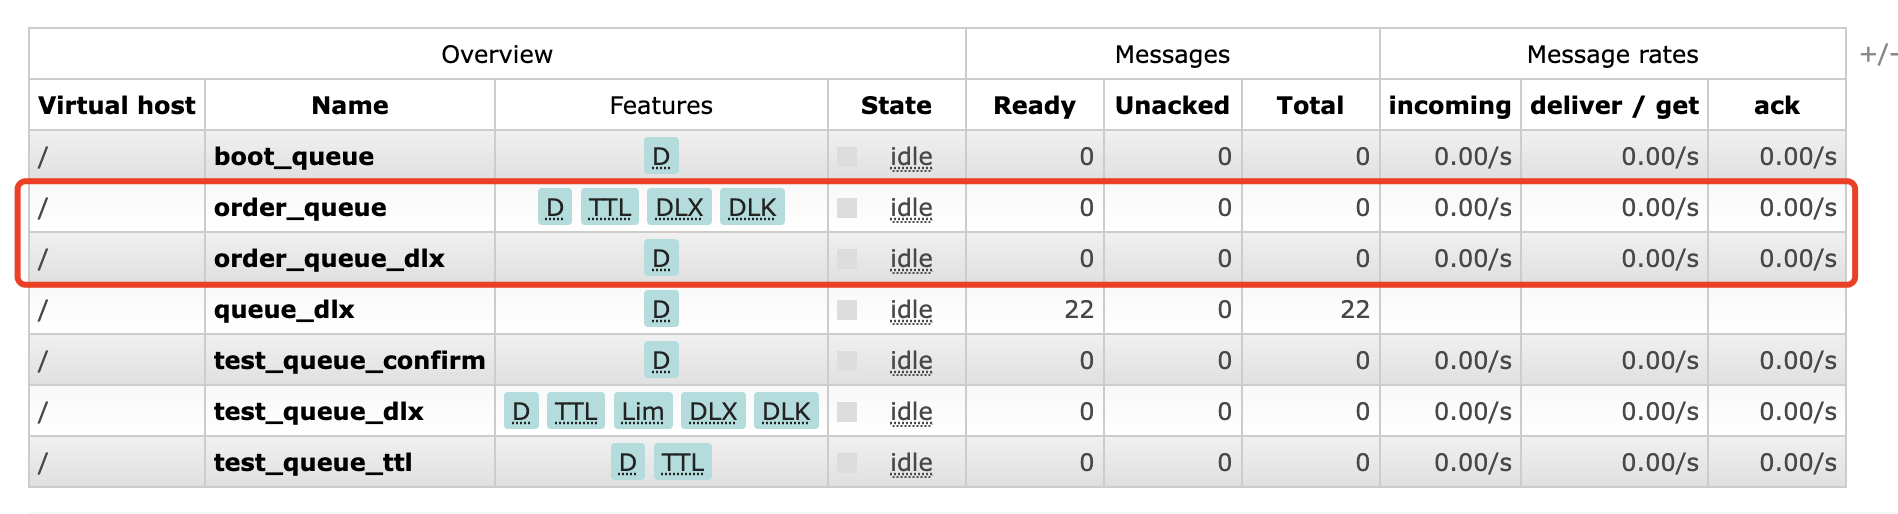
执行并观察
10s后消息进入死信队列
测试长度限制
编写测试方法
1 | /** |
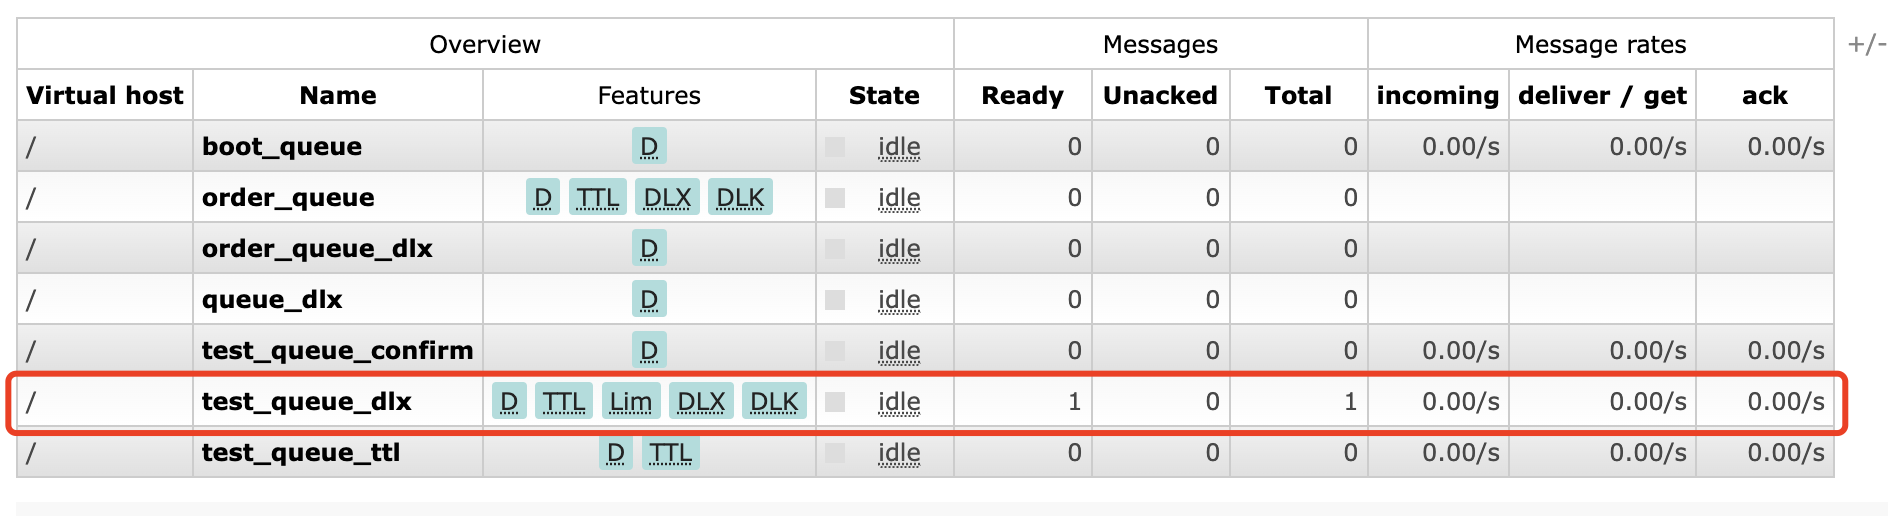
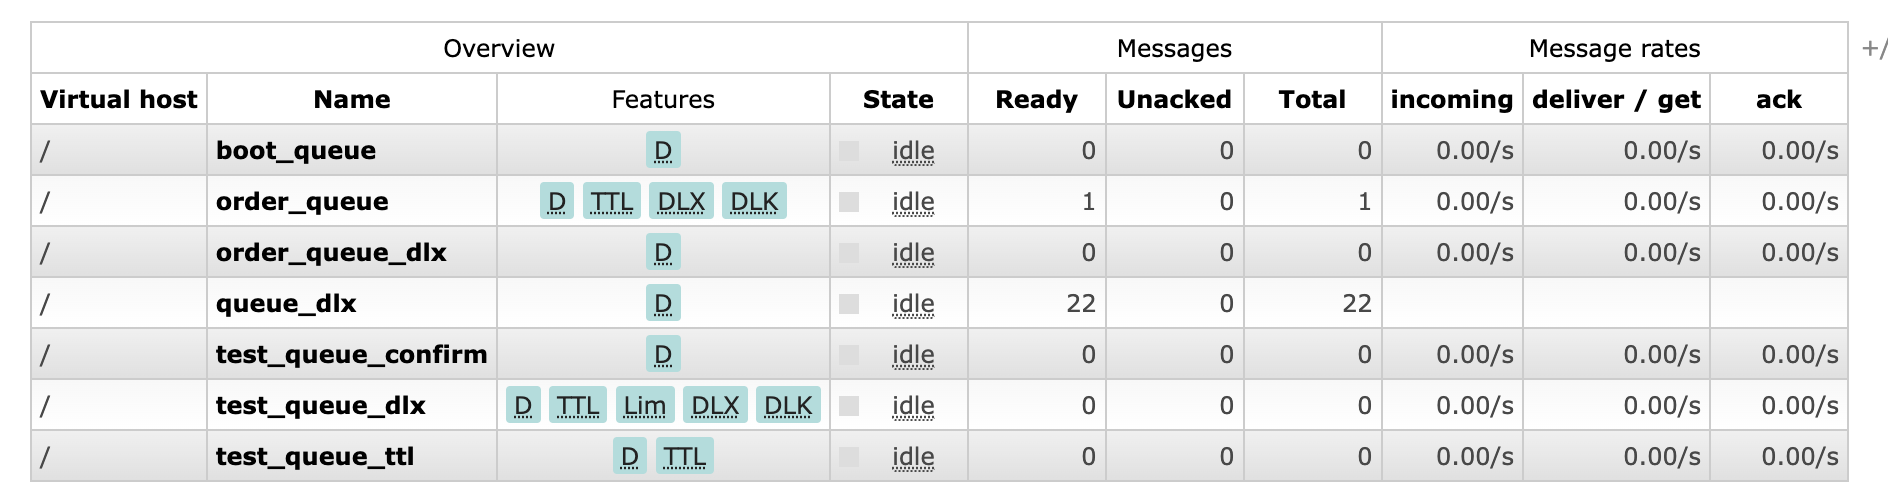
执行并观察,10条消息进入了普通队列 超过10条限制的消息直接进入了死信队列
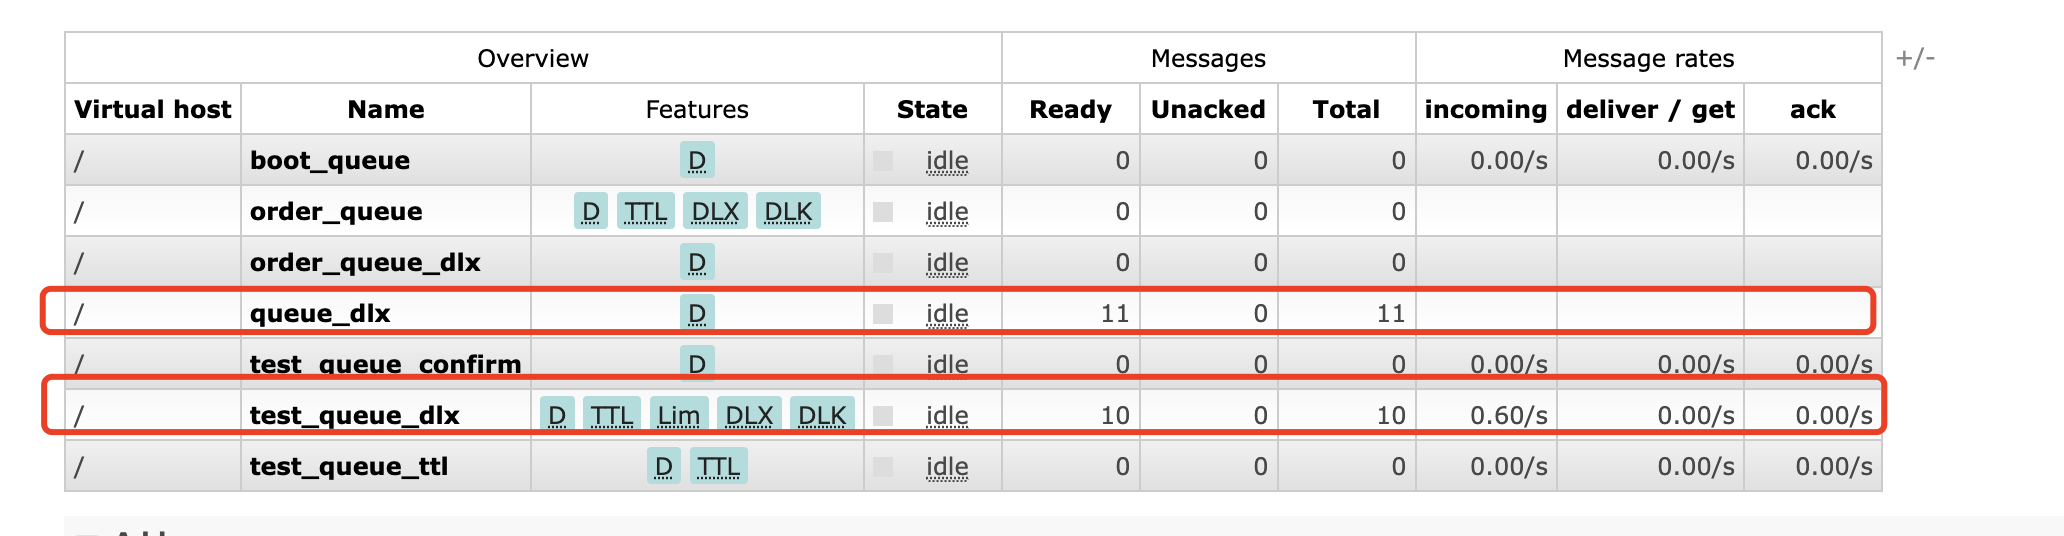
10s,普通队列的消息超时也进入了死信队列
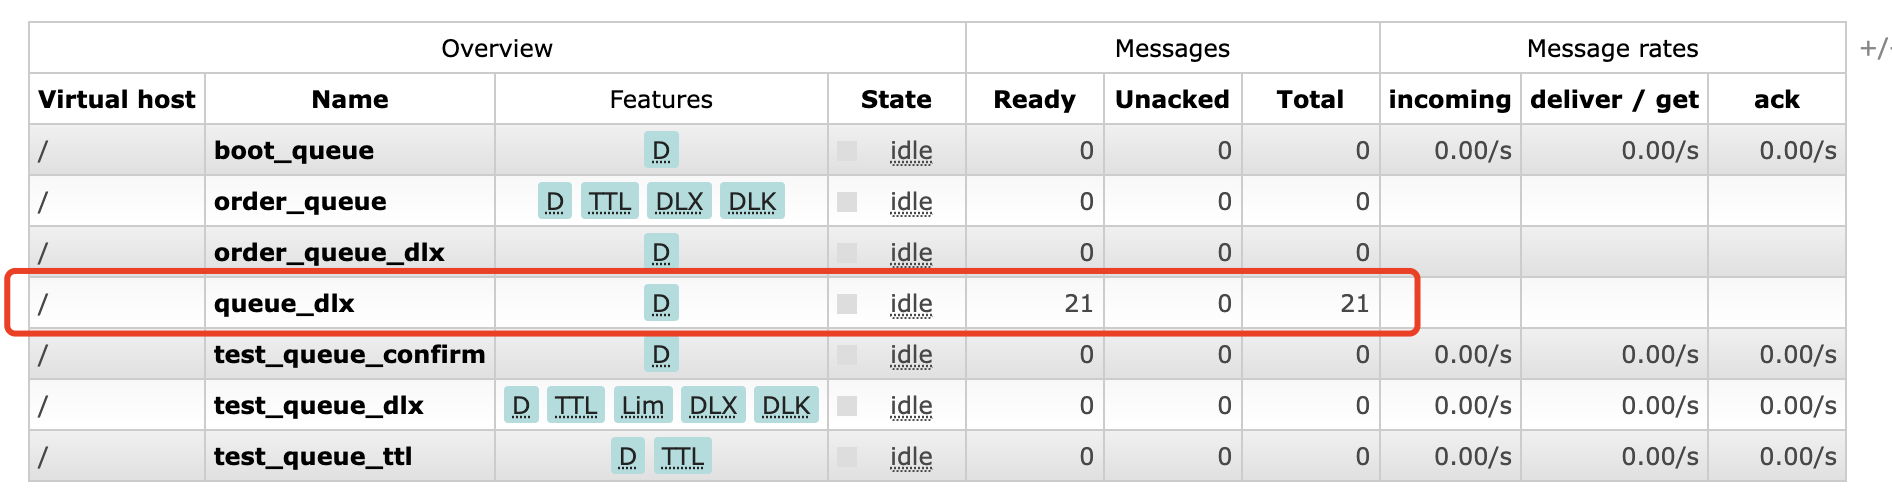
测试消息拒收
编写监听器
1 | package com.itheima.listener; |
1 | <!--定义监听器容器--> |
编写生产者测试方法
1 | /** |
执行并观察

消息直接进入了死信队列
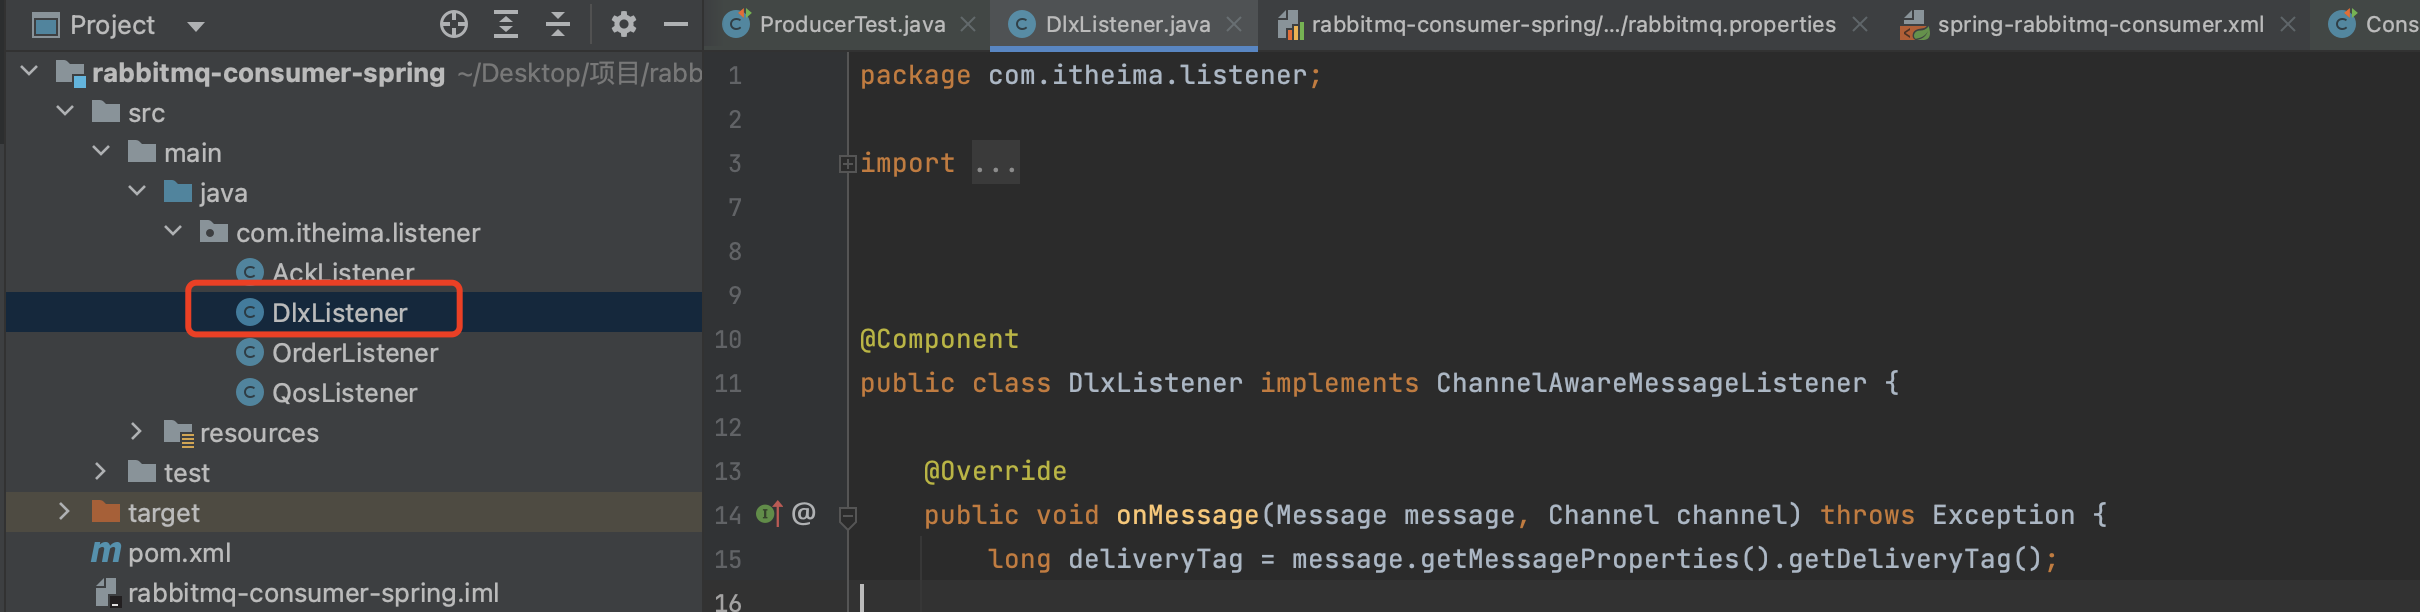
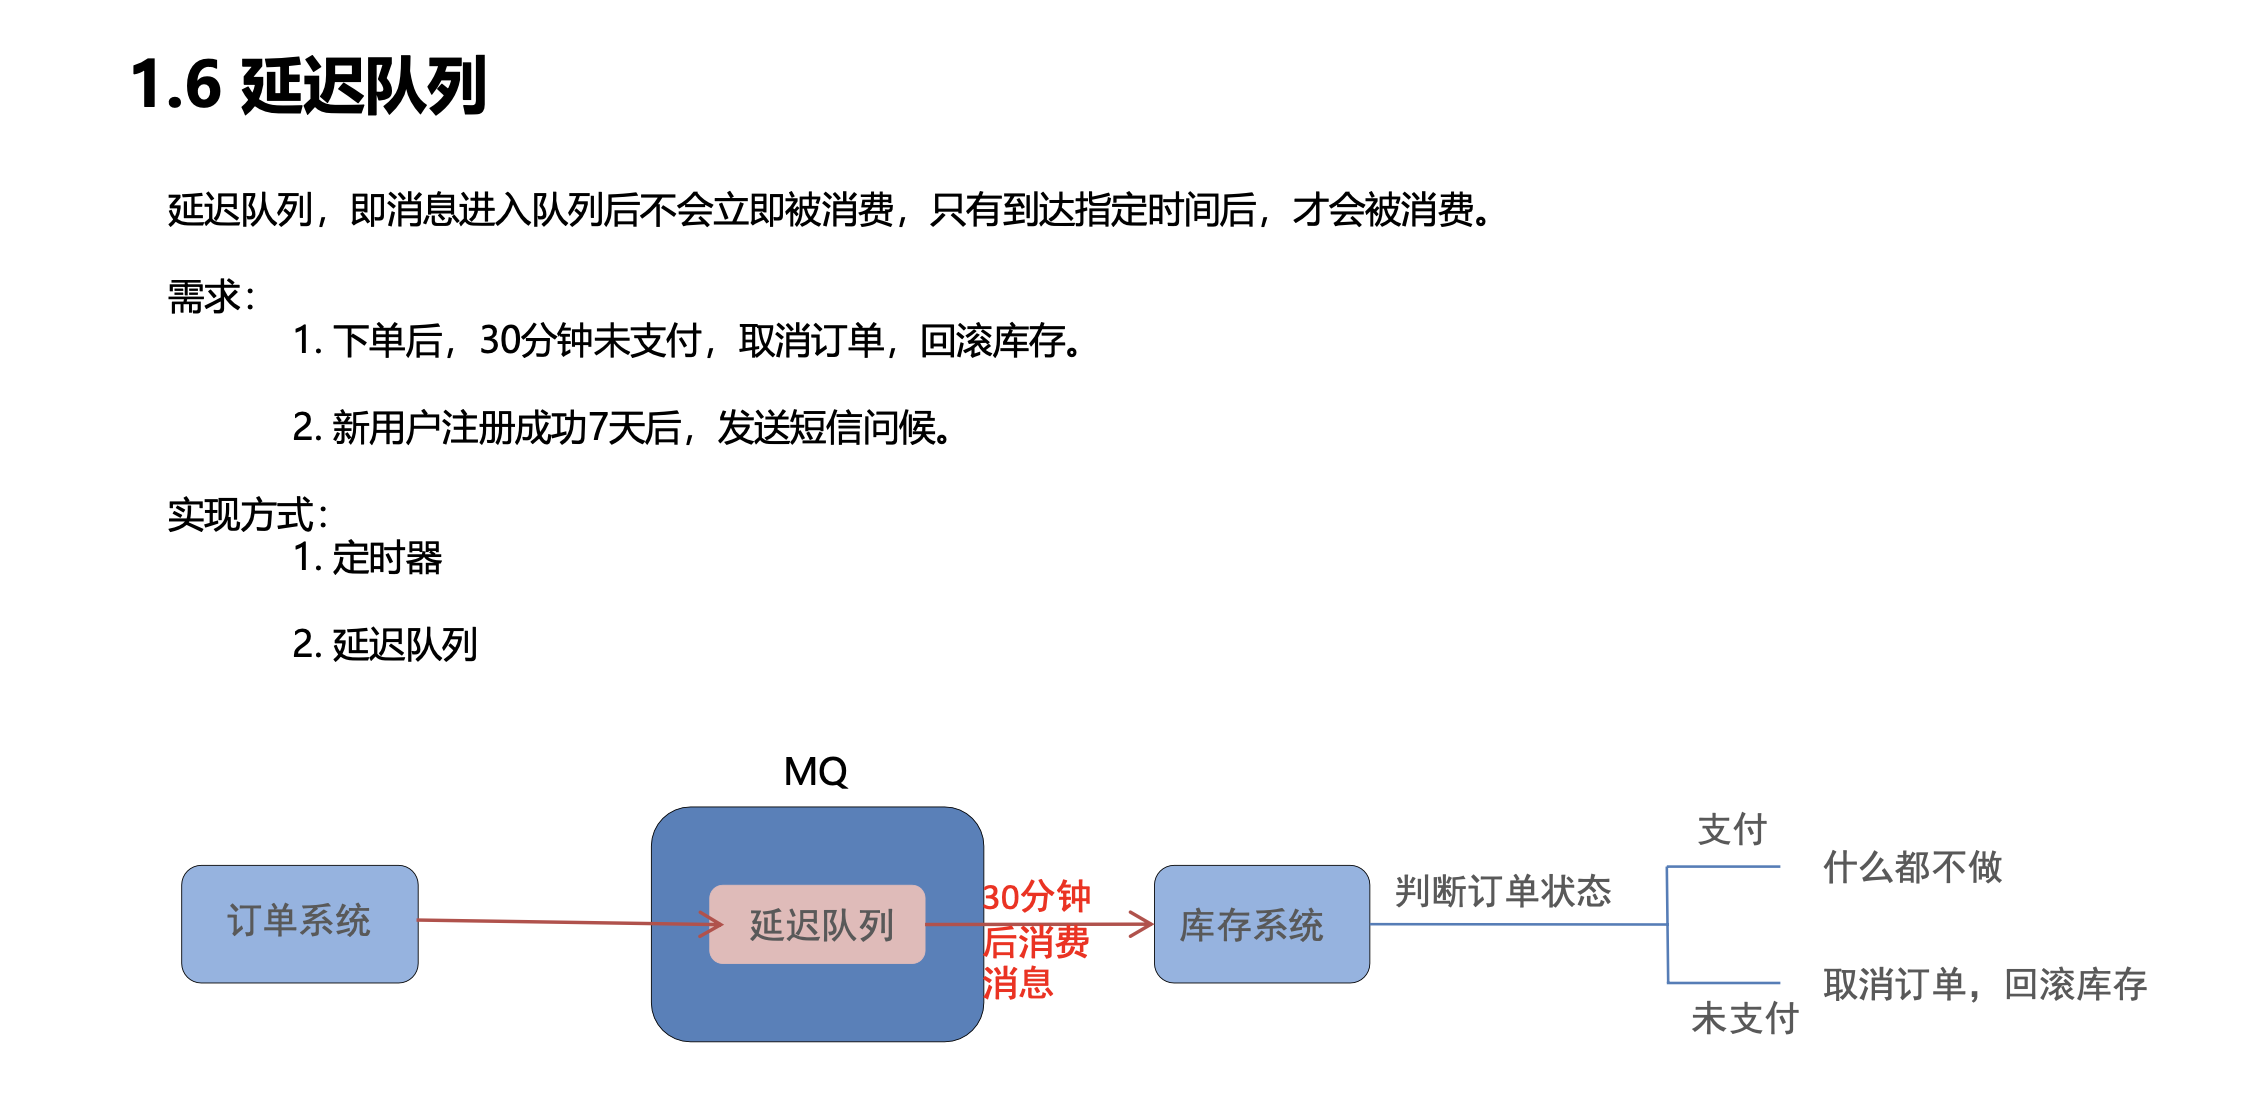
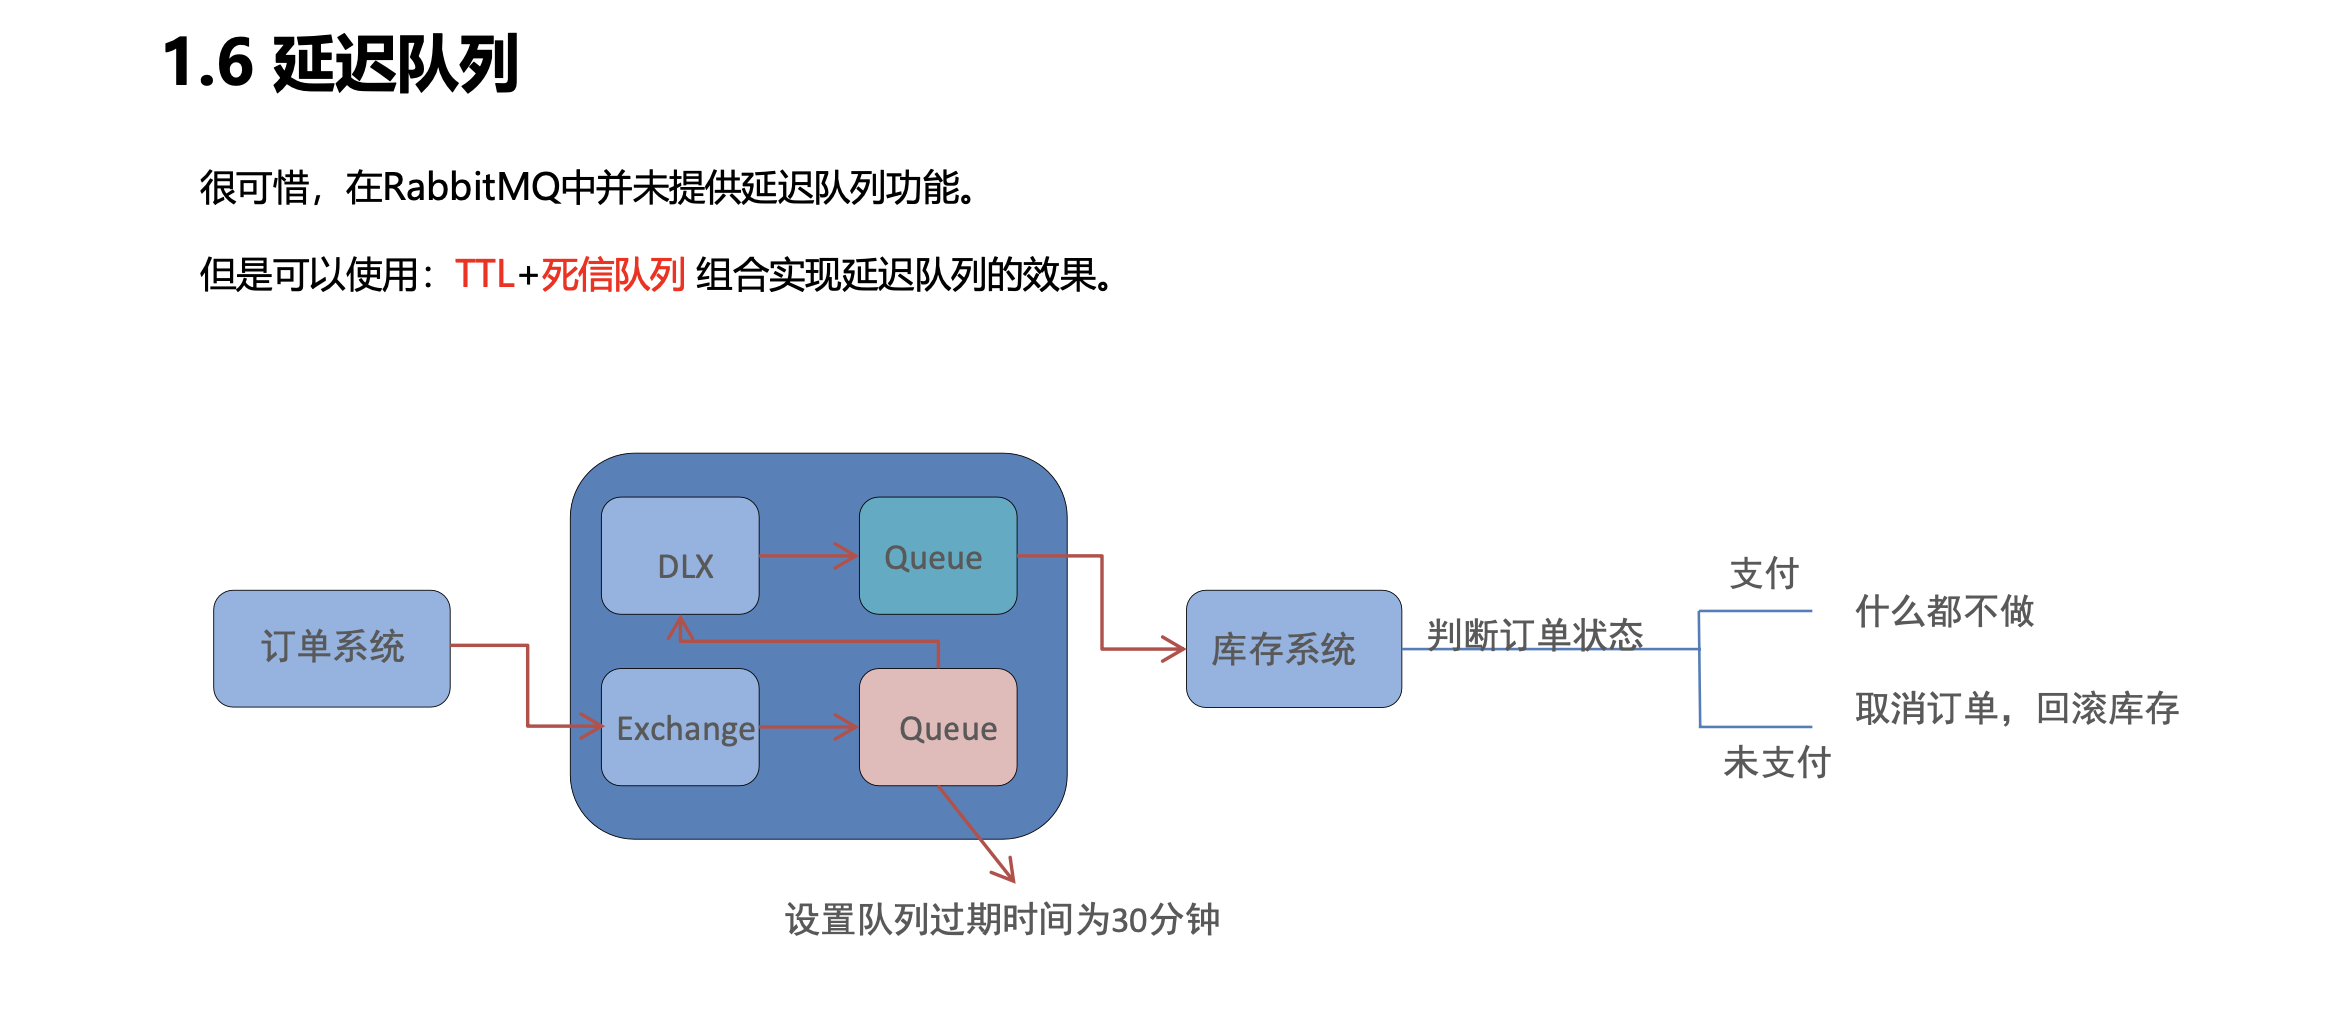
延迟队列
代码编写
编写生产者spring配置,定义普通队列和死信队列并绑定
spring-rabbitmq-producer.xml
1 | <!-- |
编写消费者监听器
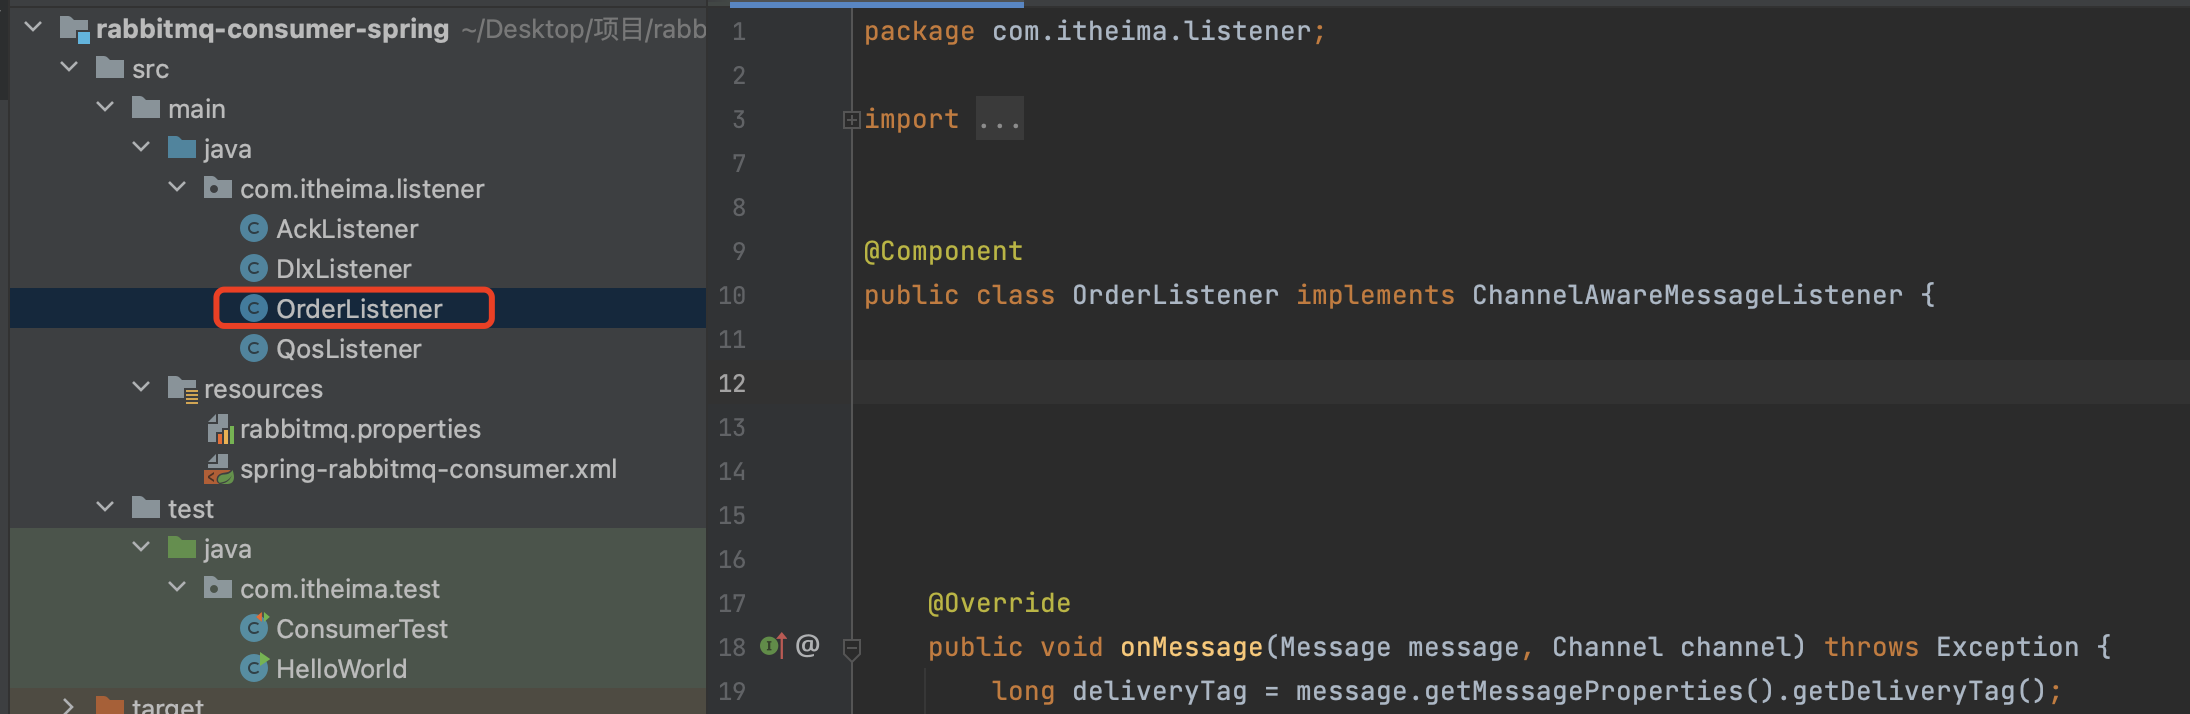
1 | package com.itheima.listener; |
编写消费者spring配置绑定监听死信队列
spring-rabbitmq-consumer.xml
1 | <!--定义监听器容器--> |
运行消费者
定义生产者测试方法
1 |
|
执行测试方法,并观察延迟队列效果

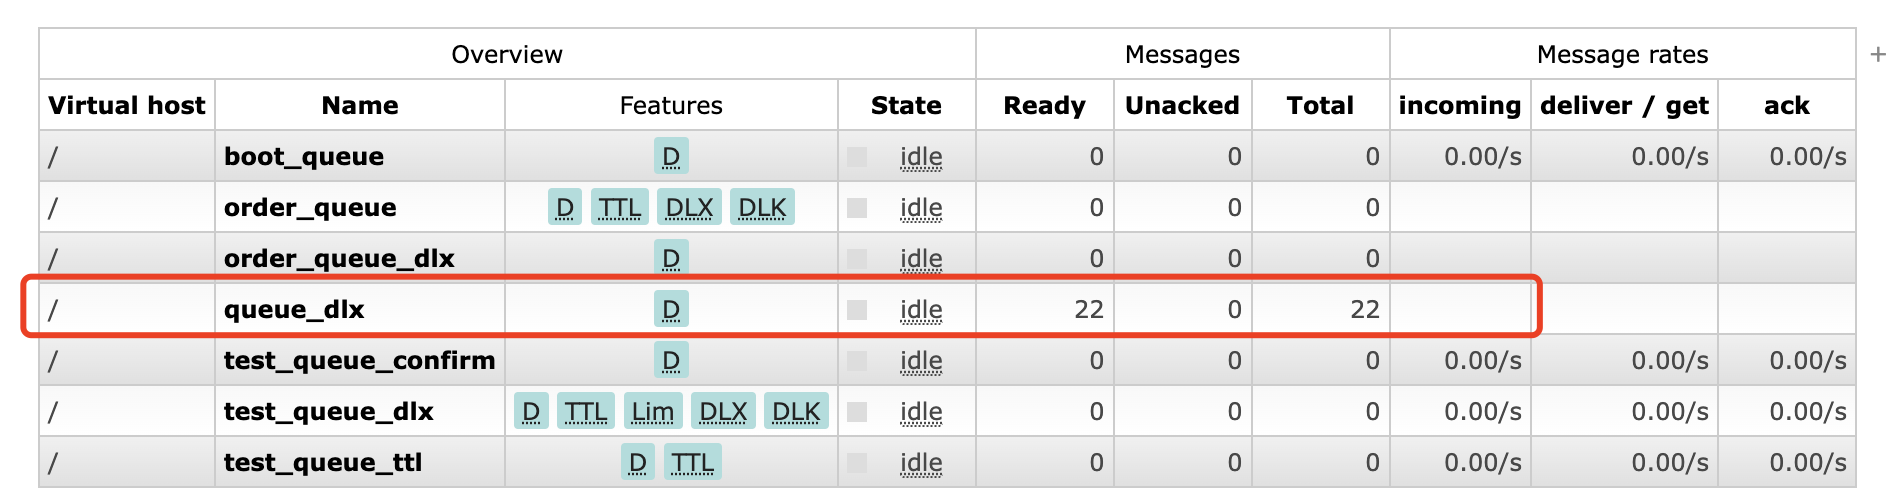
10s后,消息进入死信队列并被消费者消费


日志监控

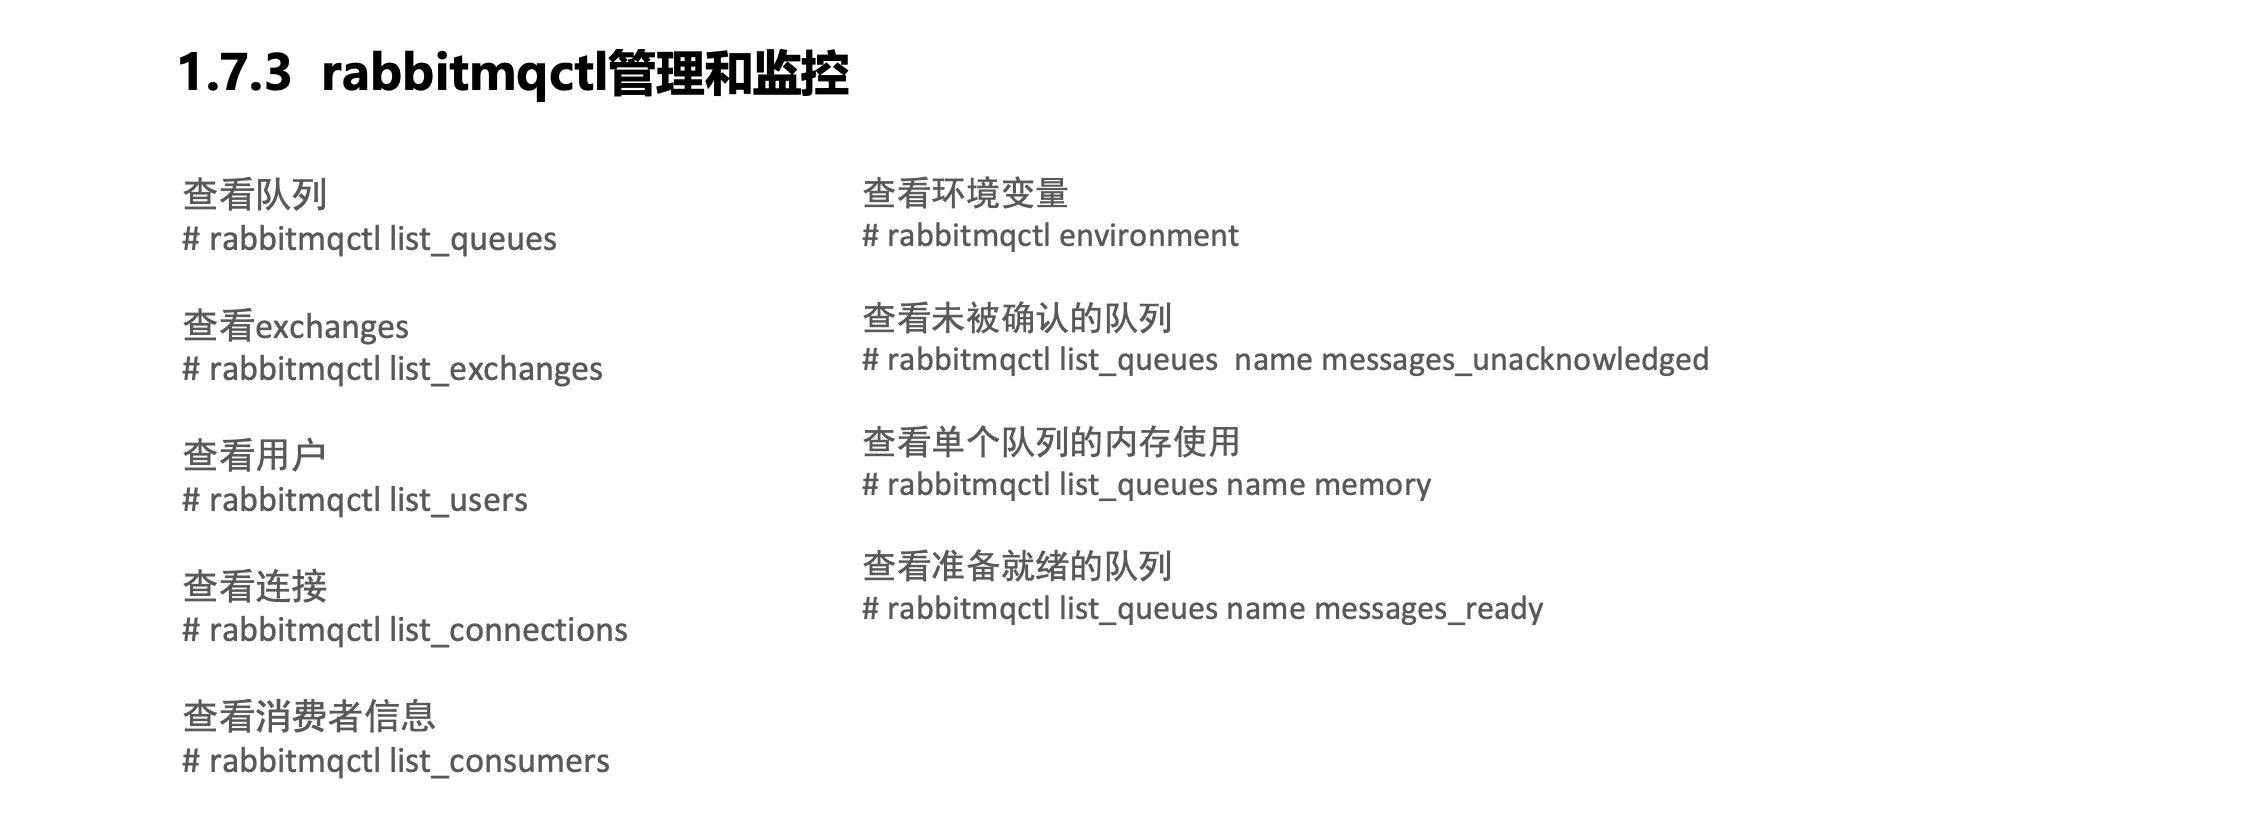
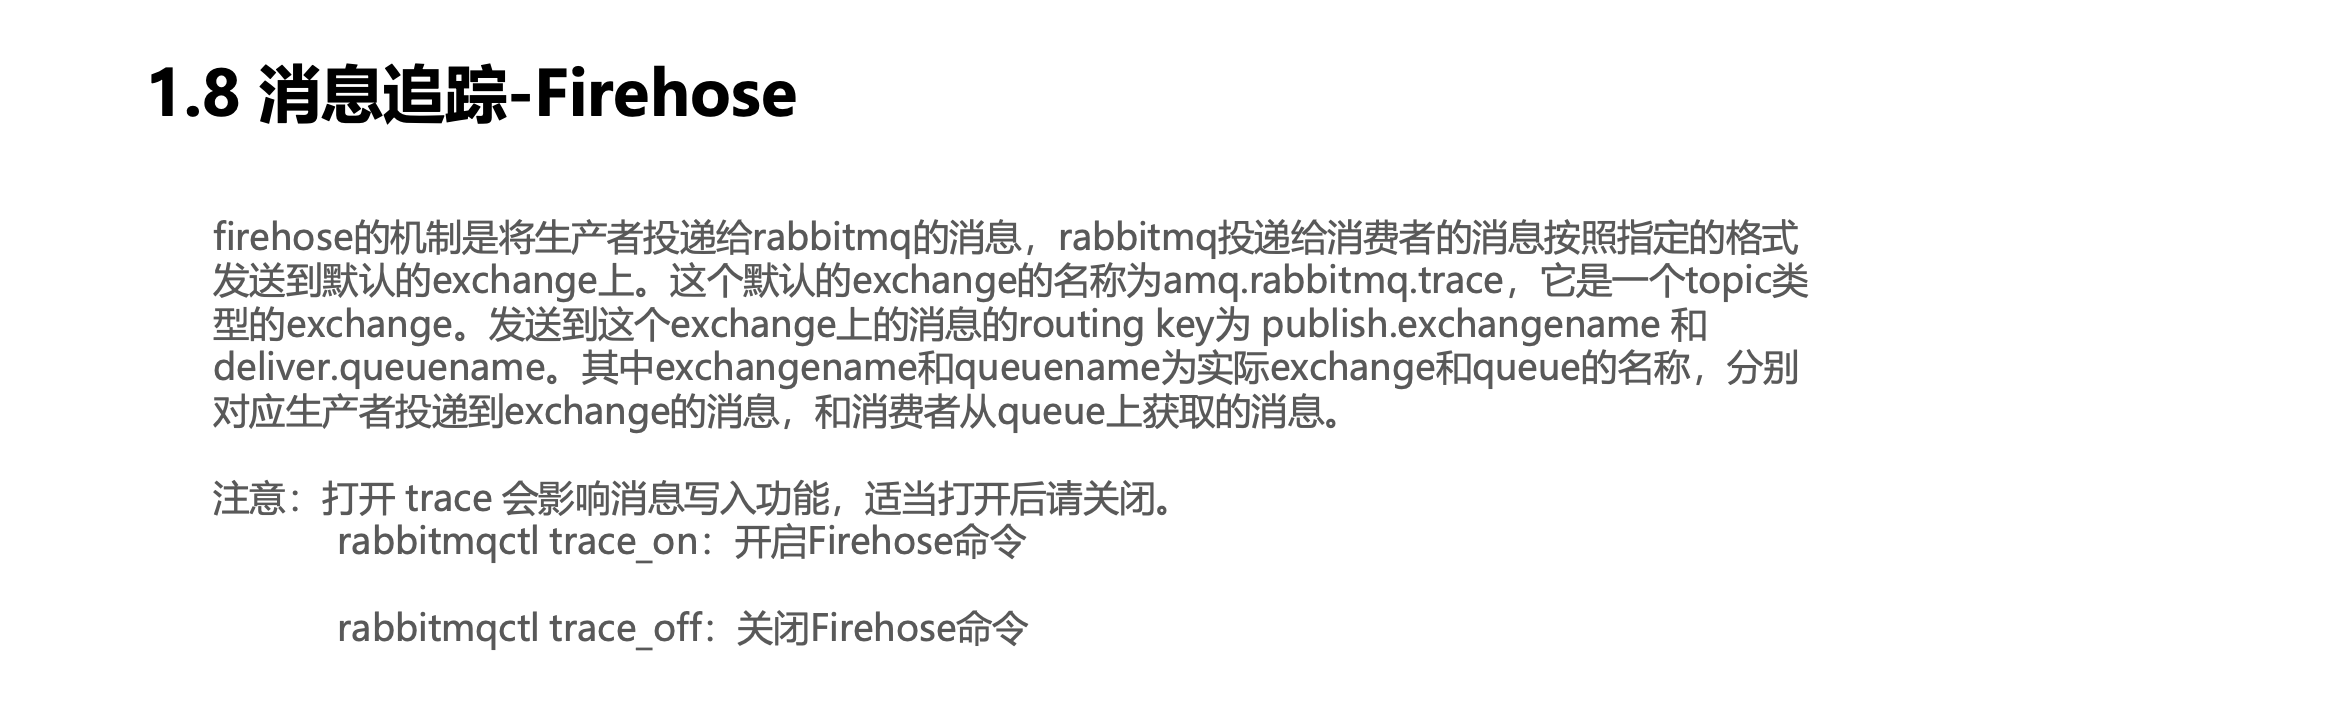
消息追踪
添加队列
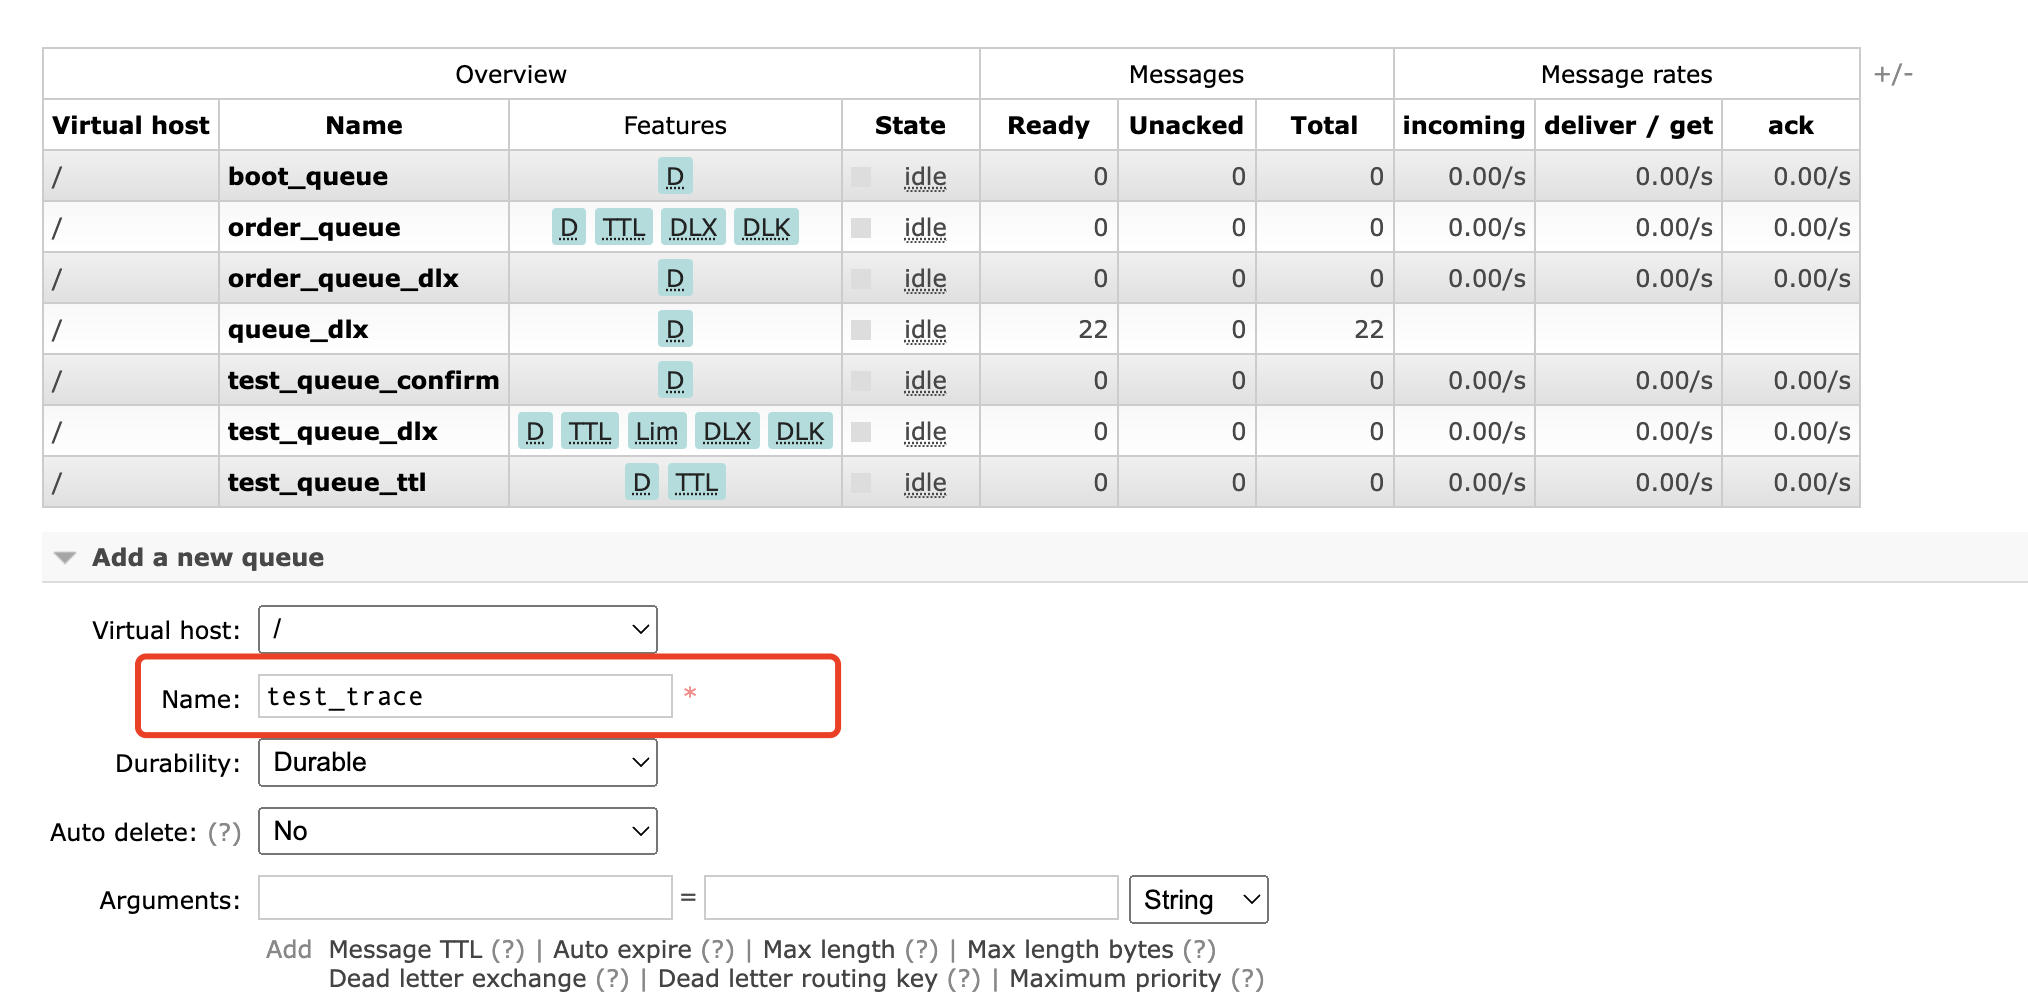
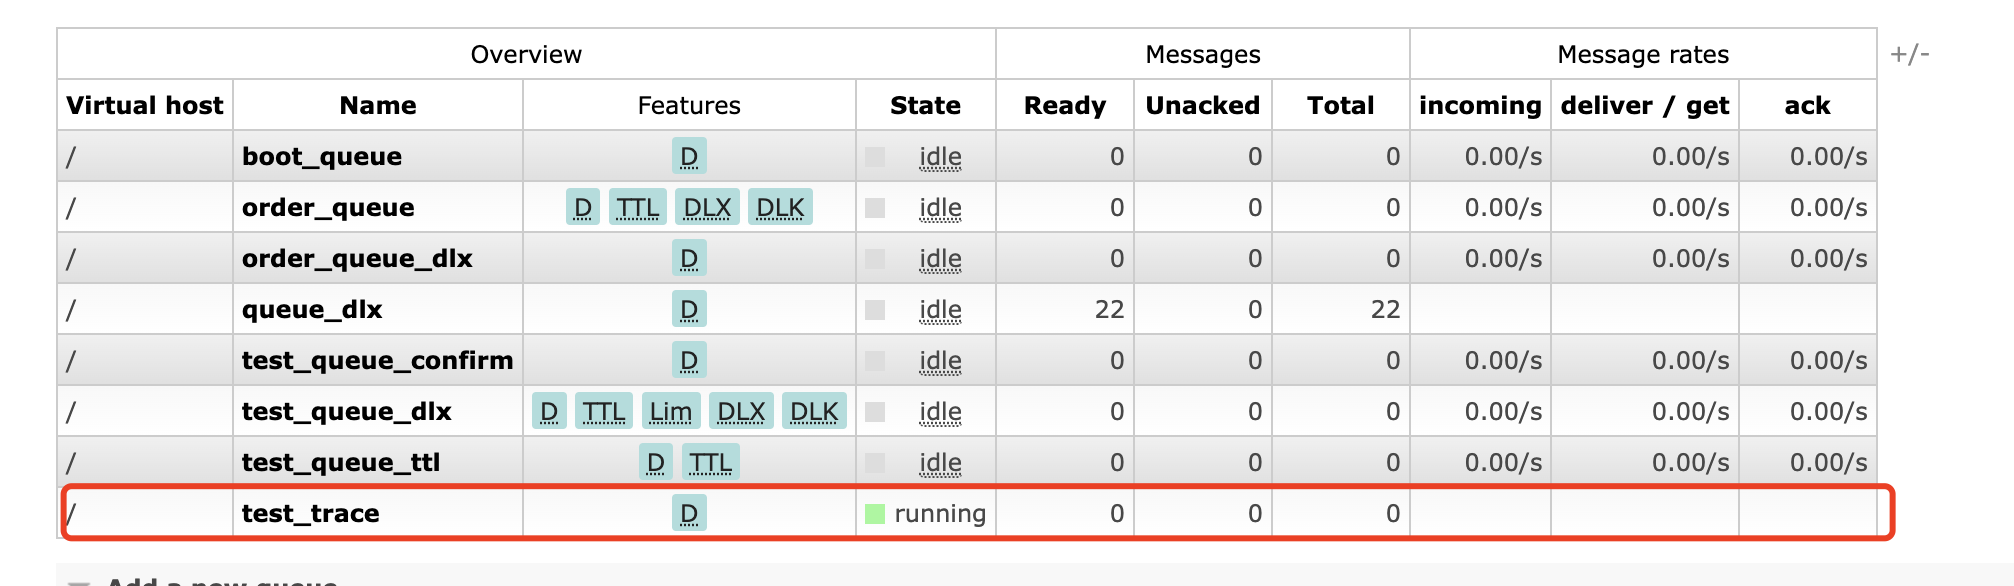
在默认的交换机amq.rabbitmq.trace中绑定创建好的队列

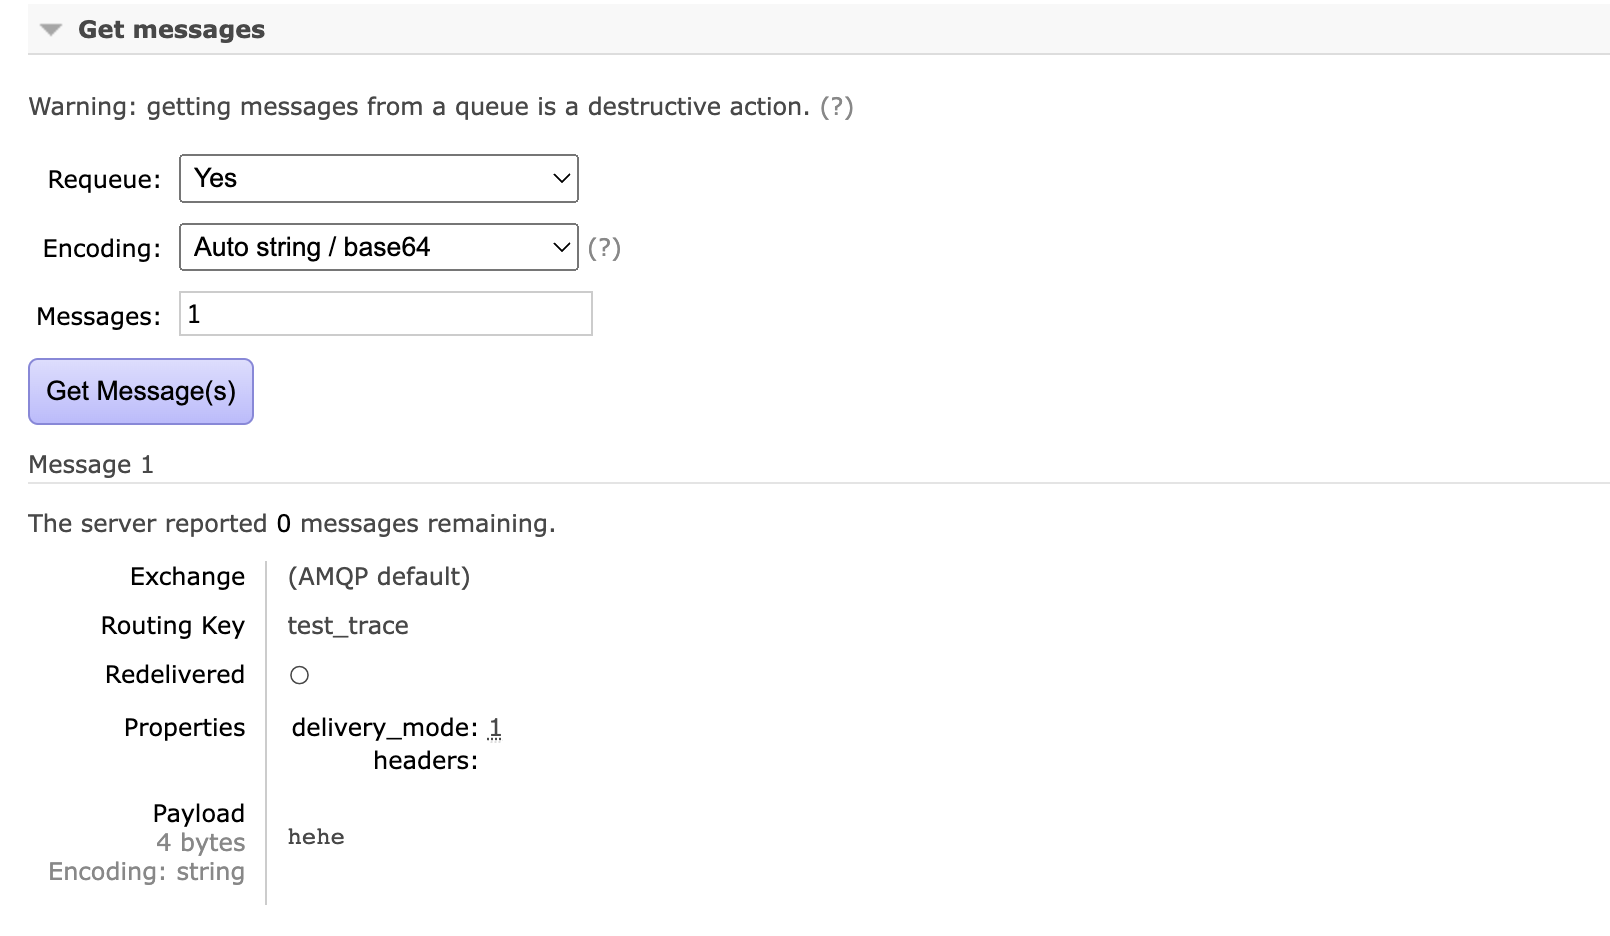
不开启追踪往队列test_trace中发送消息

观察队列中的消息情况
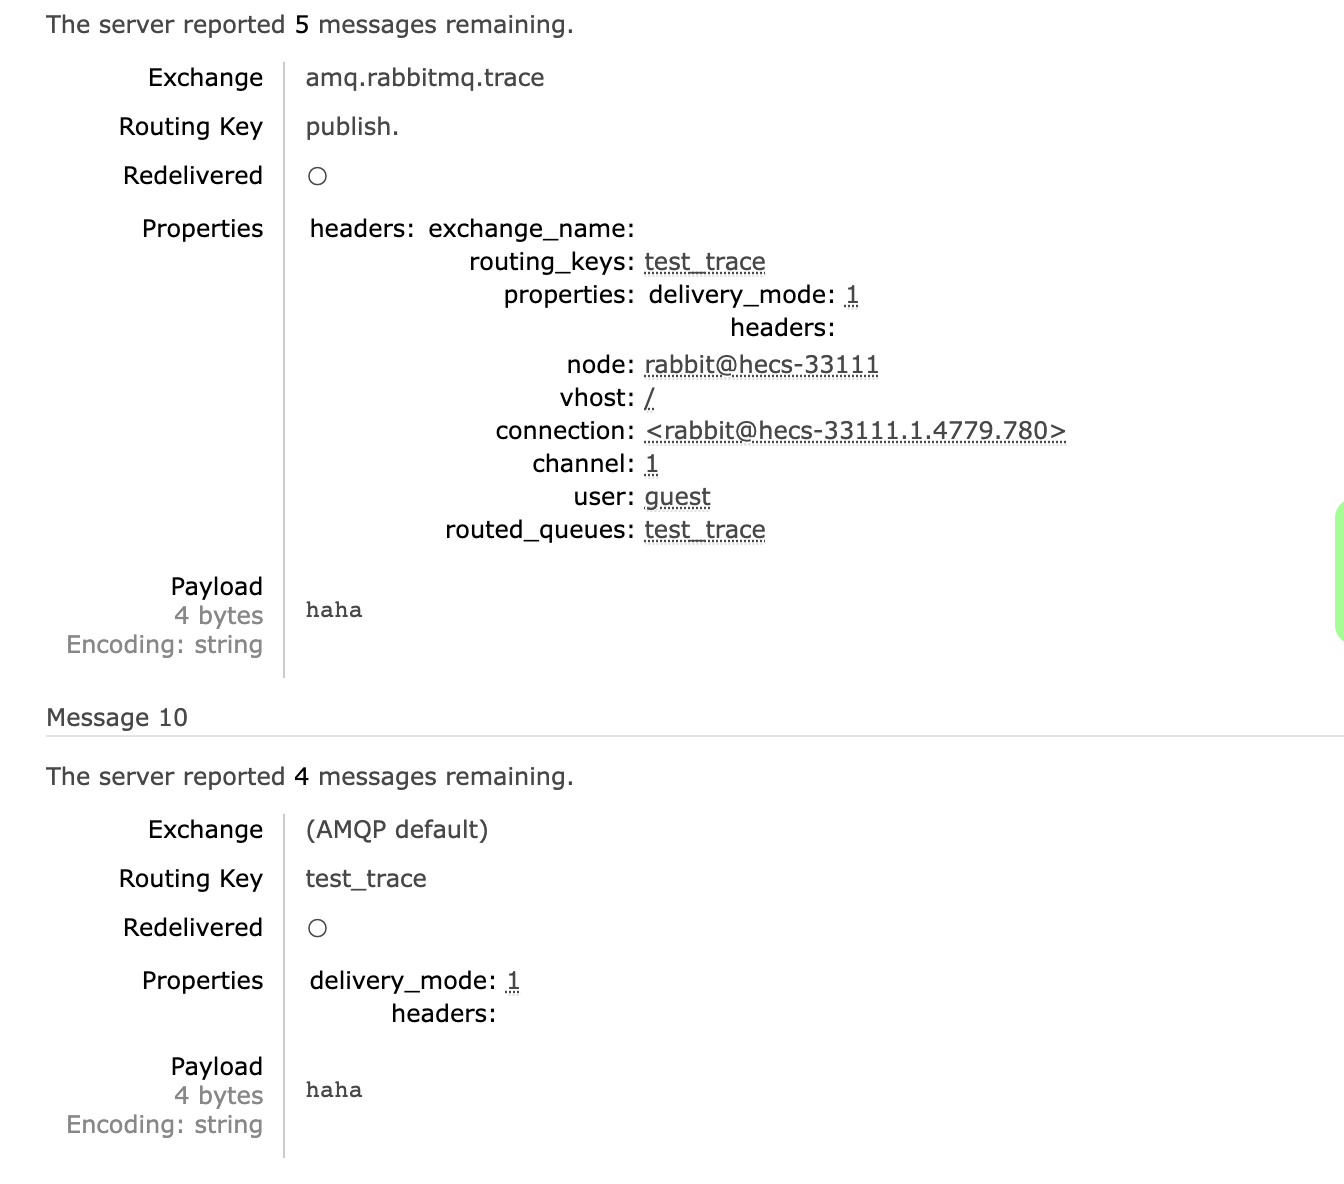
开启追踪功能
1 | [root@hecs-33111 ~]# rabbitmqctl trace_on |
观察队列消息情况,amq.rabbitmq.trace交换机也发送了消息并带有详细日志信息
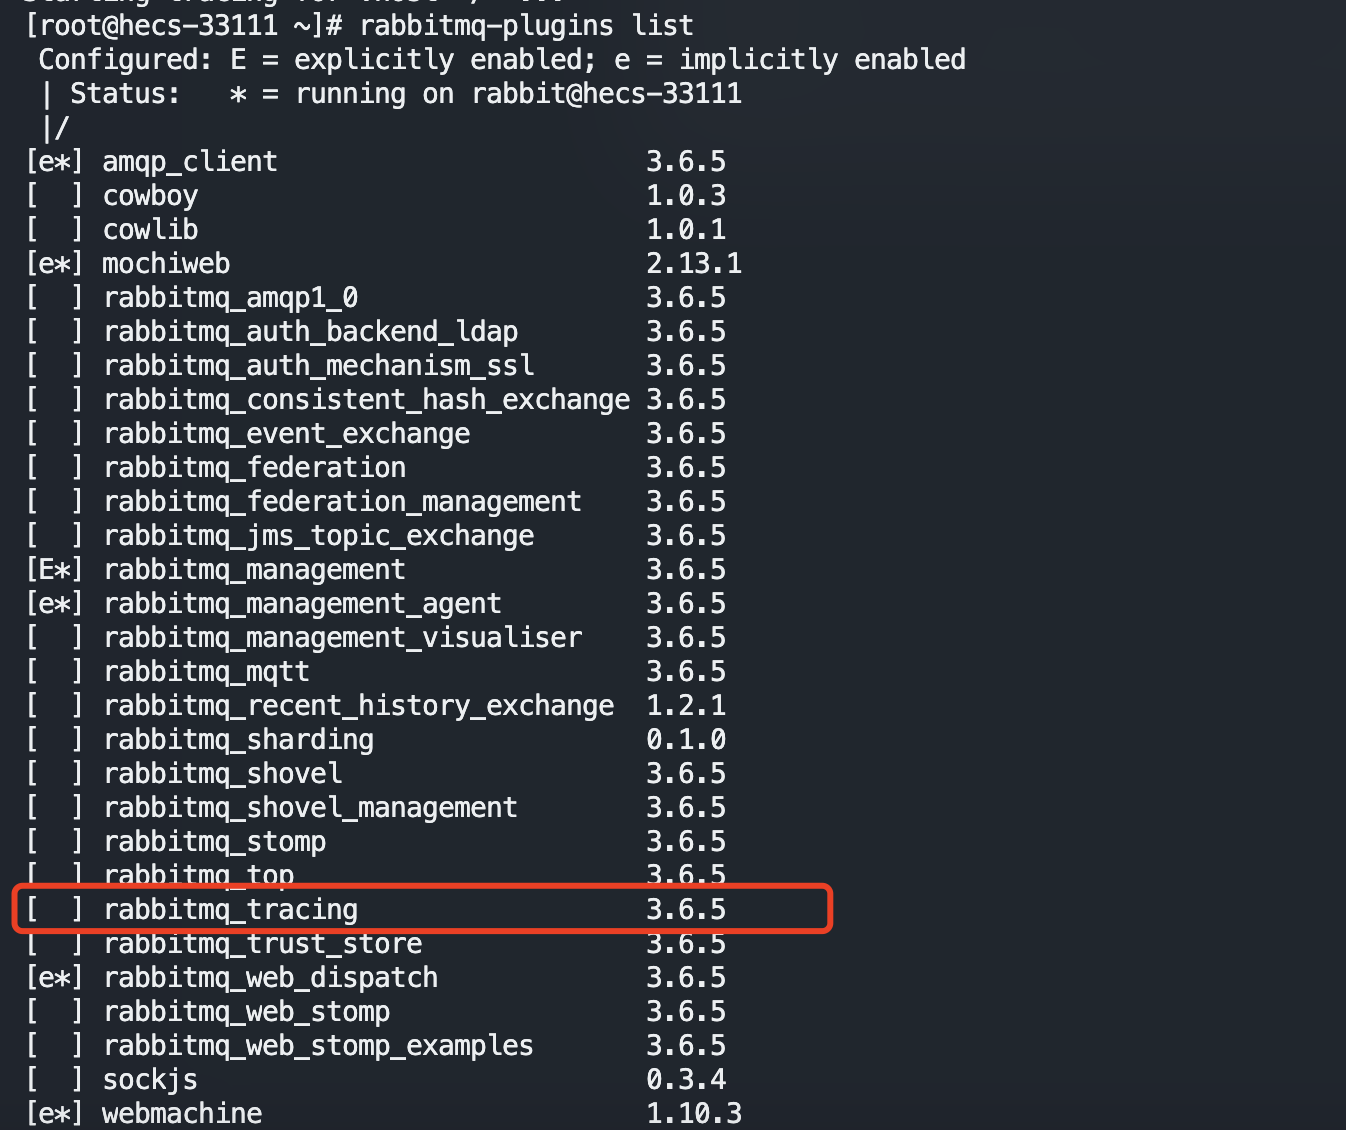
启用该插件
1 | [root@hecs-33111 ~]# rabbitmq-plugins enable rabbitmq_tracing |
观察控制台多了一个选项

定义一个trace
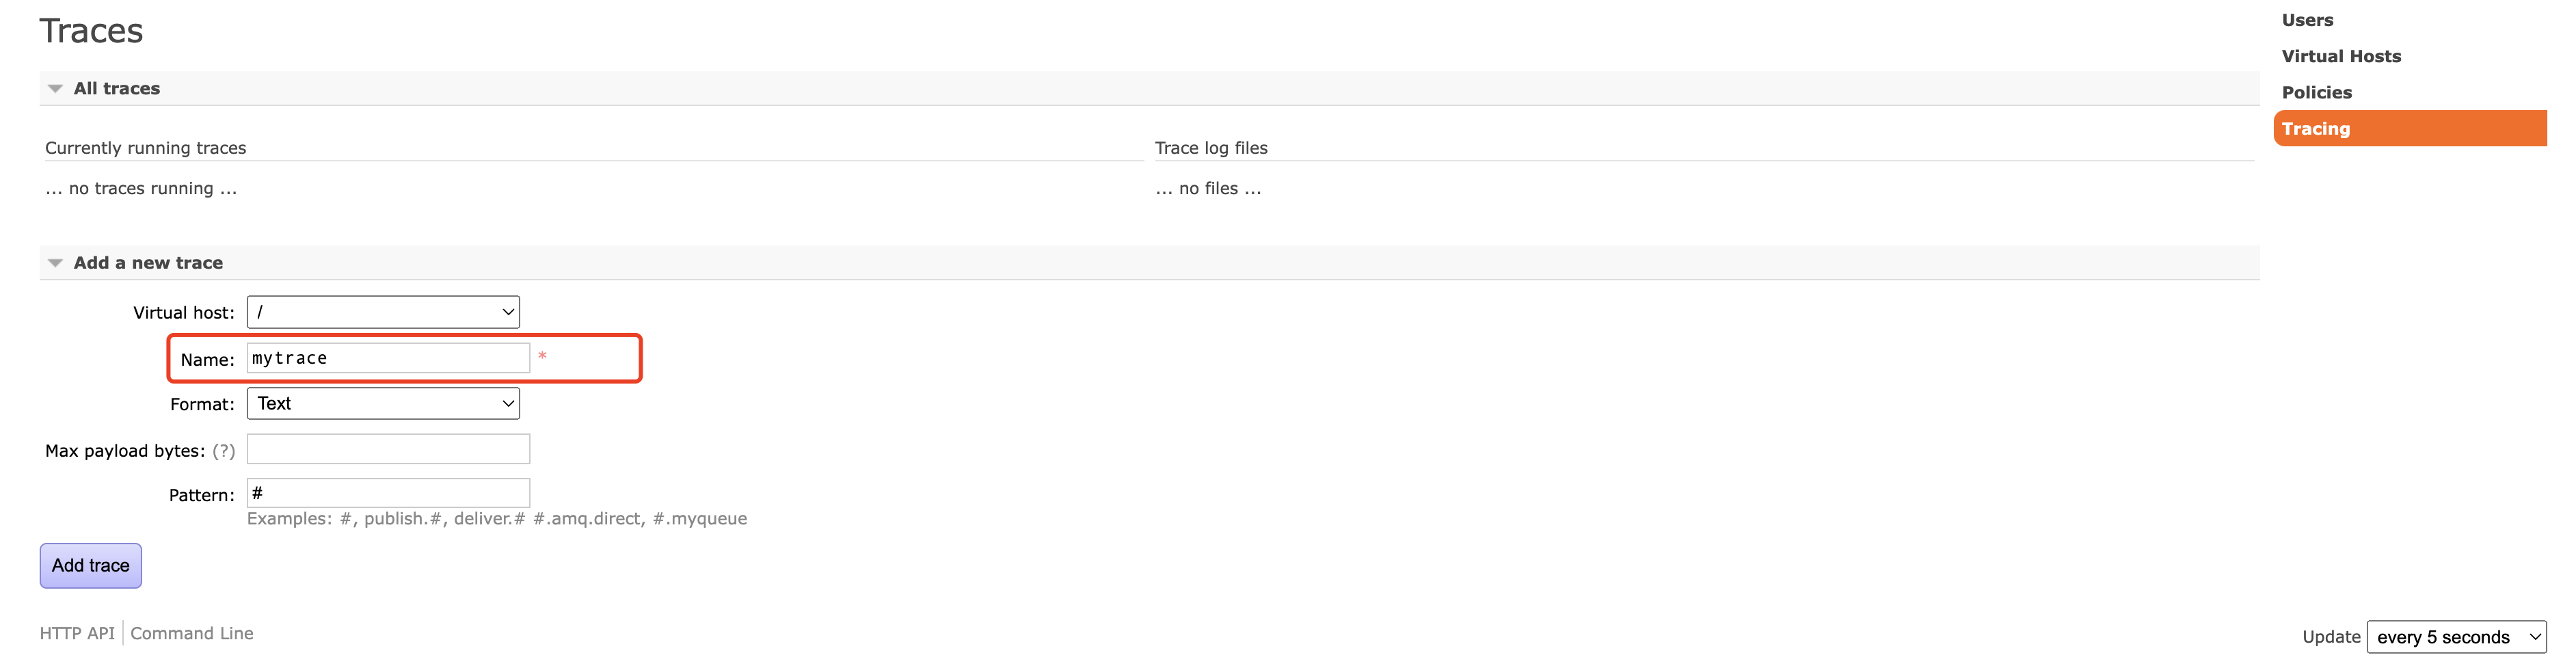
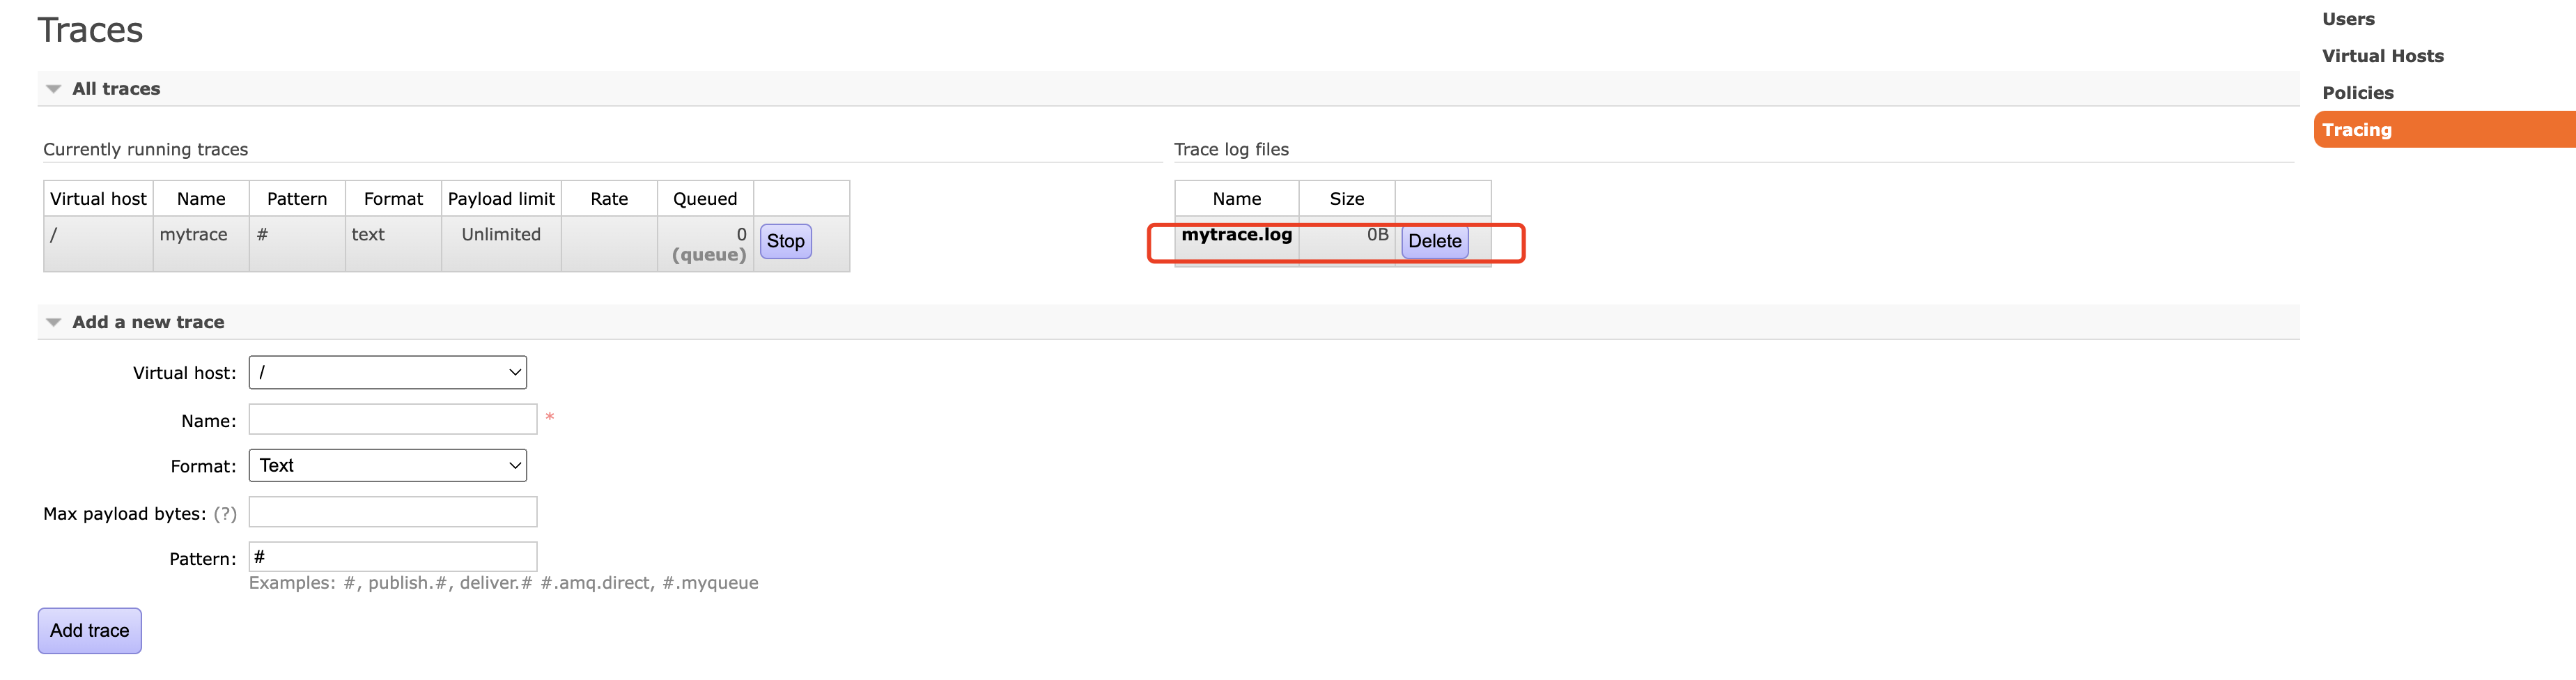
往队列里发送一个消息


RabbitMQ应用问题

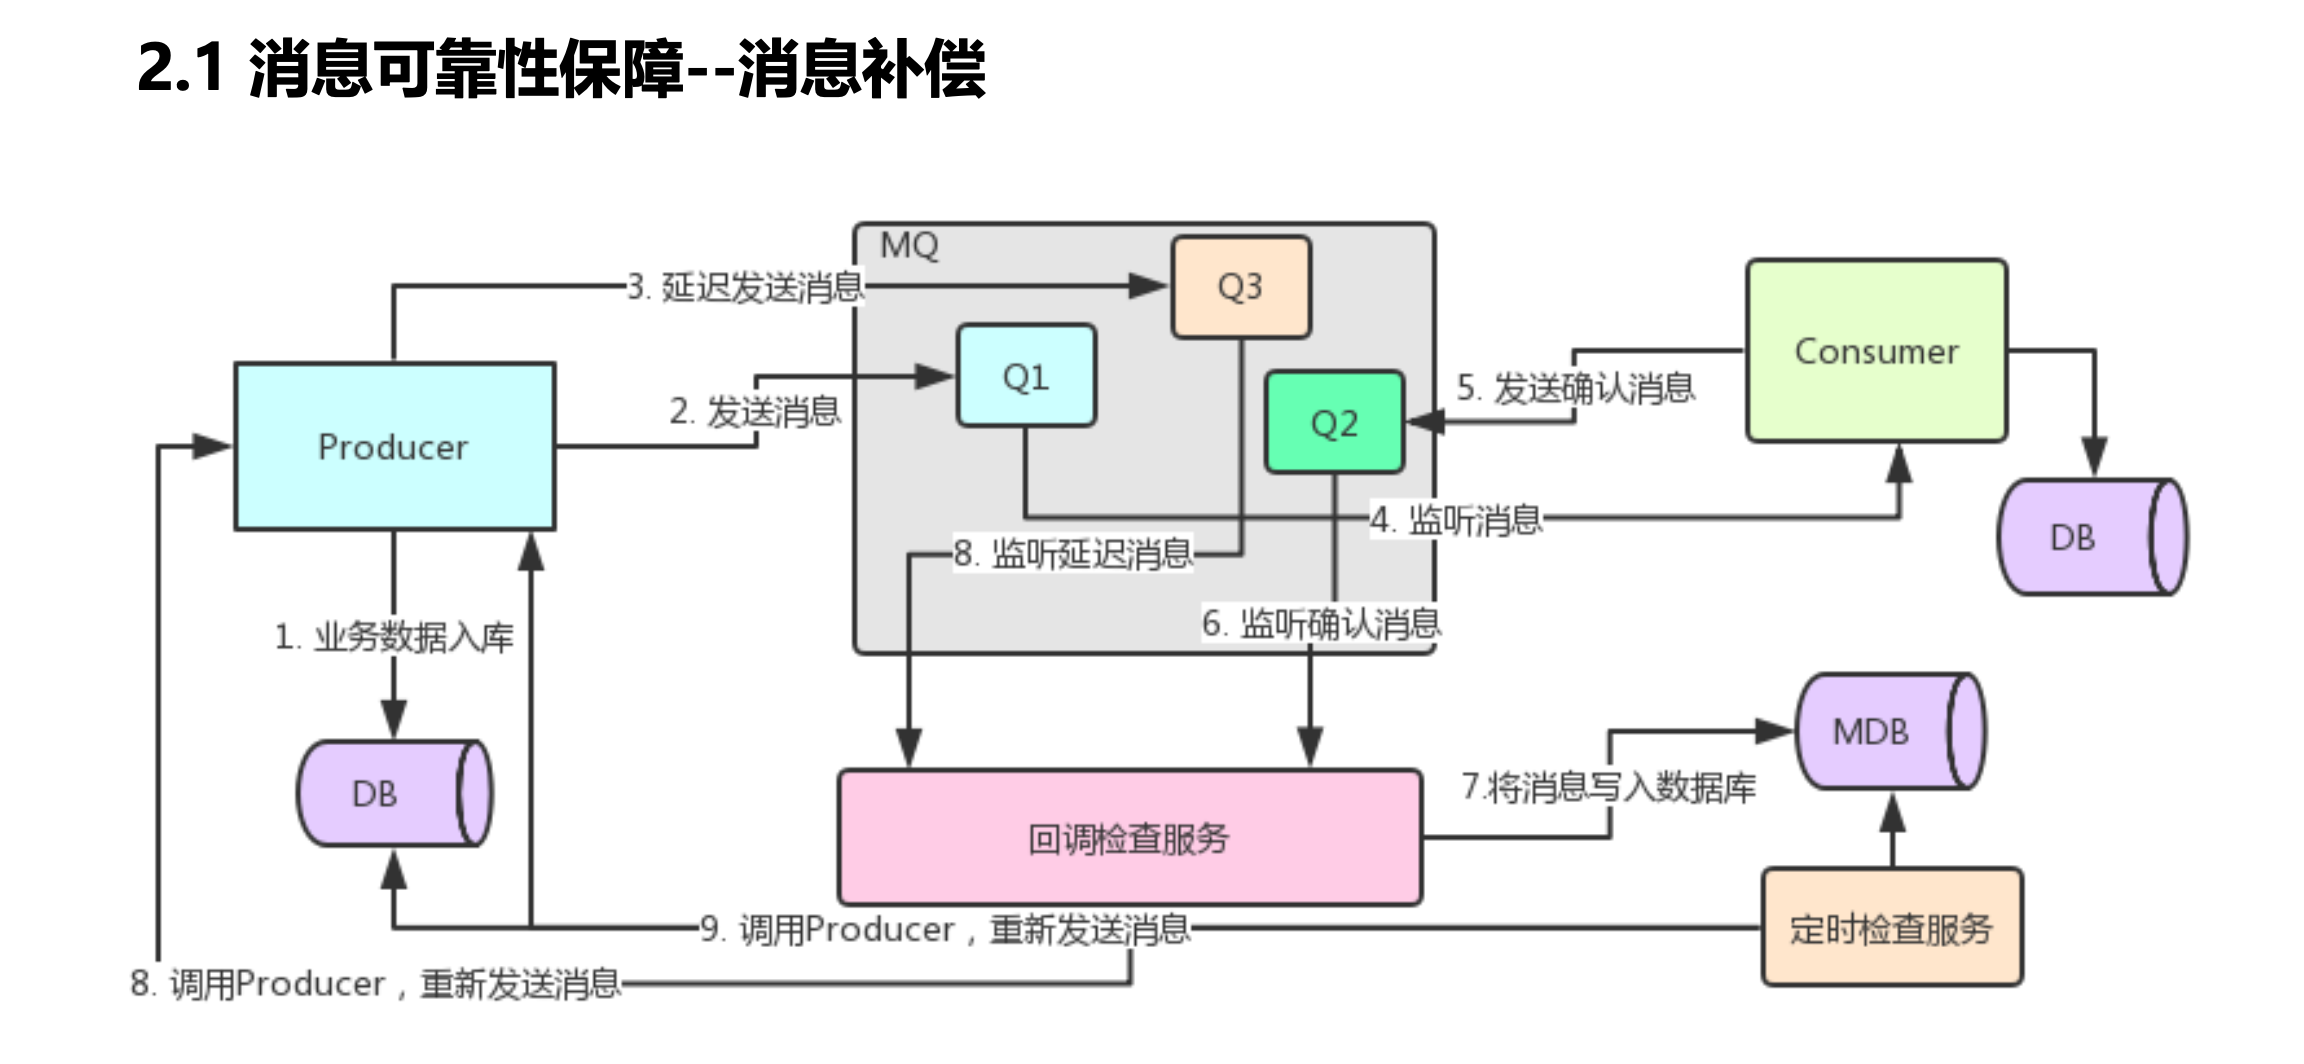
消息可靠性保障

消息幂等性保障


RabbitMQ集群搭建
摘要:实际生产应用中都会采用消息队列的集群方案,如果选择RabbitMQ那么有必要了解下它的集群方案原理
一般来说,如果只是为了学习RabbitMQ或者验证业务工程的正确性那么在本地环境或者测试环境上使用其单实例部署就可以了,但是出于MQ中间件本身的可靠性、并发性、吞吐量和消息堆积能力等问题的考虑,在生产环境上一般都会考虑使用RabbitMQ的集群方案。
集群方案的原理
RabbitMQ这款消息队列中间件产品本身是基于Erlang编写,Erlang语言天生具备分布式特性(通过同步Erlang集群各节点的magic cookie来实现)。因此,RabbitMQ天然支持Clustering。这使得RabbitMQ本身不需要像ActiveMQ、Kafka那样通过ZooKeeper分别来实现HA方案和保存集群的元数据。集群是保证可靠性的一种方式,同时可以通过水平扩展以达到增加消息吞吐量能力的目的。
单机多实例部署
由于某些因素的限制,有时候你不得不在一台机器上去搭建一个rabbitmq集群,这个有点类似zookeeper的单机版。真实生成环境还是要配成多机集群的。有关怎么配置多机集群的可以参考其他的资料,这里主要论述如何在单机中配置多个rabbitmq实例。
主要参考官方文档:https://www.rabbitmq.com/clustering.html
首先确保RabbitMQ运行没有问题
1 | [root@super ~]# rabbitmqctl status |
停止rabbitmq服务
1 | [root@super sbin]# service rabbitmq-server stop |
启动第一个节点:
1 | [root@super sbin]# RABBITMQ_NODE_PORT=5673 RABBITMQ_NODENAME=rabbit1 rabbitmq-server start |
启动第二个节点:
web管理插件端口占用,所以还要指定其web插件占用的端口号。
1 | [root@super ~]# RABBITMQ_NODE_PORT=5674 RABBITMQ_SERVER_START_ARGS="-rabbitmq_management listener [{port,15674}]" RABBITMQ_NODENAME=rabbit2 rabbitmq-server start |
结束命令:
1 | rabbitmqctl -n rabbit1 stop |
rabbit1操作作为主节点:
1 | [root@super ~]# rabbitmqctl -n rabbit1 stop_app |
rabbit2操作为从节点:
1 | [root@super ~]# rabbitmqctl -n rabbit2 stop_app |
查看集群状态:
1 | [root@super ~]# rabbitmqctl cluster_status -n rabbit1 |
web监控:

集群管理
rabbitmqctl join_cluster {cluster_node} [–ram]
将节点加入指定集群中。在这个命令执行前需要停止RabbitMQ应用并重置节点。
rabbitmqctl cluster_status
显示集群的状态。
rabbitmqctl change_cluster_node_type {disc|ram}
修改集群节点的类型。在这个命令执行前需要停止RabbitMQ应用。
rabbitmqctl forget_cluster_node [–offline]
将节点从集群中删除,允许离线执行。
rabbitmqctl update_cluster_nodes {clusternode}
在集群中的节点应用启动前咨询clusternode节点的最新信息,并更新相应的集群信息。这个和join_cluster不同,它不加入集群。考虑这样一种情况,节点A和节点B都在集群中,当节点A离线了,节点C又和节点B组成了一个集群,然后节点B又离开了集群,当A醒来的时候,它会尝试联系节点B,但是这样会失败,因为节点B已经不在集群中了。
rabbitmqctl cancel_sync_queue [-p vhost] {queue}
取消队列queue同步镜像的操作。
rabbitmqctl set_cluster_name {name}
设置集群名称。集群名称在客户端连接时会通报给客户端。Federation和Shovel插件也会有用到集群名称的地方。集群名称默认是集群中第一个节点的名称,通过这个命令可以重新设置。
RabbitMQ镜像集群配置
上面已经完成RabbitMQ默认集群模式,但并不保证队列的高可用性,尽管交换机、绑定这些可以复制到集群里的任何一个节点,但是队列内容不会复制。虽然该模式解决一项目组节点压力,但队列节点宕机直接导致该队列无法应用,只能等待重启,所以要想在队列节点宕机或故障也能正常应用,就要复制队列内容到集群里的每个节点,必须要创建镜像队列。
镜像队列是基于普通的集群模式的,然后再添加一些策略,所以你还是得先配置普通集群,然后才能设置镜像队列,我们就以上面的集群接着做。
设置的镜像队列可以通过开启的网页的管理端Admin->Policies,也可以通过命令。
rabbitmqctl set_policy my_ha “^” ‘{“ha-mode”:”all”}’
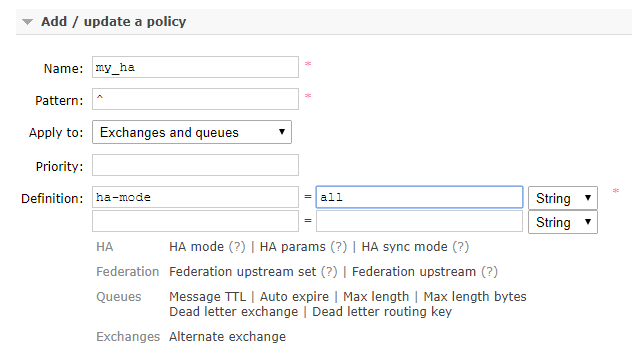
- Name:策略名称
- Pattern:匹配的规则,如果是匹配所有的队列,是^.
- Definition:使用ha-mode模式中的all,也就是同步所有匹配的队列。问号链接帮助文档。
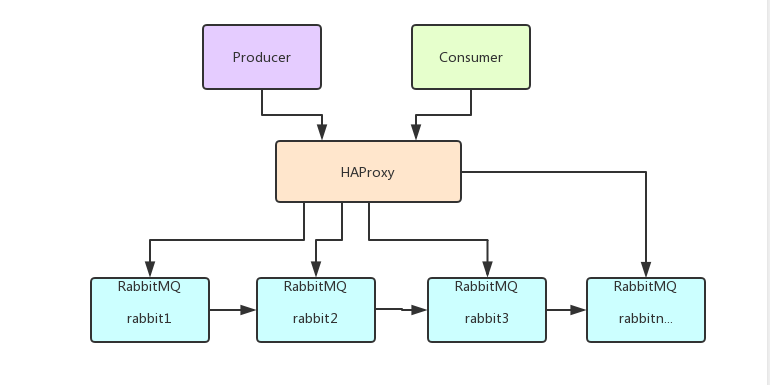
负载均衡-HAProxy
HAProxy提供高可用性、负载均衡以及基于TCP和HTTP应用的代理,支持虚拟主机,它是免费、快速并且可靠的一种解决方案,包括Twitter,Reddit,StackOverflow,GitHub在内的多家知名互联网公司在使用。HAProxy实现了一种事件驱动、单一进程模型,此模型支持非常大的并发连接数。
安装HAProxy
1 | //下载依赖包 |
配置HAProxy
配置文件路径:/etc/haproxy/haproxy.cfg
1 | logging options |
启动HAproxy负载
1 | /usr/local/haproxy/sbin/haproxy -f /etc/haproxy/haproxy.cfg |
代码中访问mq集群地址,则变为访问haproxy地址:5672