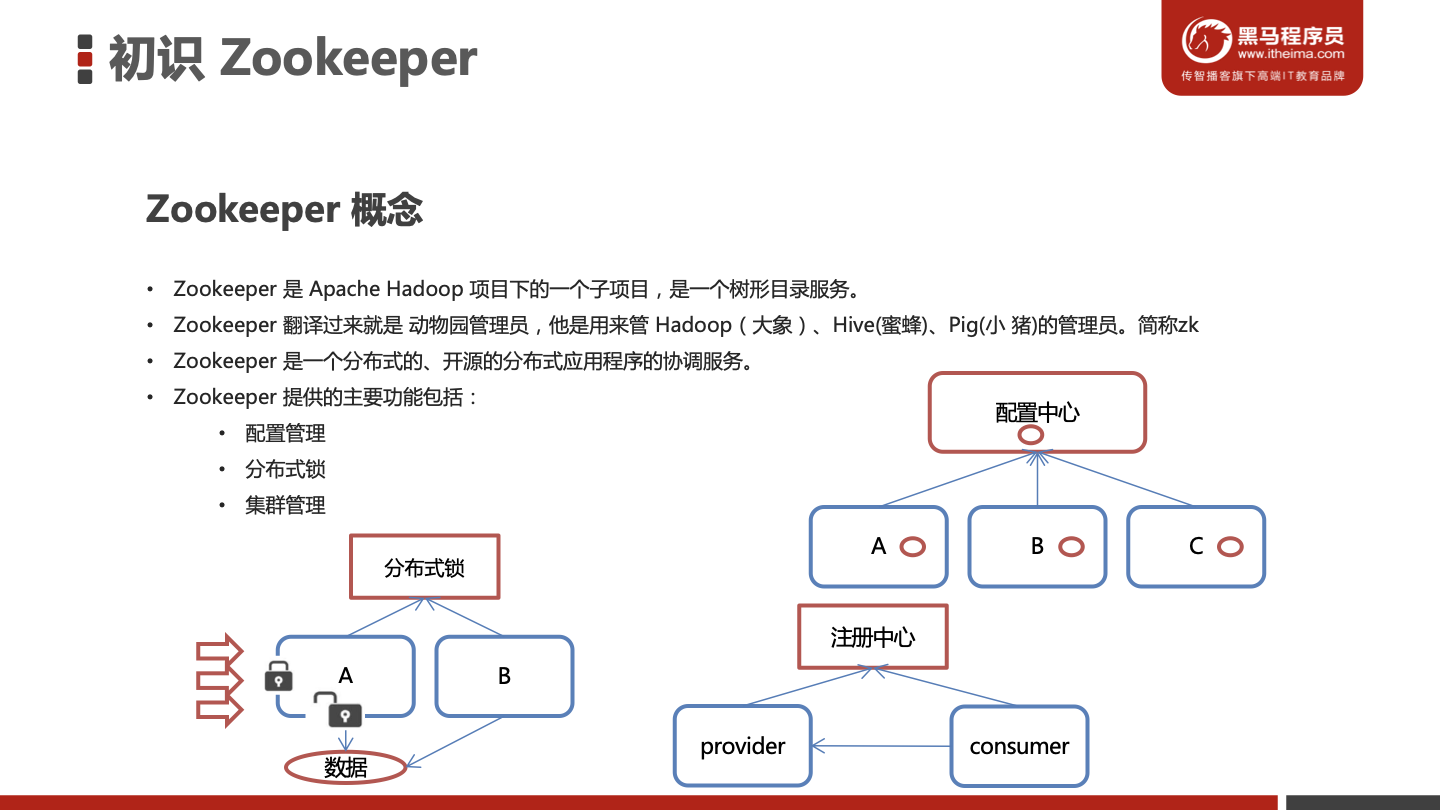
初识Zookeeper
ZooKeeper的安装与配置
1.1下载安装
1、环境准备
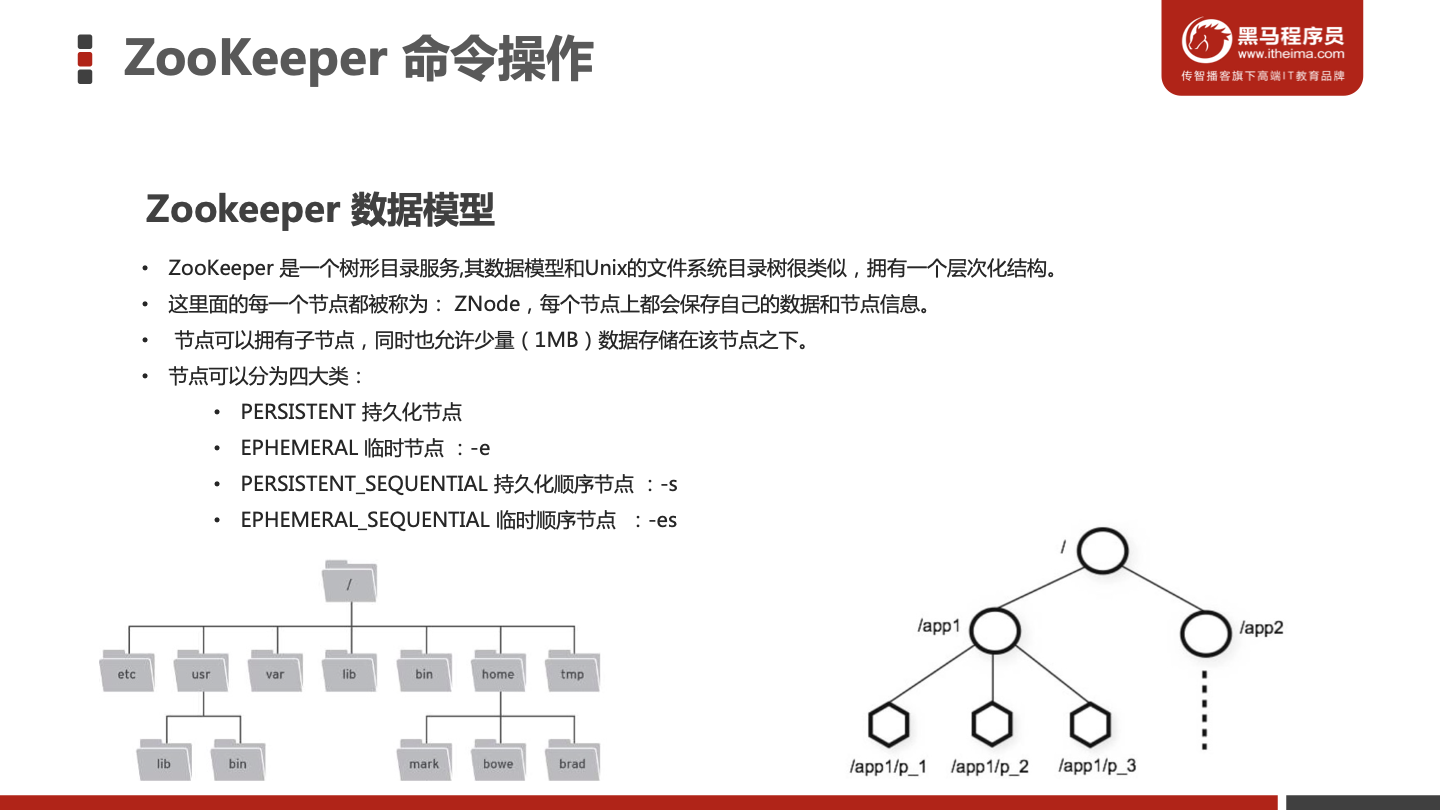
ZooKeeper服务器是用Java创建的,它运行在JVM之上。需要安装JDK 7或更高版本。
2、上传
将下载的ZooKeeper放到/opt/ZooKeeper目录下

3、解压
将tar包解压到/opt/zookeeper目录下
1
| tar -zxvf apache-zookeeper-3.5.6-bin.tar.gz
|
1.2 配置启动
1、配置zoo.cfg
进入到conf目录拷贝一个zoo_sample.cfg并完成配置
1
2
3
4
| #进入到conf目录
cd /opt/zooKeeper/apache-zookeeper-3.5.6-bin/conf/
#拷贝
cp zoo_sample.cfg zoo.cfg
|
修改zoo.cfg
1
2
3
4
5
6
| #打开目录
cd /opt/zooKeeper/
#创建zooKeeper存储目录
mkdir zkdata
#修改zoo.cfg
vim /opt/zooKeeper/apache-zookeeper-3.5.6-bin/conf/zoo.cfg
|
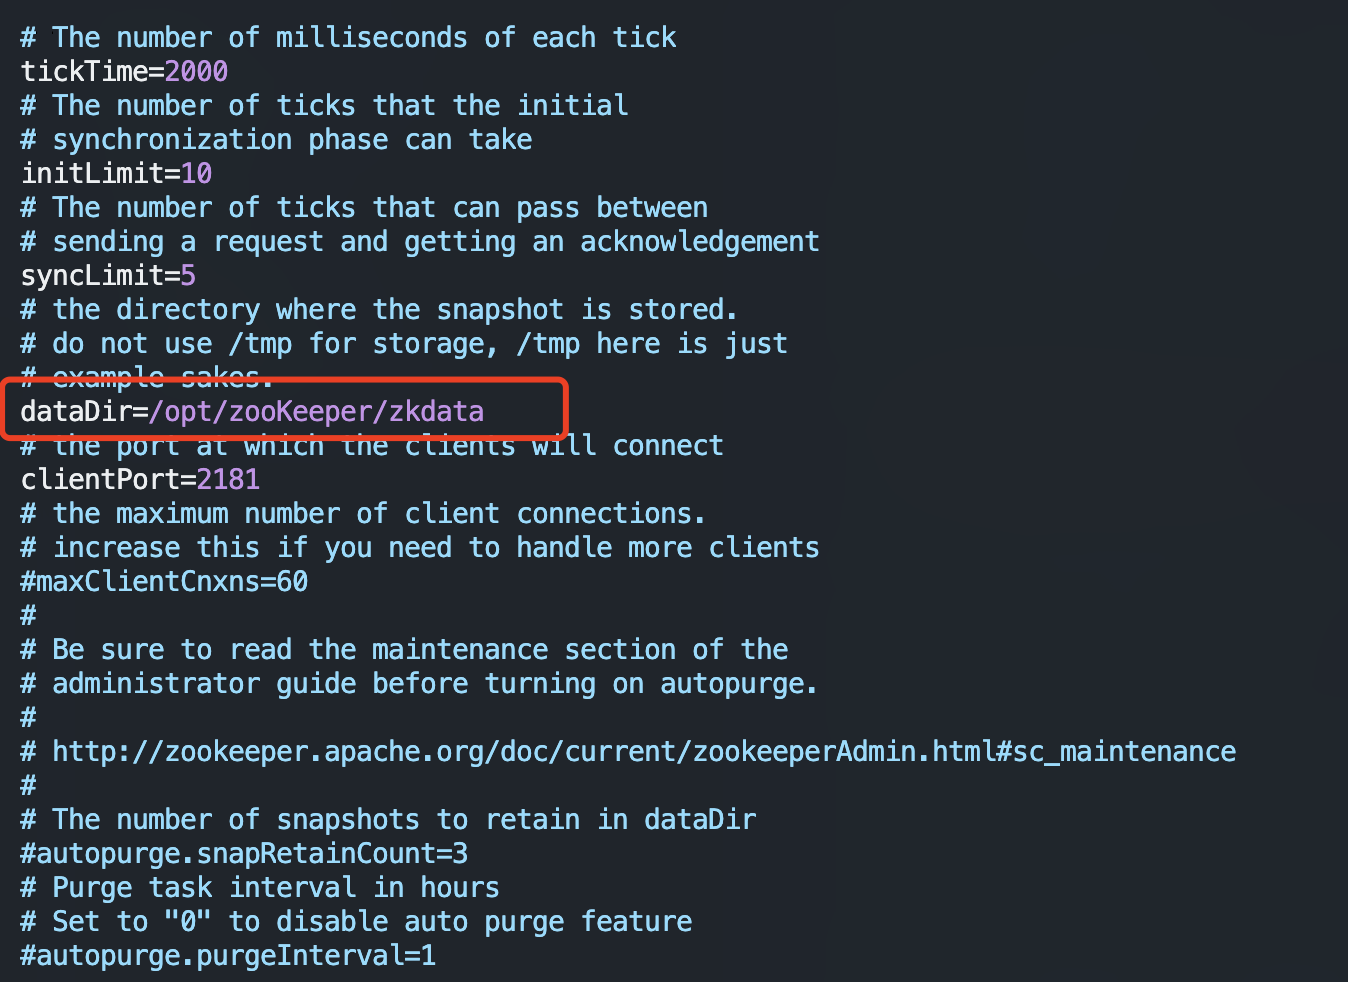
修改存储目录:dataDir=/opt/zookeeper/zkdata
2、启动ZooKeeper
1
2
3
| cd /opt/zooKeeper/apache-zookeeper-3.5.6-bin/bin/
#启动
./zkServer.sh start
|

3、查看ZooKeeper状态
zookeeper启动成功。standalone代表zk没有搭建集群,现在是单节点

ZooKeeper 命令操作


Zookeeper 数据模型
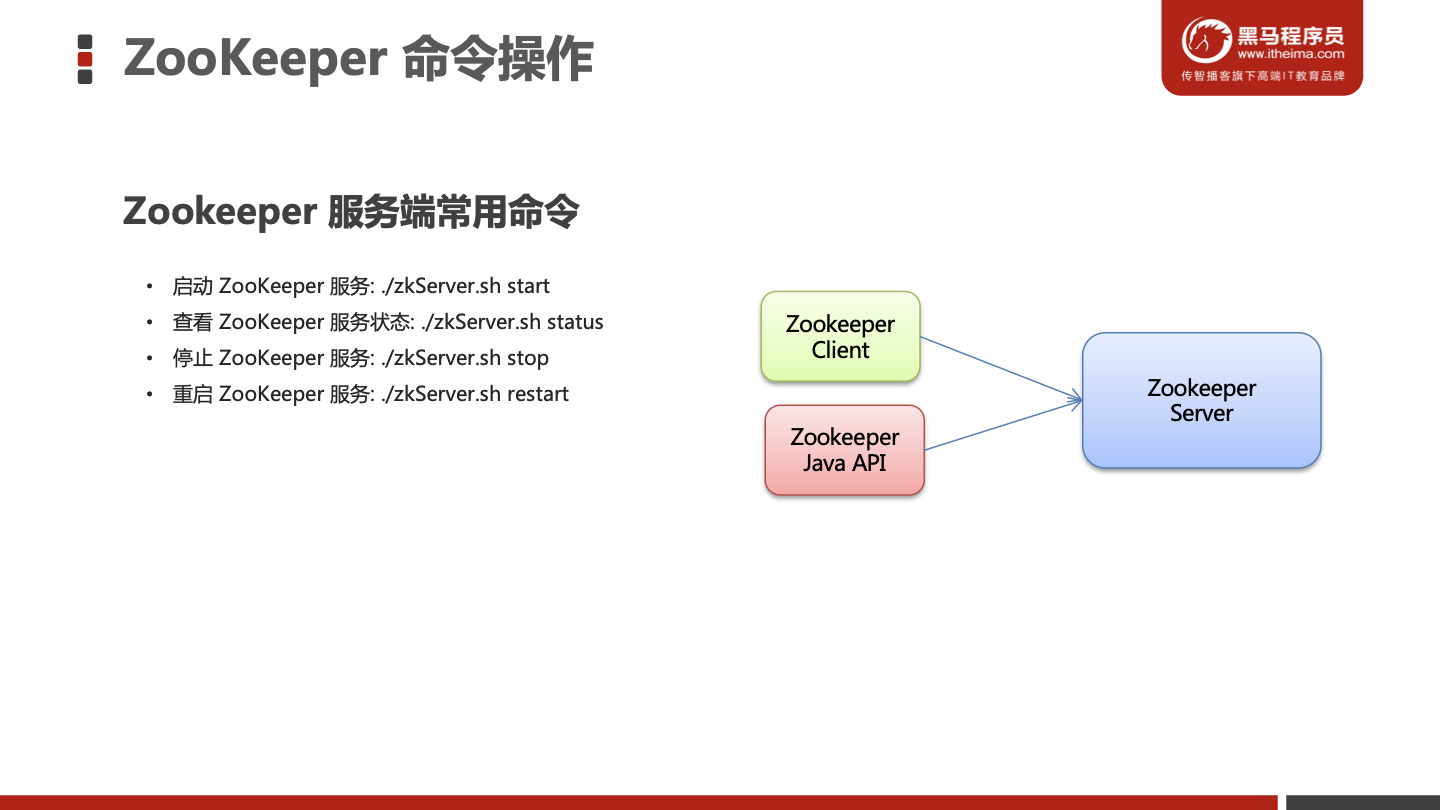
Zookeeper 服务端常用命令

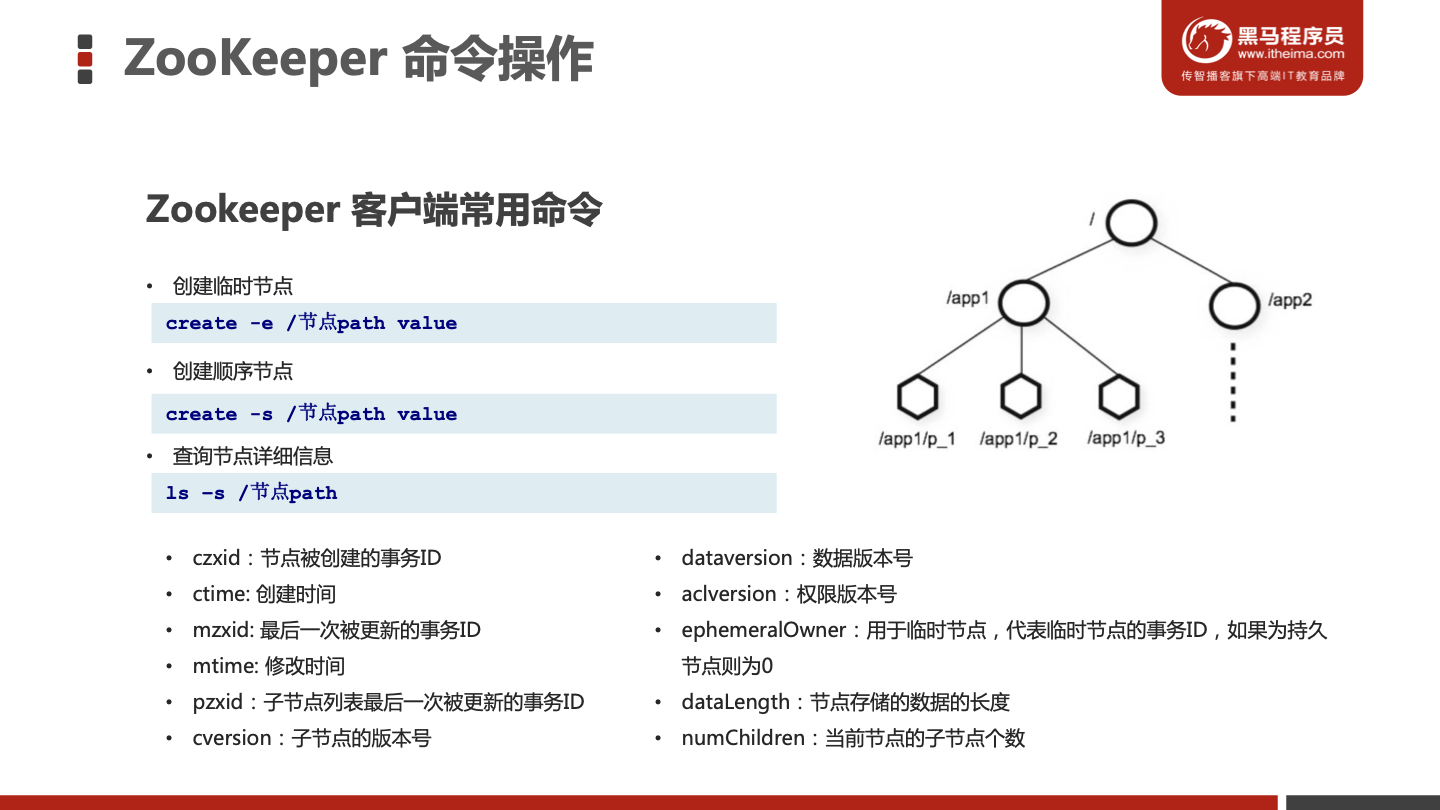
Zookeeper 客户端常用命令

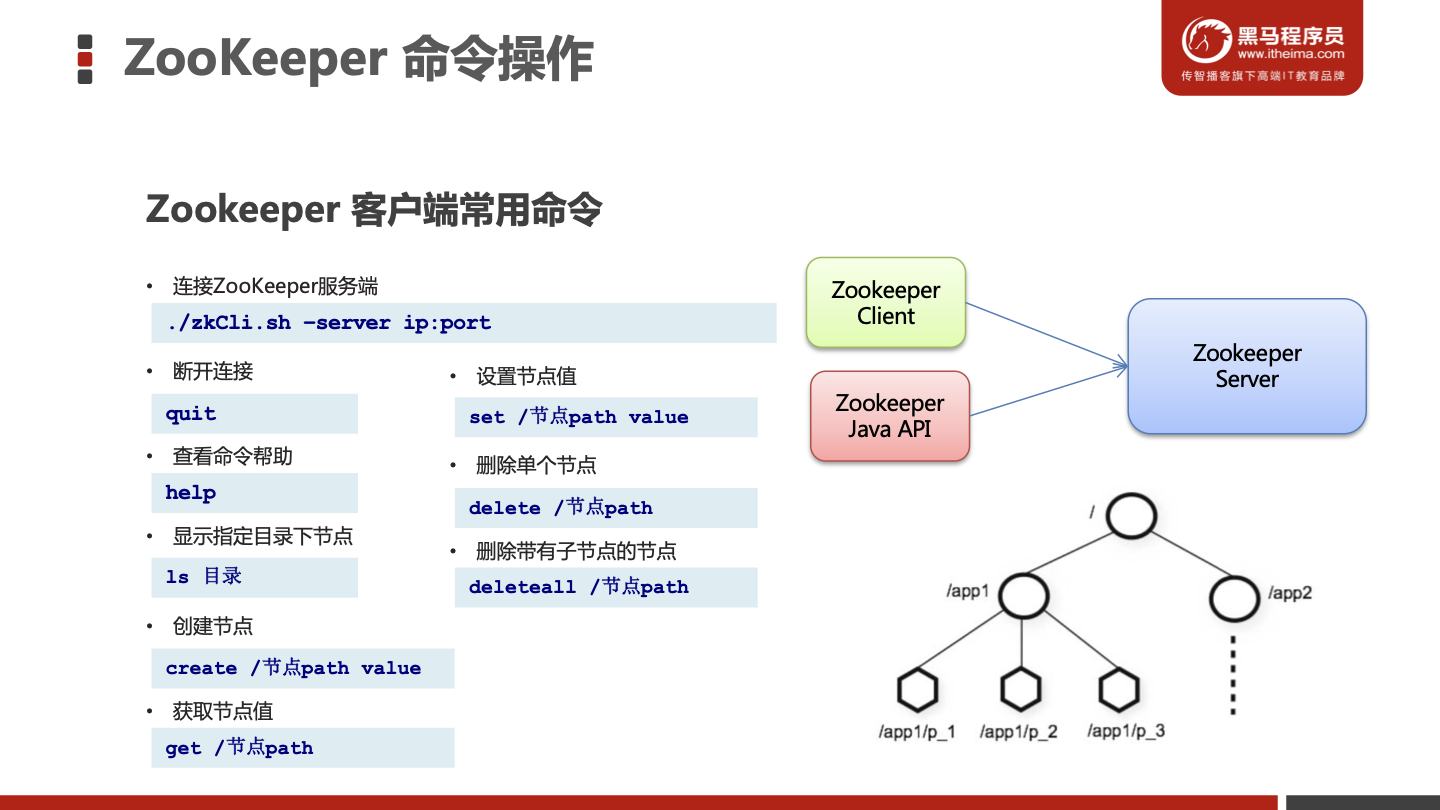
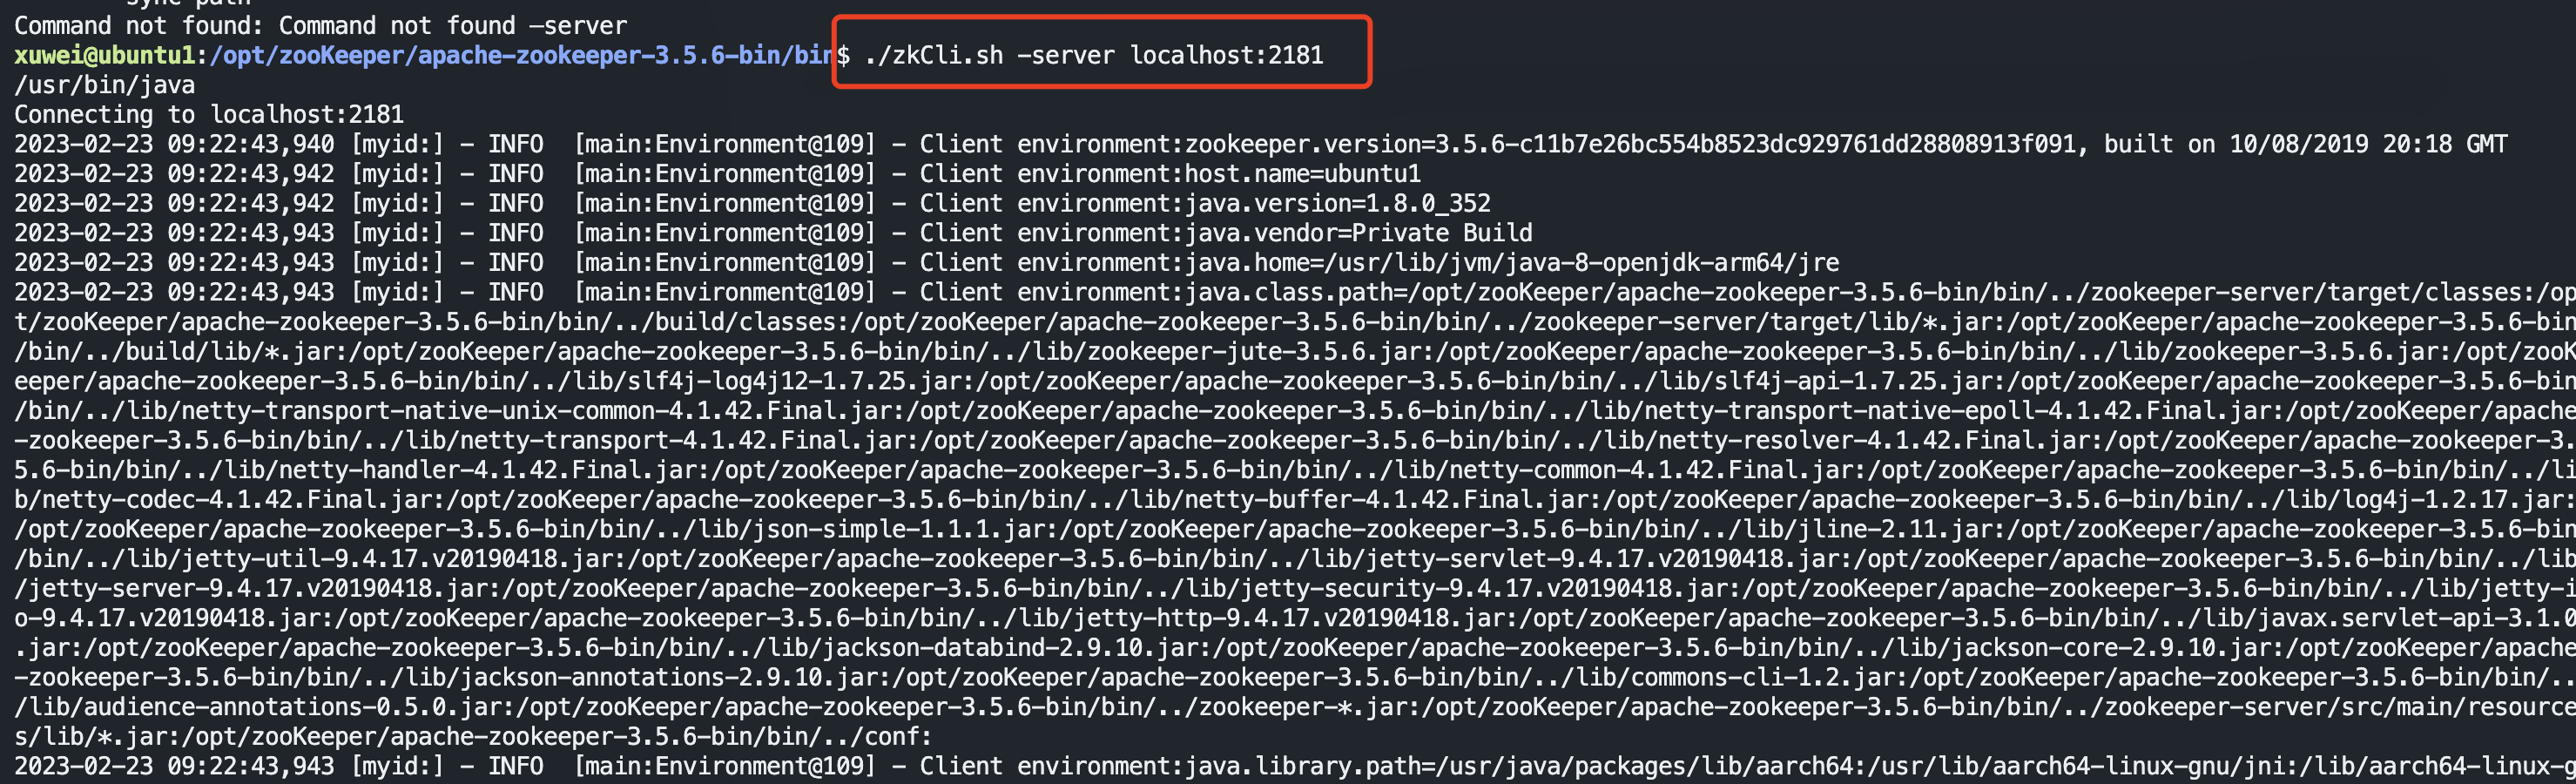
连接zookeeper服务端
1
| ./zkCli.sh -server localhost:2181
|
查看指定目录下节点

创建节点包含数据

创建节点不包含数据

获取节点数据

设置节点数据

ZooKeeper JavaAPI 操作

Curator 介绍
lCurator API 常用操作

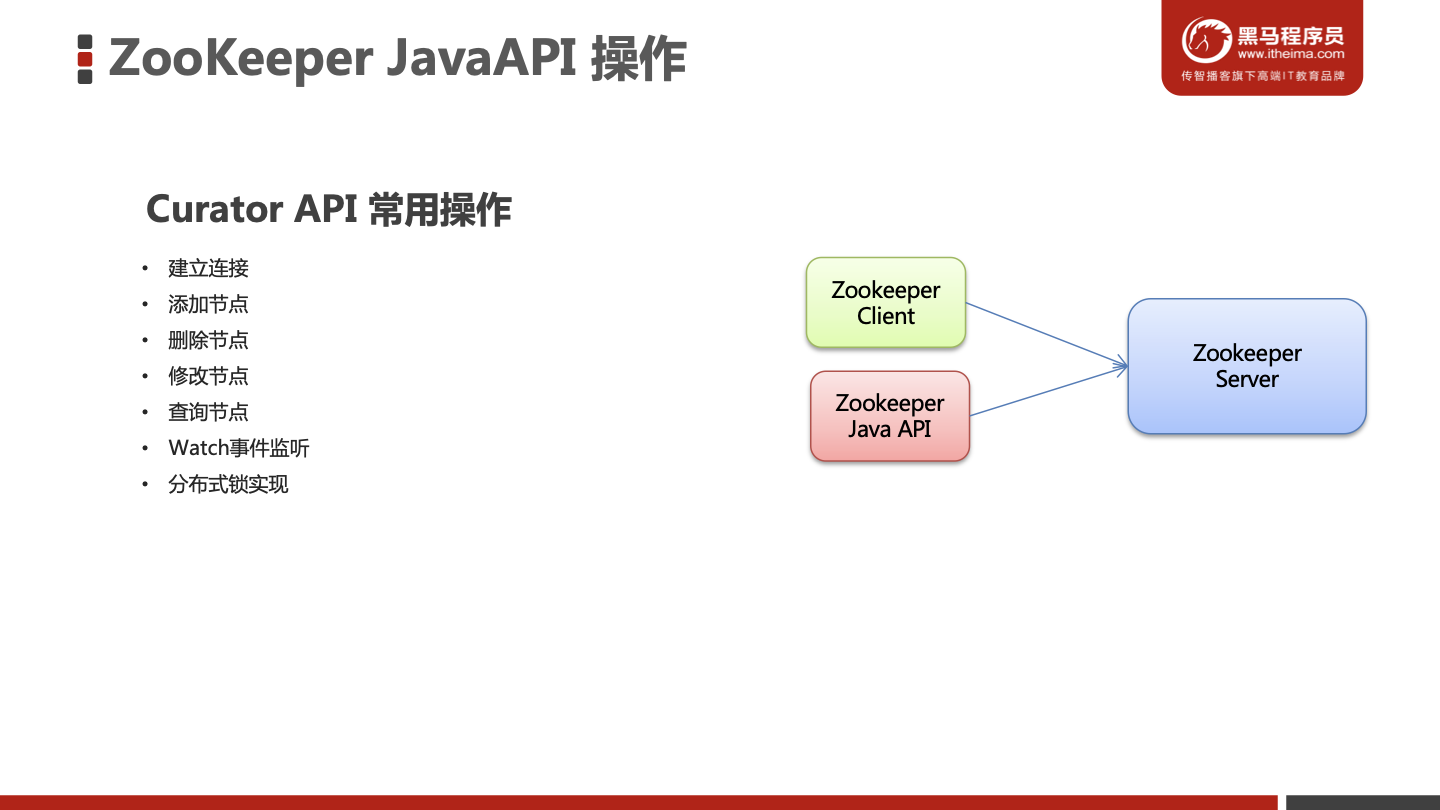
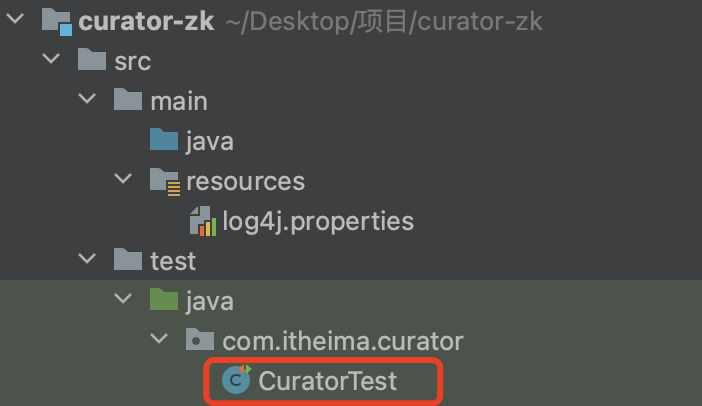
建立连接
搭建maven工程并导入坐标
1
2
3
4
5
6
7
8
9
10
11
12
13
14
15
16
17
18
19
20
21
22
23
24
25
26
27
28
29
30
31
32
33
34
35
36
37
38
39
40
41
42
43
44
45
46
47
48
49
50
51
52
53
54
55
56
57
58
59
60
61
62
63
| <?xml version="1.0" encoding="UTF-8"?>
<project xmlns="http://maven.apache.org/POM/4.0.0"
xmlns:xsi="http://www.w3.org/2001/XMLSchema-instance"
xsi:schemaLocation="http://maven.apache.org/POM/4.0.0 http://maven.apache.org/xsd/maven-4.0.0.xsd">
<modelVersion>4.0.0</modelVersion>
<groupId>com.itheima</groupId>
<artifactId>zk-client</artifactId>
<version>1.0-SNAPSHOT</version>
<dependencies>
<dependency>
<groupId>junit</groupId>
<artifactId>junit</artifactId>
<version>4.10</version>
<scope>test</scope>
</dependency>
<dependency>
<groupId>org.apache.curator</groupId>
<artifactId>curator-framework</artifactId>
<version>4.0.0</version>
</dependency>
<dependency>
<groupId>org.apache.curator</groupId>
<artifactId>curator-recipes</artifactId>
<version>4.0.0</version>
</dependency>
<dependency>
<groupId>org.slf4j</groupId>
<artifactId>slf4j-api</artifactId>
<version>1.7.21</version>
</dependency>
<dependency>
<groupId>org.slf4j</groupId>
<artifactId>slf4j-log4j12</artifactId>
<version>1.7.21</version>
</dependency>
</dependencies>
<build>
<plugins>
<plugin>
<groupId>org.apache.maven.plugins</groupId>
<artifactId>maven-compiler-plugin</artifactId>
<version>3.1</version>
<configuration>
<source>1.8</source>
<target>1.8</target>
</configuration>
</plugin>
</plugins>
</build>
</project>
|
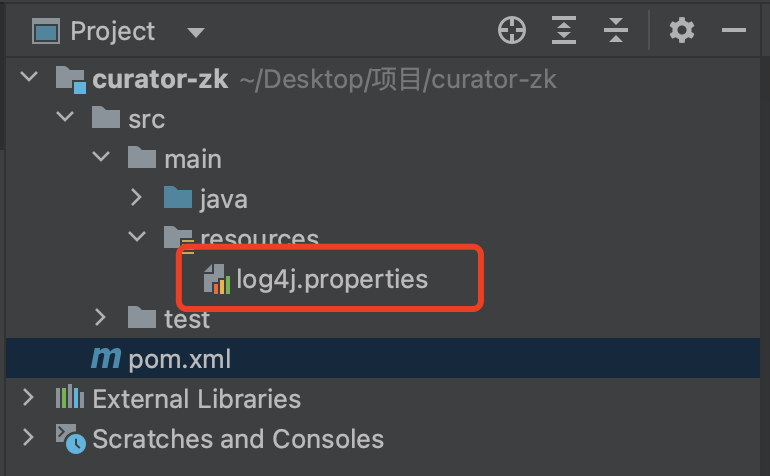
导入日志配置文件
1
2
3
4
5
6
| log4j.rootLogger=off,stdout
log4j.appender.stdout = org.apache.log4j.ConsoleAppender
log4j.appender.stdout.Target = System.out
log4j.appender.stdout.layout = org.apache.log4j.PatternLayout
log4j.appender.stdout.layout.ConversionPattern = [%d{yyyy-MM-dd HH/:mm/:ss}]%-5p %c(line/:%L) %x-%m%n
|
编写测试方法
1
2
3
4
5
6
7
8
9
10
11
12
13
14
15
16
17
18
19
20
21
22
23
24
25
26
27
28
29
30
| public void testConnect() {
RetryPolicy retryPolicy = new ExponentialBackoffRetry(3000, 10);
client = CuratorFrameworkFactory.builder()
.connectString("10.211.55.5:2181")
.sessionTimeoutMs(60 * 1000)
.connectionTimeoutMs(15 * 1000)
.retryPolicy(retryPolicy)
.namespace("itheima")
.build();
client.start();
}
|
修改结构将客户端端放入全局变量
1
2
3
4
5
6
7
8
9
10
11
12
13
14
15
16
17
18
19
20
21
22
23
24
25
26
27
28
29
30
31
32
33
34
35
36
37
38
39
40
41
42
43
44
45
46
47
48
49
50
51
52
53
54
55
56
57
58
59
60
61
62
63
64
65
66
67
68
| package com.itheima.curator;
import org.apache.curator.RetryPolicy;
import org.apache.curator.framework.CuratorFramework;
import org.apache.curator.framework.CuratorFrameworkFactory;
import org.apache.curator.framework.api.BackgroundCallback;
import org.apache.curator.framework.api.CuratorEvent;
import org.apache.curator.retry.ExponentialBackoffRetry;
import org.apache.zookeeper.CreateMode;
import org.apache.zookeeper.data.Stat;
import org.junit.After;
import org.junit.Before;
import org.junit.Test;
import java.util.List;
public class CuratorTest {
private CuratorFramework client;
@Before
public void testConnect() {
RetryPolicy retryPolicy = new ExponentialBackoffRetry(3000, 10);
client = CuratorFrameworkFactory.builder()
.connectString("10.211.55.5:2181")
.sessionTimeoutMs(60 * 1000)
.connectionTimeoutMs(15 * 1000)
.retryPolicy(retryPolicy)
.namespace("itheima")
.build();
client.start();
}
@After
public void close() {
if (client != null) {
client.close();
}
}
}
|
添加节点
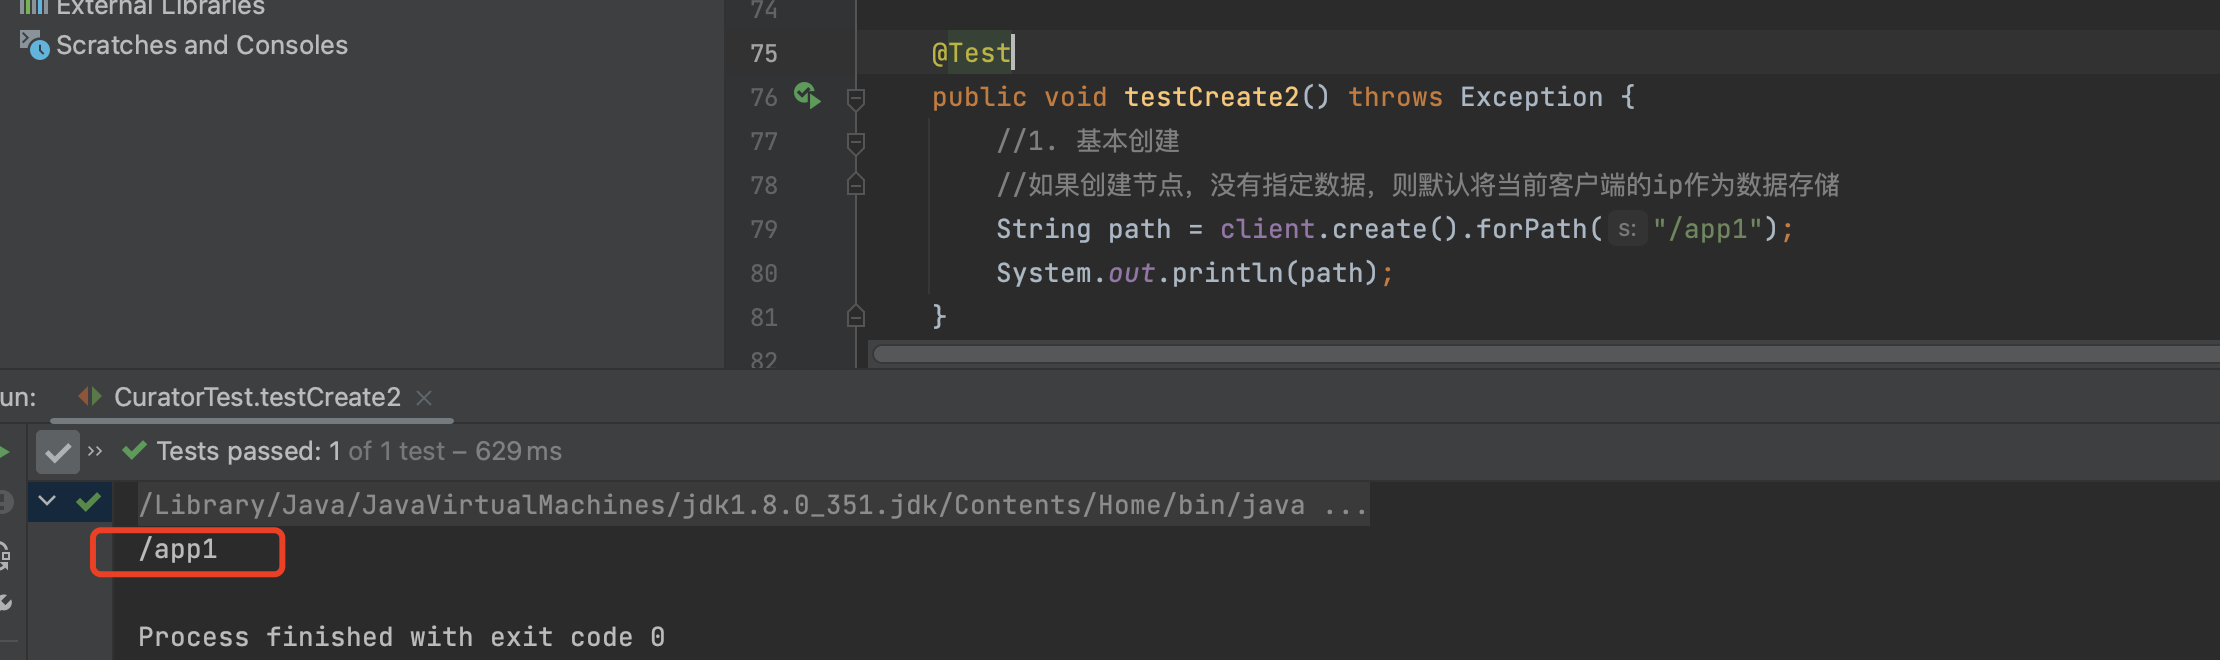
基本创建
1
2
3
4
5
6
7
| @Test
public void testCreate2() throws Exception {
String path = client.create().forPath("/app1");
System.out.println(path);
}
|
1
2
3
4
5
| [zk: localhost:2181(CONNECTED) 21] ls /
[itheima, zookeeper]
[zk: localhost:2181(CONNECTED) 22] ls /itheima
[app1]
[zk: localhost:2181(CONNECTED) 23]
|
创建节点 带有数据
1
2
3
4
5
6
7
8
| @Test
public void testCreate() throws Exception {
String path = client.create().forPath("/app2", "hehe".getBytes());
System.out.println(path);
}
|
1
2
3
4
| [zk: localhost:2181(CONNECTED) 23] ls /itheima
[app1, app2]
[zk: localhost:2181(CONNECTED) 24] get /itheima/app2
hehe
|
设置节点的类型
1
2
3
4
5
6
7
| @Test
public void testCreate3() throws Exception {
String path = client.create().withMode(CreateMode.EPHEMERAL).forPath("/app3");
System.out.println(path);
}
|
创建多级节点
1
2
3
4
5
6
7
| @Test
public void testCreate4() throws Exception {
String path = client.create().creatingParentsIfNeeded().forPath("/app4/p1");
System.out.println(path);
}
|
1
2
3
4
| [zk: localhost:2181(CONNECTED) 25] ls /itheima
[app1, app2, app4]
[zk: localhost:2181(CONNECTED) 26] ls /itheima/app4
[p1]
|
查询节点
查询数据
1
2
3
4
5
6
| @Test
public void testGet1() throws Exception {
byte[] data = client.getData().forPath("/app1");
System.out.println(new String(data));
}
|

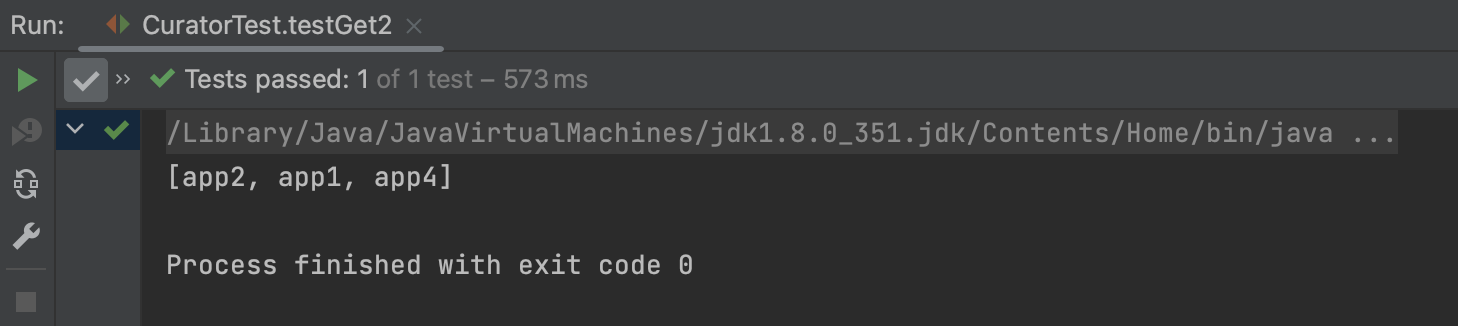
查询子节点
1
2
3
4
5
6
7
| @Test
public void testGet2() throws Exception {
List<String> path = client.getChildren().forPath("/");
System.out.println(path);
}
|
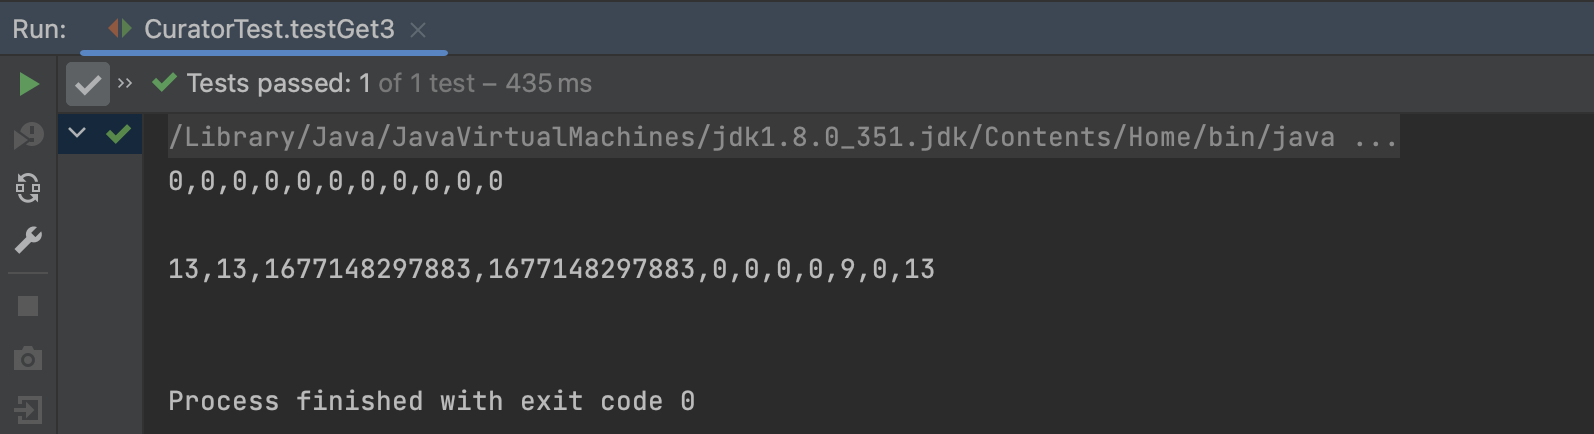
查询节点状态信息
1
2
3
4
5
6
7
8
| @Test
public void testGet3() throws Exception {
Stat status = new Stat();
System.out.println(status);
client.getData().storingStatIn(status).forPath("/app1");
System.out.println(status);
}
|
修改节点
基本修改数据
1
2
3
4
| @Test
public void testSet() throws Exception {
client.setData().forPath("/app1", "itcast".getBytes());
}
|
1
2
| [zk: localhost:2181(CONNECTED) 31] get /itheima/app1
itcast
|
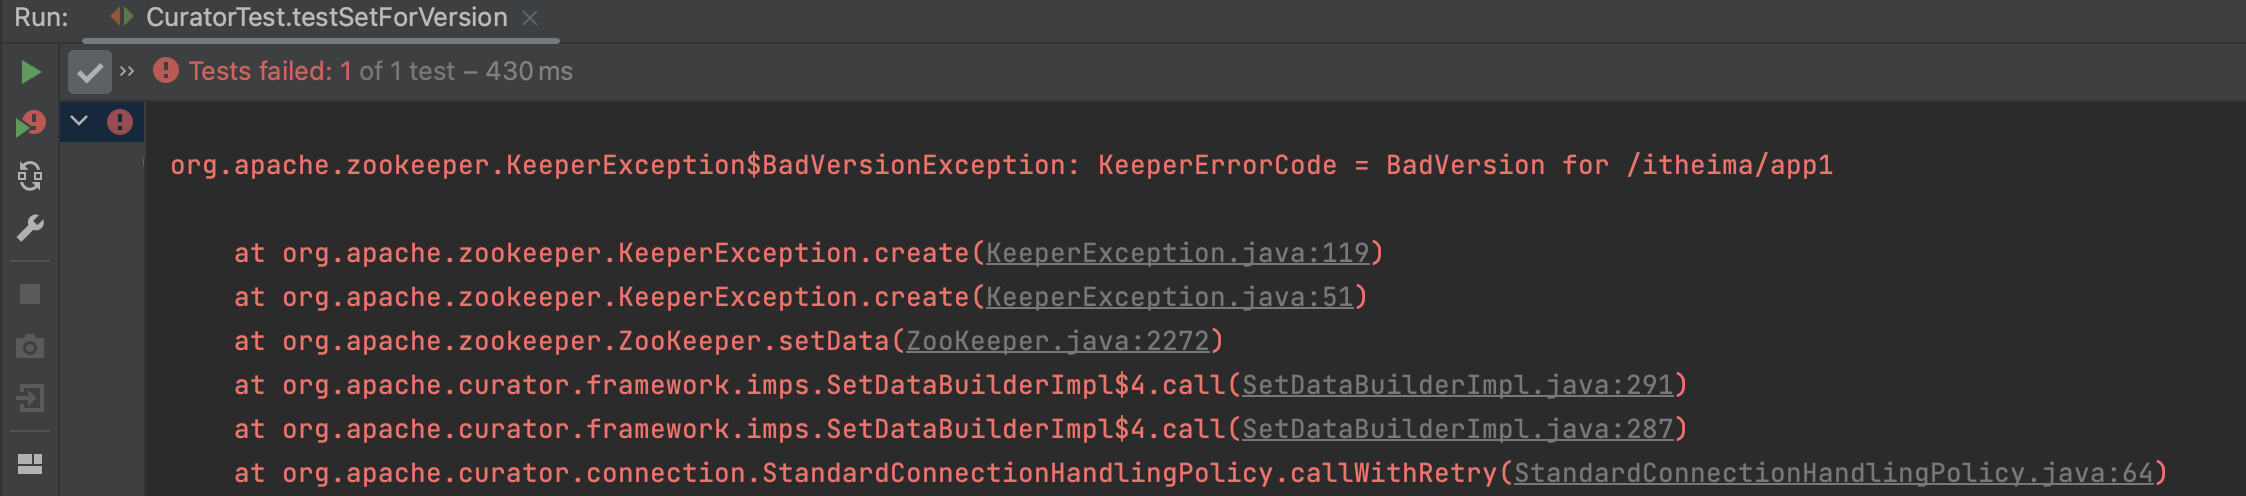
根据版本修改
1
2
3
4
5
6
7
8
9
10
11
12
| @Test
public void testSetForVersion() throws Exception {
Stat status = new Stat();
client.getData().storingStatIn(status).forPath("/app1");
int version = status.getVersion();
System.out.println(version);
client.setData().withVersion(version).forPath("/app1", "hehe".getBytes());
}
|
1
2
| [zk: localhost:2181(CONNECTED) 32] get /itheima/app1
hehe
|
当版本不一致时直接报错
删除节点
1
2
3
4
5
| @Test
public void testDelete() throws Exception {
client.delete().forPath("/app1");
}
|
1
2
3
4
5
| @Test
public void testDelete2() throws Exception {
client.delete().deletingChildrenIfNeeded().forPath("/app4");
}
|
1
2
3
4
5
| @Test
public void testDelete3() throws Exception {
client.delete().guaranteed().forPath("/app2");
}
|
1
2
3
4
5
6
7
8
9
10
11
12
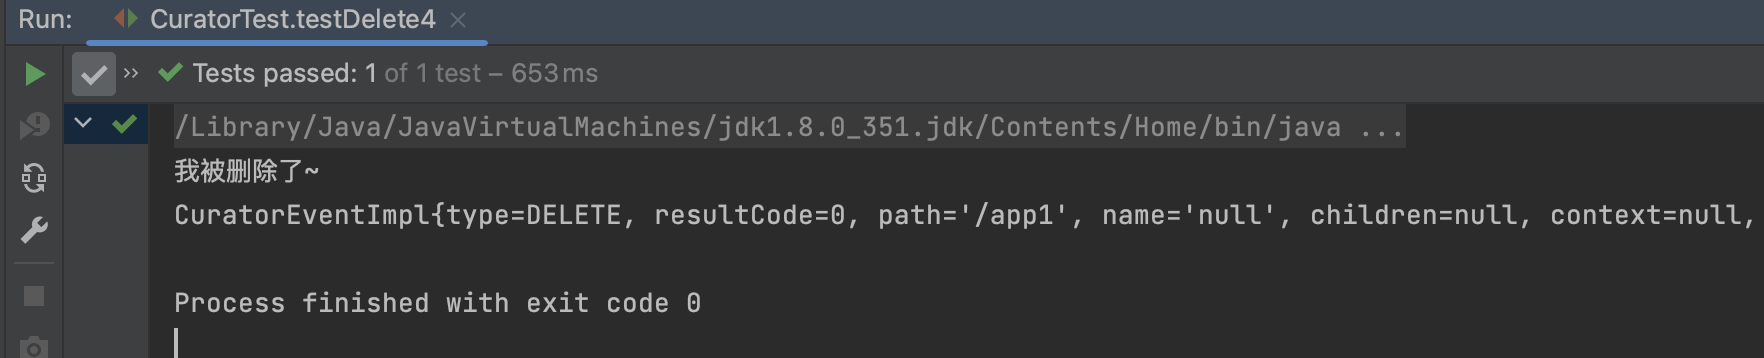
| @Test
public void testDelete4() throws Exception {
client.delete().guaranteed().inBackground(new BackgroundCallback(){
@Override
public void processResult(CuratorFramework client, CuratorEvent event) throws Exception {
System.out.println("我被删除了~");
System.out.println(event);
}
}).forPath("/app1");
}
|
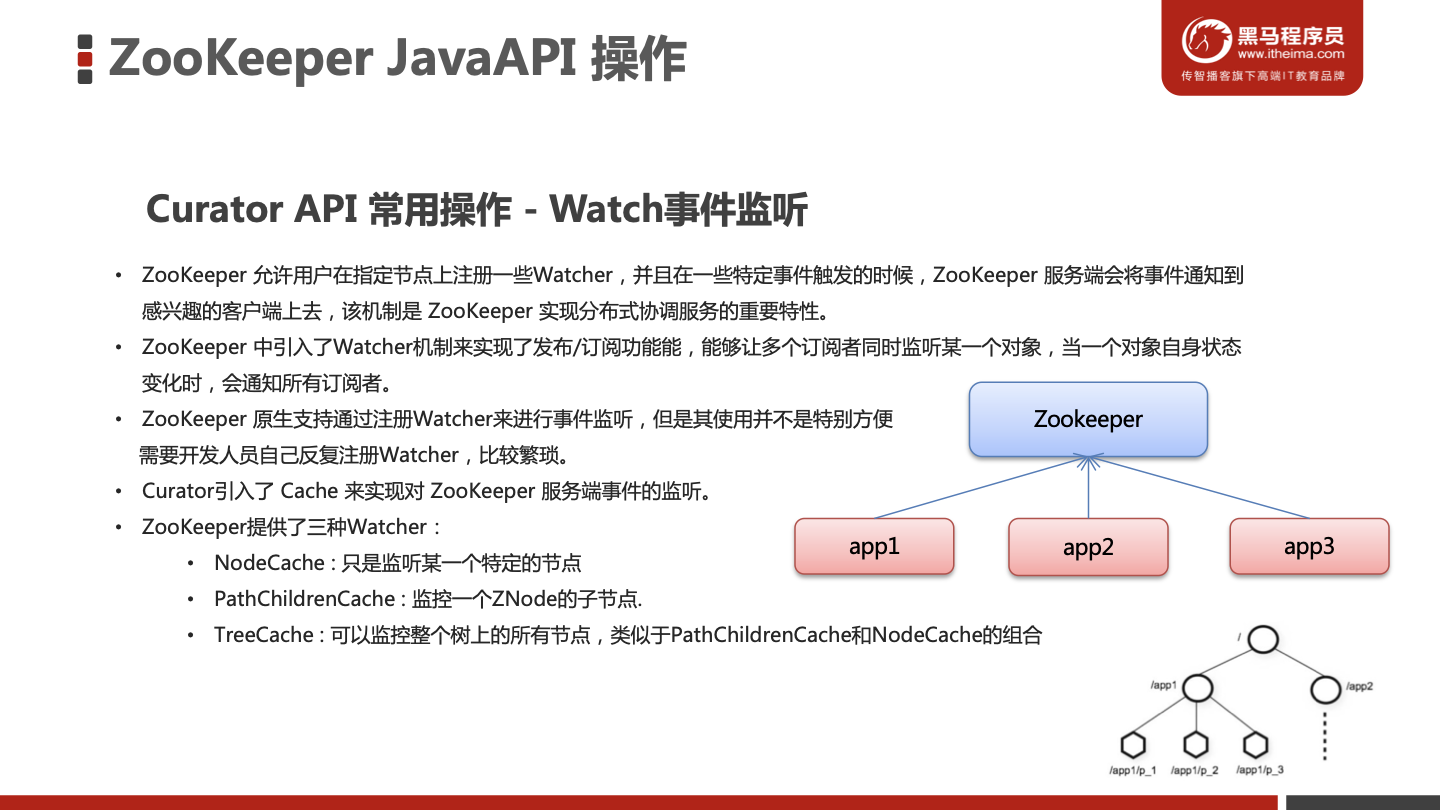
Watch事件监听

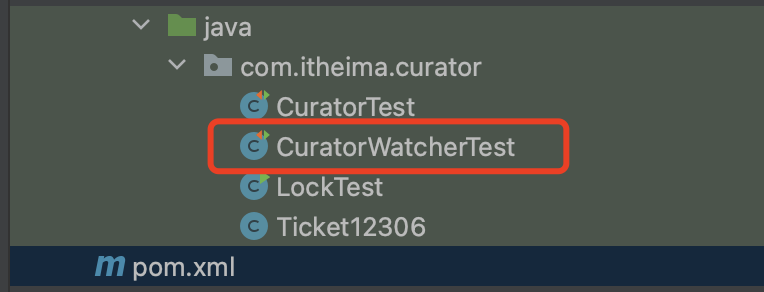
编写测试方法
NodeCache
1
2
3
4
5
6
7
8
9
10
11
12
13
14
15
16
17
18
19
20
21
22
23
24
25
26
27
28
29
|
@Test
public void testNodeCache() throws Exception {
final NodeCache nodeCache = new NodeCache(client,"/app1");
nodeCache.getListenable().addListener(new NodeCacheListener() {
@Override
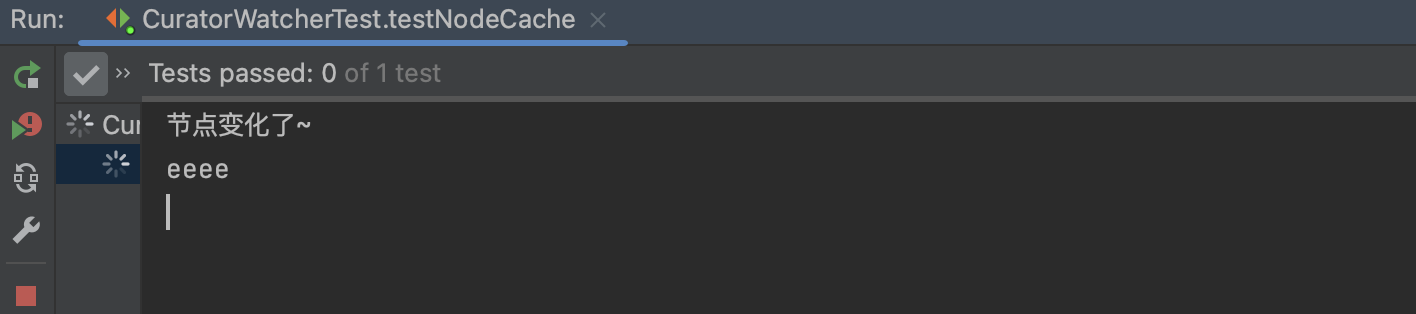
public void nodeChanged() throws Exception {
System.out.println("节点变化了~");
byte[] data = nodeCache.getCurrentData().getData();
System.out.println(new String(data));
}
});
nodeCache.start(true);
while (true){
}
}
|
修改app1的值
1
2
3
4
5
6
7
8
9
| [zk: localhost:2181(CONNECTED) 44] get /itheima/app1
www
[zk: localhost:2181(CONNECTED) 45] set /itheima/app1 eeee
[zk: localhost:2181(CONNECTED) 46]
WATCHER::
WatchedEvent state:SyncConnected type:NodeDataChanged path:/itheima/app1
[zk: localhost:2181(CONNECTED) 46]
|
PathChildrenCache
1
2
3
4
5
6
7
8
9
10
11
12
13
14
15
16
17
18
19
20
21
22
23
24
25
26
27
28
29
30
31
32
33
34
35
|
@Test
public void testPathChildrenCache() throws Exception {
PathChildrenCache pathChildrenCache = new PathChildrenCache(client,"/app2",true);
pathChildrenCache.getListenable().addListener(new PathChildrenCacheListener() {
@Override
public void childEvent(CuratorFramework client, PathChildrenCacheEvent event) throws Exception {
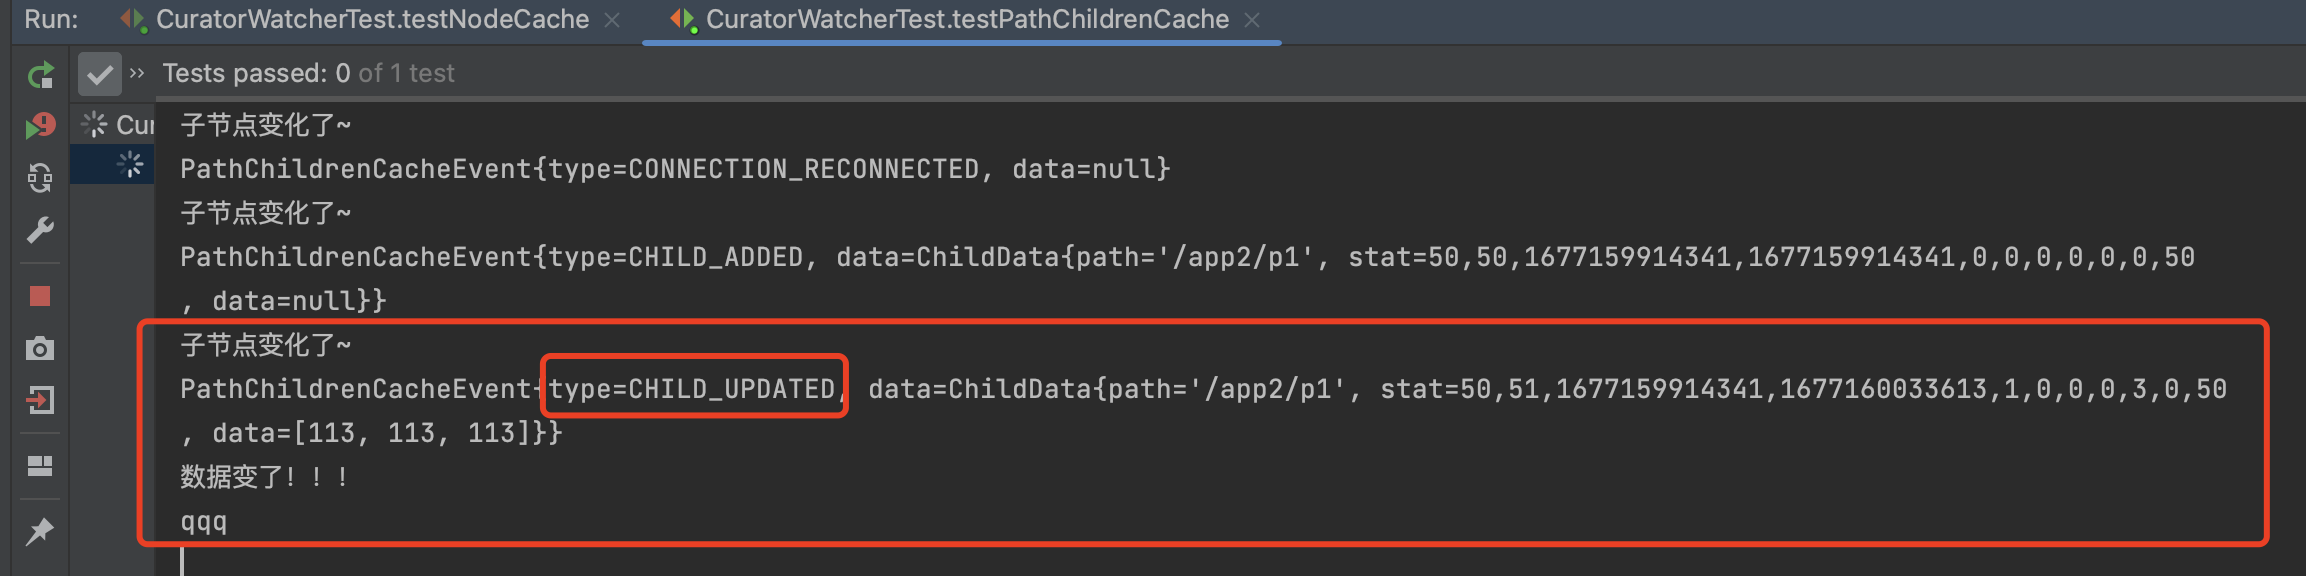
System.out.println("子节点变化了~");
System.out.println(event);
PathChildrenCacheEvent.Type type = event.getType();
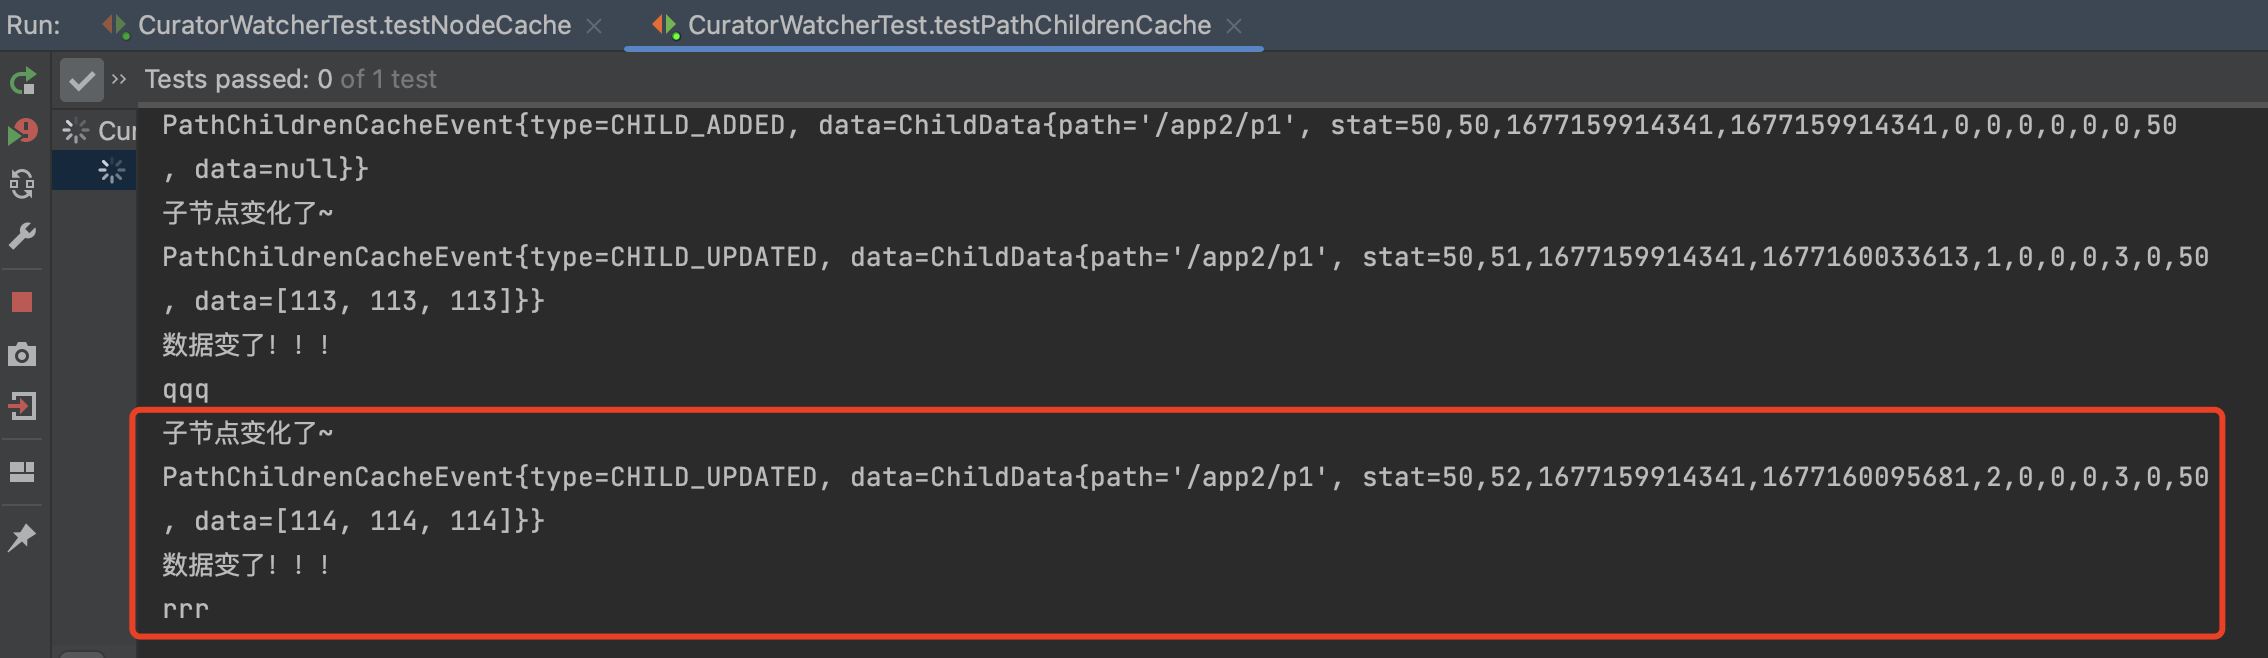
if(type.equals(PathChildrenCacheEvent.Type.CHILD_UPDATED)){
System.out.println("数据变了!!!");
byte[] data = event.getData().getData();
System.out.println(new String(data));
}
}
});
pathChildrenCache.start();
while (true){
}
}
|
app2下新增一个节点p1
1
2
3
4
5
6
| [zk: localhost:2181(CONNECTED) 47] ls /itheima/app2
[]
[zk: localhost:2181(CONNECTED) 48] create /itheima/app2/p1
Created /itheima/app2/p1
[zk: localhost:2181(CONNECTED) 49] ls /itheima/app2
[p1]
|

设置p1的值
1
| [zk: localhost:2181(CONNECTED) 50] set /itheima/app2/p1 qqq
|
修改p1的值
1
| [zk: localhost:2181(CONNECTED) 51] set /itheima/app2/p1 rrr
|
TreeCache
1
2
3
4
5
6
7
8
9
10
11
12
13
14
15
16
17
18
19
20
21
22
23
24
25
|
@Test
public void testTreeCache() throws Exception {
TreeCache treeCache = new TreeCache(client,"/app2");
treeCache.getListenable().addListener(new TreeCacheListener() {
@Override
public void childEvent(CuratorFramework client, TreeCacheEvent event) throws Exception {
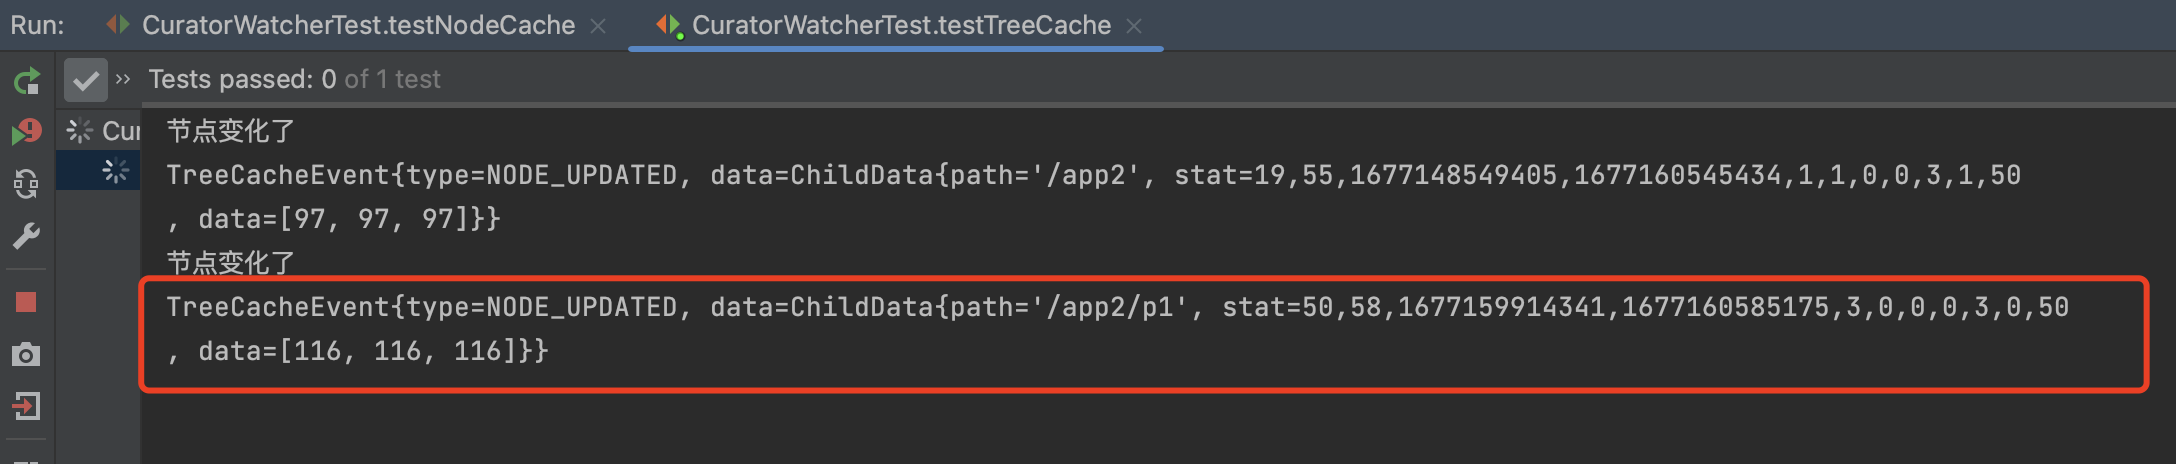
System.out.println("节点变化了");
System.out.println(event);
}
});
treeCache.start();
while (true){
}
}
|
1
| [zk: localhost:2181(CONNECTED) 53] set /itheima/app2 aaa
|

1
| [zk: localhost:2181(CONNECTED) 54] set /itheima/app2/p1 ttt
|

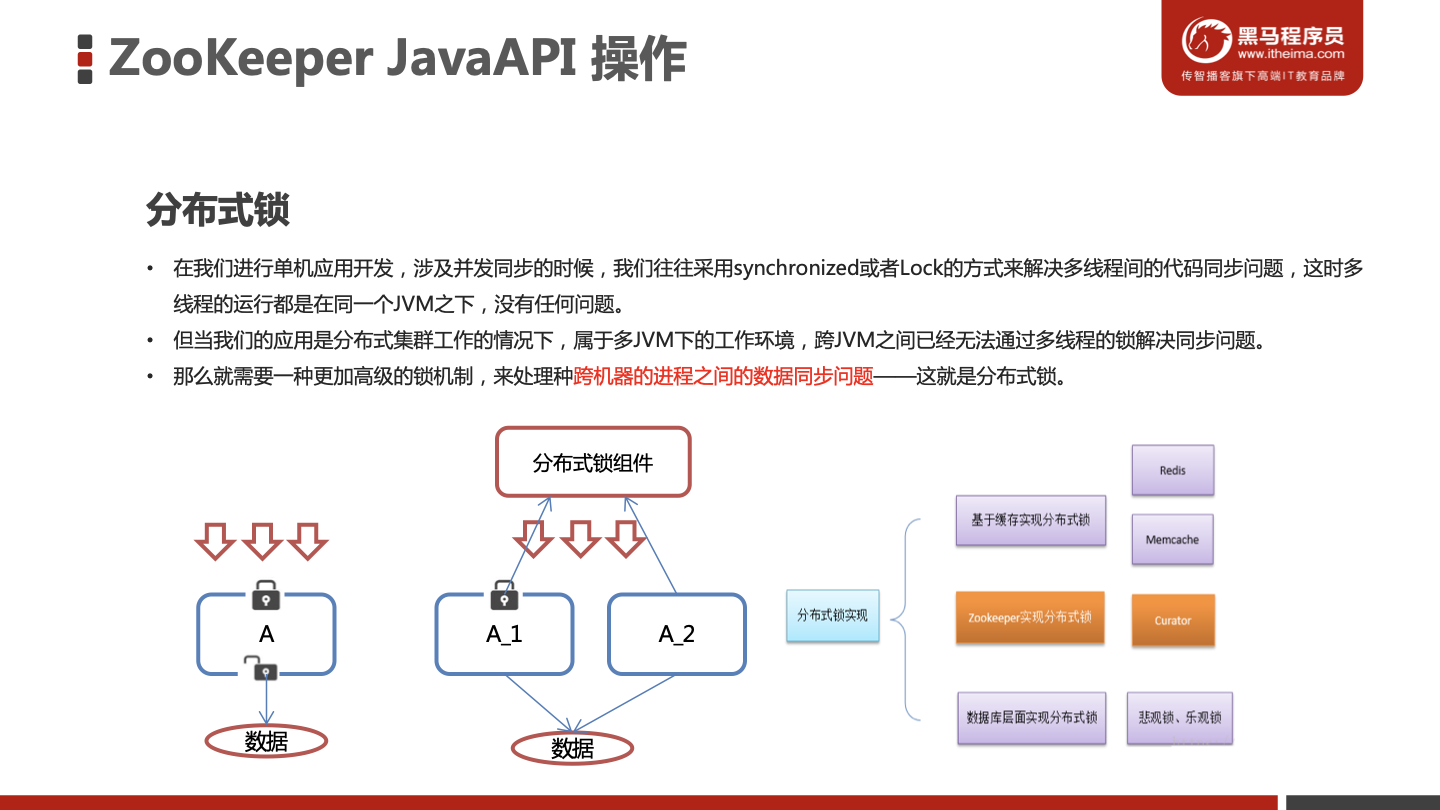
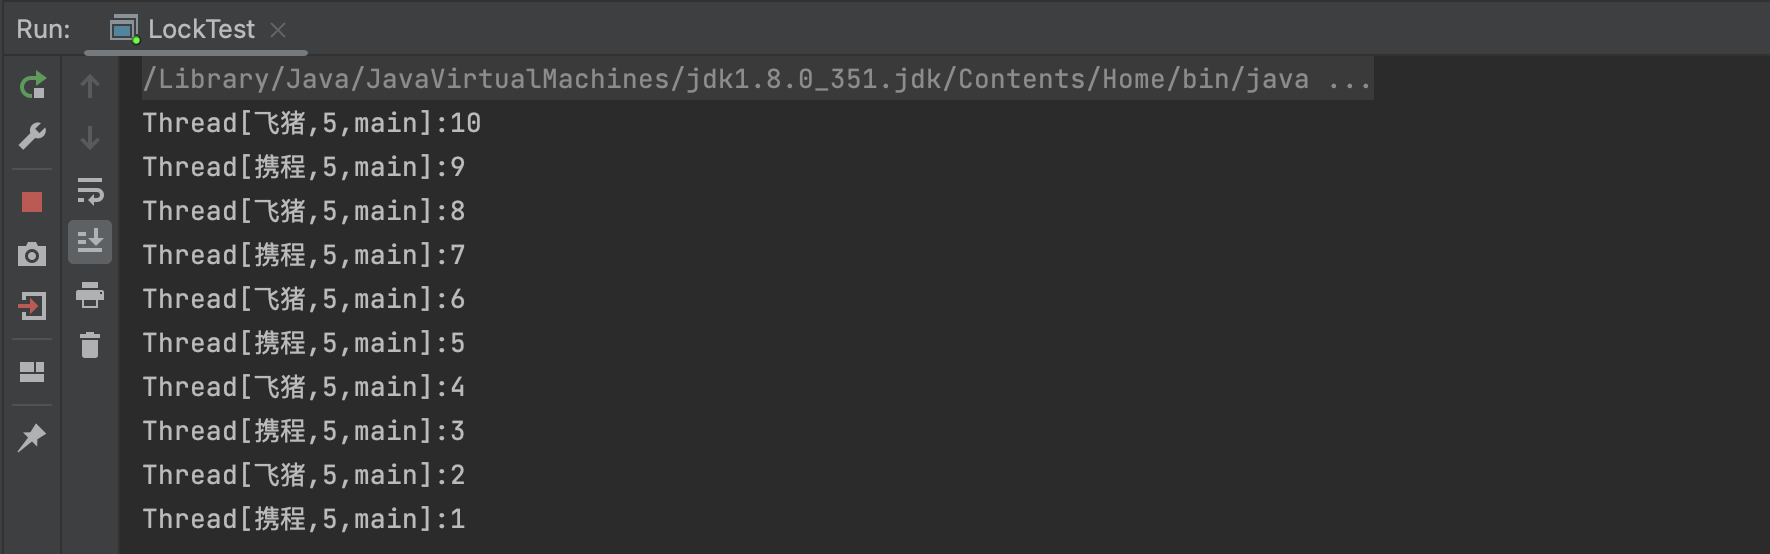
分布式锁

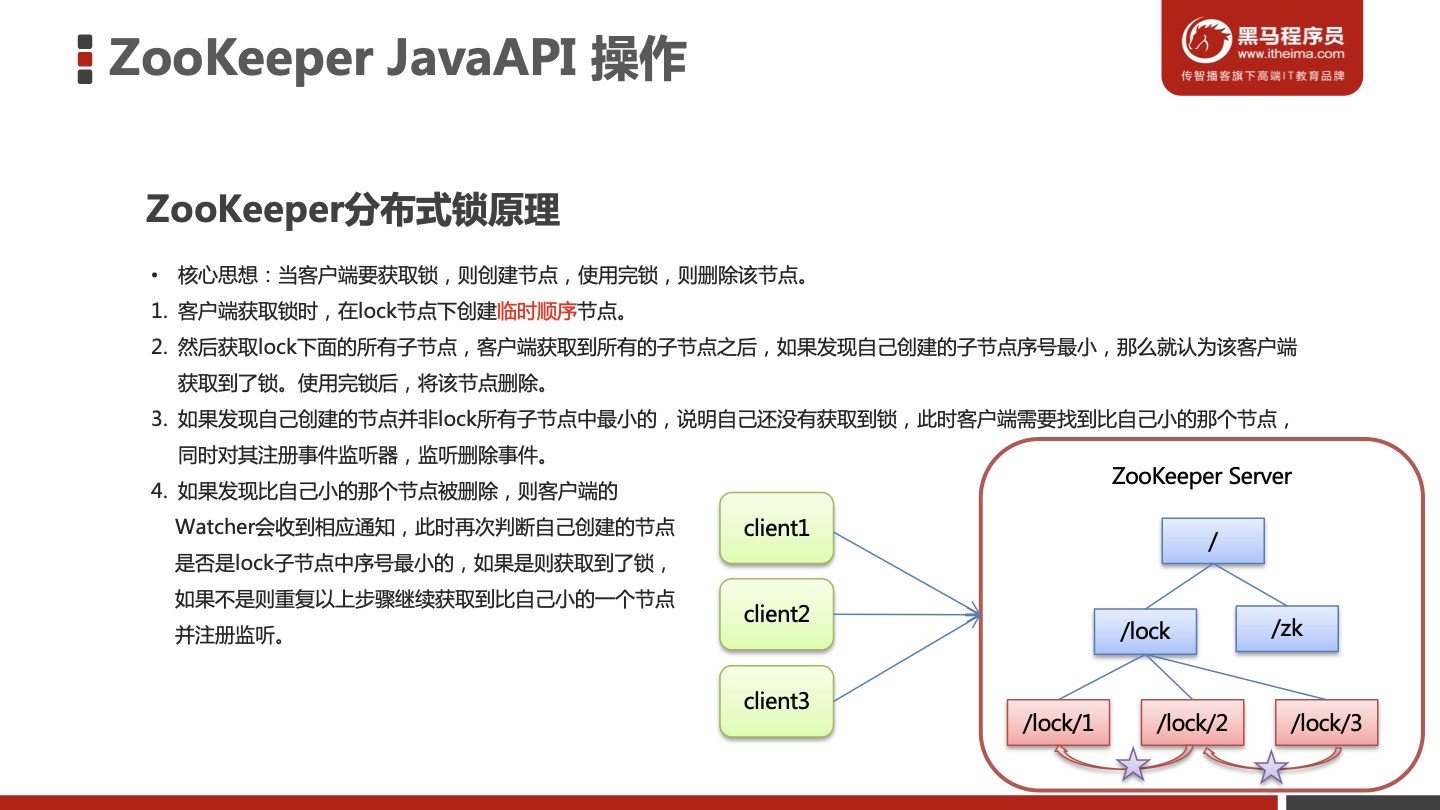
ZooKeeper分布式锁原理
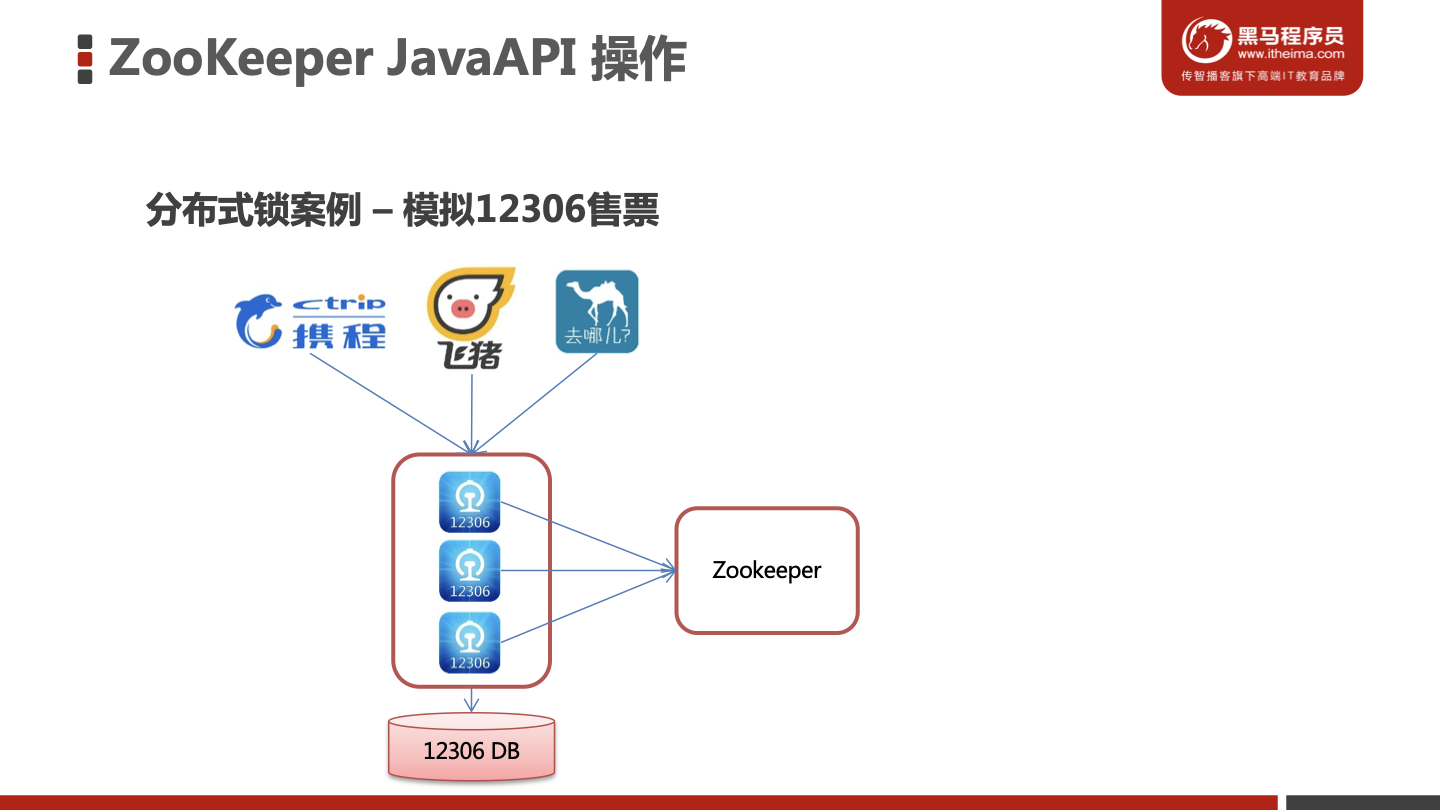
模拟12306售票案例

Ticket12306.java
1
2
3
4
5
6
7
8
9
10
11
12
13
14
15
16
17
18
19
20
21
22
23
24
25
26
27
28
29
30
31
32
33
34
35
36
37
38
39
40
41
42
43
44
45
46
47
48
49
50
51
52
53
54
55
56
57
58
59
60
61
62
63
64
65
66
| package com.itheima.curator;
import org.apache.curator.RetryPolicy;
import org.apache.curator.framework.CuratorFramework;
import org.apache.curator.framework.CuratorFrameworkFactory;
import org.apache.curator.framework.recipes.locks.InterProcessMutex;
import org.apache.curator.retry.ExponentialBackoffRetry;
import java.util.concurrent.TimeUnit;
public class Ticket12306 implements Runnable{
private int tickets = 10;
private InterProcessMutex lock ;
public Ticket12306(){
RetryPolicy retryPolicy = new ExponentialBackoffRetry(3000, 10);
CuratorFramework client = CuratorFrameworkFactory.builder()
.connectString("10.211.55.5:2181")
.sessionTimeoutMs(60 * 1000)
.connectionTimeoutMs(15 * 1000)
.retryPolicy(retryPolicy)
.build();
client.start();
lock = new InterProcessMutex(client,"/lock");
}
@Override
public void run() {
while(true){
try {
lock.acquire(3, TimeUnit.SECONDS);
if(tickets > 0){
System.out.println(Thread.currentThread()+":"+tickets);
Thread.sleep(100);
tickets--;
}
} catch (Exception e) {
e.printStackTrace();
}finally {
try {
lock.release();
} catch (Exception e) {
e.printStackTrace();
}
}
}
}
}
|
LockTest.java
1
2
3
4
5
6
7
8
9
10
11
12
13
14
15
16
17
18
19
20
21
22
23
24
25
26
27
| package com.itheima.curator;
import org.apache.curator.RetryPolicy;
import org.apache.curator.framework.CuratorFramework;
import org.apache.curator.framework.CuratorFrameworkFactory;
import org.apache.curator.framework.recipes.cache.*;
import org.apache.curator.retry.ExponentialBackoffRetry;
import org.junit.After;
import org.junit.Before;
import org.junit.Test;
public class LockTest {
public static void main(String[] args) {
Ticket12306 ticket12306 = new Ticket12306();
Thread t1 = new Thread(ticket12306,"携程");
Thread t2 = new Thread(ticket12306,"飞猪");
t1.start();
t2.start();
}
}
|

ZooKeeper 集群搭建

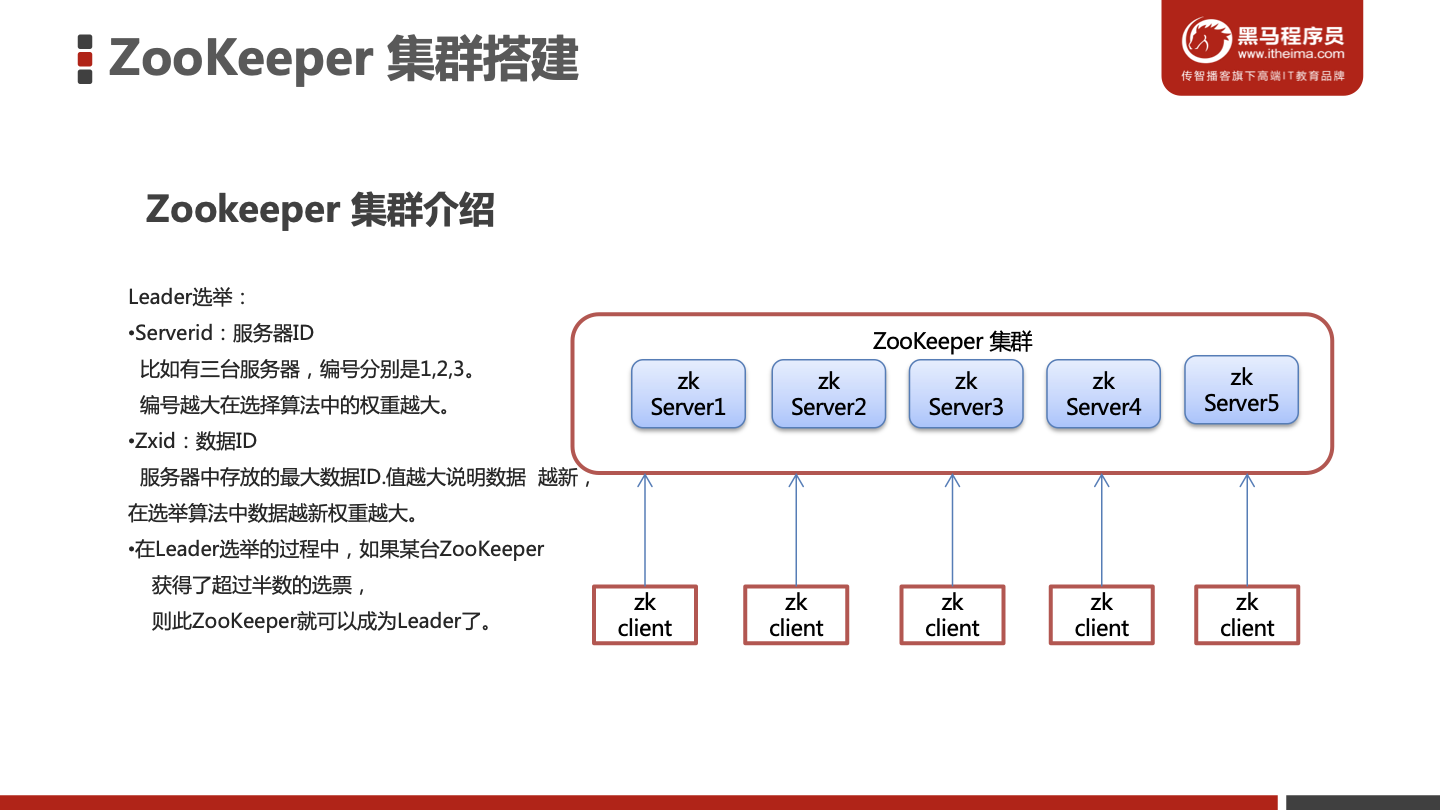
Zookeeper 集群介绍
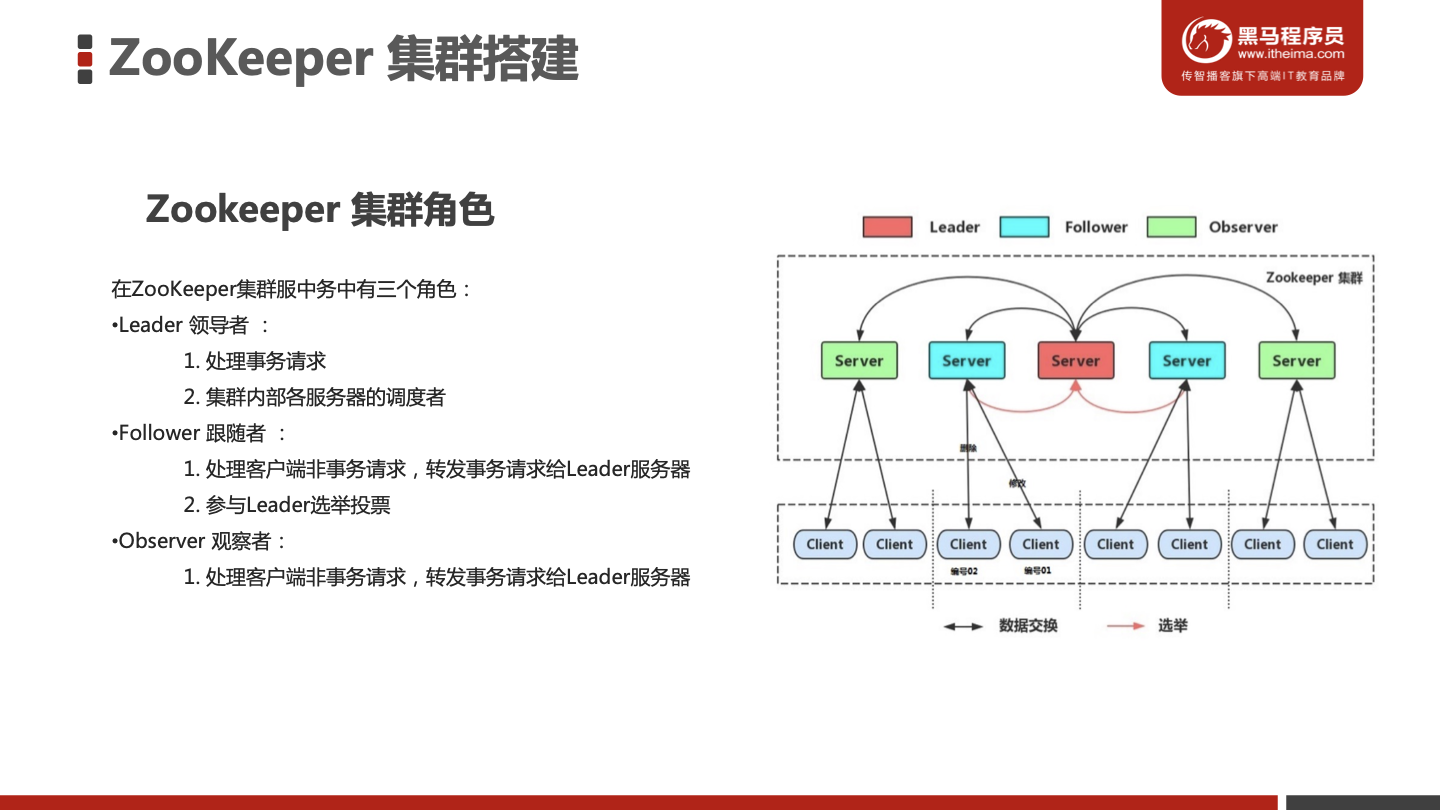
ZooKeeper 集群搭建
搭建要求
准备三台虚拟机
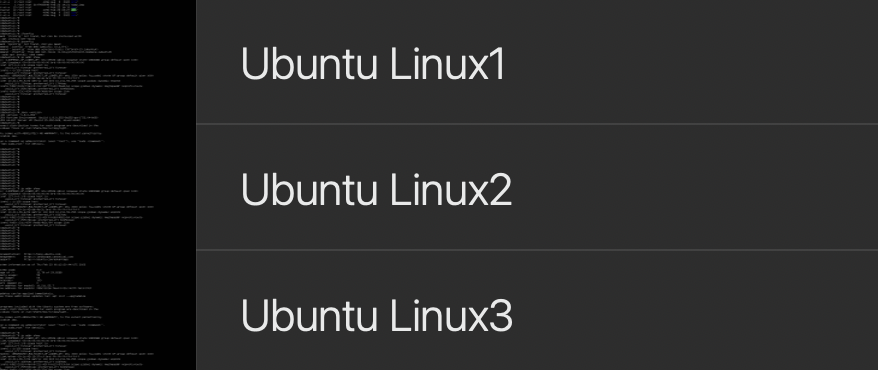
准备工作
以下在三台服务器上进行相同操作
安装JDK
1
2
| sudo apt-get update
sudo apt-get install openjdk-8-jdk
|
Zookeeper压缩包上传到服务器
将Zookeeper解压指定文件夹并修改文件夹名称
1
2
3
4
5
| sudo mkdir /usr/local/zookeeper-cluster
sudo chmod 777 /usr/local/zookeeper-cluster
cd /usr/local/zookeeper-cluster
tar -zxvf apache-zookeeper-3.5.6-bin.tar.gz
sudo mv apache-zookeeper-3.5.6-bin/ zookeeper/
|
创建data目录 ,并且将 conf下zoo_sample.cfg 文件改名为 zoo.cfg
1
2
| sudo mkdir /usr/local/zookeeper-cluster/zookeeper/data
mv /usr/local/zookeeper-cluster/zookeeper/conf/zoo_sample.cfg /usr/local/zookeeper-cluster/zookeeper/conf/zoo.cfg
|
配置每一个Zookeeper 的dataDir 和 clientPort
修改/usr/local/zookeeper-cluster/zookeeper/conf/zoo.cfg
1
2
3
4
| vim /usr/local/zookeeper-cluster/zookeeper/conf/zoo.cfg
clientPort=2181
dataDir=/usr/local/zookeeper-cluster/zookeeper/data
|
配置集群
在每个zookeeper的 data 目录下创建一个 myid 文件,内容分别是1、2、3 。这个文件就是记录每个服务器的ID
Linux1
1
2
3
| sudo chmod 777 /usr/local/zookeeper-cluster/zookeeper/data
echo 1 >/usr/local/zookeeper-cluster/zookeeper/data/myid
|
linux2
1
2
| sudo chmod 777 /usr/local/zookeeper-cluster/zookeeper/data
echo 2 >/usr/local/zookeeper-cluster/zookeeper/data/myid
|
linux3
1
2
| sudo chmod 777 /usr/local/zookeeper-cluster/zookeeper/data
echo 3 >/usr/local/zookeeper-cluster/zookeeper/data/myid
|
- 在每一个zookeeper 的 zoo.cfg配置客户端访问端口(clientPort)和集群服务器IP列表。
集群服务器IP列表如下
1
2
3
4
5
6
| vim /usr/local/zookeeper-cluster/zookeeper/conf/zoo.cfg
quorumListenOnAllIPs=true
#虚拟机需要上面这条命令
server.1=10.211.55.5:2881:3881
server.2=10.211.55.6:2881:3881
server.3=10.211.55.7:2881:3881
|
解释:server.服务器ID=服务器IP地址:服务器之间通信端口:服务器之间投票选举端口
启动集群
启动集群就是分别启动每个实例。
1
| /usr/local/zookeeper-cluster/zookeeper/bin/zkServer.sh start
|

启动后我们查询一下每个实例的运行状态
1
| /usr/local/zookeeper-cluster/zookeeper/bin/zkServer.sh status
|


模拟集群异常
- 首先我们先测试如果是从服务器挂掉,会怎么样
把3号服务器停掉,观察1号和2号,发现状态并没有变化
1
| /usr/local/zookeeper-cluster/zookeeper/bin/zkServer.sh stop
|


由此得出结论,3个节点的集群,从服务器挂掉,集群正常
- 我们再把1号服务器(从服务器)也停掉,查看2号(主服务器)的状态,发现已经停止运行了。


由此得出结论,3个节点的集群,2个从服务器都挂掉,主服务器也无法运行。因为可运行的机器没有超过集群总数量的半数。
- 我们再次把1号服务器启动起来,发现2号服务器又开始正常工作了。而且依然是领导者。


- 我们把3号服务器也启动起来,把2号服务器停掉,停掉后观察1号和3号的状态。


发现新的leader产生了~
由此我们得出结论,当集群中的主服务器挂了,集群中的其他服务器会自动进行选举状态,然后产生新得leader
- 我们再次测试,当我们把2号服务器重新启动起来启动后,会发生什么?2号服务器会再次成为新的领导吗?我们看结果


我们会发现,2号服务器启动后依然是跟随者(从服务器),3号服务器依然是领导者(主服务器),没有撼动3号服务器的领导地位。
由此我们得出结论,当领导者产生后,再次有新服务器加入集群,不会影响到现任领导者。
Zookeeper 核心理论

完结撒花🌹🌹